How to Draw a Cat and Dog: Easy Step-by-Step Guide
This drawing guide is perfect for young artists ages 5 and up looking to master their first animal duo. All you need is a pencil, an eraser, and a piece of paper to get started. Follow these simple steps to build confidence and create a charming cartoon scene.
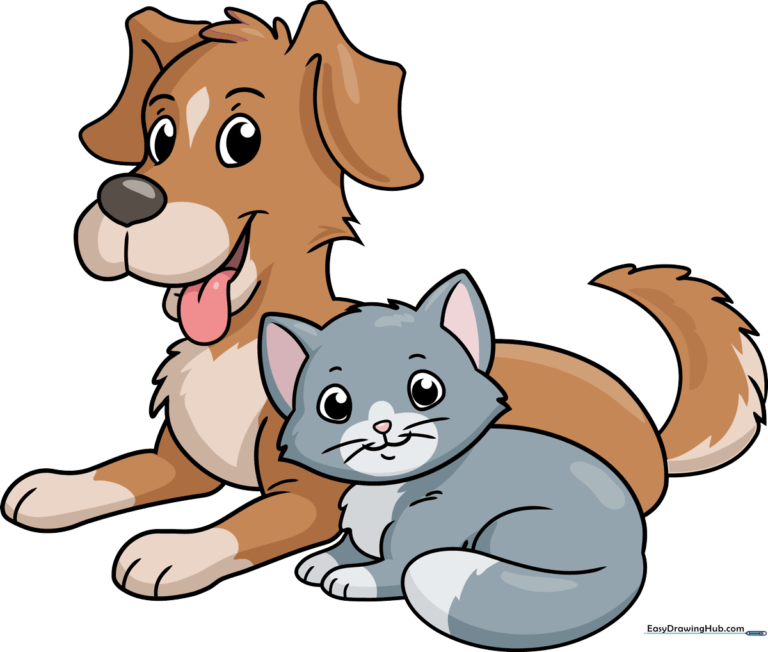
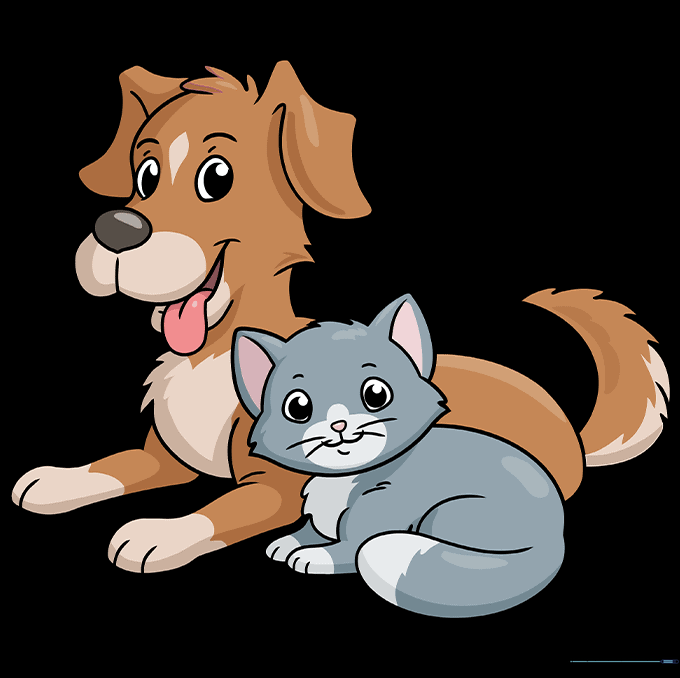
🎯 Final Result
Step-by-Step Instructions
Step 1: Sketching the Dog's Muzzle

Start by drawing the dog's nose as a rounded point, then add a 'W' shape below it for the mouth. Teacher's Tip: Keep your pencil lines light so you can easily erase any mistakes later!
Step 2: Defining the Dog's Head
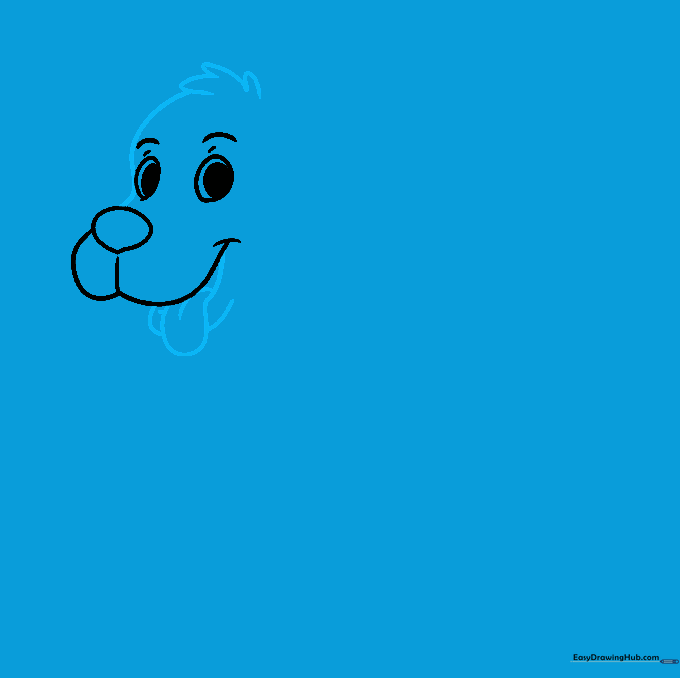
Outline the dog's open mouth and tongue using curved lines. Use small 'U' shapes on top of the head to suggest fluffy fur. Teacher's Tip: Think of the 'U' shapes like little clouds sitting on the head.
Step 3: Adding Dog Ears
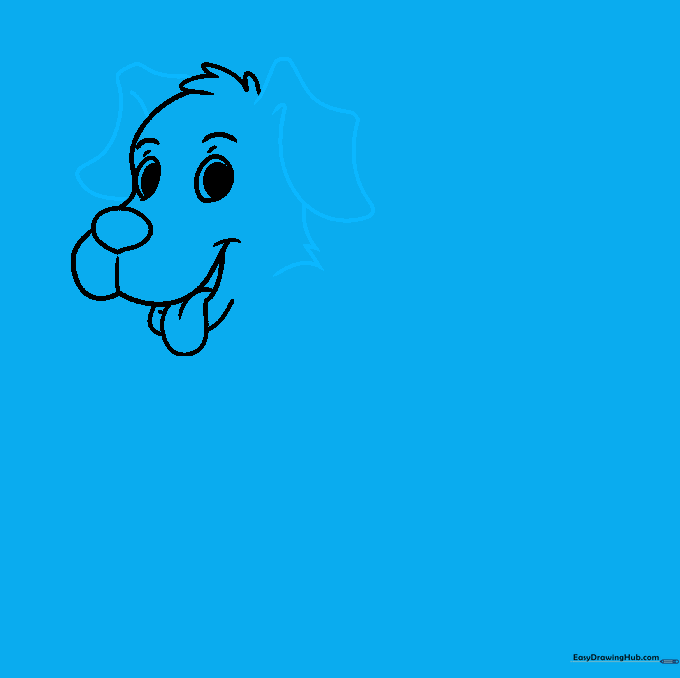
Draw the ears using wavy lines that fold back. Add jagged points along the side of the face to represent fur. Teacher's Tip: Varying the length of your jagged lines makes the fur look more natural.
Step 4: Sketching the Cat's Face
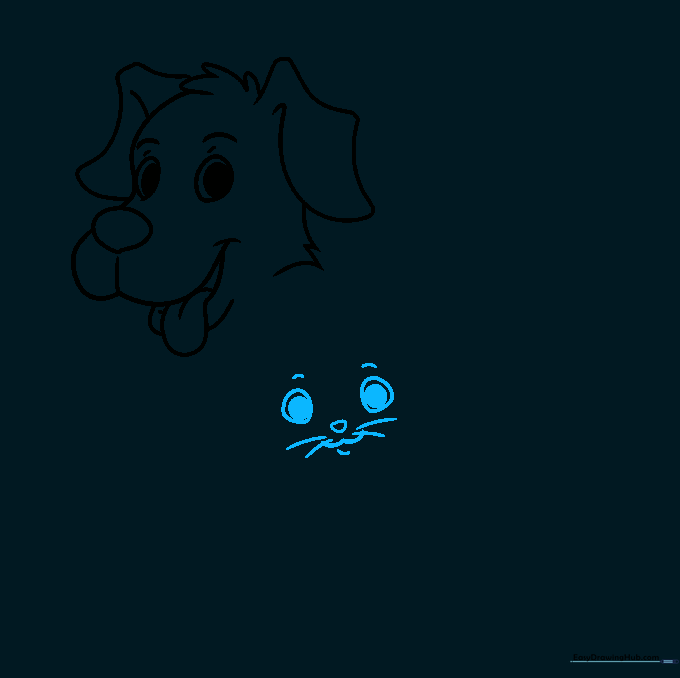
Draw the cat's eyes as two ovals with shaded pupils. Add a small triangle nose and whiskers. Teacher's Tip: Keep the whiskers long and thin to give the cat a friendly, curious expression.
Step 5: Defining the Cat's Features
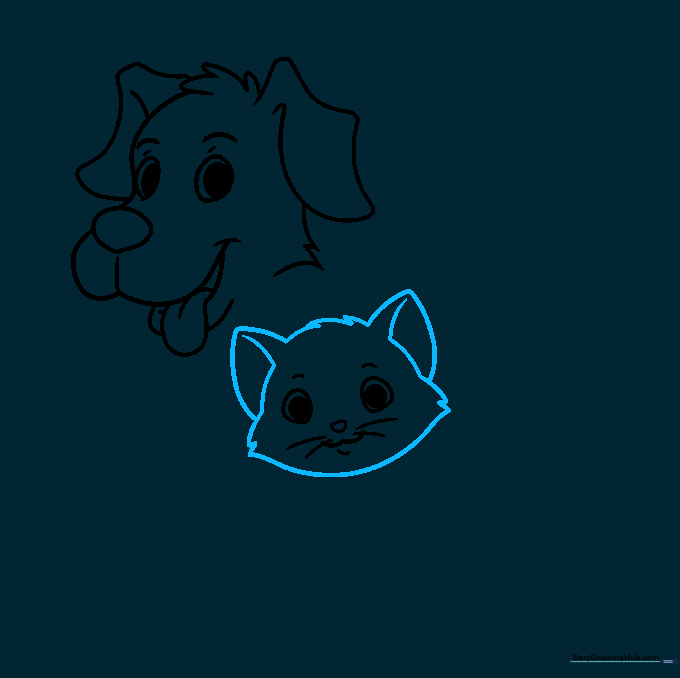
Use curved lines to shape the cat's cheeks and pointed ears. Add extra lines inside the ears for depth. Teacher's Tip: Pointed ears help distinguish the cat from the dog immediately.
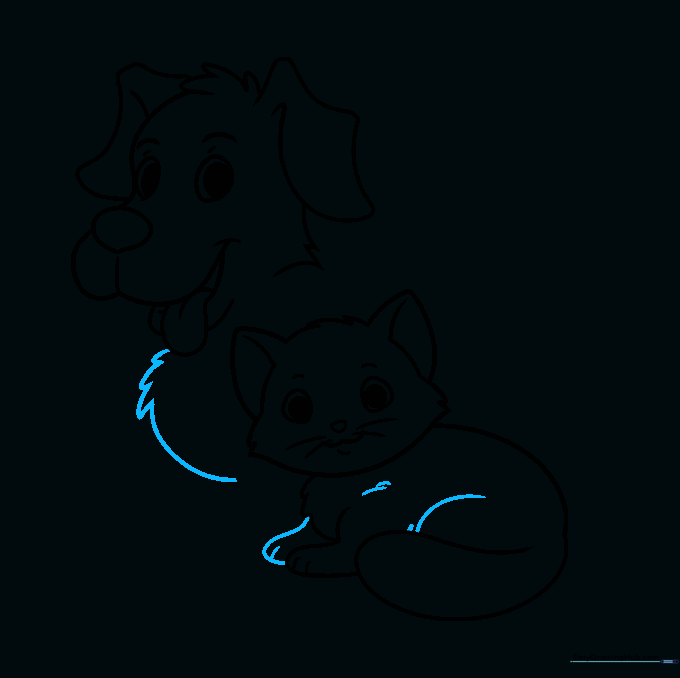
Step 6: Drawing the Cat's Body

Sketch the back and tail using a long, flowing curved line. Add a furry chest and a small paw. Teacher's Tip: A curved tail adds a sense of movement to your drawing.
Step 7: Adding the Cat's Paws and Dog's Chest
Enclose the remaining cat paw and detail the shoulders. Then, draw the dog's chest fur using connected curves. Teacher's Tip: Keep your lines overlapping to show where the animals sit together.
Step 8: Drawing the Dog's Legs
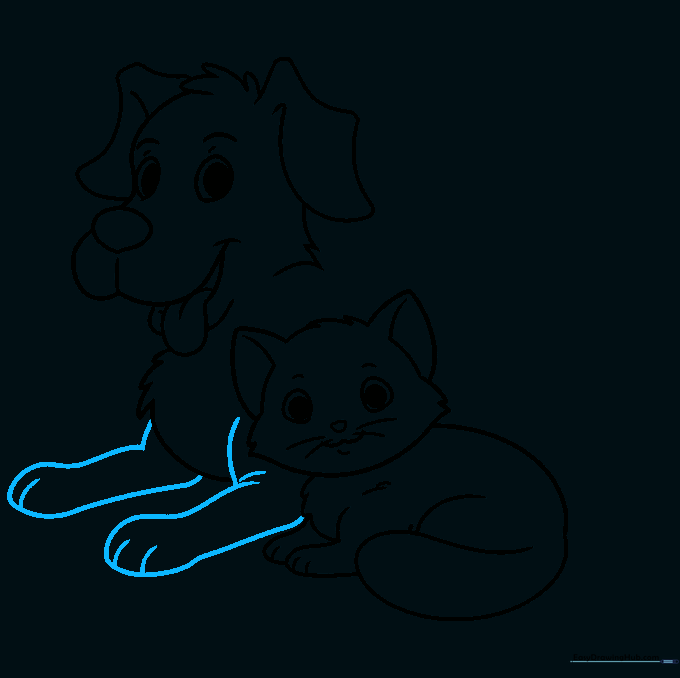
Extend long curved lines from the chest to create the dog's front legs. Add small curves at the elbows for detail. Teacher's Tip: Make the legs slightly thicker at the bottom to give the dog a sturdy look.
Step 9: Finalizing the Outline
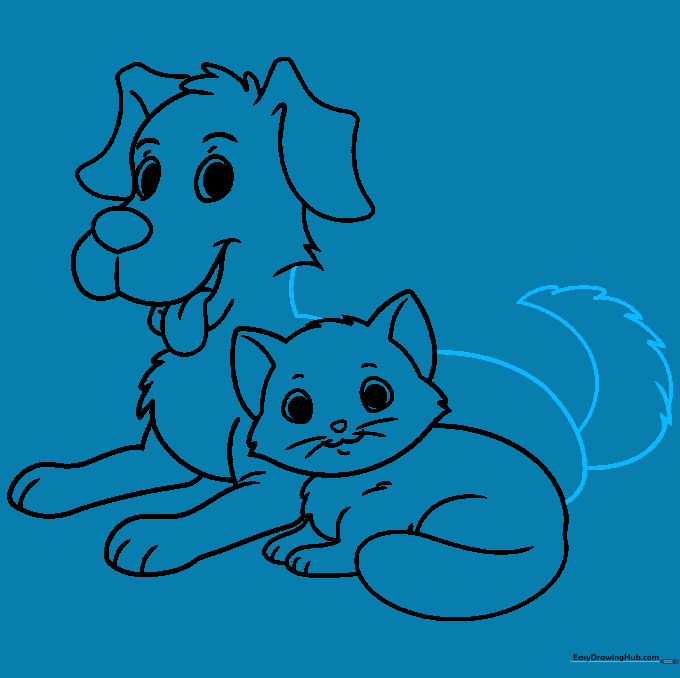
Complete the dog's body and add a fluffy tail. Ensure all lines connect smoothly. Teacher's Tip: Use a darker pencil or pen to trace your final lines before erasing the guide marks.
Step 10: Adding Color
Bring your drawing to life with your favorite colors! Use warm browns for the dog and soft grays or oranges for the cat. Teacher's Tip: Try using light pressure with your colored pencils to create soft shading.
More Tutorials


