How to Draw a Cartoon Zombie: Easy 9-Step Guide
Ready to bring a spooky character to life? This tutorial is perfect for young artists ages 8+ looking to practice character design. You will need a pencil, eraser, and paper to follow along as we build this zombie from simple shapes to a finished, undead masterpiece.
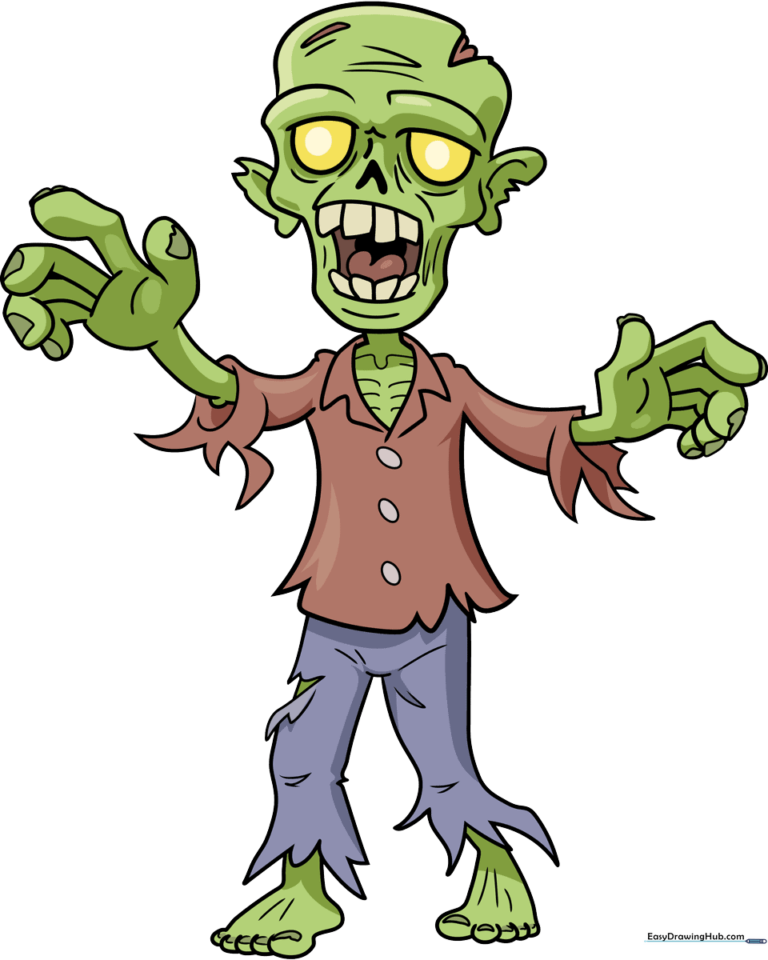
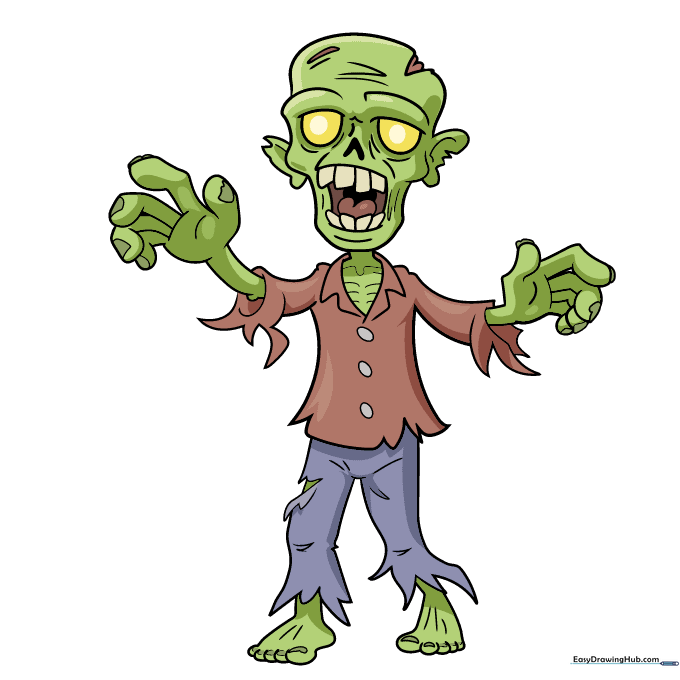
🎯 Final Result
Step-by-Step Instructions
Step 1: Sketching the Eyes and Nose
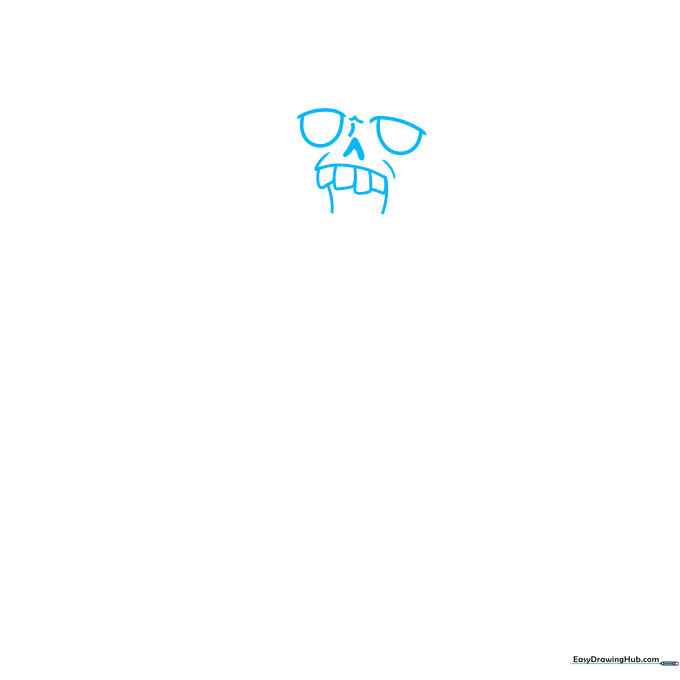
Draw two semi-circles with small dashes on top for the eyelids. Add a simple arrow shape for the nose. Teacher's Tip: Keep the eyes slightly uneven to give your zombie that classic, quirky look.
Step 2: Drawing the Mouth and Teeth

Sketch a horizontal line for the mouth, adding uneven rectangles for jagged teeth. Add a heart shape for the tongue. Teacher's Tip: Don't worry about making the teeth perfect; crooked teeth make the zombie look more authentic!
Step 3: Defining the Head Shape
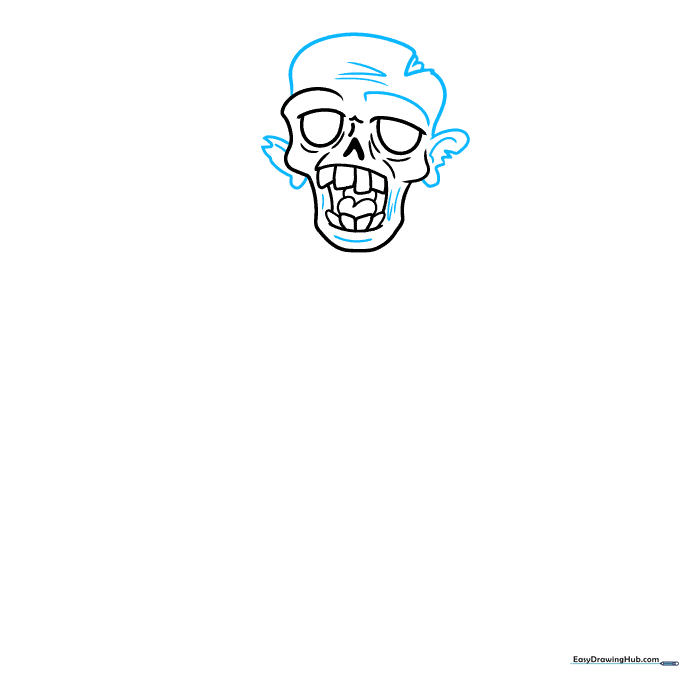
Outline the head with a curve that has blocky, uneven edges. Add tattered bean shapes for ears. Teacher's Tip: Use short, choppy pencil strokes to give the head a 'worn' or 'tattered' appearance.
Step 4: Sketching the Torso and Sleeves
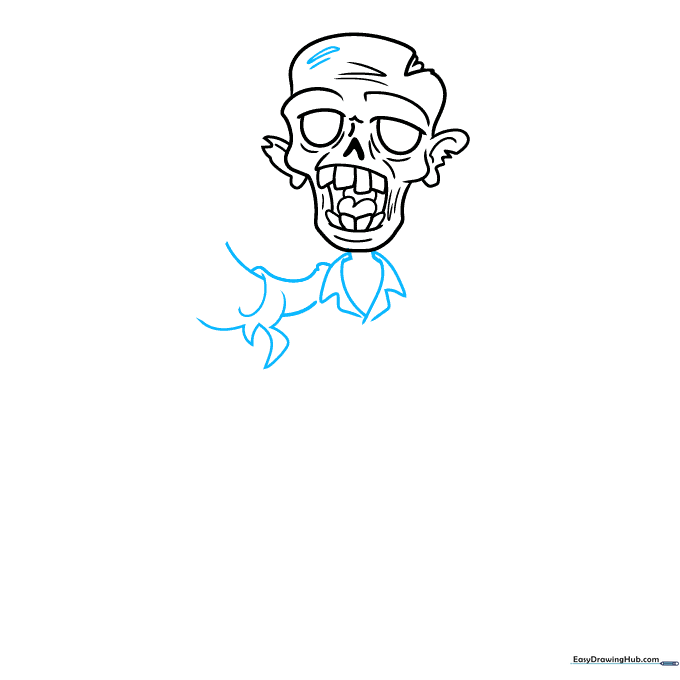
Draw a rounded arrow pointing down for the body, adding triangles for the collar. Sketch the sleeves with torn, jagged edges. Teacher's Tip: The 'torn' look is achieved by drawing small, irregular triangles along the sleeve hem.
Step 5: Drawing the First Hand
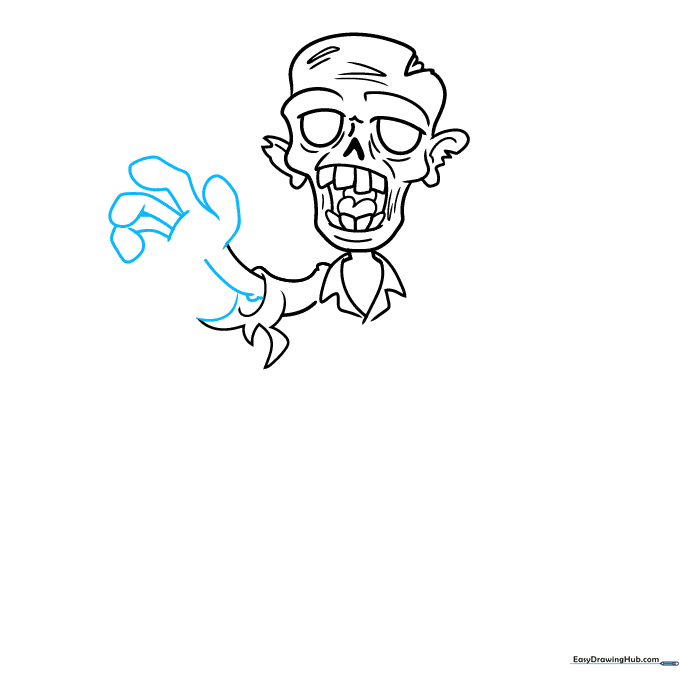
Create the fingers using straight lines with lumpy ovals at the tips. Connect these to the sleeve. Teacher's Tip: Keep the fingers slightly bent to make the zombie look like it's reaching out.
Step 6: Adding the Second Arm
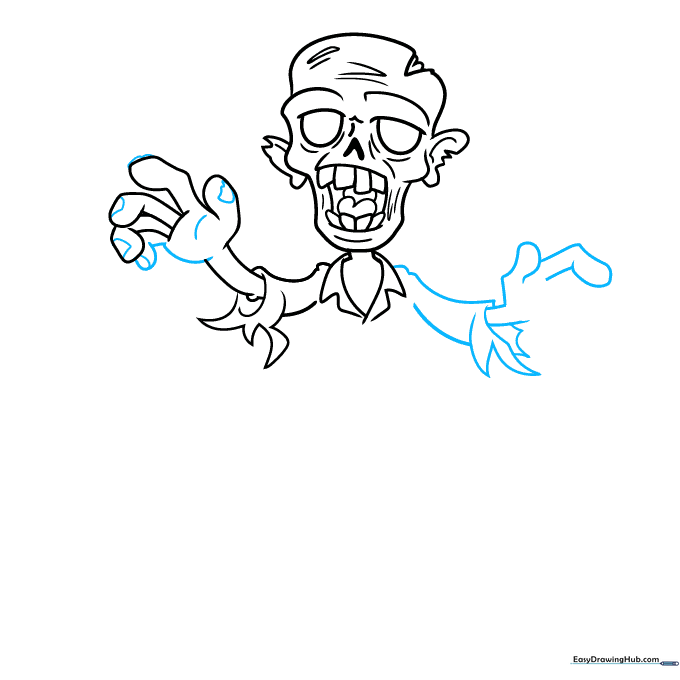
Repeat the process for the second arm, ensuring the sleeve looks equally tattered. Add small semi-ovals for thumbnails. Teacher's Tip: Consistency in the style of the 'torn' fabric helps unify the character design.
Step 7: Detailing the Shirt
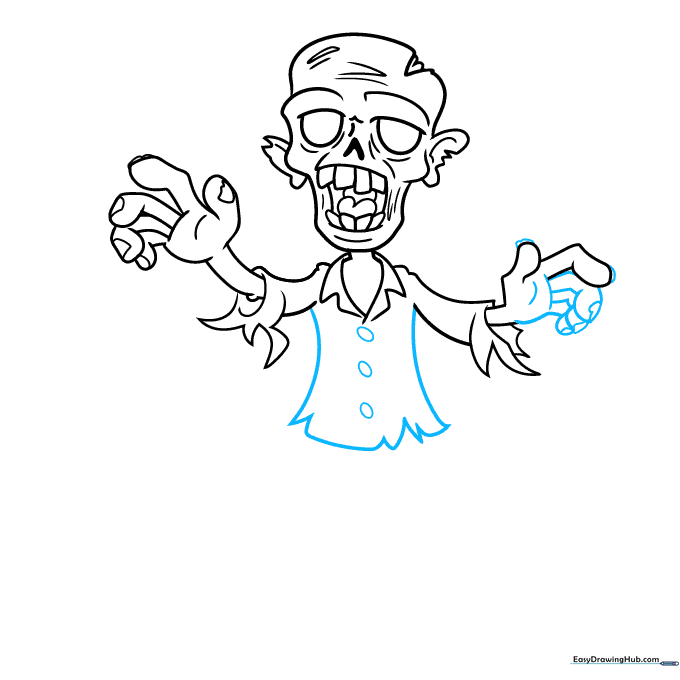
Add buttons to the shirt using simple ovals and draw jagged lines along the hem to show wear and tear. Teacher's Tip: Draw the buttons slightly off-center to emphasize the 'messy' zombie aesthetic.
Step 8: Drawing the Pants
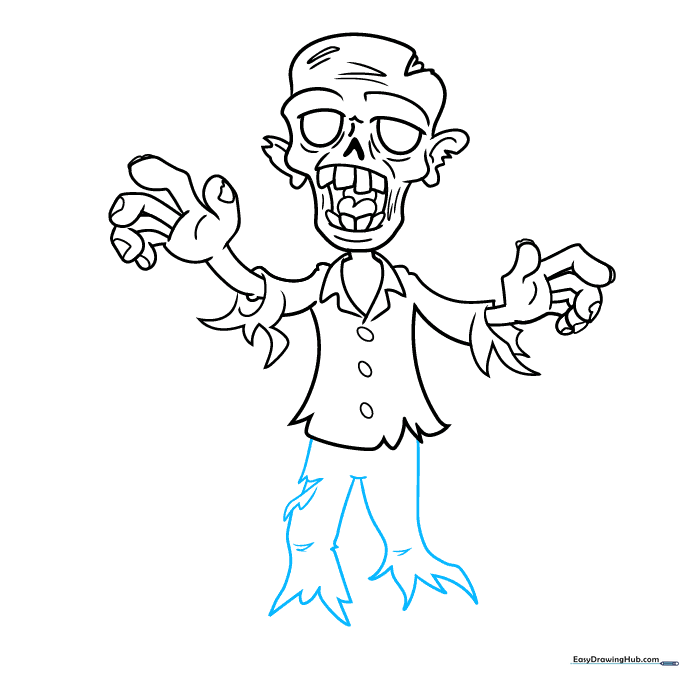
Sketch the pants with vertical lines and add sketchy triangles at the bottom for a ripped effect. Add lines over the knees. Teacher's Tip: Use light pressure for the knee lines to suggest fabric folds.
Step 9: Adding Feet and Final Touches

Draw the toes as overlapping ovals and add a round heel. Connect them to the pants. Teacher's Tip: Add a few extra 'scratch' marks on the clothing to complete the look.
Step 10: Bringing Your Zombie to Life with Color
Use bright green for the skin and yellow for the eyes. Use muted, earthy tones for the clothes to make them look 'dirty.' Teacher's Tip: Use a reddish-brown for the mouth area to add a spooky, finished touch.
More Tutorials


