How to Draw a Cartoon Soccer Ball: Easy 10-Step Guide
Ready to score a goal with your art? This tutorial is perfect for young artists ages 5 and up who want to master drawing a classic soccer ball. All you need is a pencil, an eraser, and a piece of paper to get started. Follow these simple steps to build your confidence and create a fun, sporty masterpiece.
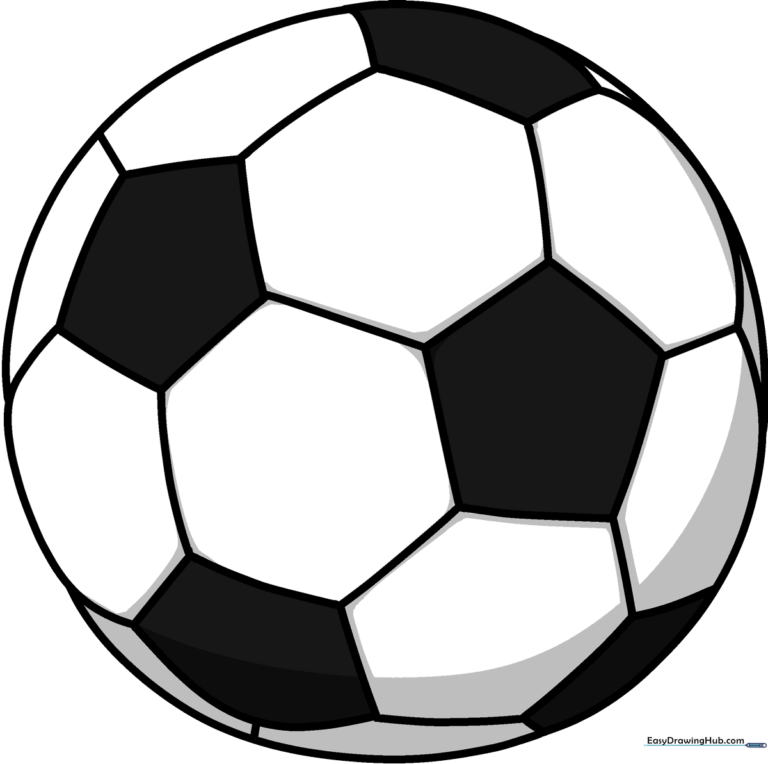
🎯 Final Result
Step-by-Step Instructions
Step 1: Sketching the Center Pentagon
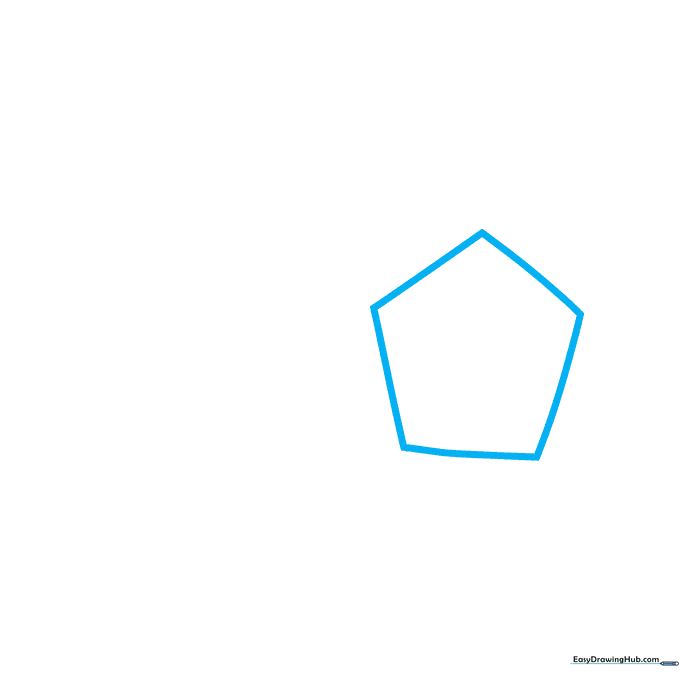
Start by drawing a small pentagon in the center of your page. Teacher's Tip: Keep your pencil lines light and loose; this will be the anchor for the rest of your ball's pattern.
Step 2: Adding the First Hexagon
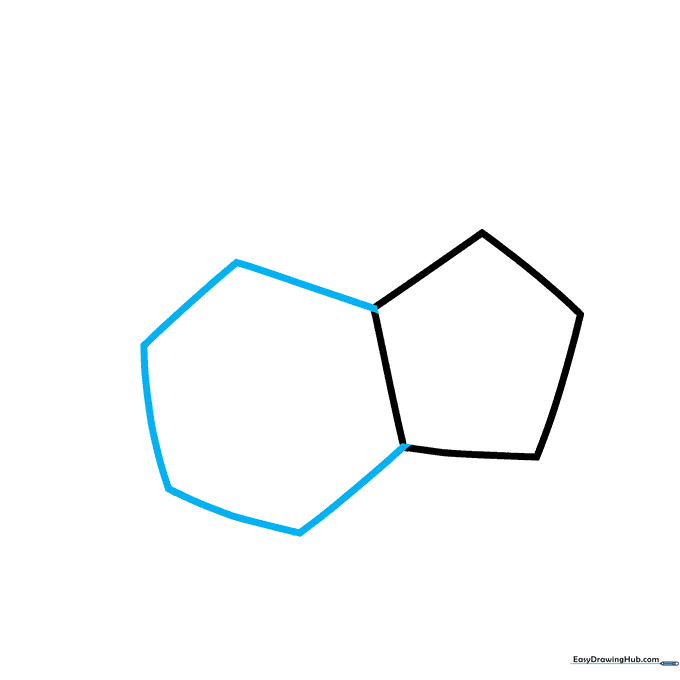
Draw a hexagon that shares one side with your pentagon. Teacher's Tip: Think of this like a puzzle piece—ensure the lines touch perfectly at the corners.
Step 3: Building the Pattern
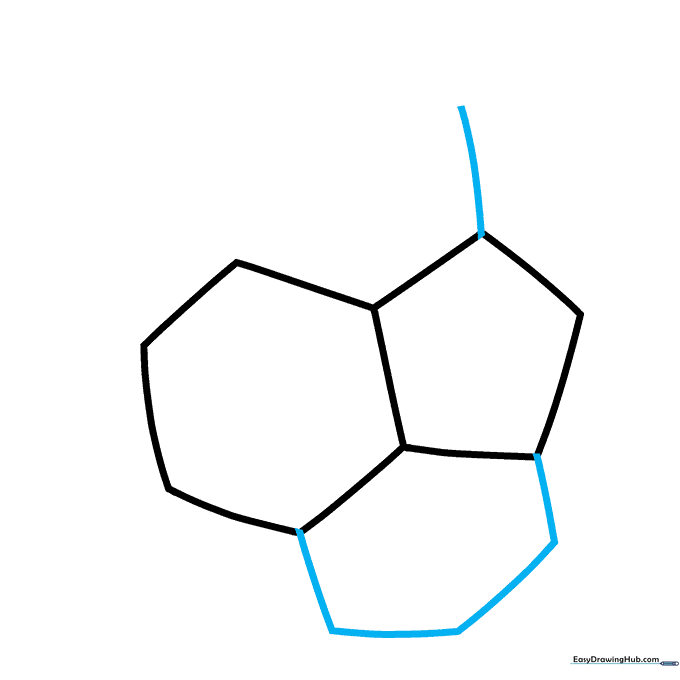
Add another hexagon using two sides of the existing shapes. Teacher's Tip: As you move outward, slightly curve your lines to give the ball a rounded, 3D appearance.
Step 4: Creating the Honeycomb Effect
Complete the hexagon with curved lines and add a partial pentagon at the bottom. Teacher's Tip: Notice how the shapes start to look like a honeycomb; this is the secret to a realistic soccer ball structure.
Step 5: Expanding the Sides
Add another pentagon and a curved hexagon on the side. Teacher's Tip: Don't worry if the shapes look a bit squashed—that's how they look when they wrap around a sphere!
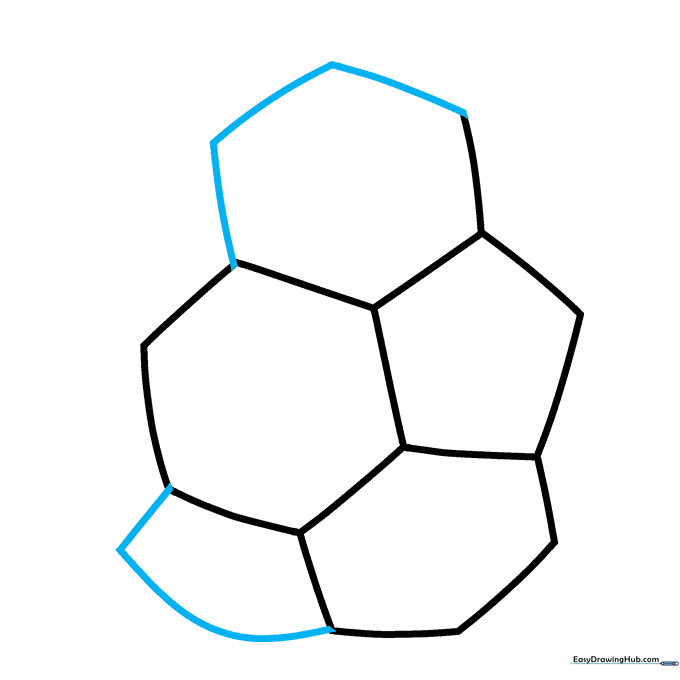
Step 6: Defining the Bottom Edge
Use curved lines to enclose the bottom shapes. Teacher's Tip: Keep your wrist loose to create smooth, rounded lines that define the ball's outer edge.
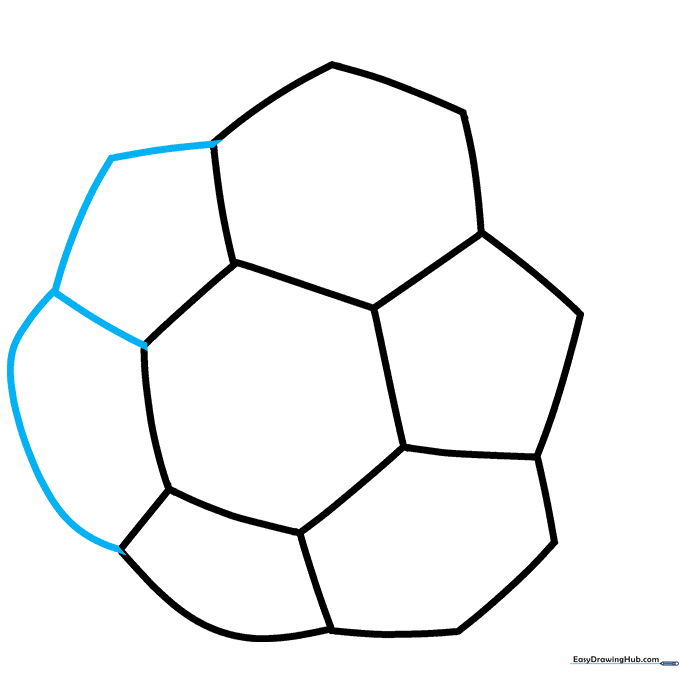
Step 7: Continuing the Outline
Extend the circular outline and add more flattened hexagons. Teacher's Tip: Check your symmetry—try to keep the ball looking balanced on both sides.
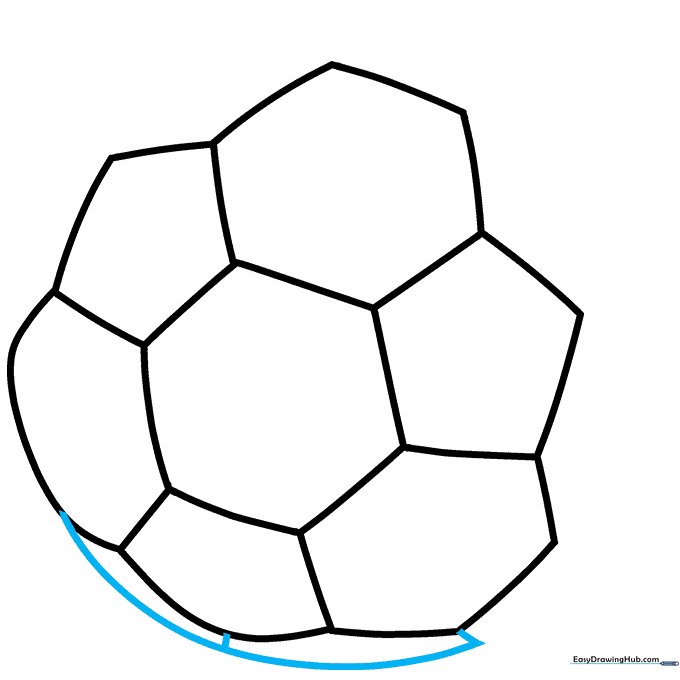
Step 8: Working Toward the Top
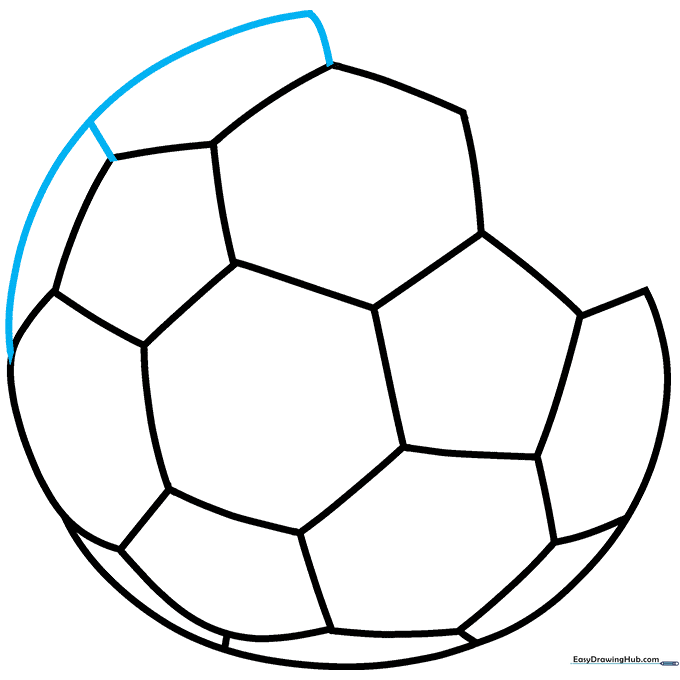
Continue the circular outline toward the top, adding partial hexagons as you go. Teacher's Tip: If you make a mistake, gently dab it with your eraser rather than rubbing hard.
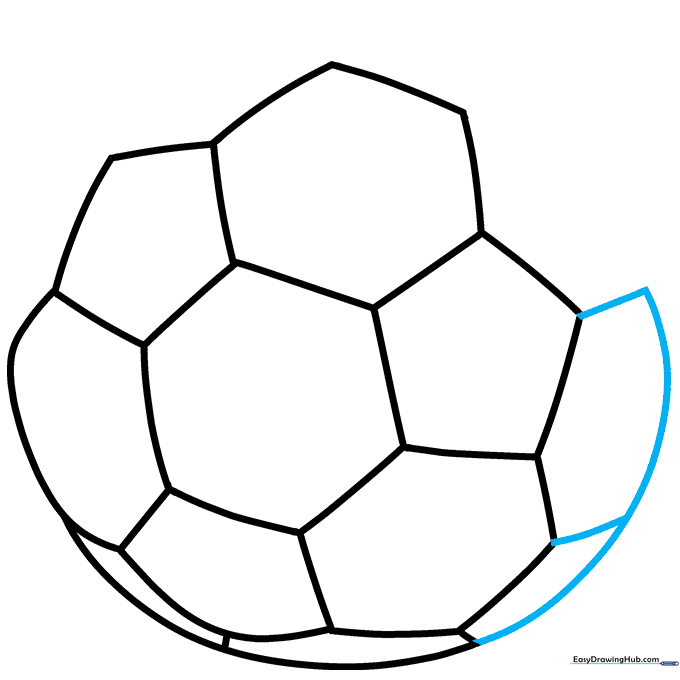
Step 9: Finalizing the Shape
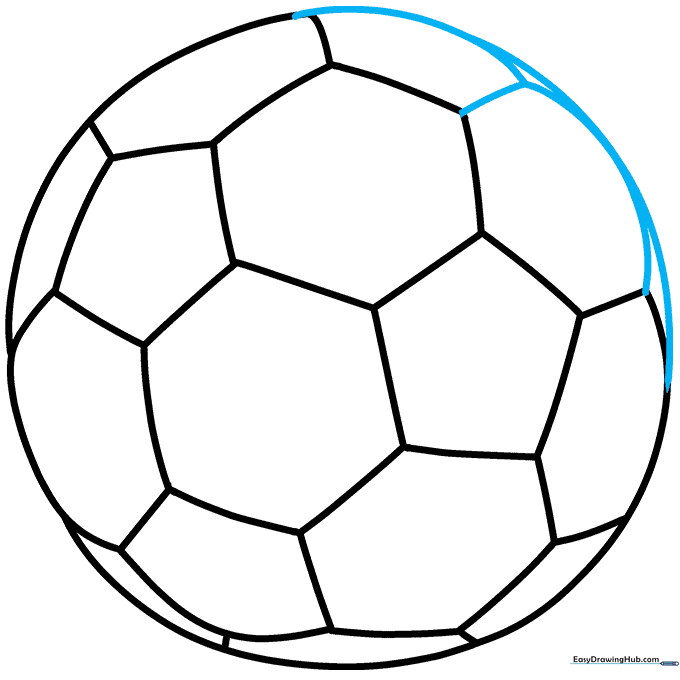
Close the circular shape and add the final triangles and hexagons. Teacher's Tip: Take a step back and look at your drawing from a distance to ensure the circle looks round.
Step 10: Adding Color
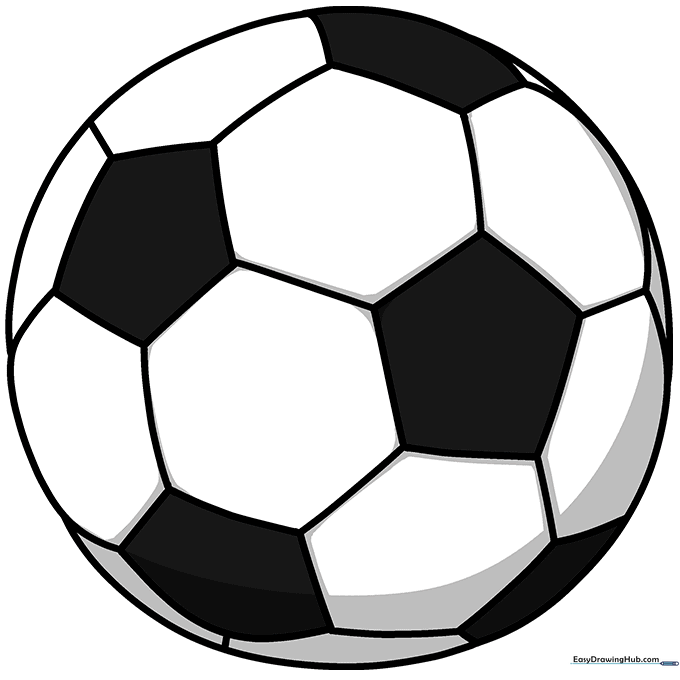
Time to bring your ball to life! Color the pentagons black and leave the hexagons white. Teacher's Tip: Use bold markers for a classic look, or get creative with your favorite team colors!
More Tutorials


