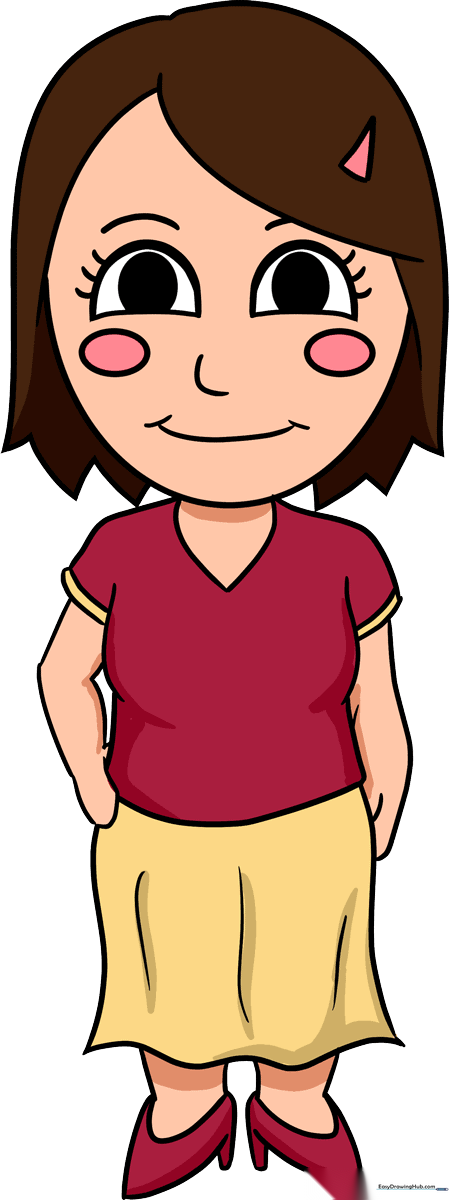
How to Draw a Cartoon Mom: Easy 10-Step Guide
Looking for a fun, screen-free activity? This tutorial is perfect for artists ages 5 and up. Grab your pencil, eraser, and paper to follow along as we build a friendly cartoon character using simple shapes and lines.
🎯 Final Result
Step-by-Step Instructions
Step 1: Sketching the Face Guide

Draw a light oval for the head. Add a vertical line down the center and a horizontal line slightly below the middle. Teacher's Tip: Keep these lines very faint so they are easy to erase later—they are just a map for your features!
Step 2: Adding Eyes and Brows
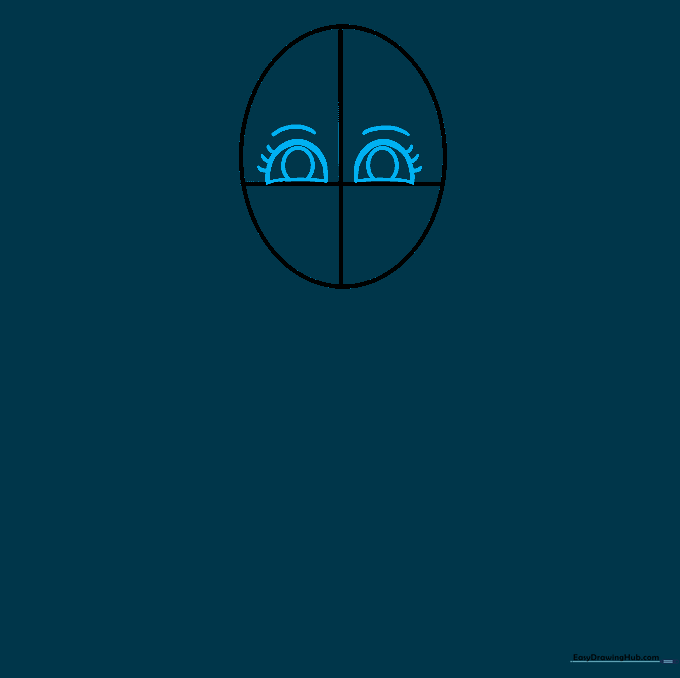
Draw two eyes above the horizontal line using a curved base and an inverted 'U' for the top. Add pupils, eyebrows, and delicate eyelashes. Teacher's Tip: Drawing the pupils slightly off-center can give your character a cute, looking-up expression.
Step 3: Defining the Face

Erase your horizontal guide line. Use the vertical line to place a small curved nose, rosy cheeks, and a wide, happy smile. Teacher's Tip: Use short, light strokes for the blush to make it look soft and natural.
Step 4: Styling the Hair
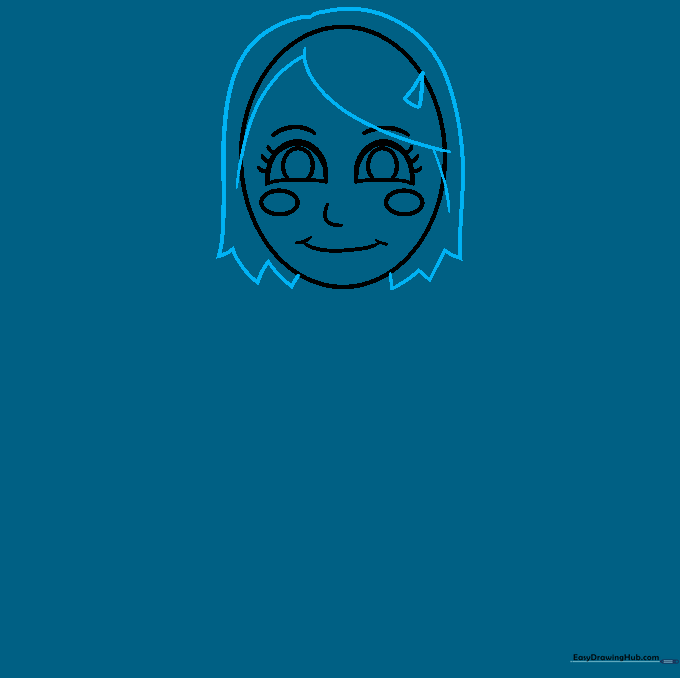
Erase the vertical guide. Draw bangs falling across the forehead and long hair framing the face. Add a small triangle barrette for detail. Teacher's Tip: Use jagged, overlapping lines to make the hair look textured and realistic.
Step 5: Drawing the Neck and Torso
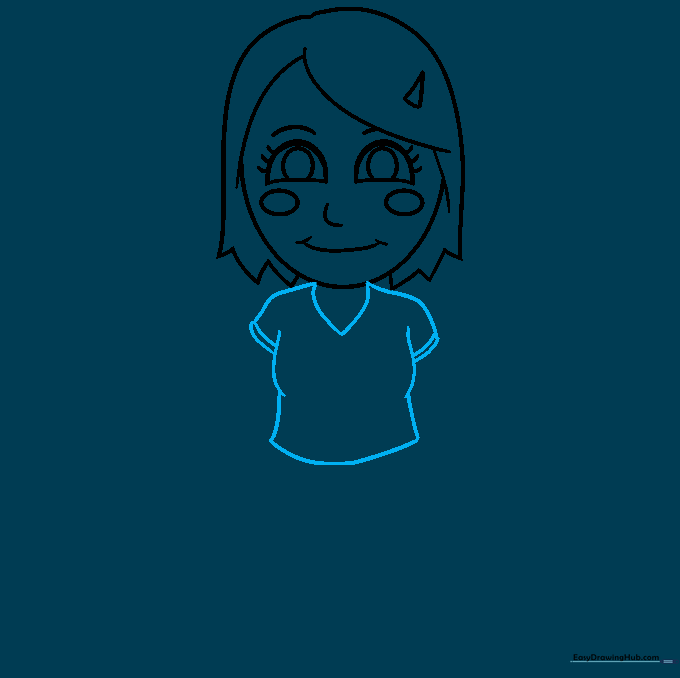
Draw a 'V' shape for the neck and outline the shirt sleeves and torso. Teacher's Tip: Keep the lines for the shirt hem parallel to the sleeve ends to show depth and perspective.
Step 6: Adding the Skirt
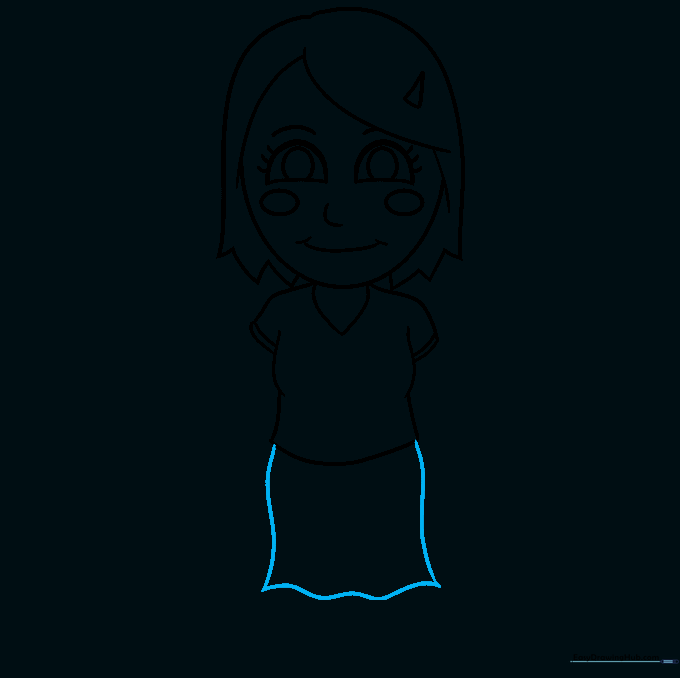
Extend curved lines from the shirt to create a skirt, connecting them at the bottom with a wavy line. Teacher's Tip: The wavy line suggests movement in the fabric.
Step 7: Sketching the Arms
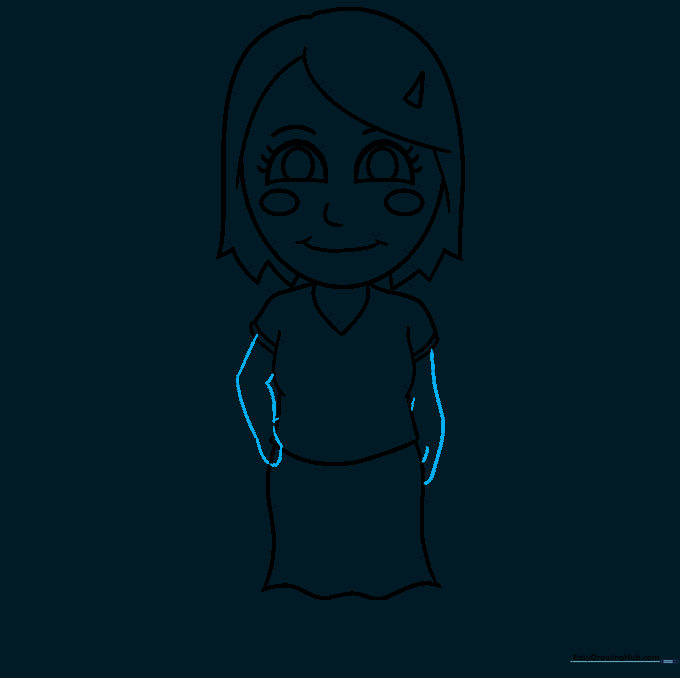
Use overlapping curved lines to draw the arms. One arm should be partially hidden to create a natural pose. Teacher's Tip: Keep the arm lines smooth to show the curve of the elbows.
Step 8: Adding Fabric and Legs
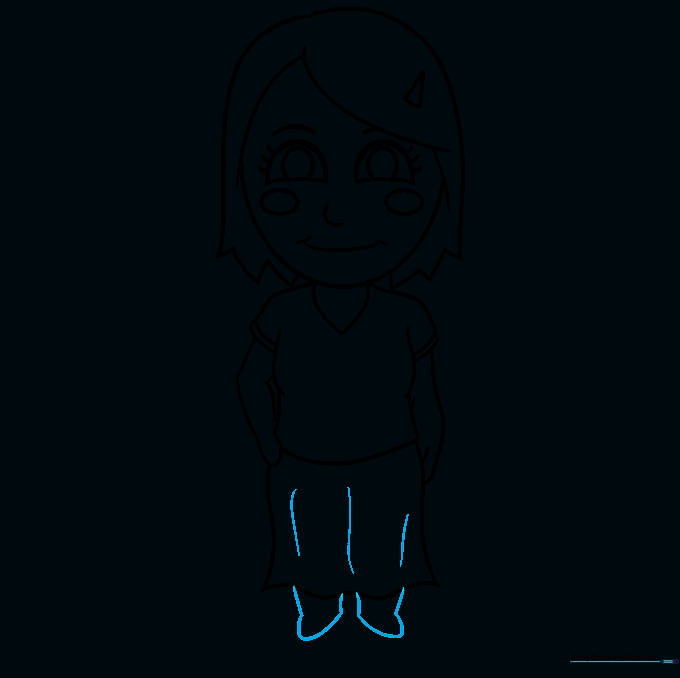
Add contour lines to the skirt to show folds. Draw the legs extending below the skirt. Teacher's Tip: Use a 'doubling back' technique to ensure the legs look solid and connected.
Step 9: Drawing the Shoes

Finish the figure by sketching the high-heeled shoes using simple curved lines. Teacher's Tip: Keep the heels small to maintain the cartoon proportions.
Step 10: Bring Your Drawing to Life
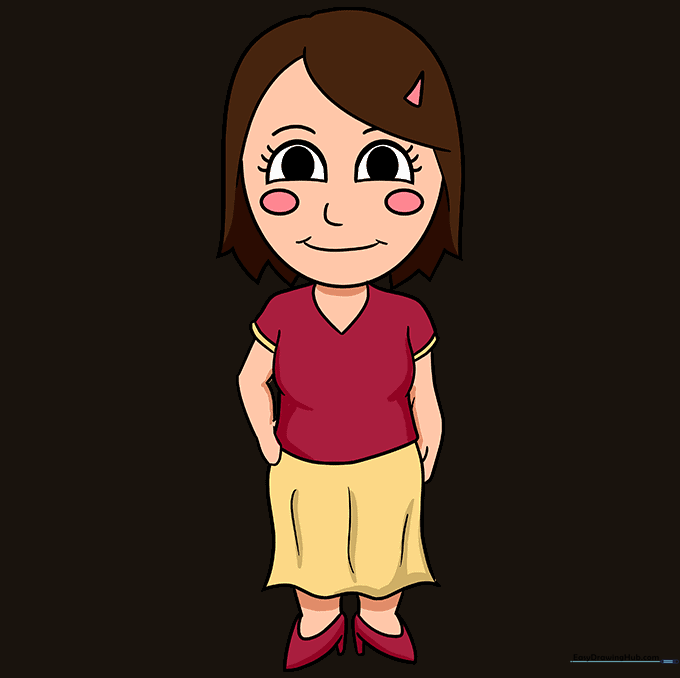
Color your cartoon mom! Use bright, cheerful colors to fill in the clothes and hair. Teacher's Tip: Try using a lighter shade for the skin and a darker shade for the hair to add contrast.
More Tutorials


