How to Draw a Cartoon Chicken: Easy 9-Step Guide
Ready to bring a farmyard friend to life? This tutorial is perfect for young artists ages 5 and up. You’ll only need a pencil, an eraser, and a piece of paper to master this fun character, helping you practice basic shapes and confident line work.
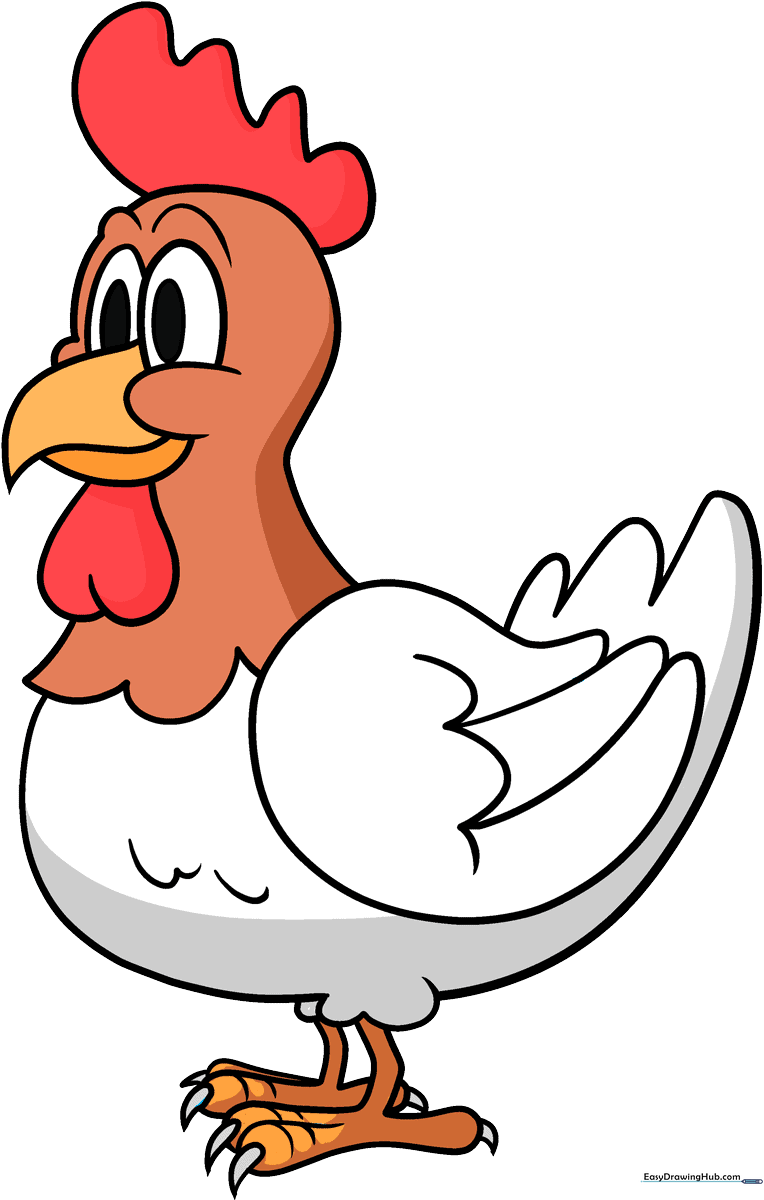
🎯 Final Result
Step-by-Step Instructions
Step 1: Sketching the Beak and Eyes
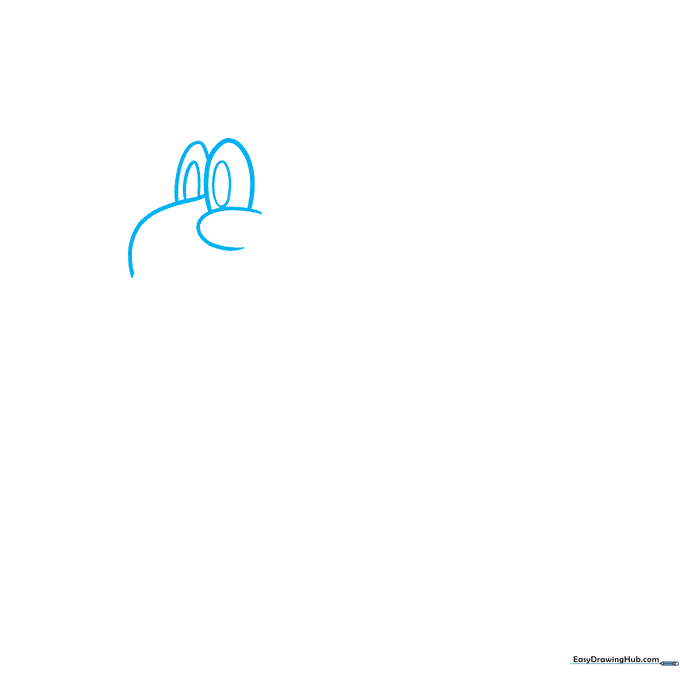
Start by drawing a small curved line for the top of the beak. Add two 'U' shapes for the cheeks and circles for the eyes. Teacher's Tip: Keep the eyes close together to give your chicken a friendly, curious expression.
Step 2: Defining the Face
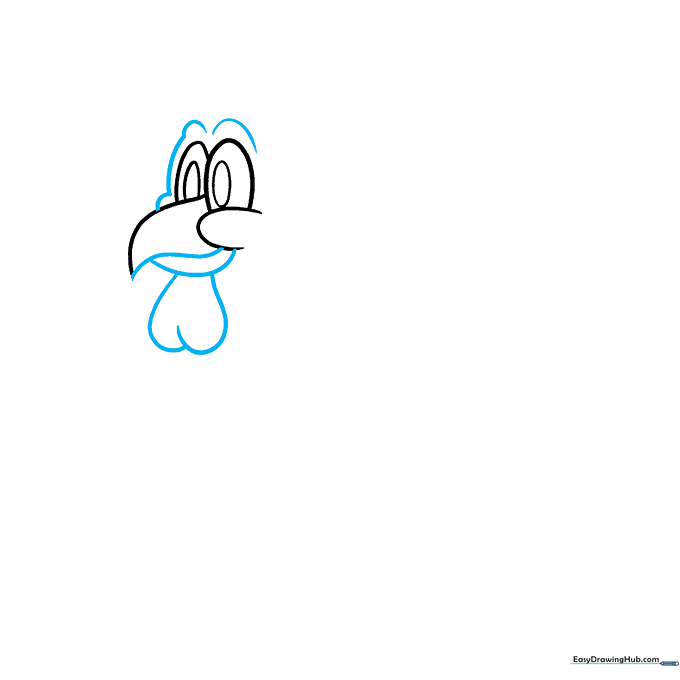
Add curved lines for the eyebrows, the side of the face, the bottom beak, and a small wattle. Teacher's Tip: Use a light touch for the wattle so it looks soft and fleshy.
Step 3: Shaping the Neck
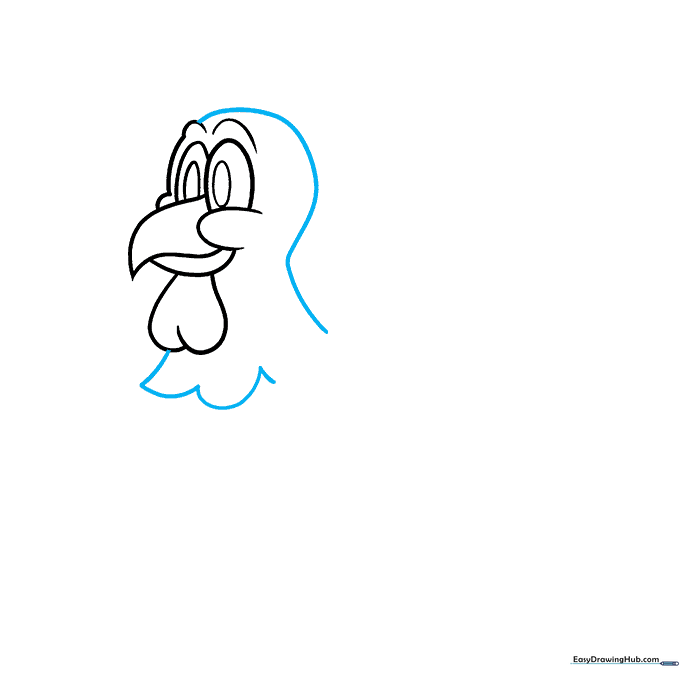
Draw a long, smooth curve for the back of the head and neck. Add small, jagged 'U' shapes at the base for feathers. Teacher's Tip: Vary the size of the feather bumps to make them look more natural.
Step 4: Adding the Comb
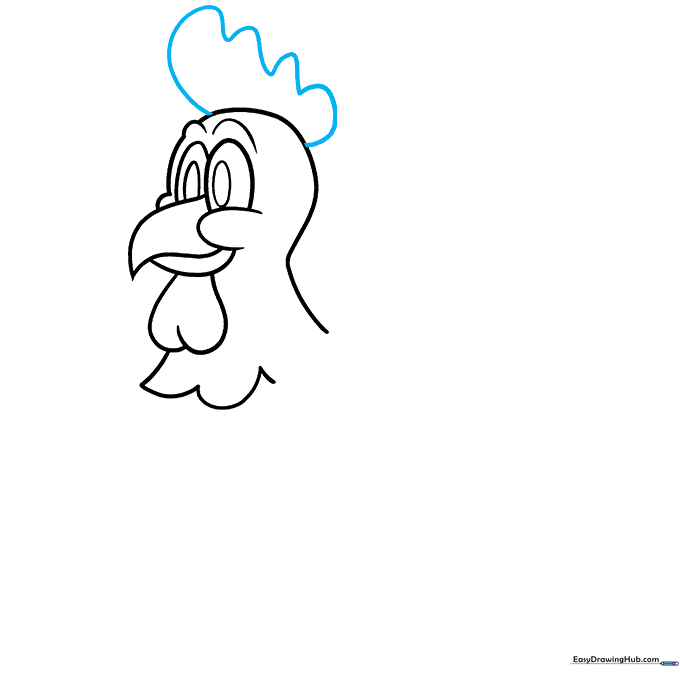
Draw the comb on top of the head using a wavy, irregular line. Teacher's Tip: Imagine you are drawing a small, puffy cloud sitting on the chicken's head.
Step 5: Sketching the Body
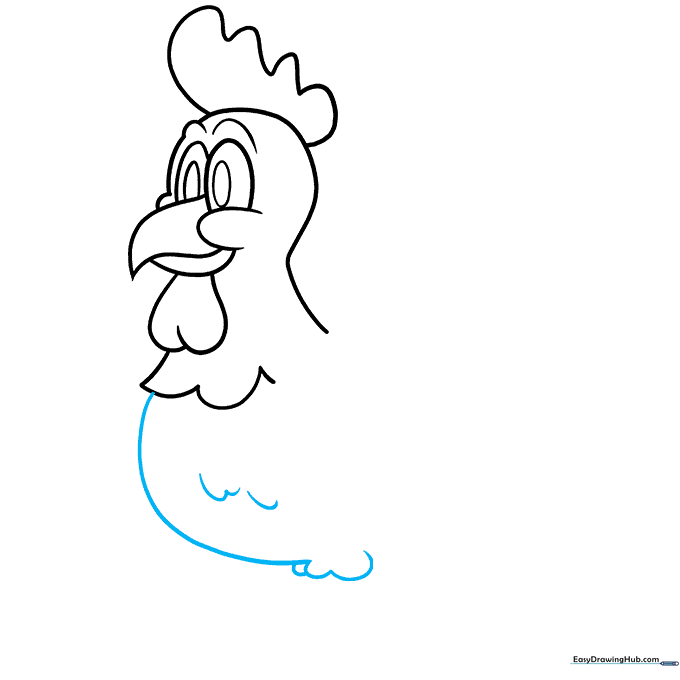
Draw a large, rounded curve for the chest and belly. Add a few small curves where the legs will attach. Teacher's Tip: Keep this line continuous to give the chicken a nice, plump shape.
Step 6: Drawing the Wing
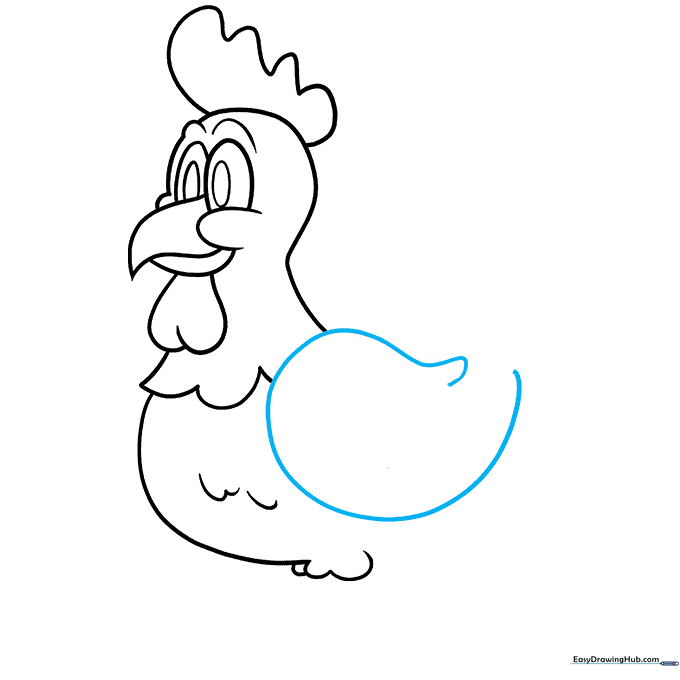
Use a long, curved line that doubles back on itself to create the wing shape. Teacher's Tip: Make the wing look like a teardrop shape for a classic cartoon look.
Step 7: Adding Wing Feathers
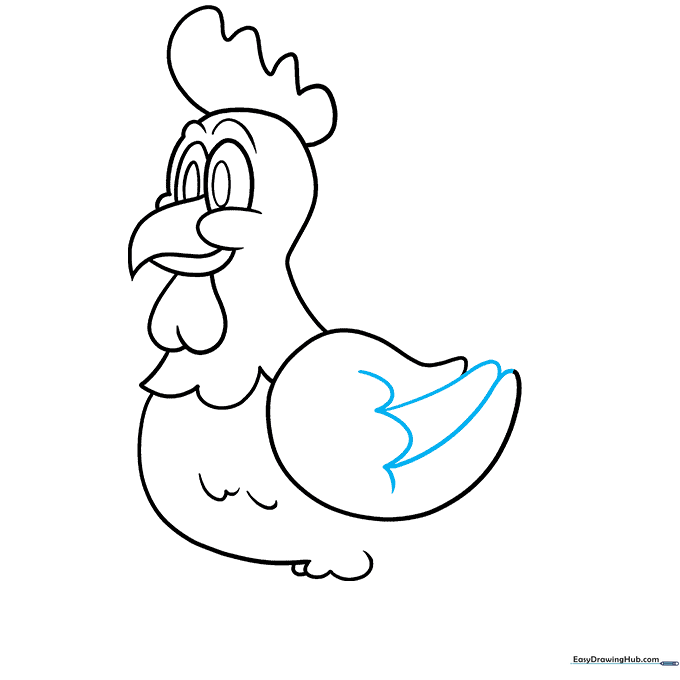
Add small, connected curves inside the wing to show texture, then use 'U' shapes for the flight feathers at the bottom. Teacher's Tip: Press firmly with your pencil for these details to make them stand out.
Step 8: Creating the Tail
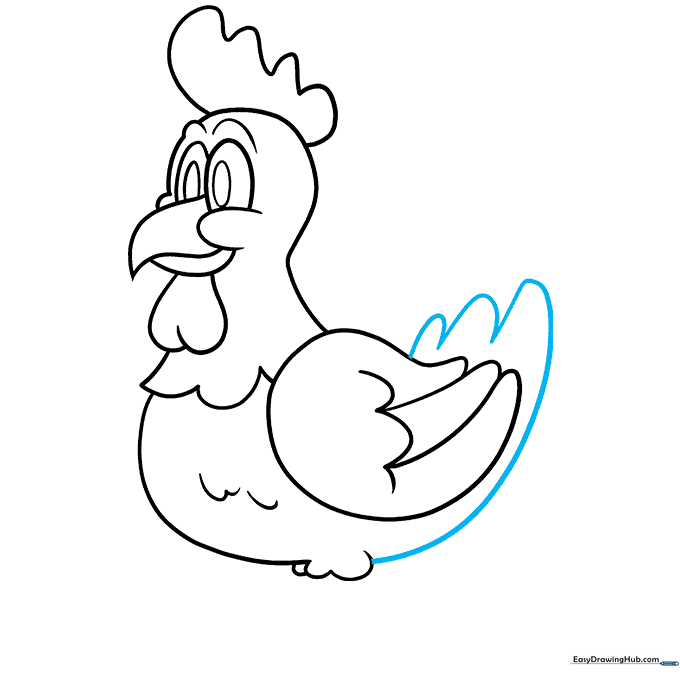
Add a series of 'U' shaped lines for the tail feathers, connecting them back to the body. Teacher's Tip: Make the tail feathers fan out slightly to give your chicken some personality.
Step 9: Drawing Legs and Feet
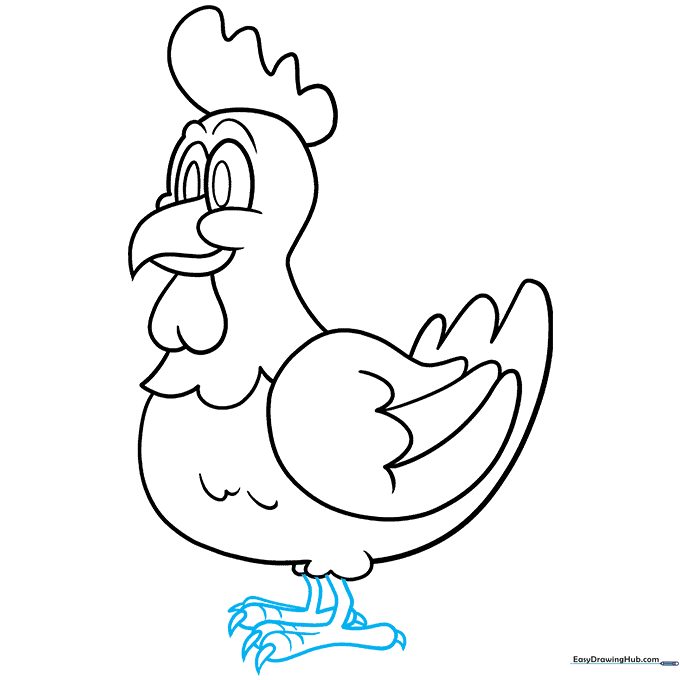
Draw the legs using two parallel lines, then add cylindrical toes with triangular claws. Teacher's Tip: Draw the toes slightly overlapping to show depth.
Step 10: Final Touches and Color
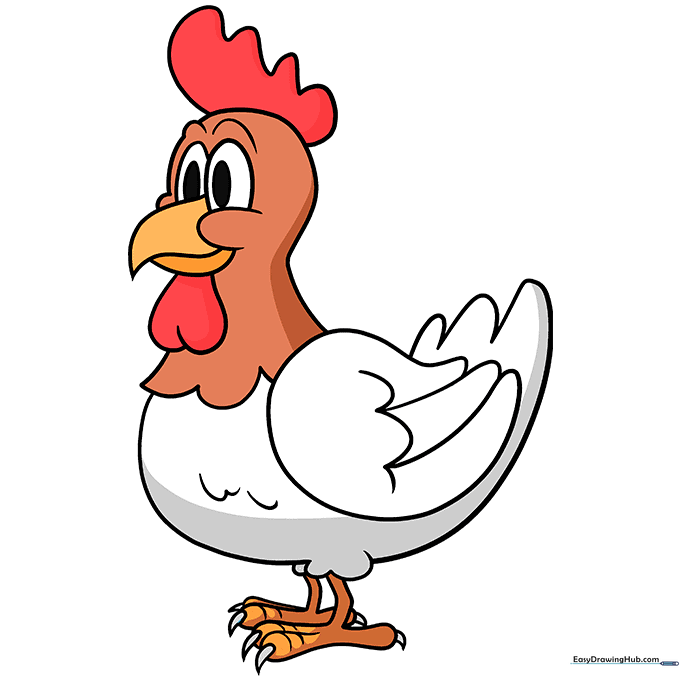
Erase any stray guidelines and add color! Use bright yellow for the body and orange for the beak and feet. Teacher's Tip: Use a darker shade of orange to add shadows under the wing for a 3D effect.
More Tutorials


