How to Draw a Cute Cartoon Cat: Easy 10-Step Guide
This friendly cartoon cat tutorial is perfect for artists ages 5 and up. You only need a pencil, an eraser, and a piece of paper to bring this playful character to life. Follow these simple steps to build confidence in your drawing skills while creating a fun, expressive feline friend.
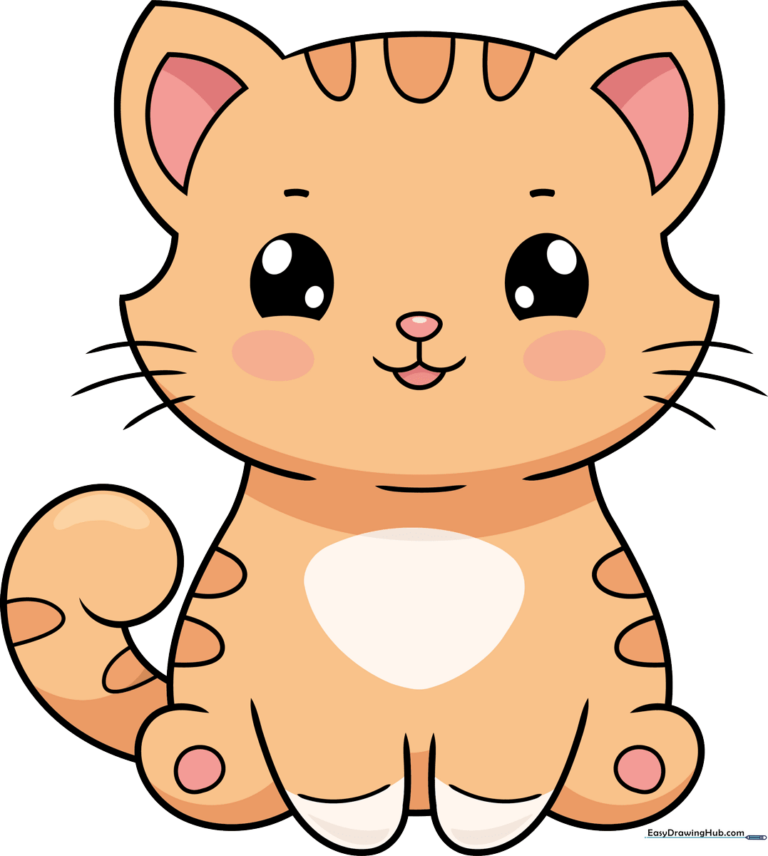
🎯 Final Result
Step-by-Step Instructions
Step 1: Sketching the Face Base

Draw two light ovals near the bottom of your page. Erase the bottom curves to create a soft, rounded jawline, then sketch two circles inside for the eyes and a small triangle for the nose. Teacher's Tip: Keep your pencil pressure light so these guidelines are easy to clean up later!
Step 2: Defining the Expression

Draw two symmetrical curves on the sides to frame the head. Add a loose 'W' shape under the nose for the mouth, and sketch short, flicking lines above the eyes for expressive brows. Teacher's Tip: Use quick, short strokes for the brows to give your cat a curious, lively look.
Step 3: Adding the Ears

Draw two triangles on top of the head for the ears. Connect the base of the ears to the head shape with smooth, curved lines. Teacher's Tip: Make the ears slightly rounded at the tips to keep the cat looking friendly rather than sharp.
Step 4: Whiskers and Inner Ears

Connect the ears with a single horizontal line. Sketch smaller triangles inside the ears for detail, and add three long, sweeping lines on each cheek for whiskers. Teacher's Tip: Draw whiskers with a confident, fluid motion to make them look natural.
Step 5: Shaping the Body
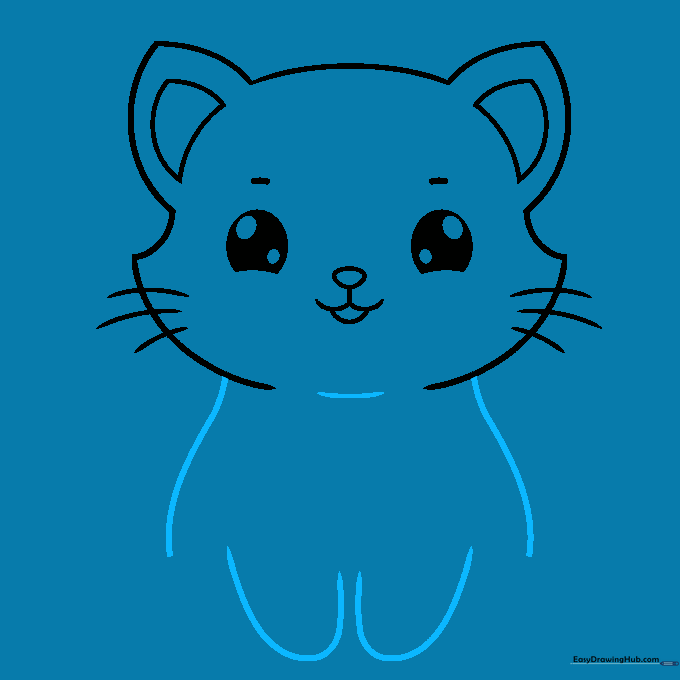
Draw two identical wavy lines extending down from the head to create a vase-like body shape. Add two small loops at the bottom for the front paws. Teacher's Tip: Keep the wavy lines parallel to ensure your cat looks balanced and symmetrical.
Step 6: Adding Back Feet
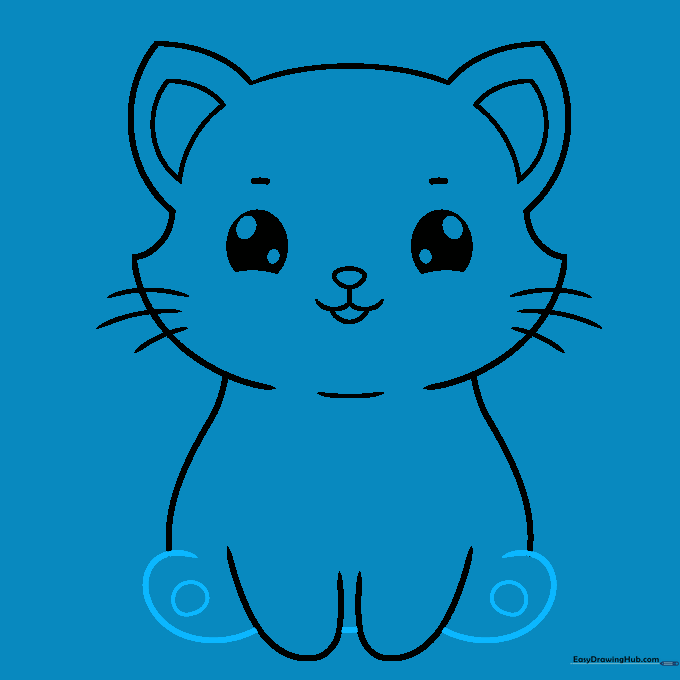
Draw two additional loops behind the front paws for the back feet, adding a small circle inside each for the paw pads. Connect the front feet with a single horizontal line. Teacher's Tip: Overlapping the back feet behind the front ones creates a sense of depth in your drawing.
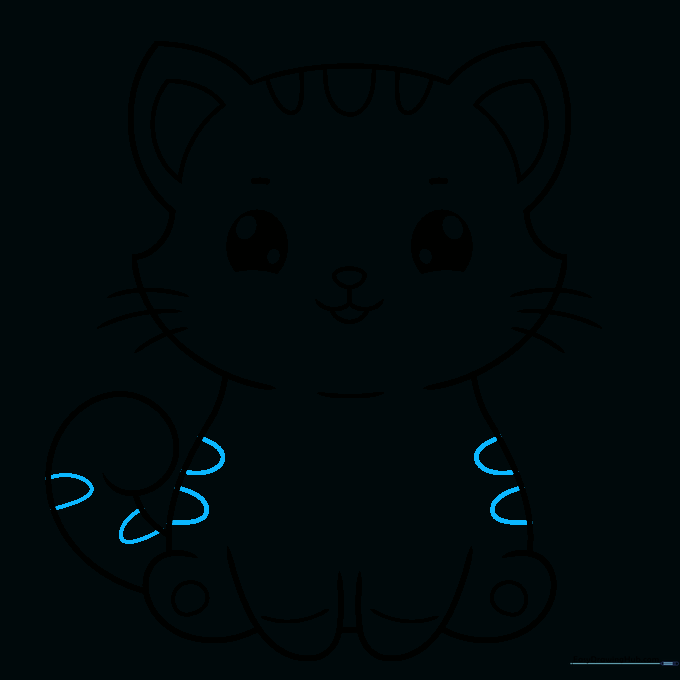
Step 7: Drawing the Tail

Draw a playful, swirling 'S' shape for the tail and connect it to the body with a curved line. Teacher's Tip: A curved tail adds personality—make it as long or as curly as you like!
Step 8: Adding Fur Texture

Sketch small 'hill' shapes along the top of the head and add short lines inside the front paws to suggest toes. Teacher's Tip: These small details make the drawing look more professional and 'finished'.
Step 9: Final Touches
Add more 'hill' shapes along the tail and body to complete the fur texture. Review your lines and erase any stray marks. Teacher's Tip: Take a moment to look at your drawing from a distance to see if the proportions look right before you move to coloring.
Step 10: Bring Your Cat to Life with Color

Trace your final lines with a black pen or marker. For coloring, try a pale orange for the body with darker orange stripes. Use off-white for the chest and paws, and soft pink for the ears, nose, and toe pads. Teacher's Tip: Use light, circular motions with your colored pencils to get an even, smooth look.
More Tutorials


