How to Draw a Cartoon Bicycle: Easy 10-Step Guide
Ready to draw your own set of wheels? This tutorial is perfect for young artists ages 5 and up. All you need is a pencil, an eraser, and a piece of paper to bring this fun cartoon bicycle to life while practicing your geometric shapes.
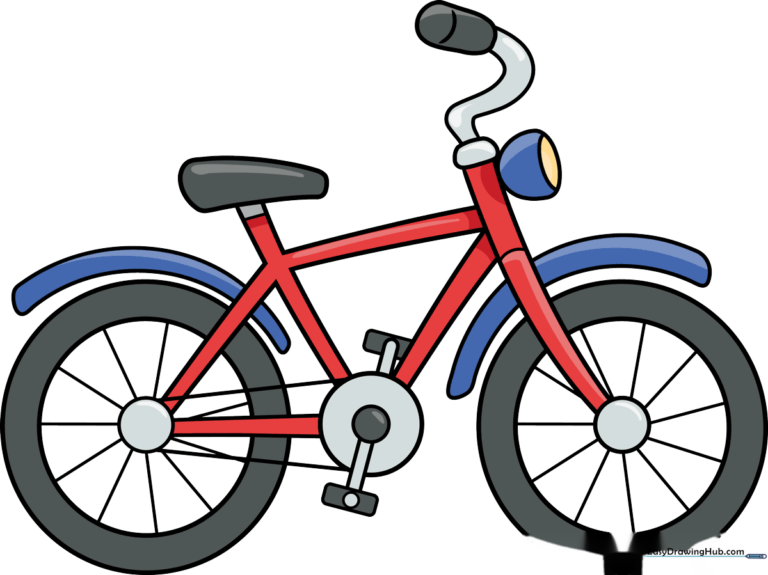
🎯 Final Result
Step-by-Step Instructions
Step 1: Sketching the Front Wheel
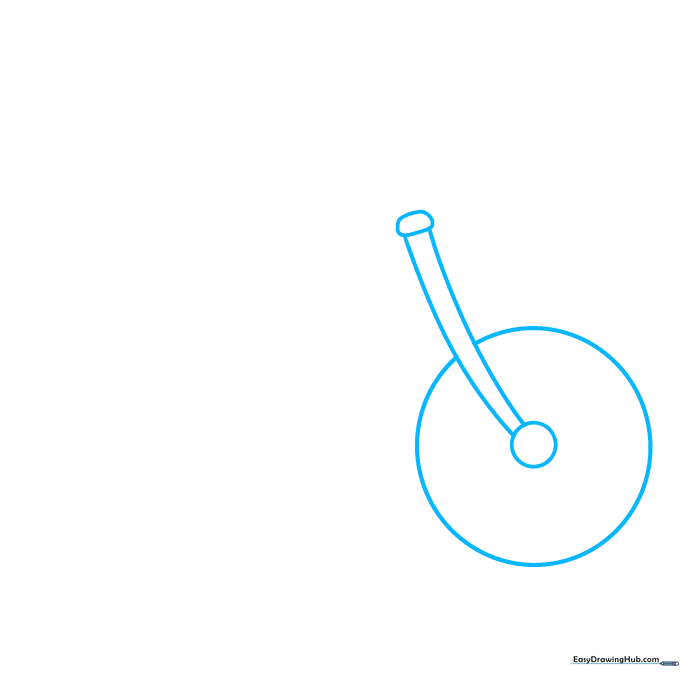
Start by drawing a small circle for the wheel's hub. Extend two curved lines upward and cap them with a rounded trapezoid to form the front fork. Finally, draw a larger circle around the hub for the tire. Teacher's Tip: Keep your pencil lines light so you can easily adjust the shape if it's not perfectly round.
Step 2: Adding Handlebars
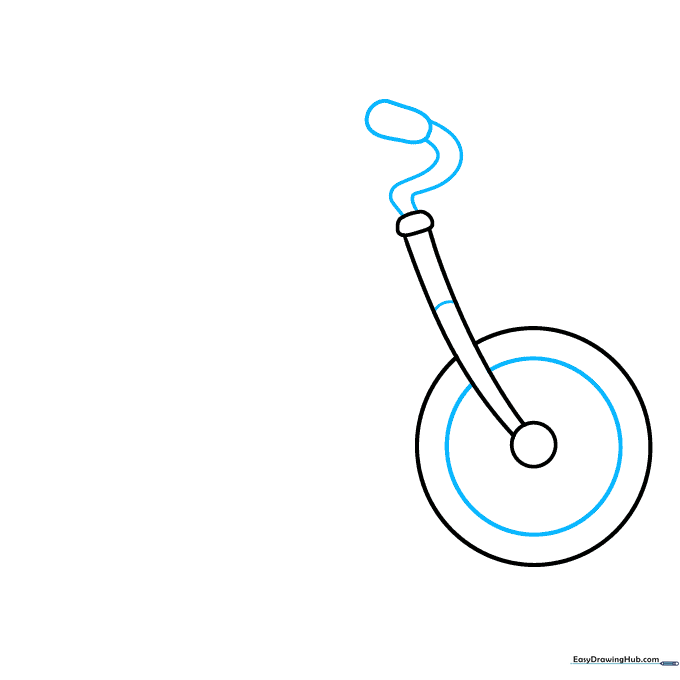
Draw a smaller circle inside the tire to show the rim. Then, extend two curved lines from the top of the fork and connect them with a rounded shape to create the handlebars. Teacher's Tip: Use a smooth, continuous motion for the handlebars to make them look sleek.
Step 3: Building the Frame
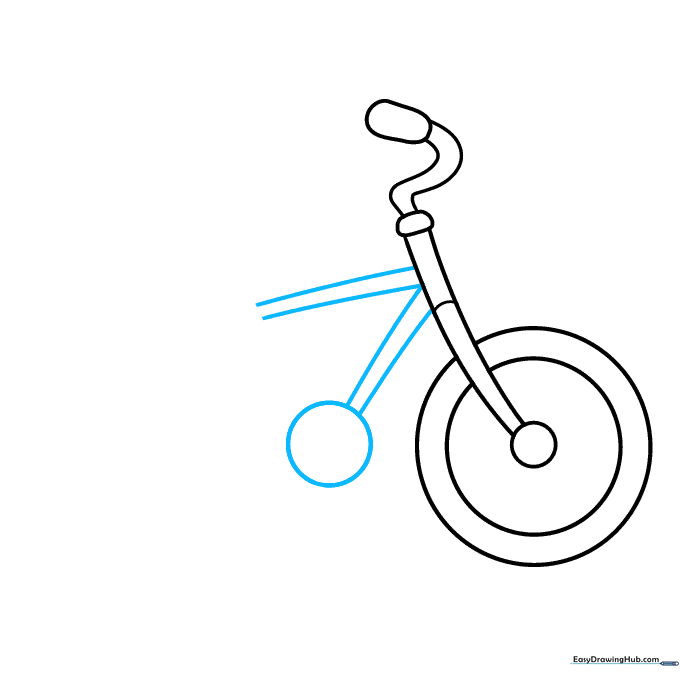
Extend two pairs of lines from the front tube in a 'V' shape to form the top and down tubes. Connect the down tube with a circle to represent the chain ring. Teacher's Tip: Make sure your 'V' shape is wide enough to leave room for the seat later.
Step 4: Connecting the Rear
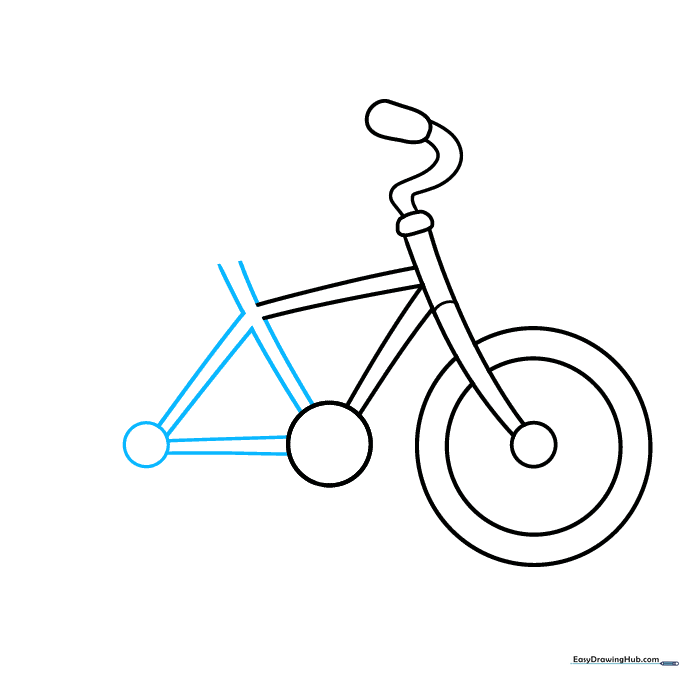
Draw a smaller circle for the rear cogset and connect it to the chain ring with two lines. Enclose a triangle shape above these circles and extend two lines upward for the seat post. Teacher's Tip: Use your ruler if you want the frame lines to look extra straight!
Step 5: Adding the Seat and Rear Wheel
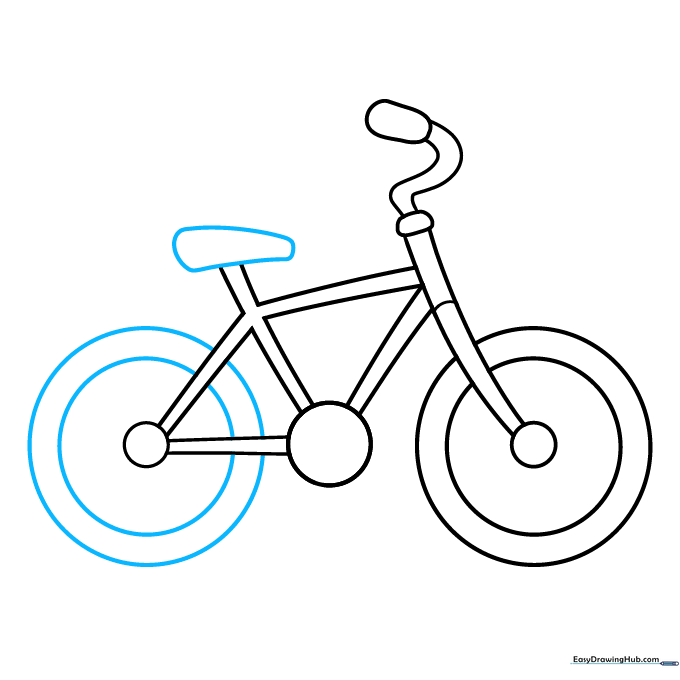
Draw an irregular, rounded shape on top of the seat post for the saddle. Then, draw two large circles around the rear hub to finish the back wheel. Teacher's Tip: A slightly tilted seat makes the bike look like it's ready for an adventure.
Step 6: Adding Mudguards
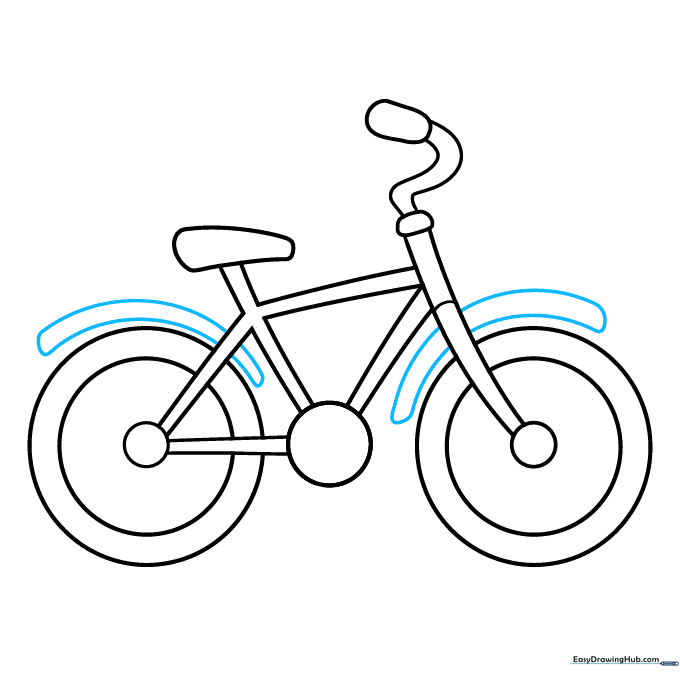
Draw a curved shape over the top of each wheel to represent the mudguards. Teacher's Tip: Make sure the curves follow the shape of the tire so they look like they are protecting the rider from splashes.
Step 7: Drawing the Pedals

Draw a small circle in the center of the crankset, extend two lines, and cap them with a rectangle for the pedal. Repeat this for the second pedal on the opposite side. Teacher's Tip: Erase any overlapping lines inside the pedal area to keep your drawing clean.
Step 8: Headlight and Chain
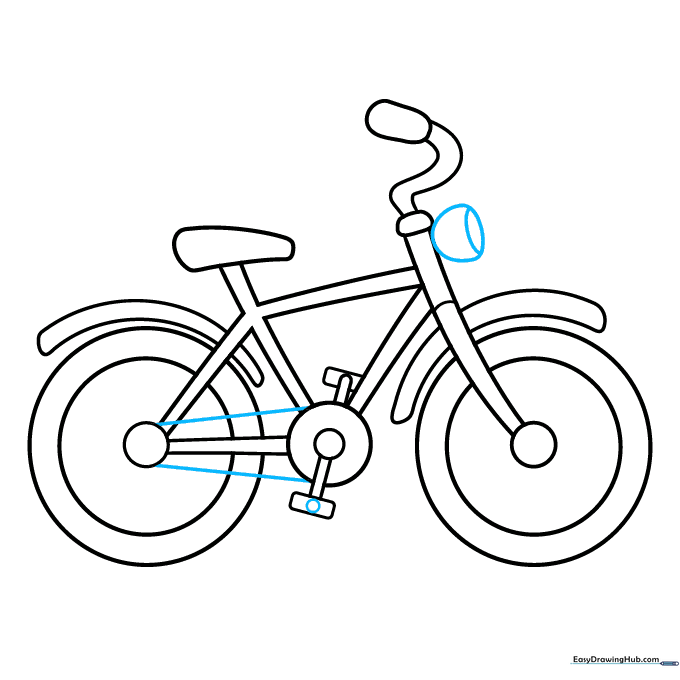
Draw an irregular shape on the front tube with a small oval inside for the headlight. Connect the crankset and cogset with two straight lines to represent the chain. Teacher's Tip: Use a darker pencil stroke for the chain to make it stand out.
Step 9: Final Touches
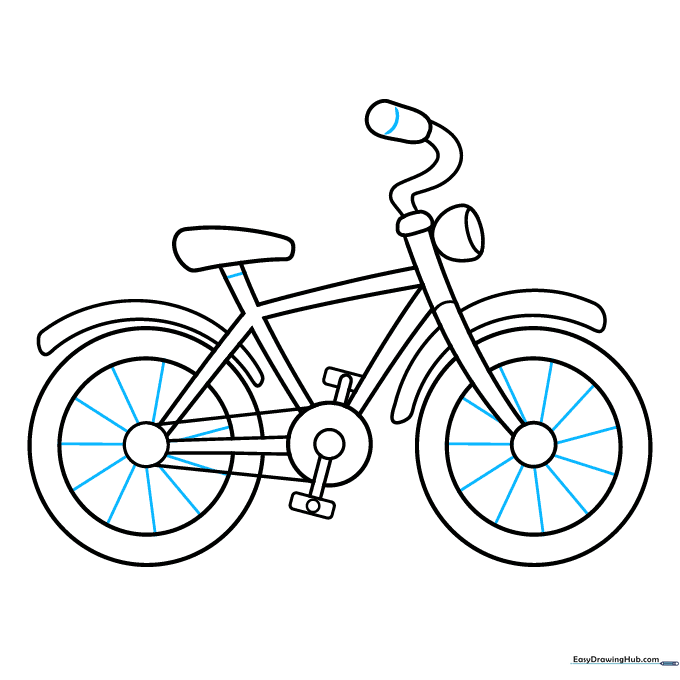
Add curved lines to the seat post and handlebars for detail. Draw straight lines from the hubs to the tires to create the spokes. Teacher's Tip: Count your spokes to make sure they are evenly spaced for a realistic look!
Step 10: Color Your Bicycle
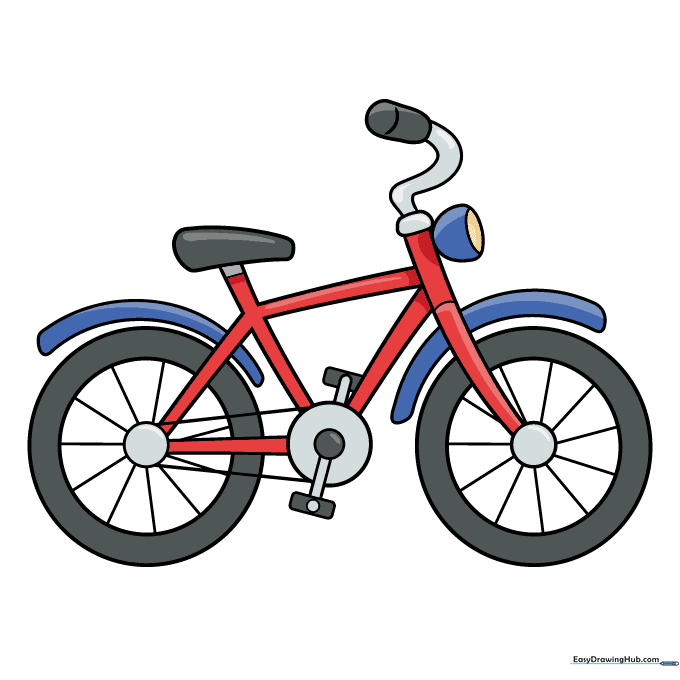
Your bicycle outline is finished! Now, grab your favorite markers or colored pencils. Whether you choose a classic red, a cool metallic blue, or a bright neon pink, make it uniquely yours. Teacher's Tip: Use a darker shade of your main color to add a little shadow under the seat for a 3D effect.
More Tutorials


