How to Draw a Cargo Ship: Easy 10-Step Guide for Kids
Ready to set sail? This cargo ship tutorial is designed for young artists ages 5 and up to practice geometric shapes and perspective. Grab a pencil, an eraser, and some paper to build your own massive freighter from scratch.
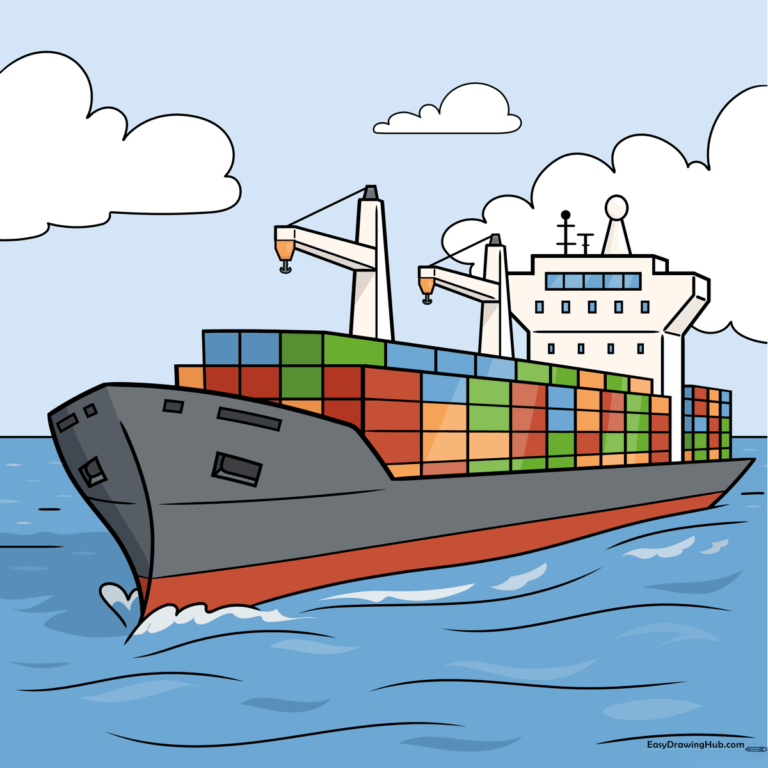
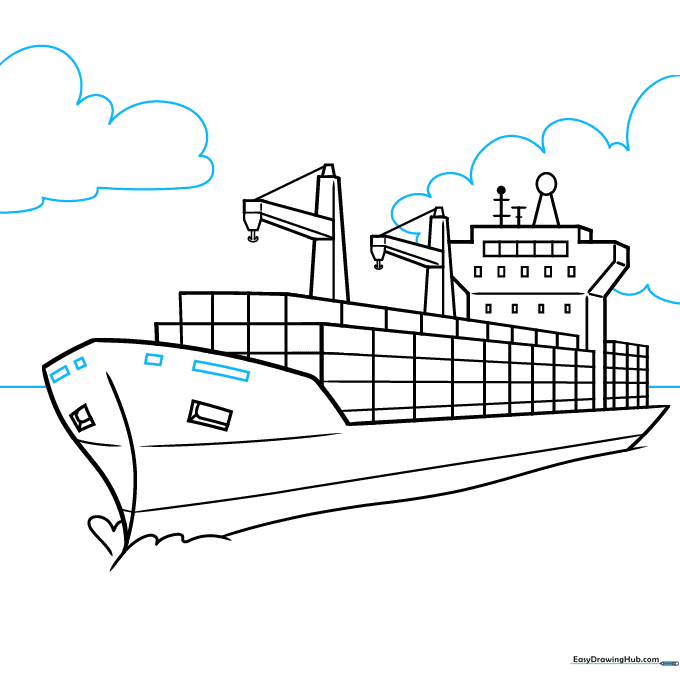
🎯 Final Result
Step-by-Step Instructions
Step 1: Sketching the Hull Base
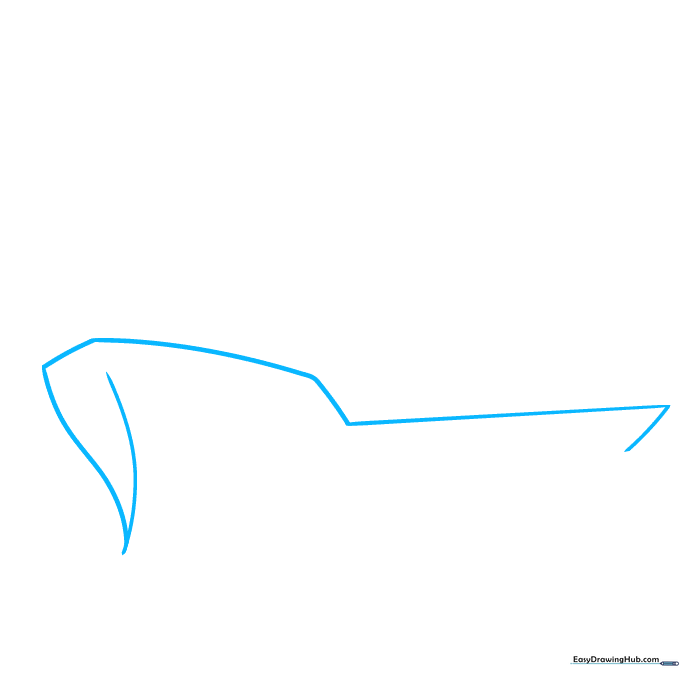
Start by drawing a wide 'V' shape for the bow. Extend a long, slightly curved line from the top of the 'V' to create the base of the hull. Teacher's Tip: Keep your pencil pressure light here; this is just the foundation of your ship.
Step 2: Adding the Waterline
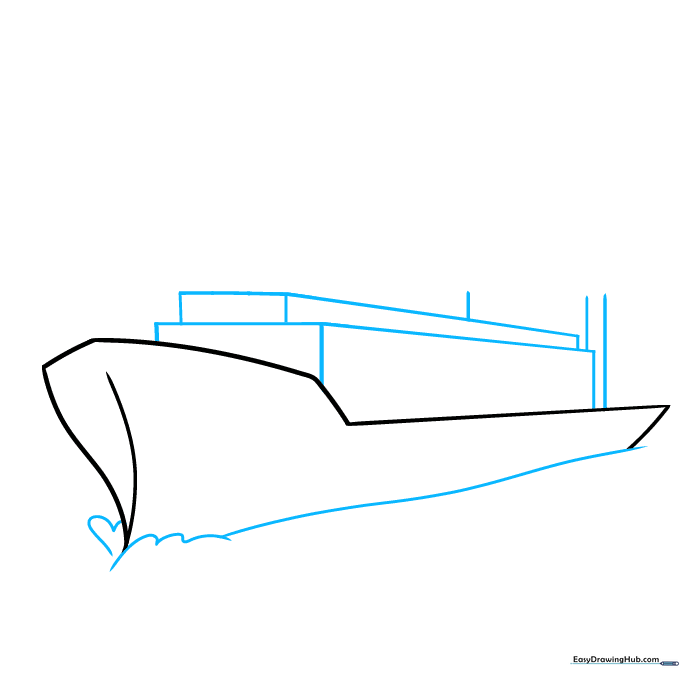
Draw wavy lines at the base of the 'V' to show the ship cutting through the ocean. Connect the waves to the back of the boat with a long, smooth curve. Teacher's Tip: Use short, quick strokes for the waves to give them a splashing effect.
Step 3: Stacking Cargo Containers
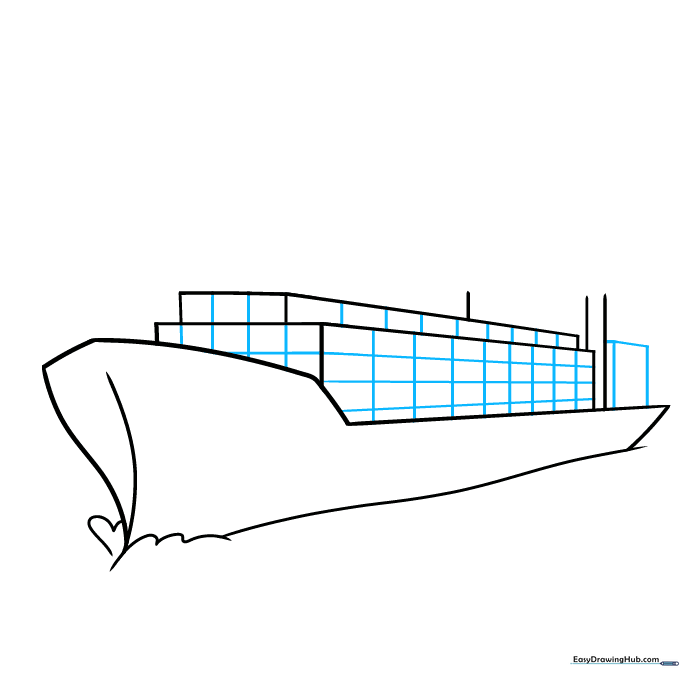
Draw rectangular prisms on the deck to represent stacks of containers. Add a checkerboard pattern of straight lines across them. Teacher's Tip: Use a ruler if you want your containers to look perfectly uniform, or go freehand for a more organic look.
Step 4: Constructing the Crane
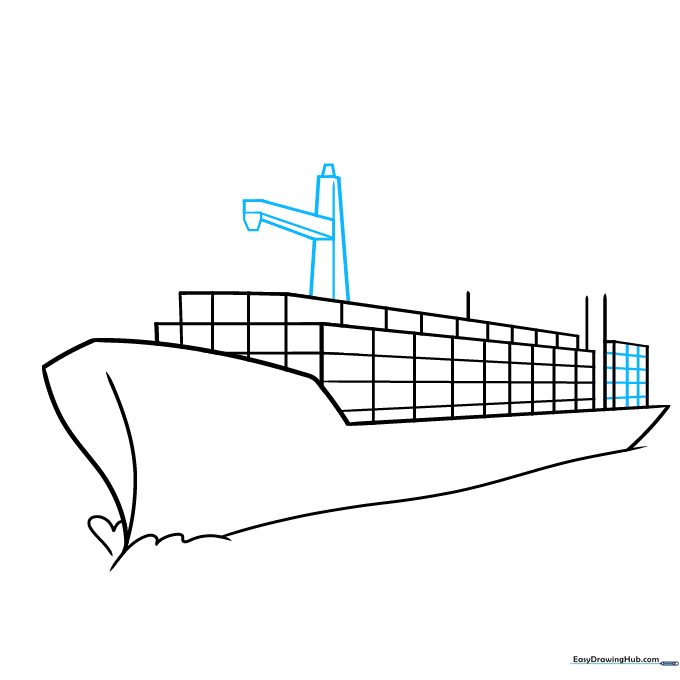
Draw a tall, narrow trapezoid for the crane base with a smaller one on top. Add a vertical line down the center and a rectangular arm extending from the side. Teacher's Tip: Erase any overlapping lines inside the crane to make it look solid.
Step 5: Adding Anchors and Second Crane
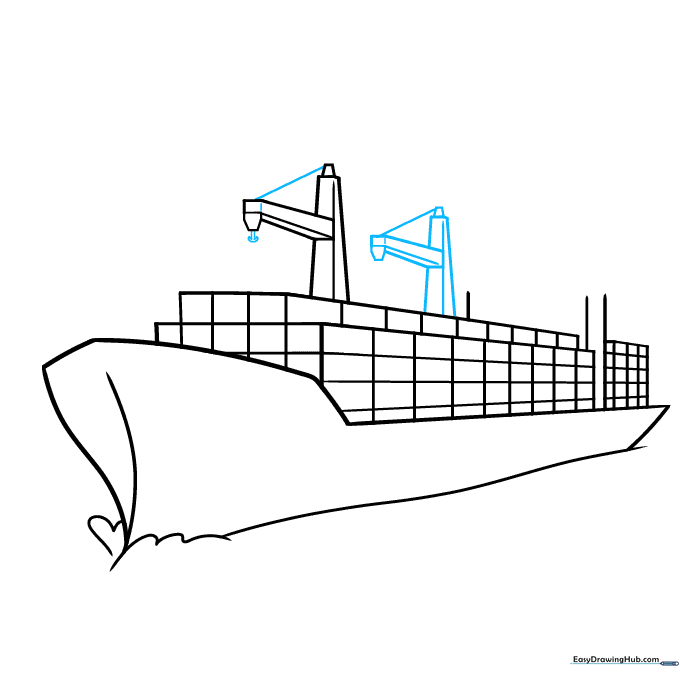
Draw a small anchor shape hanging from the crane arm. Repeat the crane process to add a second crane on the deck. Teacher's Tip: Keep the second crane the same size as the first to maintain balance in your drawing.
Step 6: Drawing the Bridge
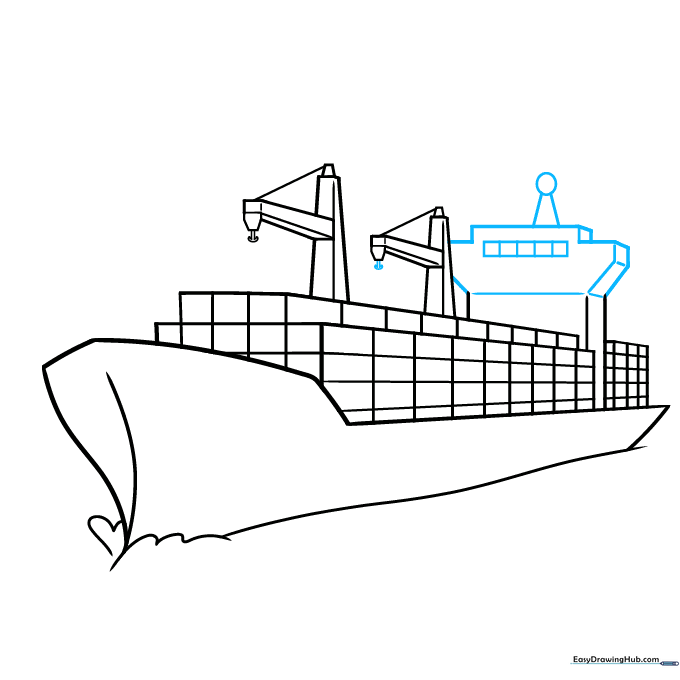
Sketch the ship's bridge using straight lines to form an irregular geometric shape. Add a rectangle with vertical lines for the windows and a circle on top for the radar. Teacher's Tip: The bridge is the 'brain' of the ship, so make it look sturdy and tall.
Step 7: Adding Final Details
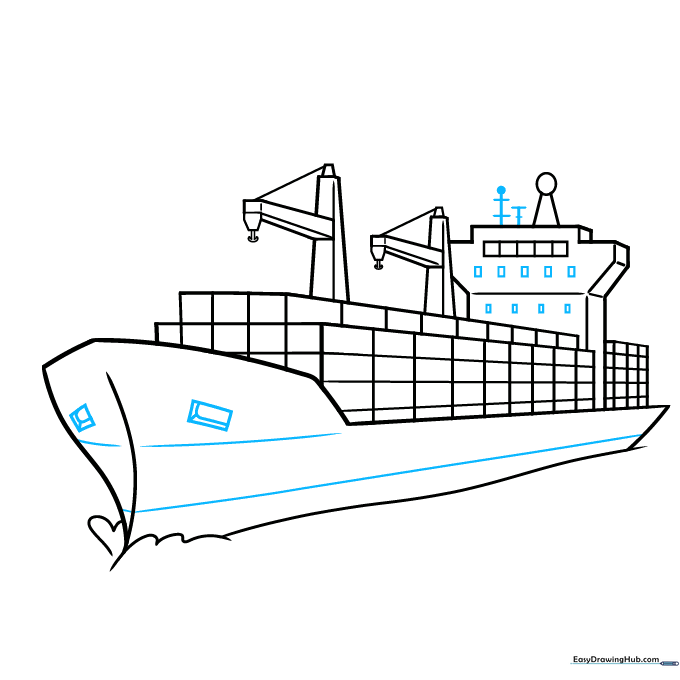
Add more windows to the bridge and draw radio antennas on top. Texture the hull with long, horizontal curved lines. Teacher's Tip: These lines help show the curve of the ship's metal sides.
Step 8: Setting the Scene
Draw a straight horizontal line behind the ship to represent the horizon. Add fluffy, cloud-like shapes in the sky. Teacher's Tip: Keep the horizon line perfectly straight to make the water look calm.
Step 9: Final Touches
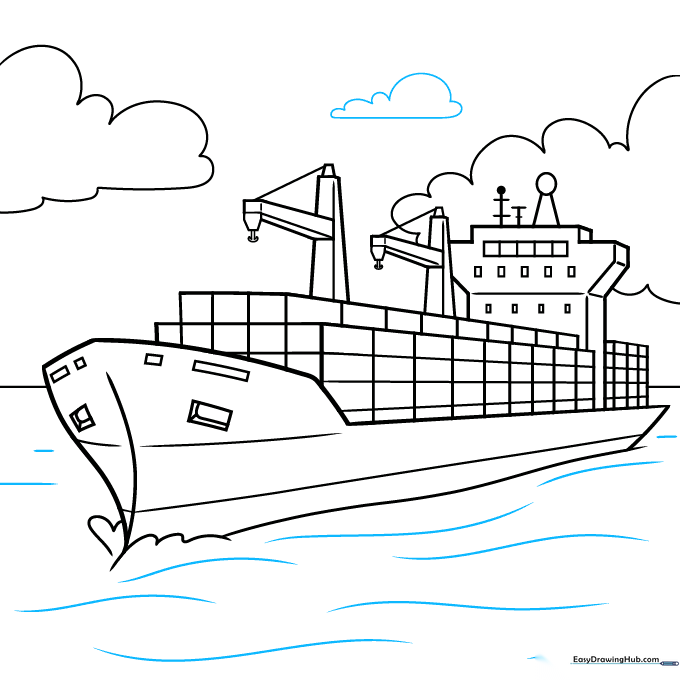
Add a few more clouds and refine the water texture with extra wavy lines. Teacher's Tip: Vary the size of your waves to create a sense of depth in the water.
Step 10: Bring It to Life with Color
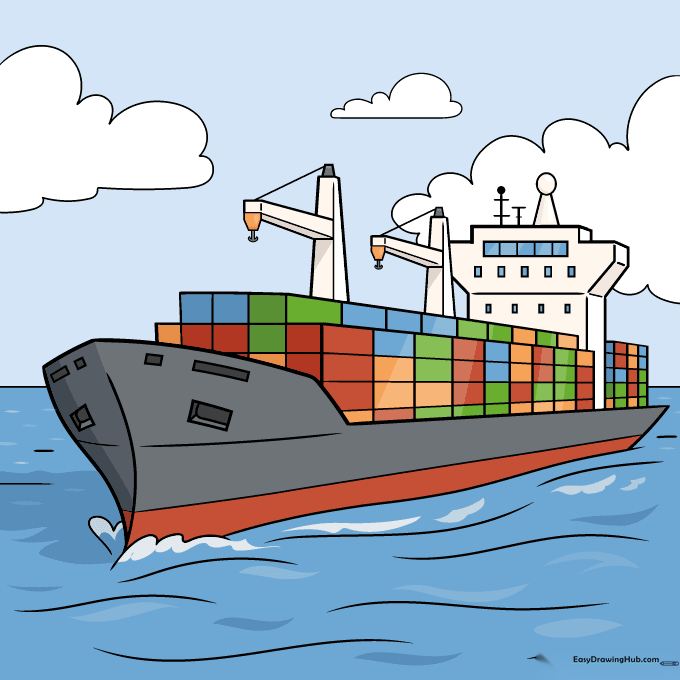
Your outline is complete! Use bright colors for the cargo containers to make them stand out against the gray hull of the ship. Teacher's Tip: Use blue for the water and light blue for the sky to create a beautiful contrast.
More Tutorials


