How to Draw a Car: Easy Front View Tutorial for Kids
Ready to design your own set of wheels? This tutorial is perfect for young artists ages 5 and up who want to learn how to draw a car from a front-facing perspective. All you need is a pencil, an eraser, and a piece of paper to get started on this fun, confidence-building project.
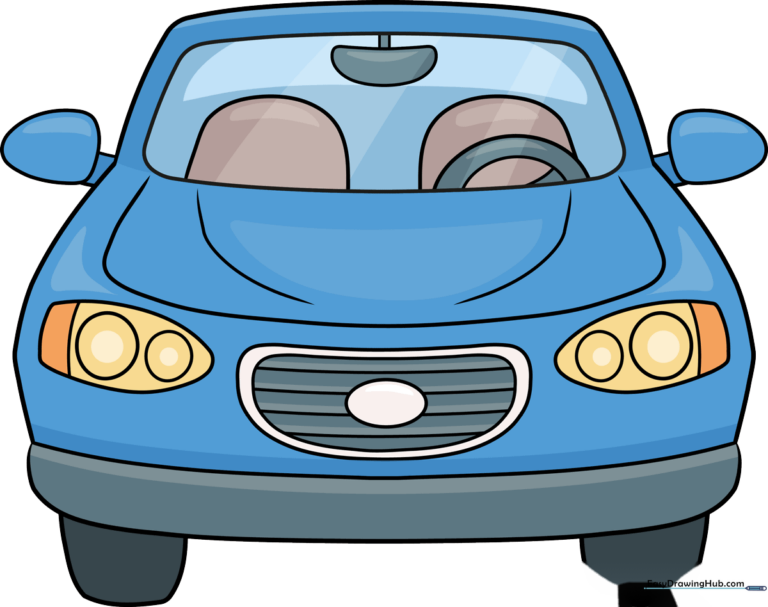
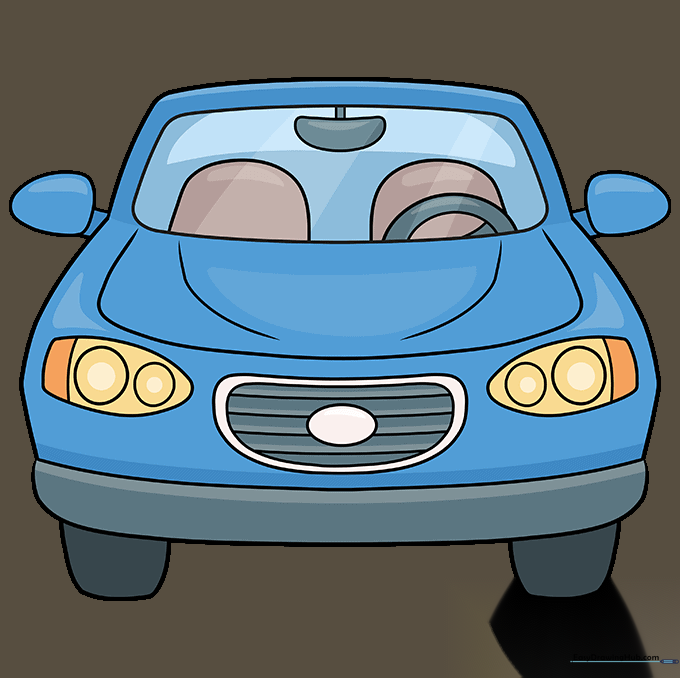
🎯 Final Result
Step-by-Step Instructions
Step 1: Sketching the Main Body

Use a long, gentle curved line to outline the main body of the car. Teacher's Tip: Keep your pencil pressure light so you can easily adjust the shape if it looks a bit lopsided!
Step 2: Defining the Bumper and Tires
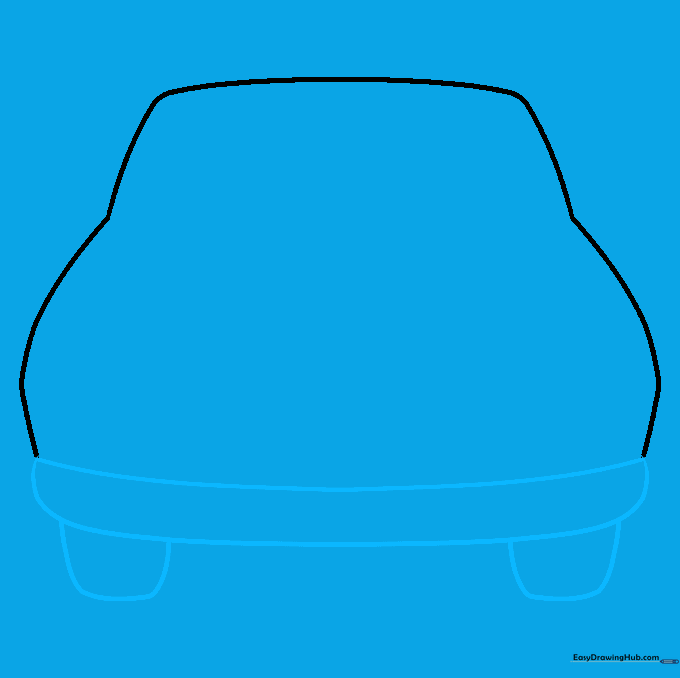
Draw a curved line across the front to create the bumper, then sketch the rounded shapes for the tires. Teacher's Tip: Make sure the tires are symmetrical on both sides to keep your car looking balanced.
Step 3: Adding the Windshield and Hood
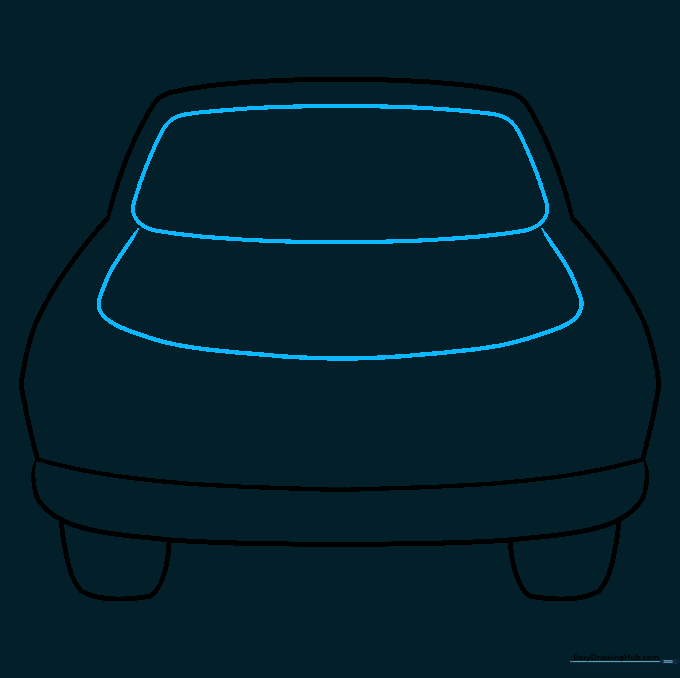
Sketch a rounded rectangle for the windshield and another for the hood. Teacher's Tip: Leave a small gap between the hood and the windshield to show depth and perspective.
Step 4: Drawing the Headlights
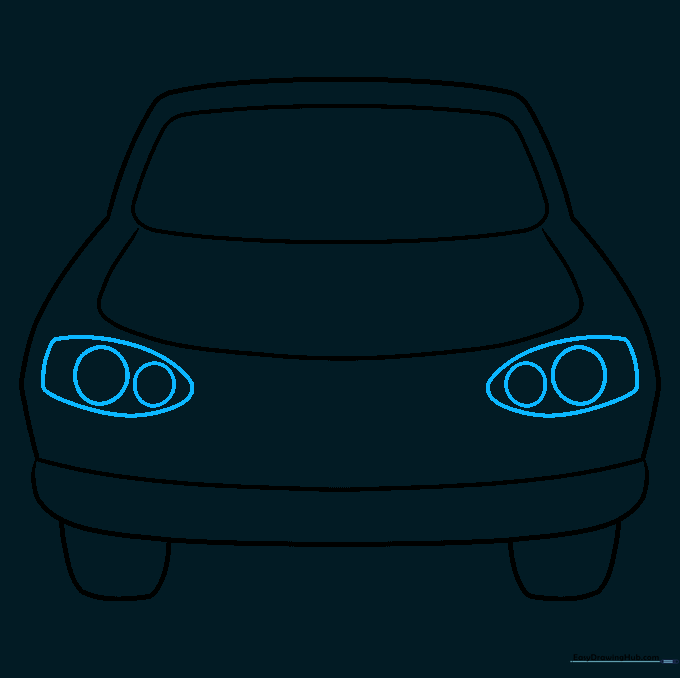
Draw two flattened ovals at the front for headlights, adding two smaller circles inside each. Teacher's Tip: These circles act as the 'eyes' of the car, giving it a friendly personality.
Step 5: Creating the Front Grill

Add a vertical line through each headlight and draw an irregular shape between them for the grill. Teacher's Tip: Keep your lines smooth to make the car look sleek and modern.
Step 6: Hood Texture and Steering Wheel
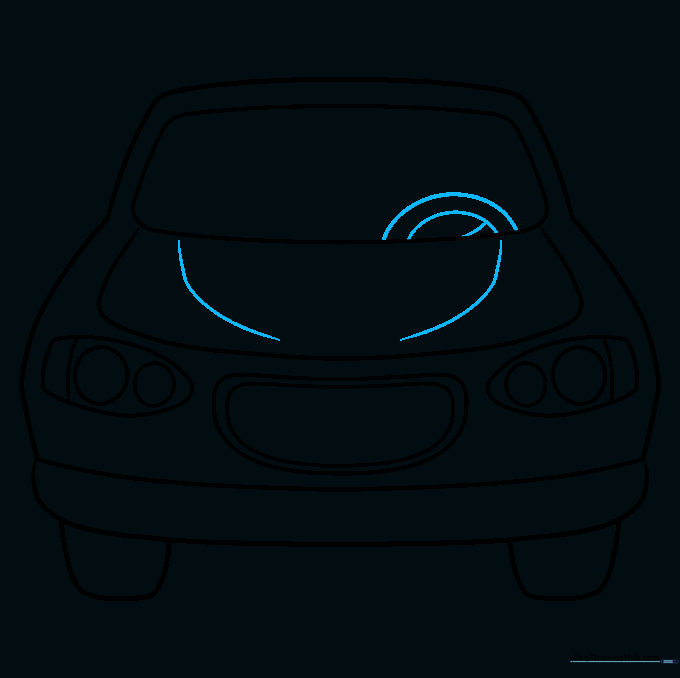
Add curved lines to the hood and sketch the steering wheel inside the windshield. Teacher's Tip: Use a circular motion for the wheel, but don't worry if it's not a perfect circle—it adds character!
Step 7: Interior and Rearview Mirror
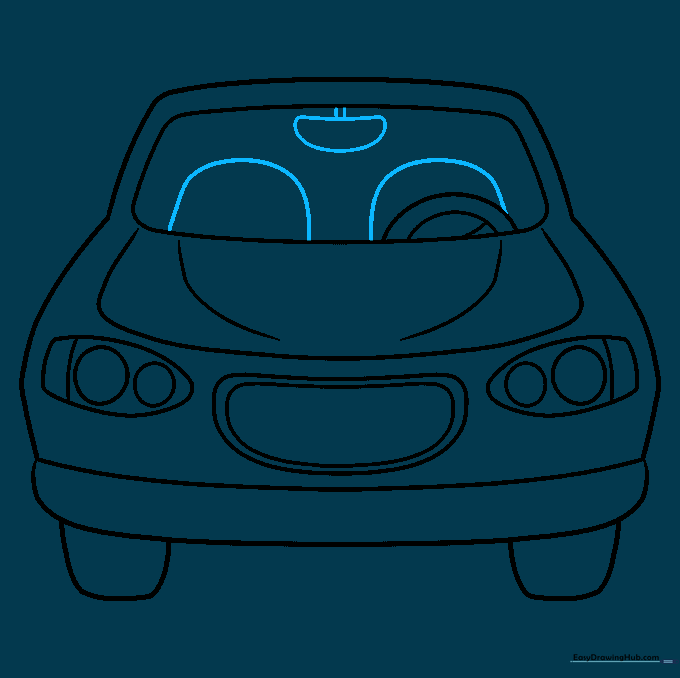
Draw the seats and a small half-circle for the rearview mirror. Teacher's Tip: Connect the mirror with two short, parallel lines to make it look like it's hanging from the ceiling.
Step 8: Side Mirrors
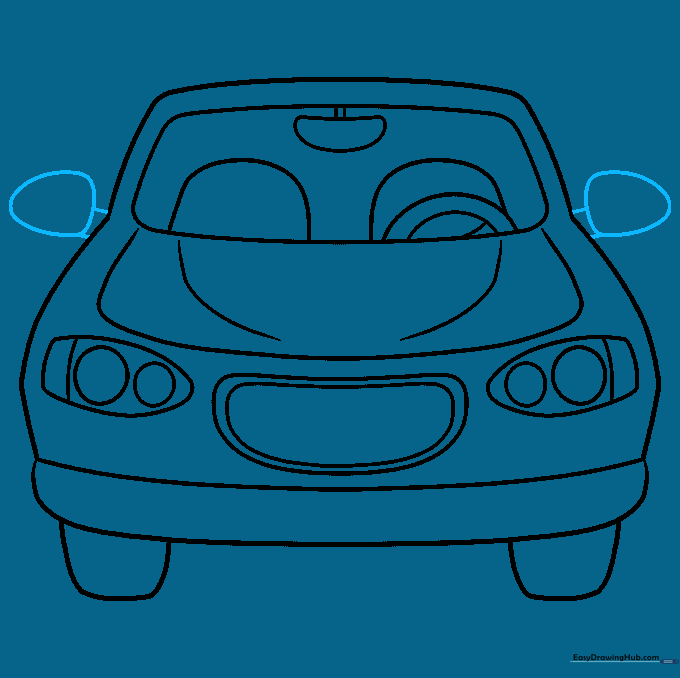
Attach side mirrors to the body using irregular rounded shapes. Teacher's Tip: Make sure they are placed at the same height on both sides for a professional look.
Step 9: Final Grill Details
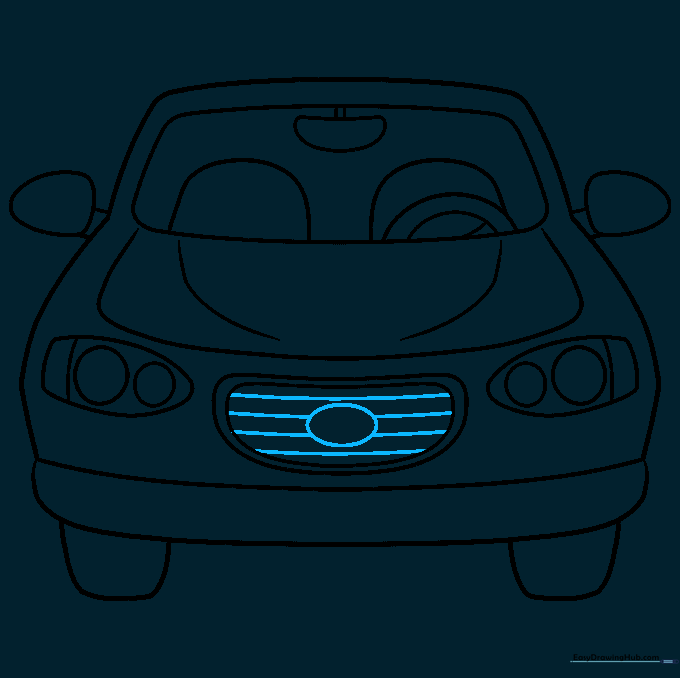
Add an oval to the center of the grill and draw horizontal lines across it. Teacher's Tip: These horizontal lines create a realistic 'mesh' look for the car's engine intake.
Step 10: Bring Your Car to Life with Color
Time to color! Choose your favorite bright colors. Teacher's Tip: Try using markers for bold lines or colored pencils for soft shading to give your car a metallic finish.
More Tutorials


