How to Draw a Cake: Easy 10-Step Guide for Kids
This step-by-step tutorial is perfect for young artists ages 5 and up. All you need is a pencil, an eraser, and some paper to create a festive, multi-layered masterpiece. Follow along to build confidence in your drawing skills while creating a delicious-looking treat.
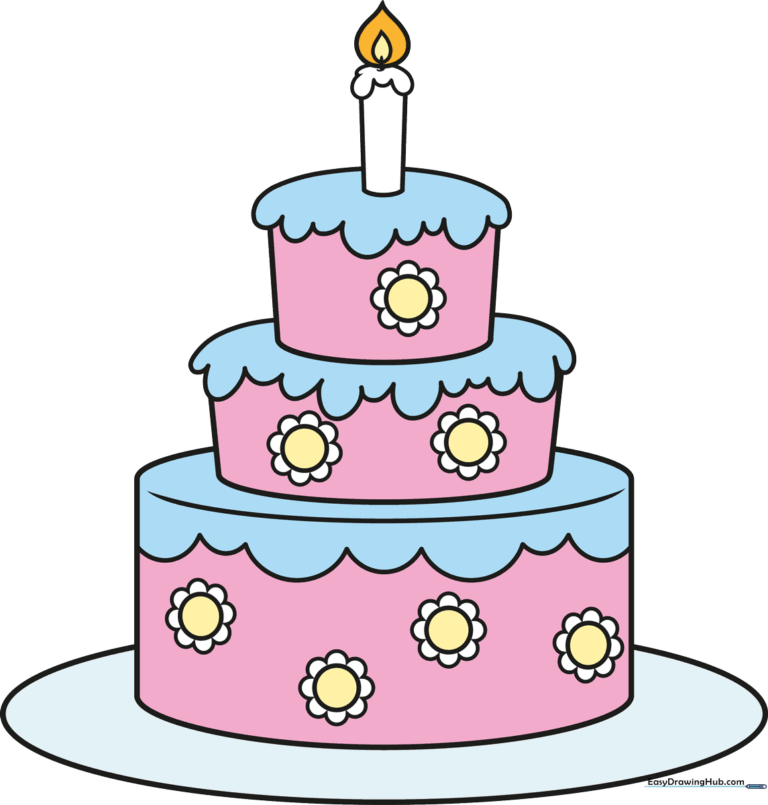
🎯 Final Result
Step-by-Step Instructions
Step 1: Sketching the Base

Start by drawing two vertical, parallel lines to form the sides of your bottom cake layer. Teacher's Tip: Keep your pencil pressure light so you can easily adjust the width if needed.
Step 2: Defining the Top Edge

Connect the top of your vertical lines with a soft, curved line. Tip: Think of this as the 'lid' of your cake layer; we will add more layers on top later, so don't press too hard!
Step 3: Closing the Base

Draw a matching curved line at the bottom to close the shape. Tip: Matching the curve of the top line helps the cake look round and three-dimensional.
Step 4: Adding Depth

Add a slightly curved line across the top surface of the cake. Tip: This line shouldn't touch the edges; it creates the illusion that the cake is sitting on a table.
Step 5: Drawing the Platter

Draw a large, wide oval around the base of the cake. Tip: Imagine the cake is sitting in the center of a dinner plate; keep the oval smooth and symmetrical.
Step 6: Adding Icing Details

Draw a series of scalloped 'U' shapes along the top edge of your cake layer. Tip: Alternate between a wide 'U' and a narrow 'U' to make the frosting look realistic and fun.
Step 7: Building the Tiers

Repeat the process to add two smaller layers on top. Tip: As you go higher, make each layer slightly narrower than the one below it to create a classic tiered cake shape.
Step 8: Decorating with Flowers

Add small flowers to the sides of your cake. Draw a circle for the center and surround it with petals. Tip: Use a steady hand to keep the petals uniform in size.
Step 9: Adding the Candle
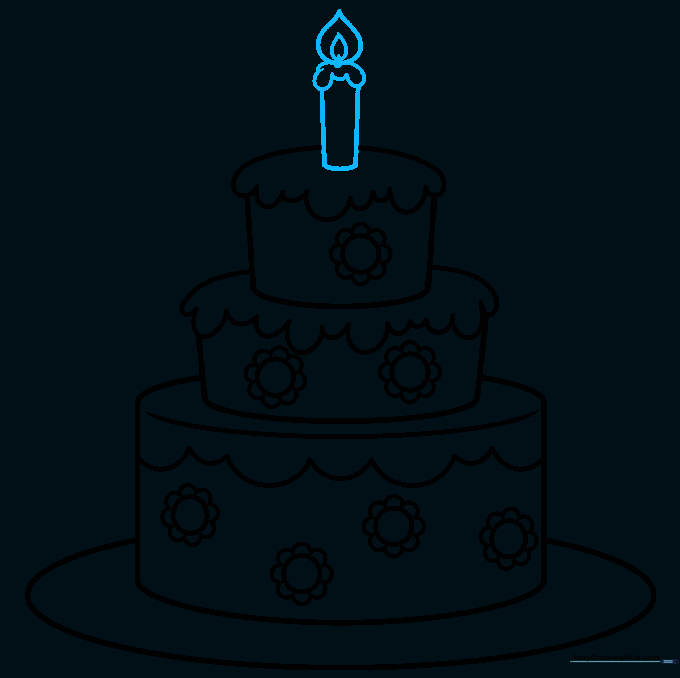
Draw a small candle on the very top. Use a teardrop shape for the flame. Tip: Draw the flame slightly off-center to give it a more natural, flickering look.
Step 10: Bringing it to Life with Color

Time to color! Use your favorite markers or crayons. Tip: Try using bright colors for the frosting and a warm yellow or orange for the candle flame to make it pop.
More Tutorials


