How to Draw a Buttercup: Easy 10-Step Guide for Kids
Bring the beauty of summer into your sketchbook with this simple buttercup tutorial. Designed for young artists and beginners, this activity requires only paper, a pencil, and your favorite markers or crayons. Follow along to develop your line-work skills and create a vibrant floral masterpiece.
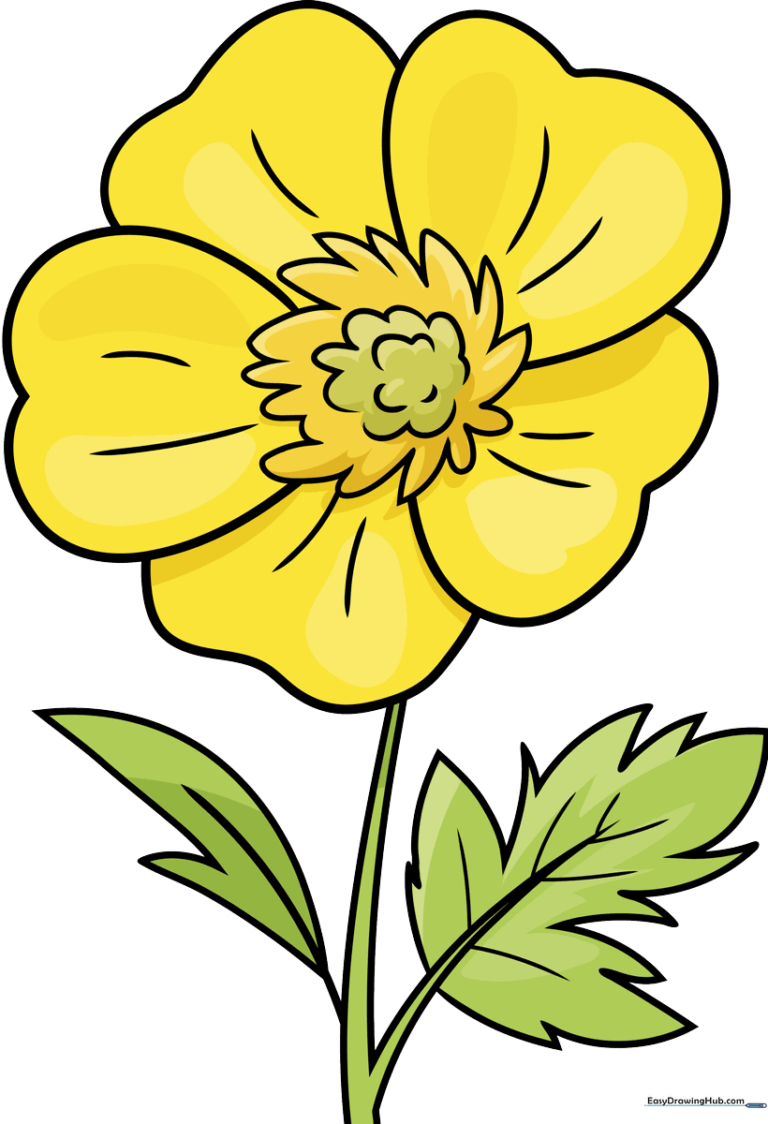
🎯 Final Result
Step-by-Step Instructions
Step 1: Sketching the Fuzzy Center

Start by drawing the flower's center using a series of small, jagged curves. Teacher's Tip: Think of this as drawing a tiny, fluffy cloud—keep the points soft and rounded.
Step 2: Closing the Center Shape

Continue the jagged line pattern until you have fully enclosed the circular center. Tip: Don't worry about making it a perfect circle; nature is rarely perfectly round!
Step 3: Adding Inner Detail

Draw a series of small 'U' shaped lines inside the center to add texture. Tip: These represent the tiny stamens of the flower, so keep them close together.
Step 4: Starting the Petals

Add more 'U' shapes to fill the center, then begin drawing large, heart-shaped petals around the outside. Tip: Make the petals slightly overlapping to create a realistic, layered look.
Step 5: Completing the Petals and Stem
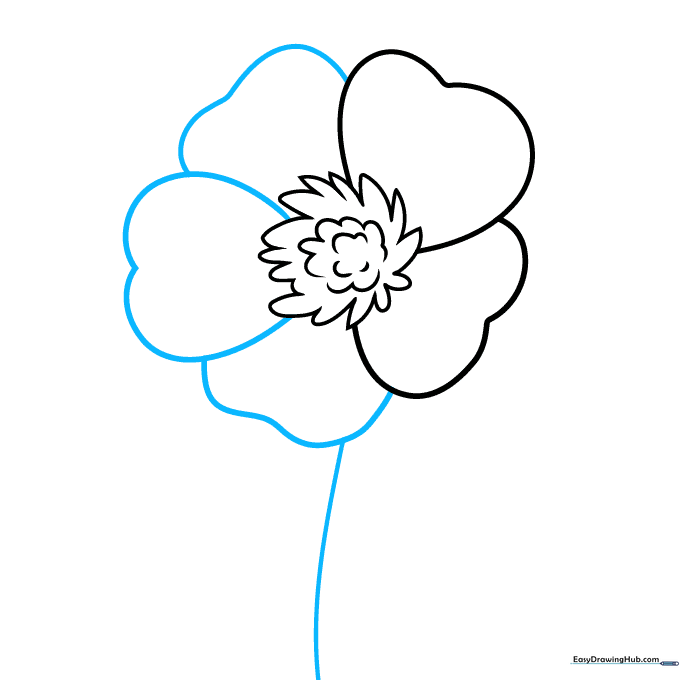
Finish with five petals total, then draw a long, slightly curved line extending downward to form the stem. Tip: A gentle curve makes the flower look more natural and graceful.
Step 6: Drawing the Leaf Base
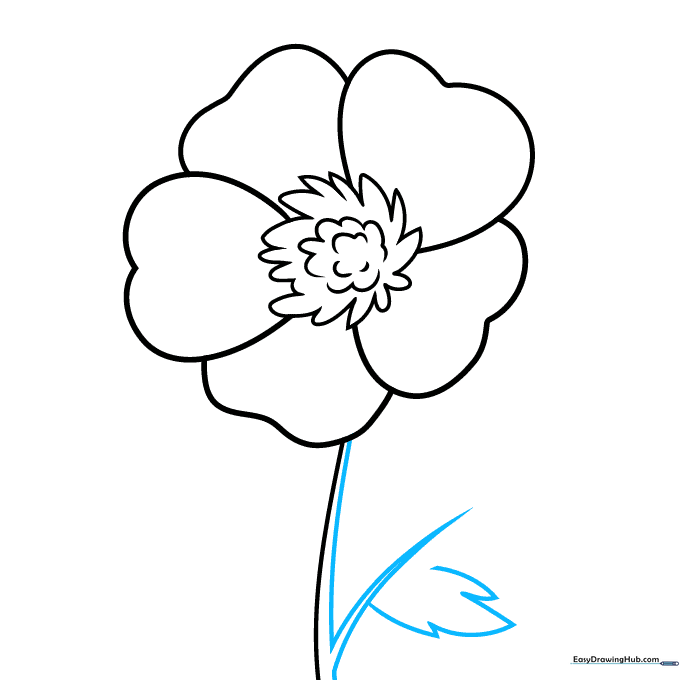
Draw a second parallel line for the stem. At the bottom, sketch a sharp, pointed leaf using jagged, curved lines. Tip: Keep your pencil strokes fluid to mimic the organic shape of a leaf.
Step 7: Detailing the Leaf
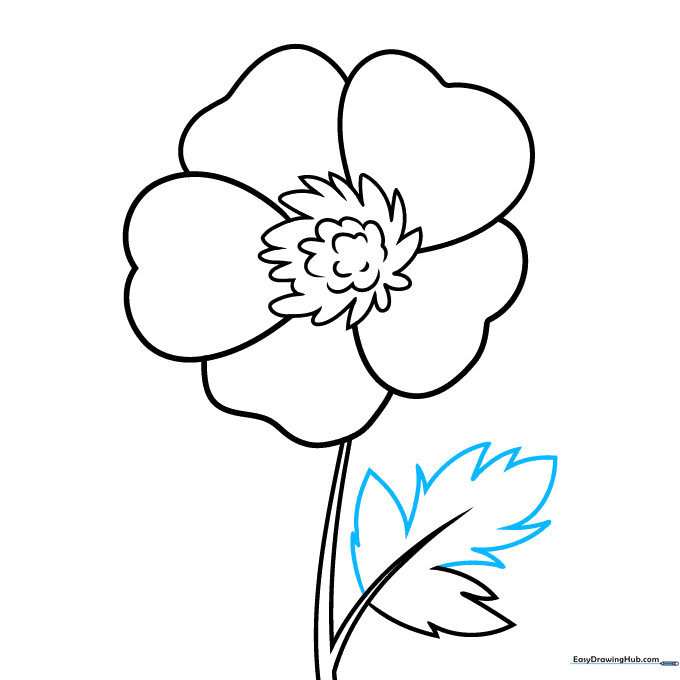
Continue sketching the deeply lobed leaf using jagged points. Tip: Buttercup leaves are known for their distinct, sharp edges, so don't be afraid to make them nice and pointy!
Step 8: Adding More Leaves
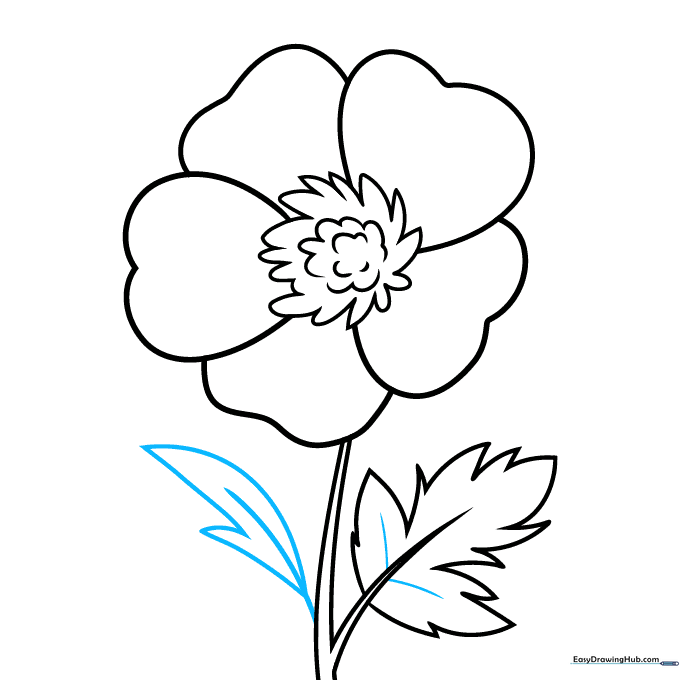
Add another leaf on the opposite side of the stem, including small veins. Tip: Use light, thin lines for the veins so they don't overpower the main outline.
Step 9: Final Touches
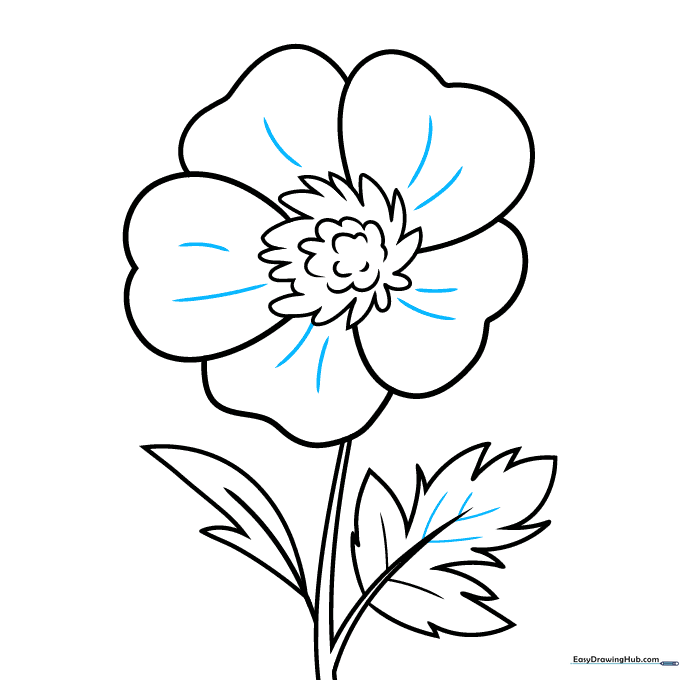
Add final vein details to the leaves and small curved lines on the petals to show their natural folds. Tip: These small lines add a professional, finished look to your drawing.
Step 10: Color Your Buttercup
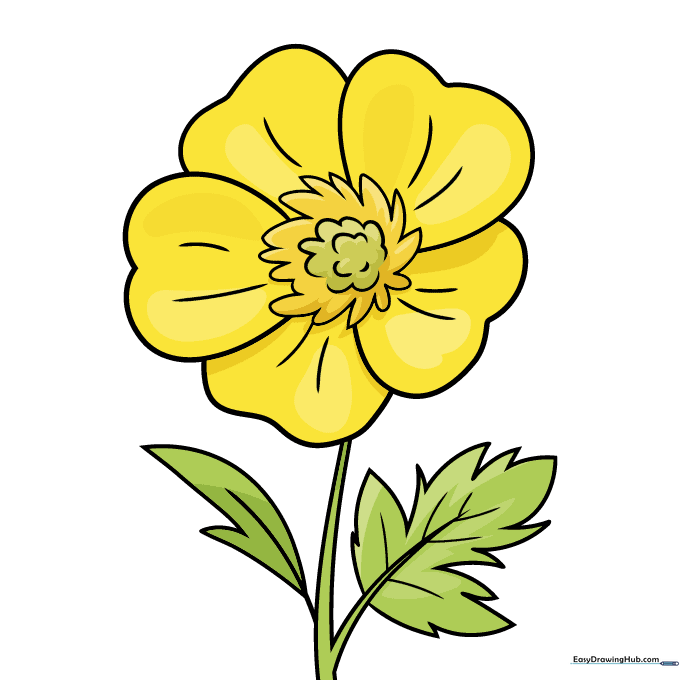
Bring your drawing to life! Use bright yellow for the petals and center, and a vibrant green for the stem and leaves. Tip: Use a slightly darker yellow in the center to create a beautiful 3D effect.
More Tutorials


