How to Draw a Bubble Bath: Easy 10-Step Guide
Ready to bring a relaxing scene to life? This tutorial is perfect for young artists ages 5+ to practice drawing organic shapes and overlapping forms. All you need is a pencil, an eraser, and your favorite markers to create a bubbly masterpiece.
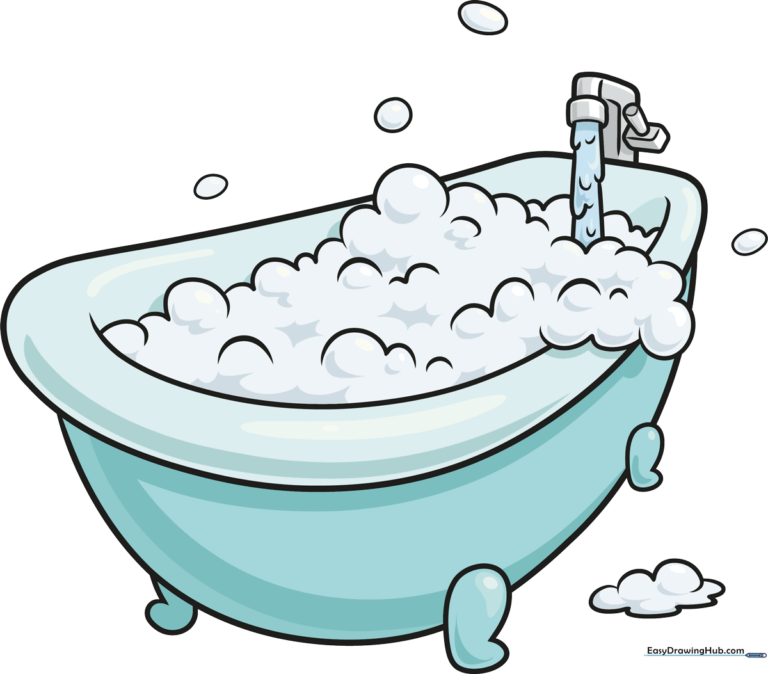
🎯 Final Result
Step-by-Step Instructions
Step 1: Sketching the Tub Rim

Draw a long, curved bean shape to form the top rim of the tub. Teacher's Tip: Keep your pencil strokes light so you can easily adjust the shape if it looks a bit lopsided!
Step 2: Defining the Basin
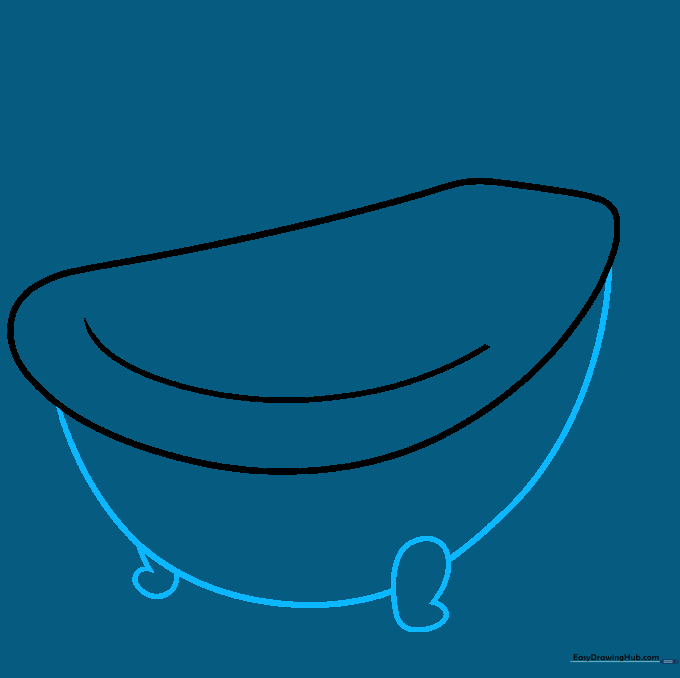
Add a curved line beneath the rim to create the basin, then sketch two small, irregular shapes at the bottom for the tub's feet. Tip: Use short, rounded strokes to make the feet look sturdy.
Step 3: Adding the First Bubbles
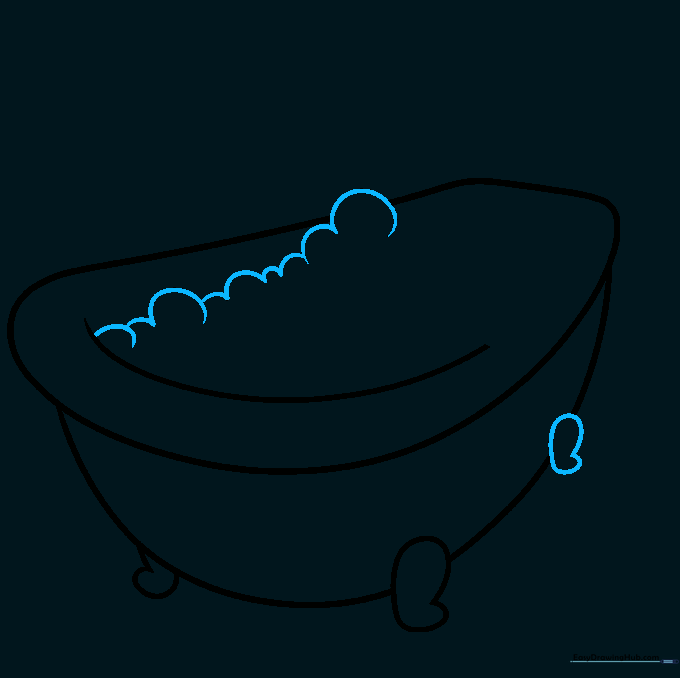
Draw the third leg and begin filling the tub with overlapping circles. Tip: Don't worry about making the bubbles perfect; real bubbles are all different sizes and shapes!
Step 4: Building the Foam
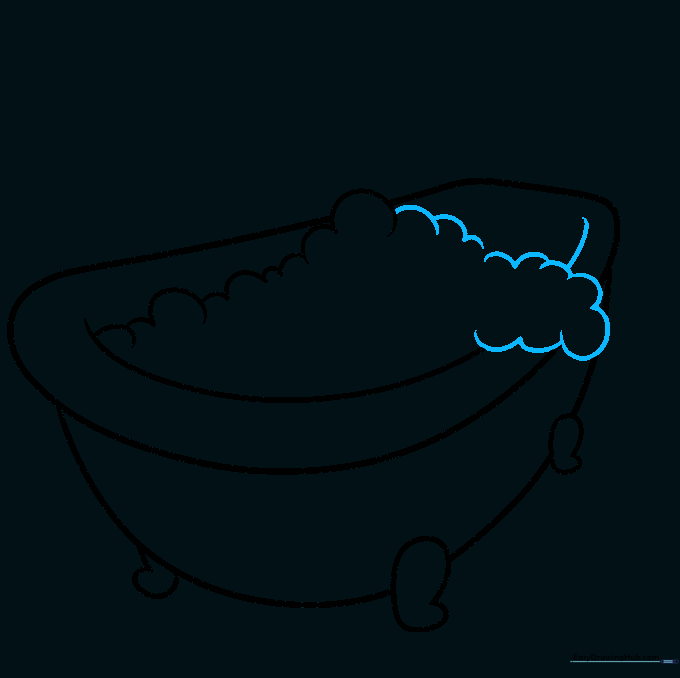
Add more overlapping circles to create a thick layer of foam. Use a curved line to define the inner rim of the tub. Tip: Erase the lines inside the bubbles to make them look like they are sitting on top of the water.
Step 5: Sketching the Faucet

Draw an 'L' shaped pipe for the faucet, adding a small square at the end. Tip: Use a ruler if you want the pipe to look perfectly straight, or keep it freehand for a cartoon style.
Step 6: Drawing Flowing Water
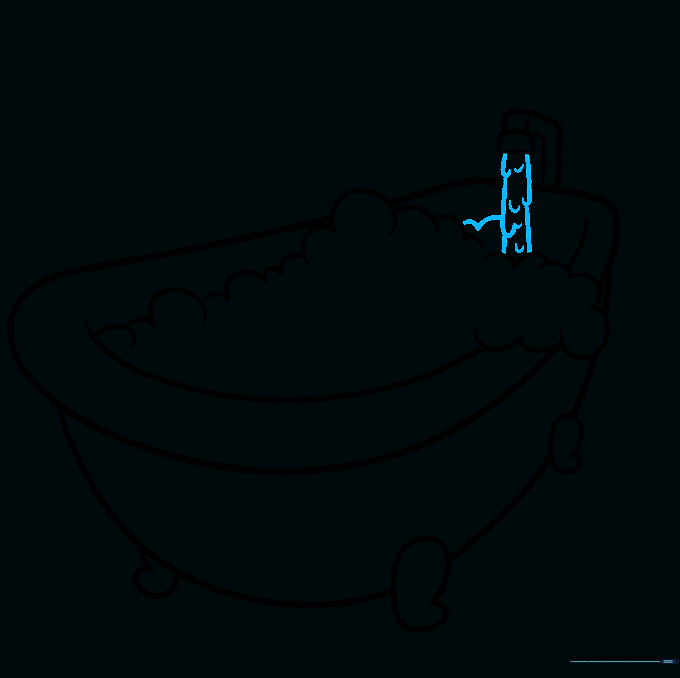
Draw water pouring from the faucet using 'U' shaped lines to show movement. Tip: Use light, wavy lines to suggest the water is splashing into the bubbles.
Step 7: Adding Faucet Controls
Draw a six-sided shape for the faucet handle and add more bubbles around the tub. Tip: A hexagonal shape makes the handle look like a real metal knob.
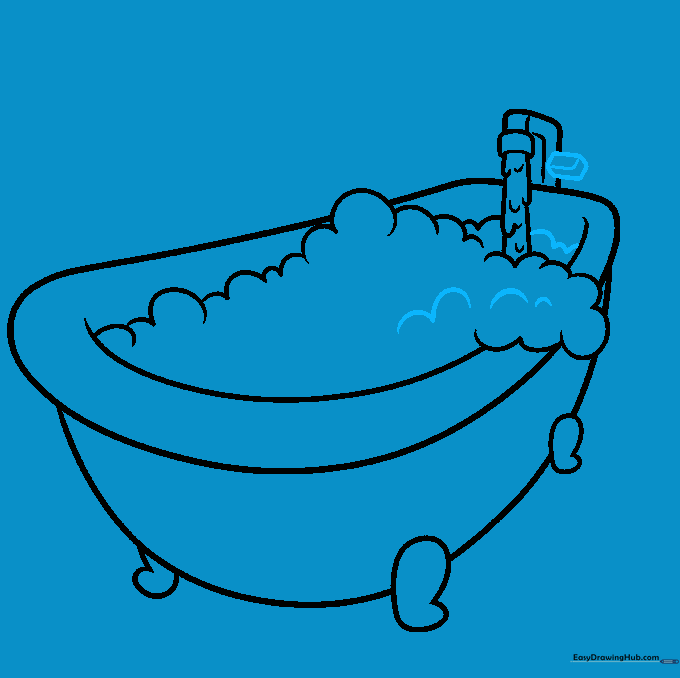
Step 8: Floating Bubbles

Draw a few stray bubbles floating in the air above the tub using simple ovals. Tip: Varying the size of the bubbles adds a sense of realism to your drawing.
Step 9: Final Touches

Draw a puddle on the floor with a few spilled bubbles. Tip: Use a slightly darker line for the floor puddle to ground your drawing.
Step 10: Coloring Your Masterpiece
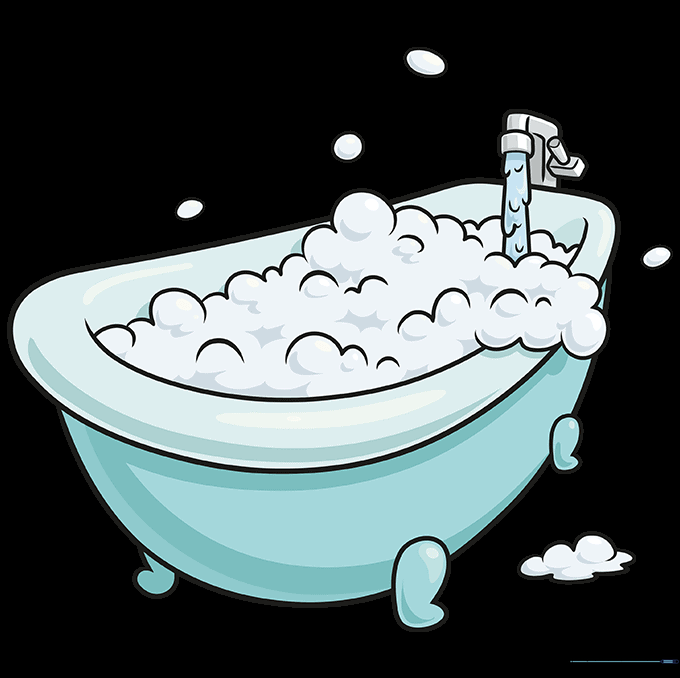
Color your tub white or cream, and add bright colors for the bubbles. Tip: Add a little yellow for a rubber ducky to make the scene extra fun!
More Tutorials


