How to Draw a Bridge: Simple 10-Step Guide for Kids
Ready to build a bridge on paper? This tutorial is perfect for young artists ages 5 and up looking to master perspective and landscape drawing. All you need is a pencil, an eraser, and a piece of paper to bring this charming scene to life.
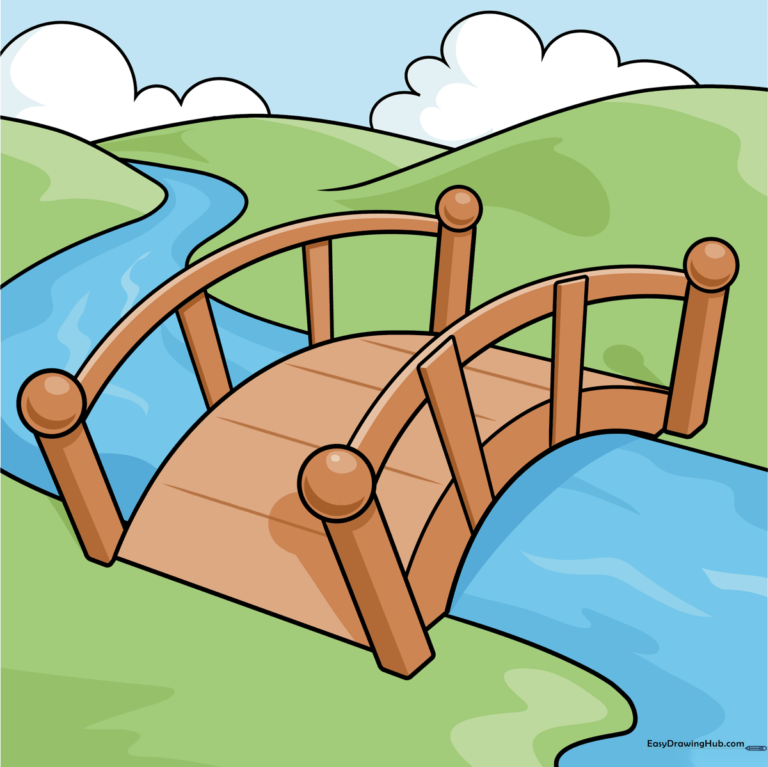
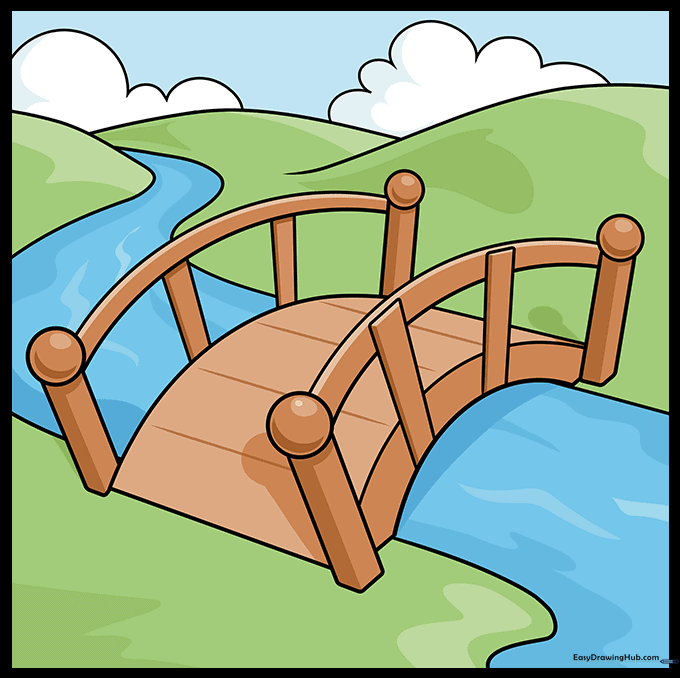
🎯 Final Result
Step-by-Step Instructions
Step 1: Sketching the Bridge Base

Draw a curved rectangle using four gentle, rounded lines. Teacher's Tip: Keep your pencil pressure light so you can easily adjust the shape if it looks a bit wobbly!
Step 2: Adding the First Railing Post
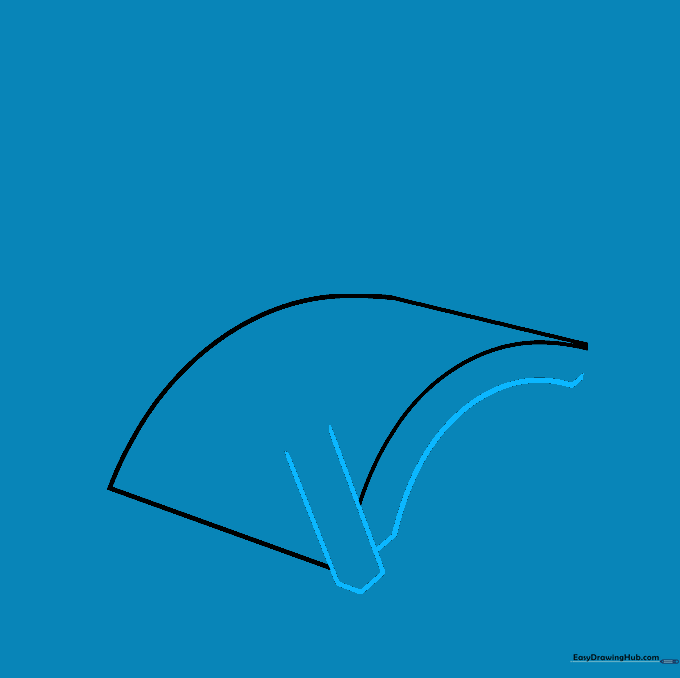
Draw two parallel vertical lines at the near corner of your bridge. Connect them at the bottom with a small 'V' shape. Teacher's Tip: Use a ruler if you struggle with straight lines, but freehand is great for building steady hands!
Step 3: Creating the Second Post

Repeat the process on the opposite end of the bridge. Add a small circle on top of each post to act as a decorative cap. Teacher's Tip: Try to make the circles the same size to keep your bridge looking symmetrical.
Step 4: Connecting the Handrails

Draw two parallel curved lines between the posts to form the handrail. Add vertical supports between the bridge deck and the rail. Teacher's Tip: Space your supports evenly to make the bridge look sturdy.
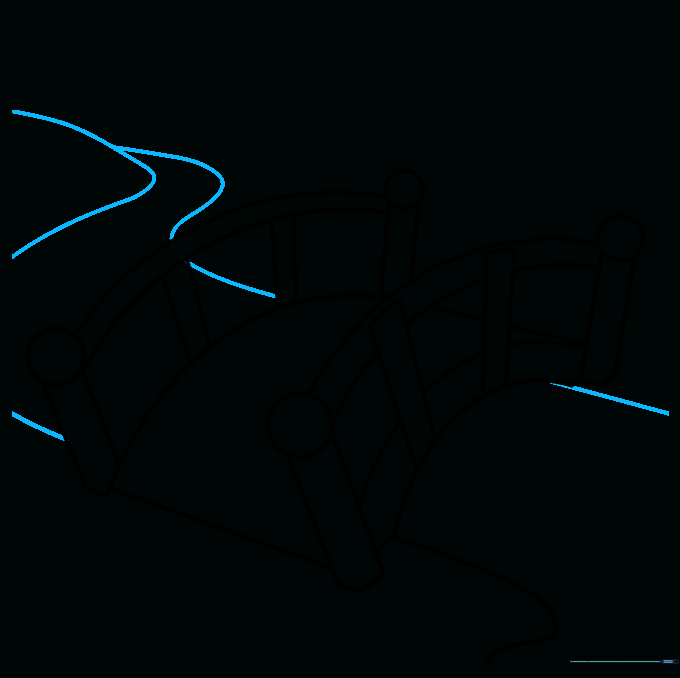
Step 5: Completing the Corner Posts

Add the remaining two posts on the far corners of the bridge. Ensure they match the style of the first two. Teacher's Tip: If they look a bit crooked, just erase and try again—that's how we learn!
Step 6: Adding the River

Connect the back posts with a handrail and start drawing the river underneath using a long, flowing curved line. Teacher's Tip: Rivers aren't perfectly straight, so let your hand wiggle a little to create a natural water effect.
Step 7: Defining the Riverbank
Continue the river lines, making them converge as they move into the distance. This creates a sense of depth. Teacher's Tip: The further away the river goes, the narrower it should look.
Step 8: Adding Background Hills
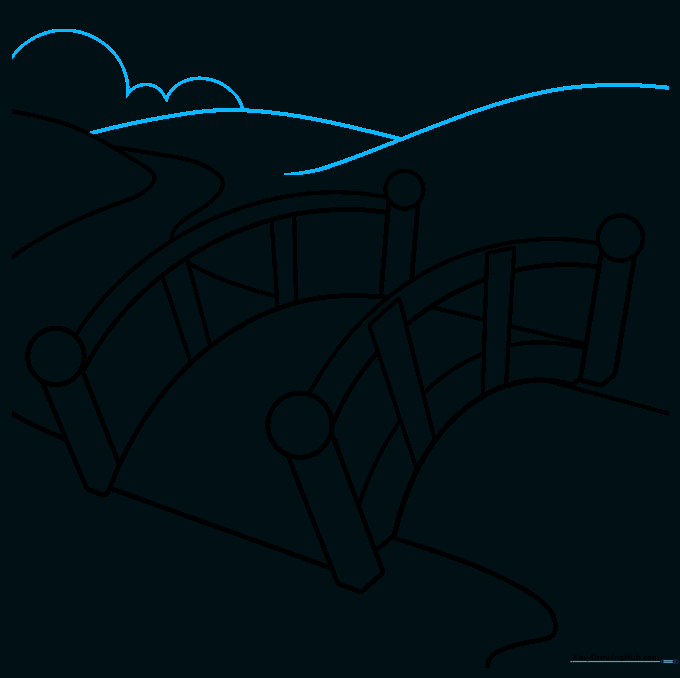
Draw overlapping curved lines on the horizon to create rolling hills. Add some fluffy, cloud-like shapes in the sky. Teacher's Tip: Use light, circular motions for the clouds to make them look soft and puffy.
Step 9: Final Touches

Add a few more clouds to fill the horizon. Check your drawing for any stray lines and erase them for a clean look. Teacher's Tip: Take a step back from your paper to see the whole landscape before you start coloring.
Step 10: Bring It to Life with Color
Time to color! Use earthy browns for the wooden bridge and cool blues for the water. Teacher's Tip: Try using different shades of blue for the river to show depth and movement.
More Tutorials


