How to Draw a Bratz Doll: Easy 10-Step Guide
Ready to bring a fashion icon to life? This tutorial is perfect for young artists ages 8+ who want to master character proportions and stylized features. You will need a pencil, an eraser, and your favorite markers to complete this look.
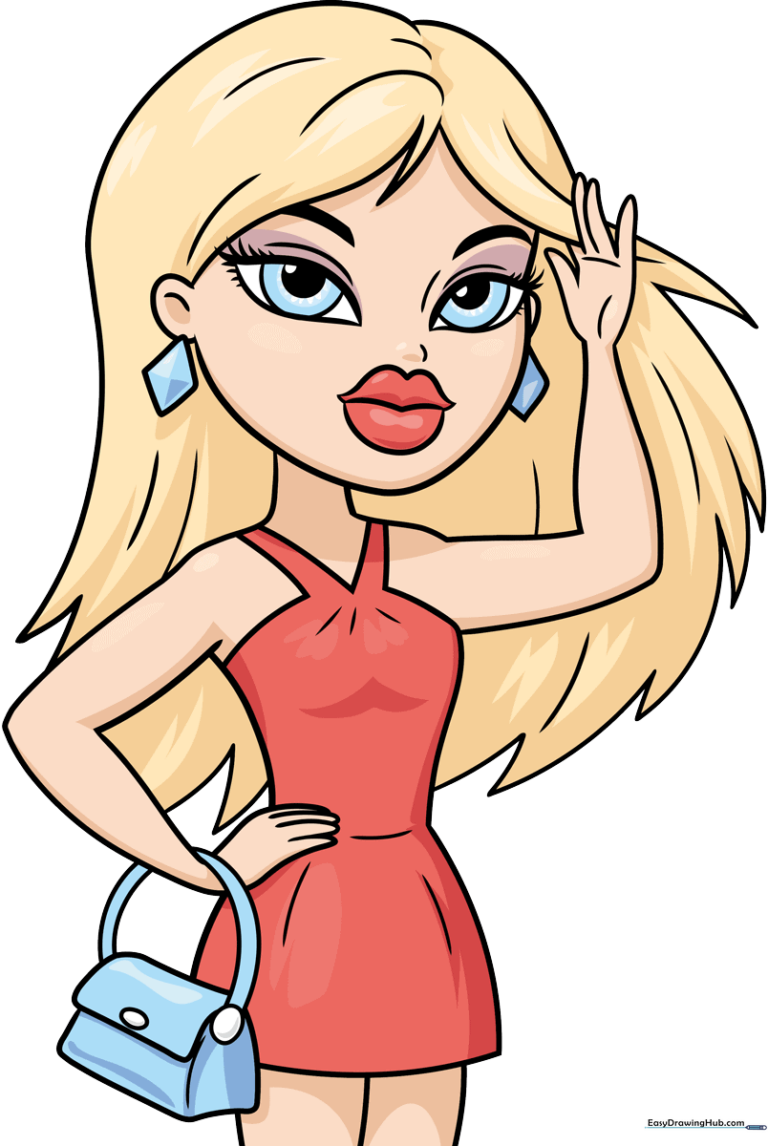
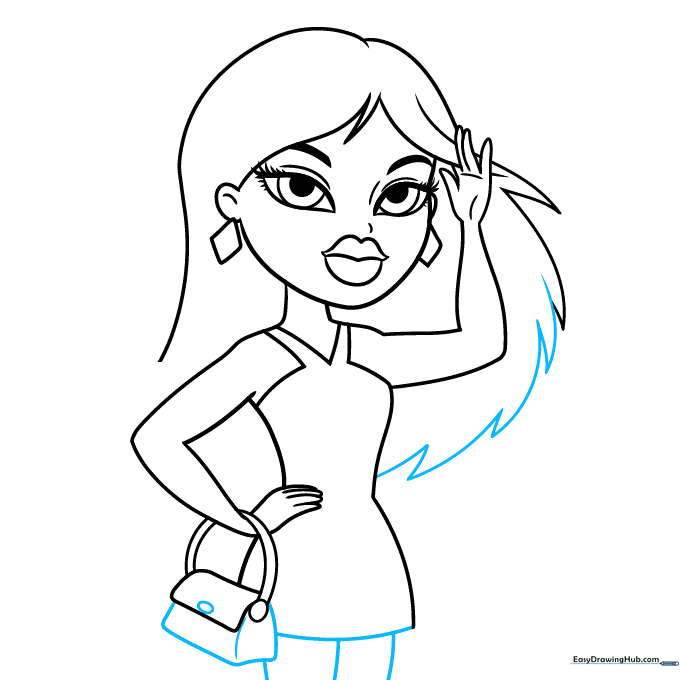
🎯 Final Result
Step-by-Step Instructions
Step 1: Sketching the Signature Eyes
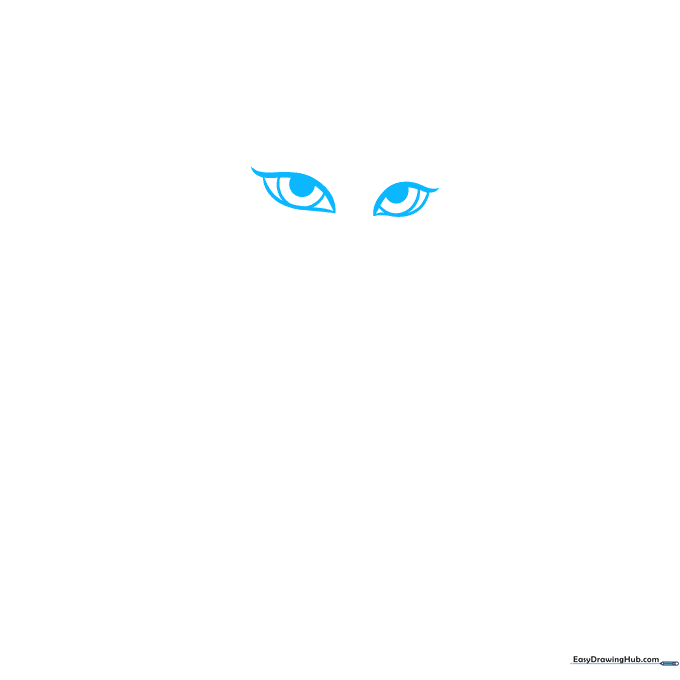
Start by drawing two large, almond-shaped eyes with double-pointed corners. Tip: Keep the top lash line thick and dark to give her that iconic, expressive Bratz gaze. Add two smaller circles inside for the pupils and shade the inner one.
Step 2: Defining Facial Features
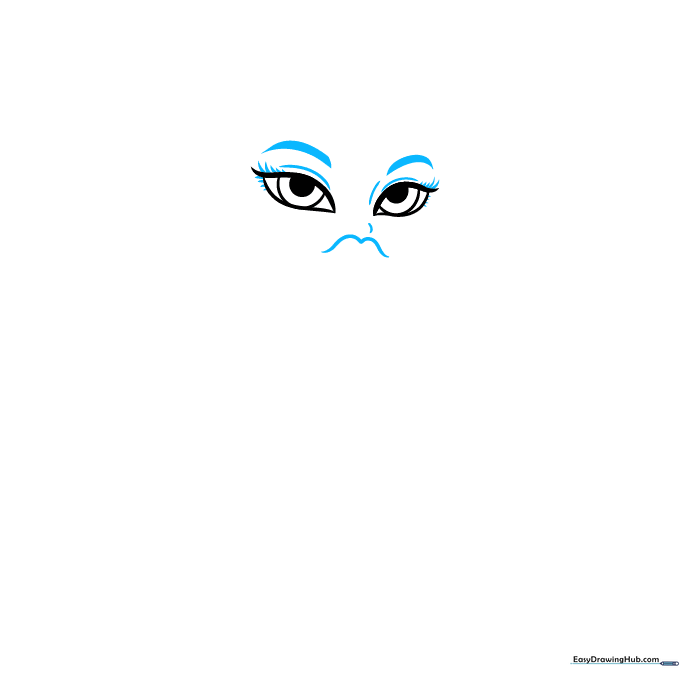
Add the eyelids, a small nose, and bold, arched eyebrows. For the lips, draw a soft 'M' shape. Tip: Use a light touch for the nose—it should be subtle to keep the focus on the eyes and lips.
Step 3: Shaping the Face and Hairline
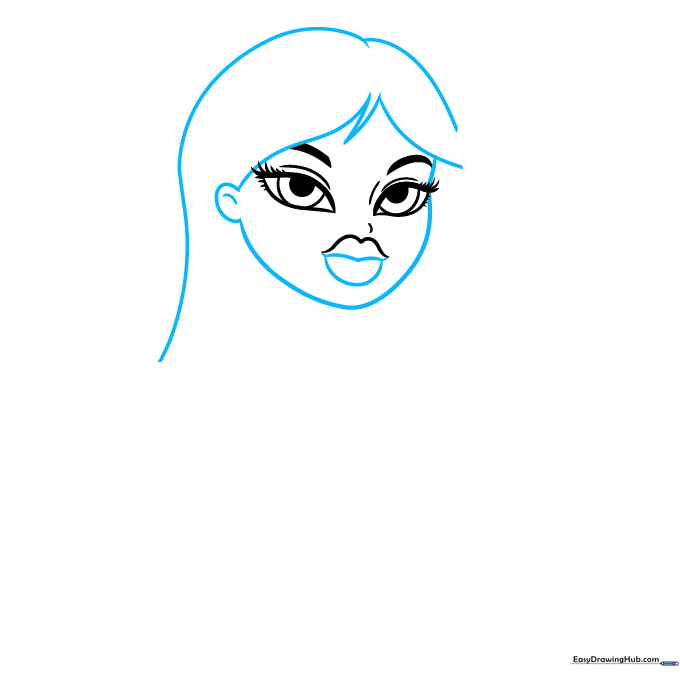
Complete the lips with a curved bottom line. Outline the face shape and add the ear. Tip: When drawing the hairline, use sharp, angular points to create that trendy, styled look.
Step 4: Adding Shoulders and Arms
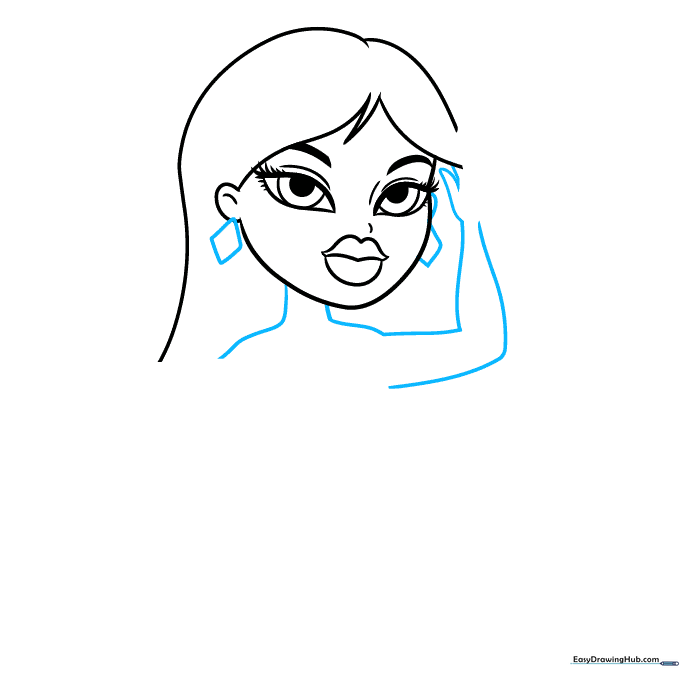
Draw the second ear and a small diamond earring. Extend the neck and shoulders downward. Tip: Sketch the arms with a gentle curve to make the pose look natural and relaxed.
Step 5: Torso and Hair Details
Sketch the torso using two long, graceful curves. Add more locks of hair falling around the shoulders. Tip: Use varying line lengths to make the hair look voluminous and layered.
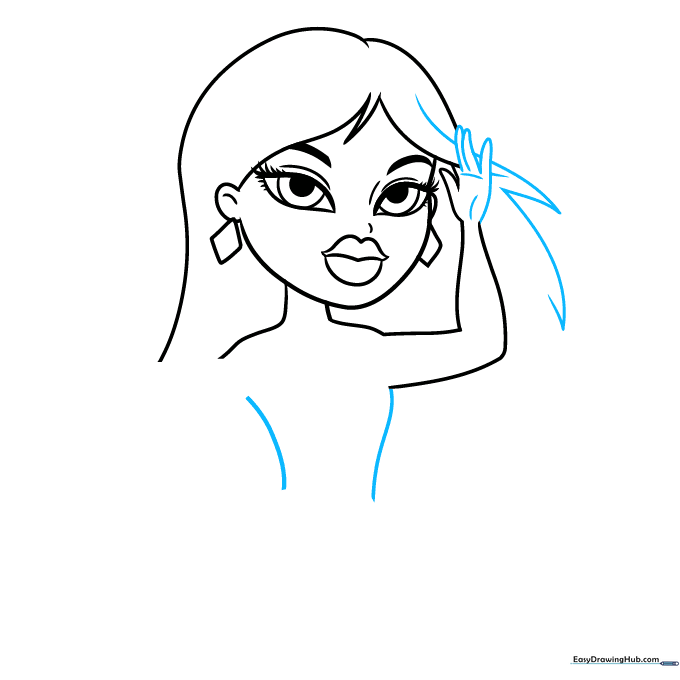
Step 6: Posing the Arms
Draw the remaining arm bent at the elbow with the hand resting on the hip. Add 'V' shaped lines for the garment neckline. Tip: This pose adds personality and movement to your character.
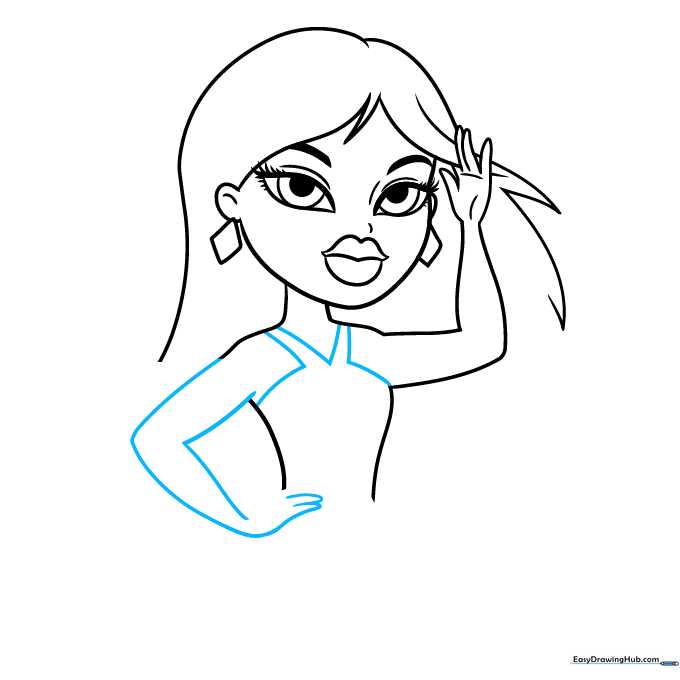
Step 7: Designing the Accessories
Complete the hand and dress outline. Start the purse by drawing two parallel lines for the handle and a rounded rectangle for the bag. Tip: Keep the purse shape simple so it doesn't distract from the doll.
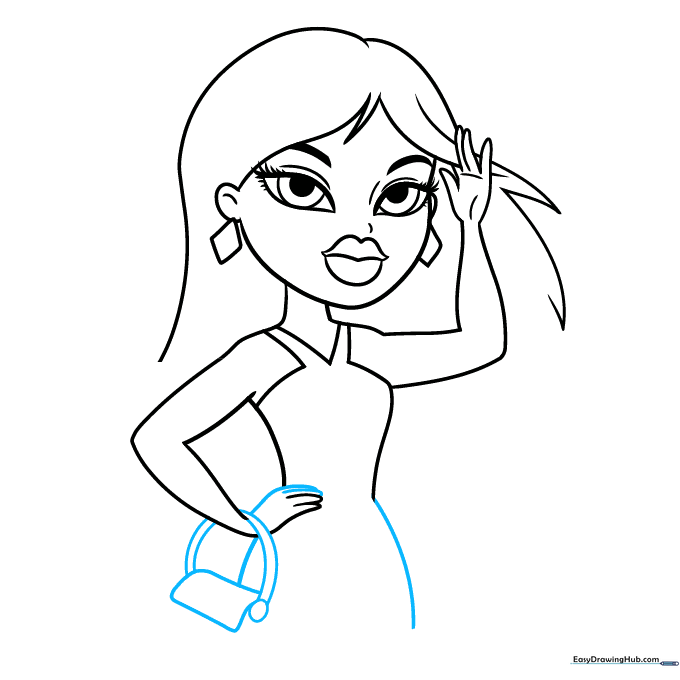
Step 8: Refining the Details
Add more hair volume with jagged, flowing lines. Finish the purse with a small oval clasp. Tip: Use short, quick strokes for the hair to make it look realistic and textured.
Step 9: Finalizing the Outline
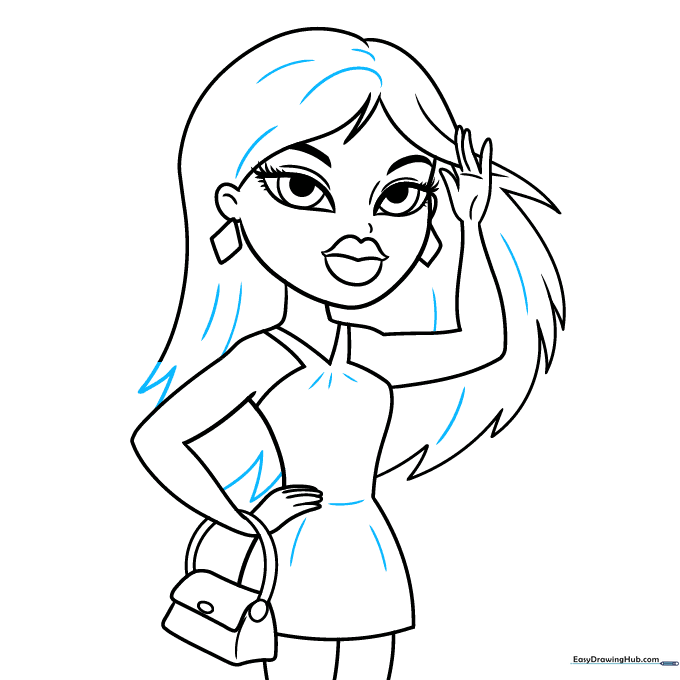
Complete the hair and add texture lines to the dress. Tip: Go over your final lines with a pen and erase any stray pencil marks for a clean, professional look.
Step 10: Bringing Her to Life with Color

Now for the fun part! Add your own color palette. We chose blonde hair and a vibrant red dress. Tip: Use a lighter shade for the center of the lips to create a glossy, 3D effect.
More Tutorials


