How to Draw a Bracelet: Easy 10-Step Guide for Kids
Ready to design your own jewelry? This tutorial is perfect for young artists ages 5 and up who want to practice drawing shapes and patterns. All you need is a pencil, an eraser, and your favorite coloring supplies to bring this charm bracelet to life.
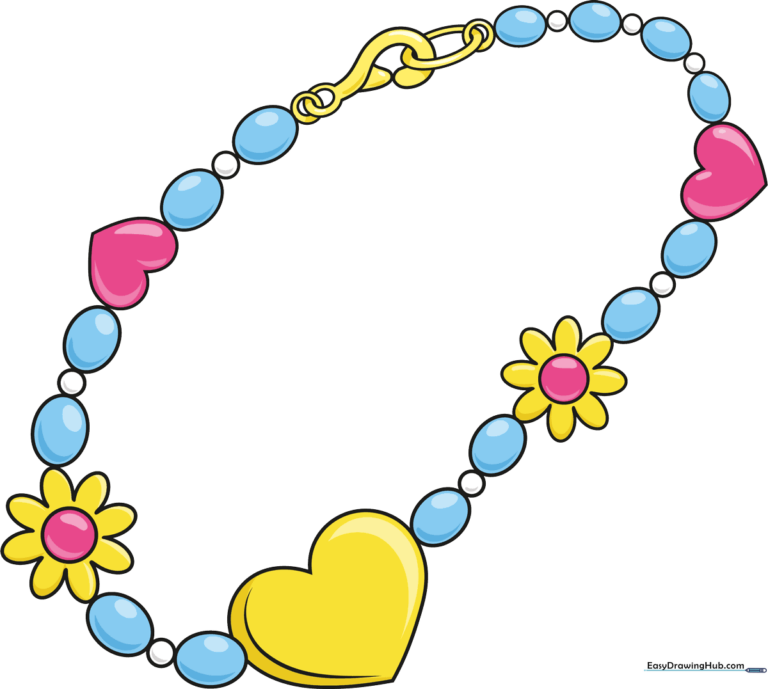
🎯 Final Result
Step-by-Step Instructions
Step 1: Sketching the Heart Charm
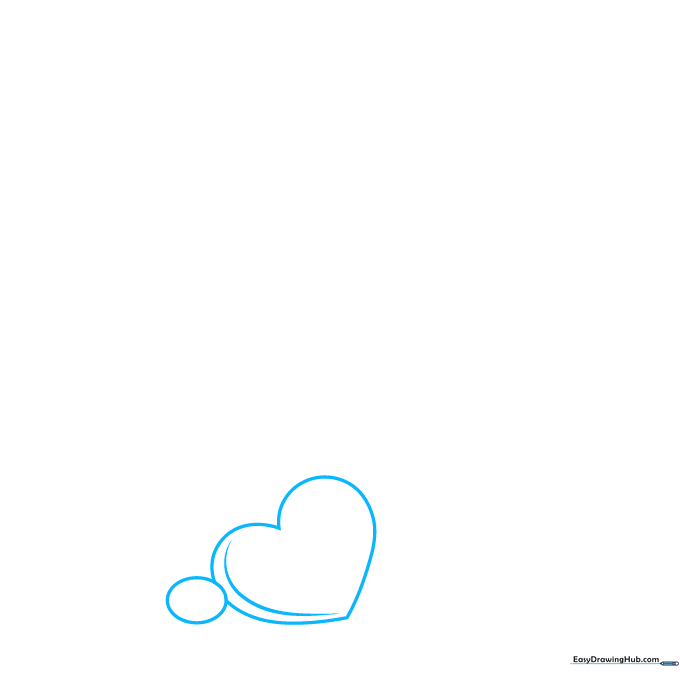
Start by drawing a heart shape for the main charm. Add a long, curved line inside the heart to create a sense of depth. Tip: Keep your pencil lines light so you can easily adjust the shape if needed!
Step 2: Adding Initial Beads
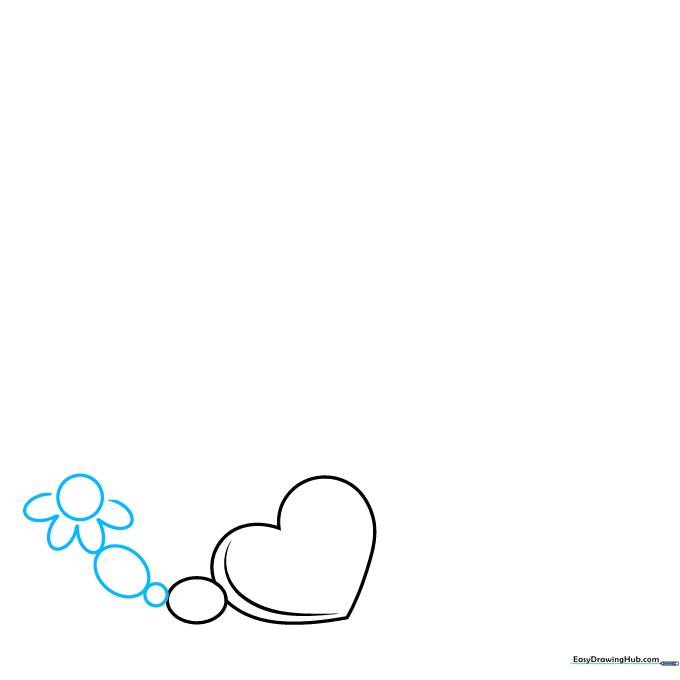
Draw a small circle and an oval next to your heart to represent beads. Then, start your flower charm by drawing a small center circle. Tip: Use light, quick strokes for the petals to keep the flower looking soft.
Step 3: Completing the Flower
Finish the flower petals using simple 'U' shaped lines around the center circle. Add more oval and circular beads to extend the bracelet chain. Tip: Try to vary the sizes of the beads to make your drawing look more realistic.
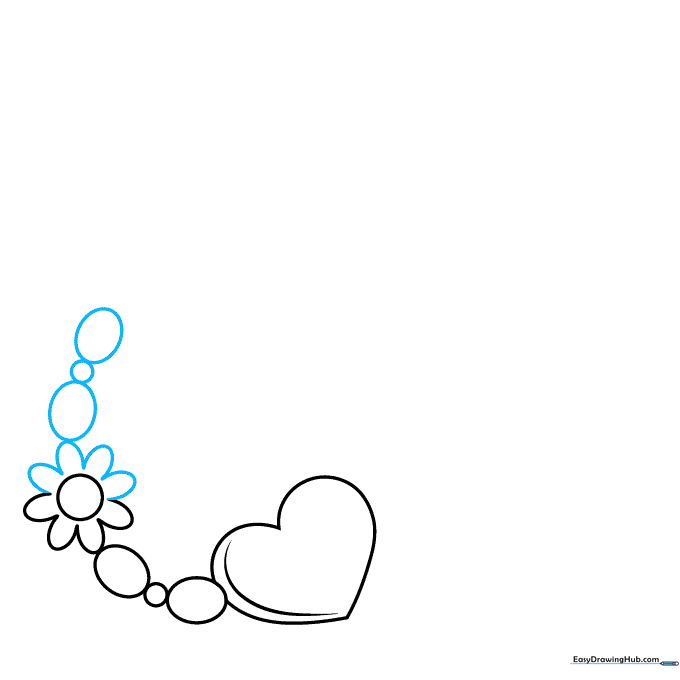
Step 4: Adding More Charms
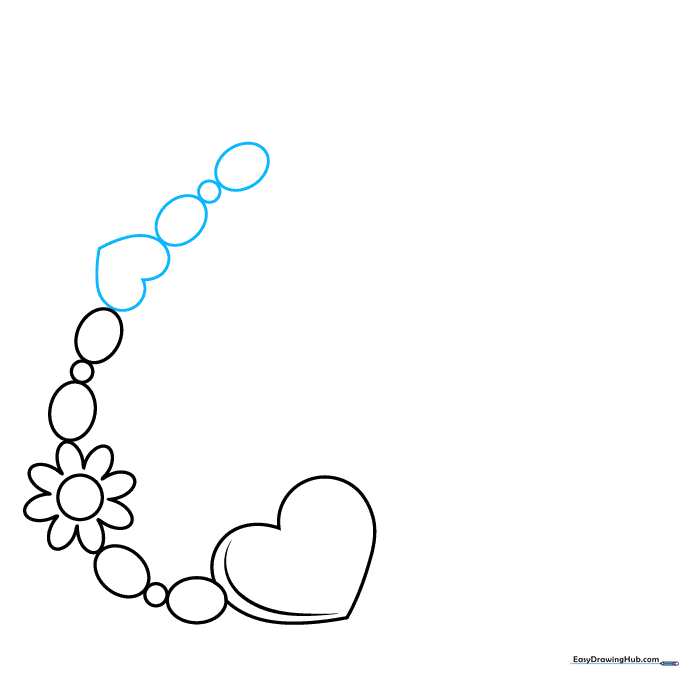
Draw a smaller heart charm followed by another pattern of oval and circular beads. Tip: If your beads aren't perfectly round, don't worry—real jewelry has all sorts of unique shapes!
Step 5: Balancing the Bracelet
On the other side of your main heart, add more beads and a second flower charm. Use the same 'U' shape technique for the petals. Tip: Symmetry makes the bracelet look balanced, but feel free to add your own creative charms!
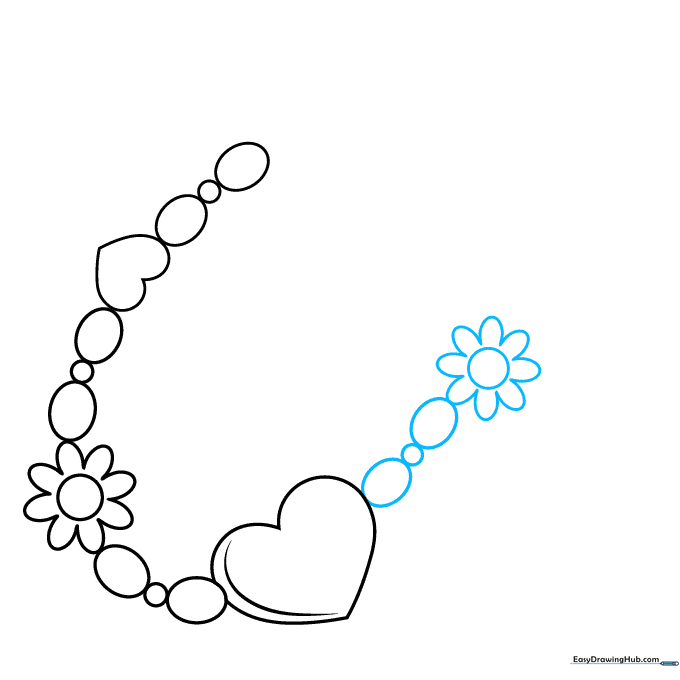
Step 6: Adding Final Charms

Continue the bead sequence and add one more small heart charm to the end of the chain. Tip: Use your eraser to clean up any overlapping lines between the beads and the string.
Step 7: Designing the Clasp
Extend the chain with a few more beads and draw two circles, one inside the other, to start the clasp. Tip: This is the 'hook' that keeps the bracelet closed, so make it look sturdy!
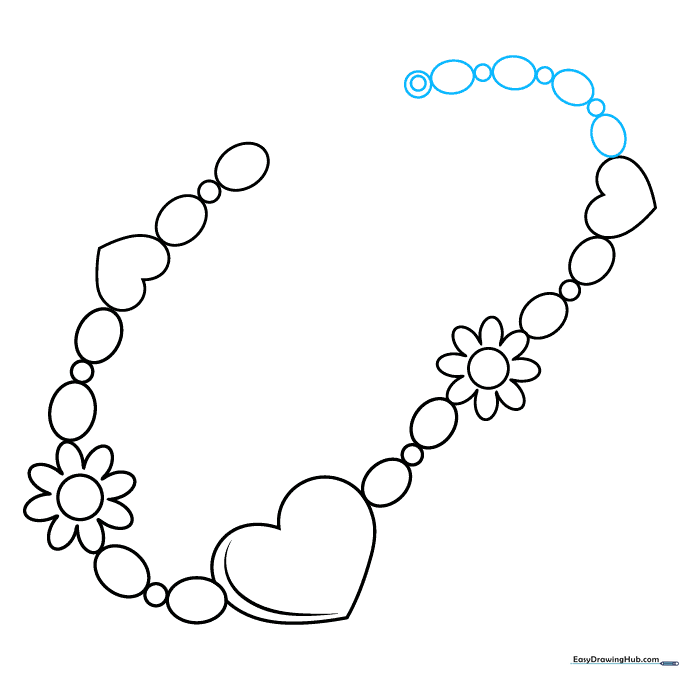
Step 8: Refining the Clasp
Draw an oval inside an oval for the clasp mechanism. Add two parallel curved lines that look like a question mark to form the movable part of the clasp. Tip: Take your time here; this is the most detailed part of the drawing.
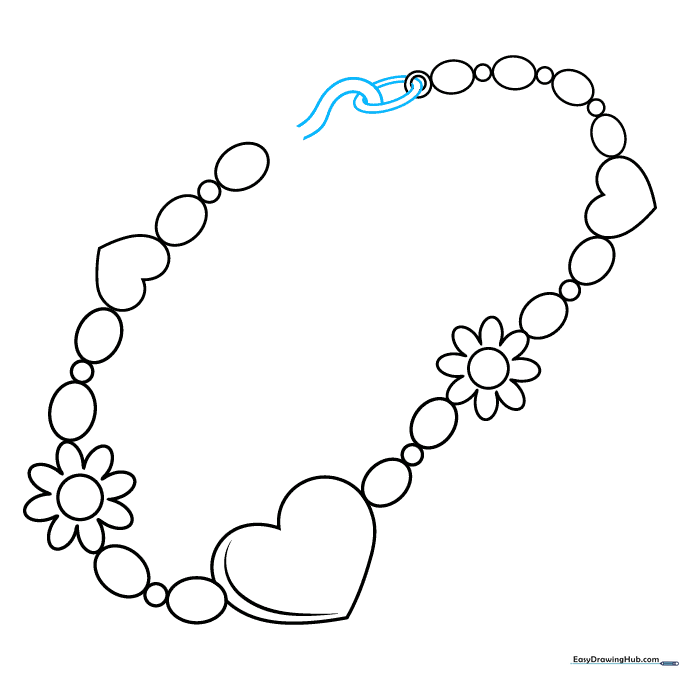
Step 9: Completing the Clasp
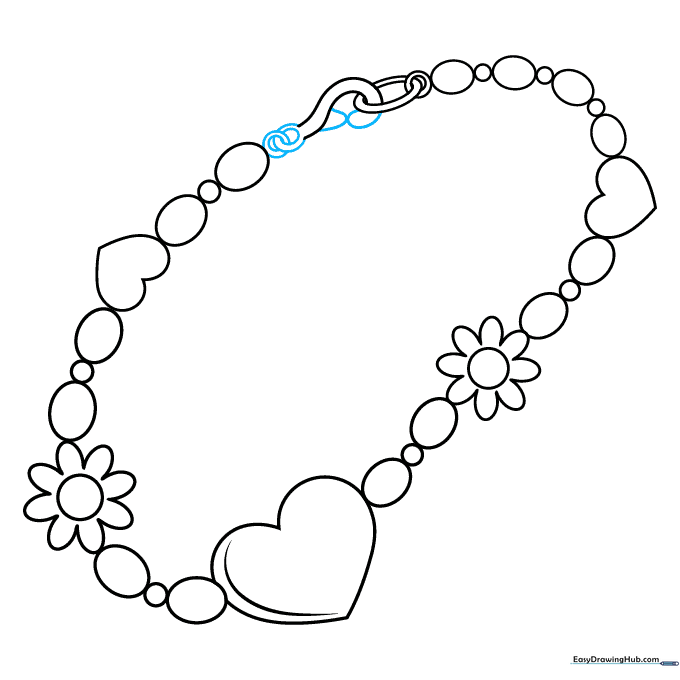
Finish the clasp by adding a small bump for the lever and a final circle to connect it to the bracelet. Tip: Use a darker pencil stroke to outline the final shape so it stands out.
Step 10: Adding Color
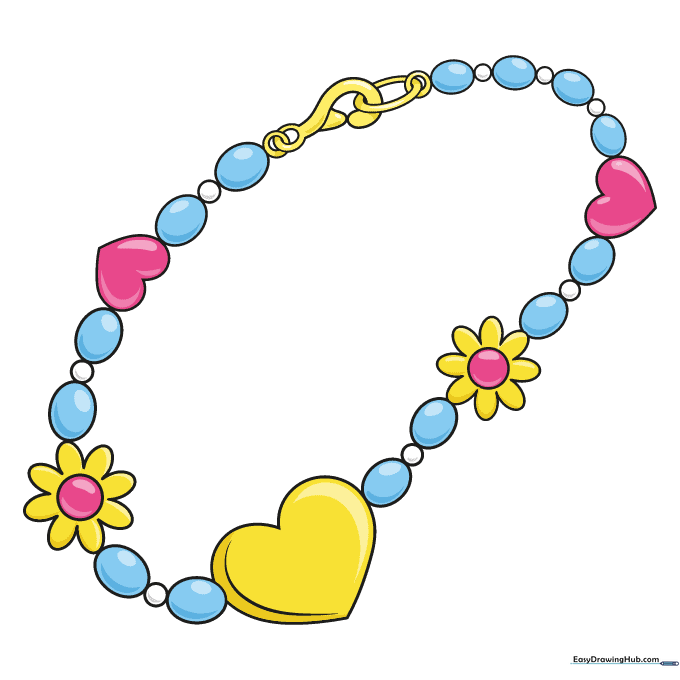
Your bracelet is ready for color! Use pearls for the beads, or try bright blues, pinks, and yellows. Make the clasp gold or silver to give it a realistic metallic shine. Tip: Use light pressure with your colored pencils to create a soft, polished look.
More Tutorials


