How to Draw a Boston Terrier: Easy 10-Step Guide
Ready to bring a dapper Boston Terrier to life? This tutorial is perfect for young artists ages 5+ looking to practice character proportions. All you need is a pencil, an eraser, and a piece of paper to master this iconic 'American Gentleman' dog breed.
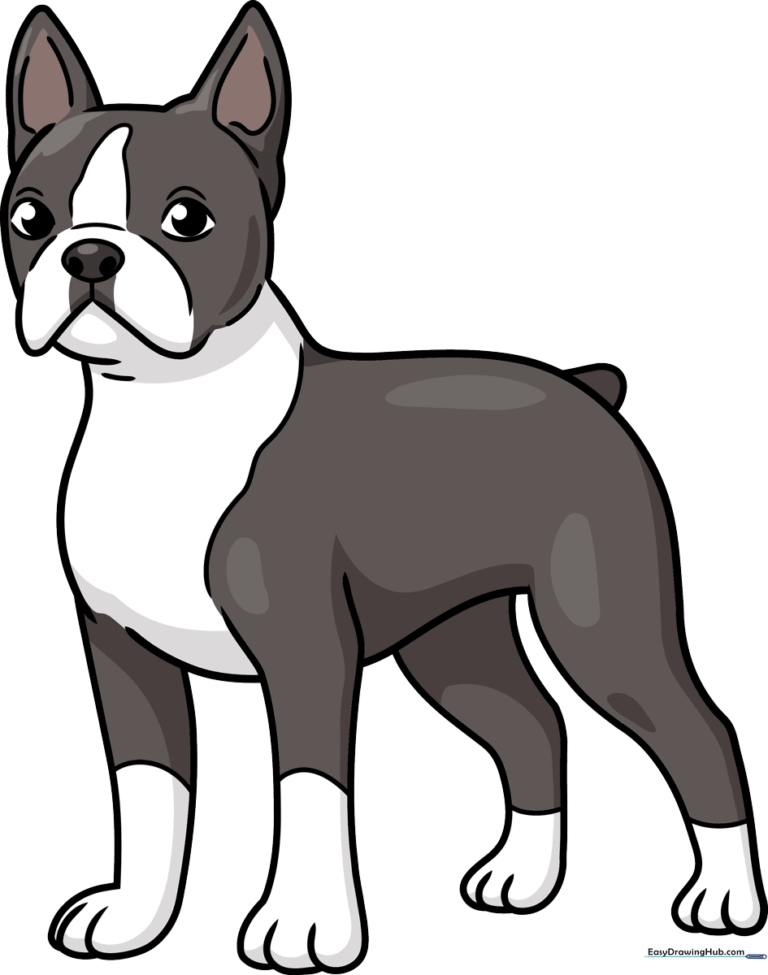
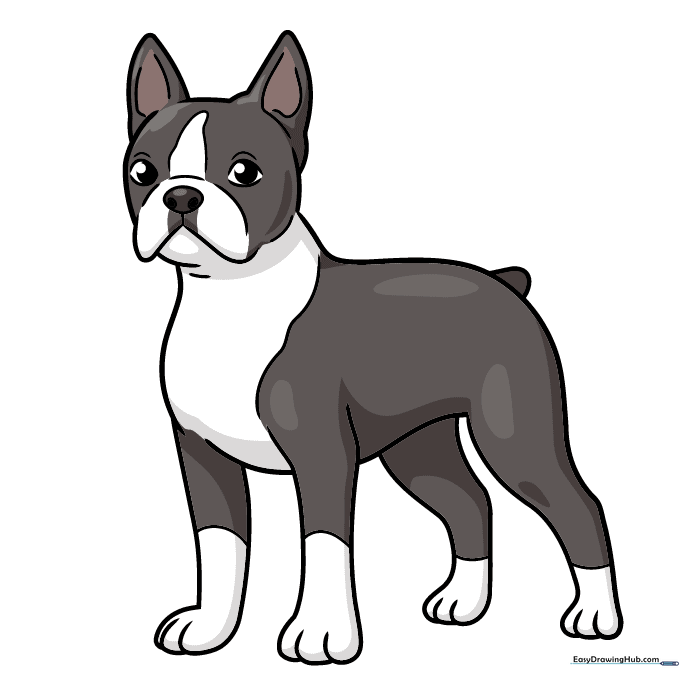
🎯 Final Result
Step-by-Step Instructions
Step 1: Sketching the Expressive Eyes

Draw two almond-shaped outlines for the eyes, leaving the corners slightly open. Add a small, dark pupil inside each. Teacher's Tip: Keep the eyes close together to capture that classic, curious Boston Terrier gaze.
Step 2: Shaping the Head and Snout

Use soft, curved lines to outline the top of the head and the characteristic sagging jowls. Add a small oval for the nose. Teacher's Tip: Don't press too hard; these lines define the dog's friendly personality.
Step 3: Adding the Upright Ears
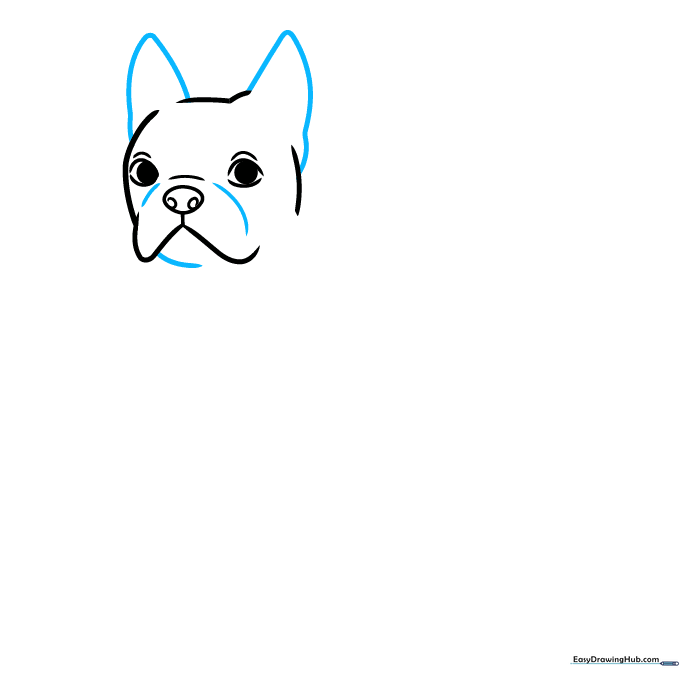
Sketch two long, triangular shapes on top of the head for the ears. Refine the snout with a curved line for the lower jaw. Teacher's Tip: Boston Terriers have 'bat-like' ears, so make them tall and pointed!
Step 4: Defining the Chest
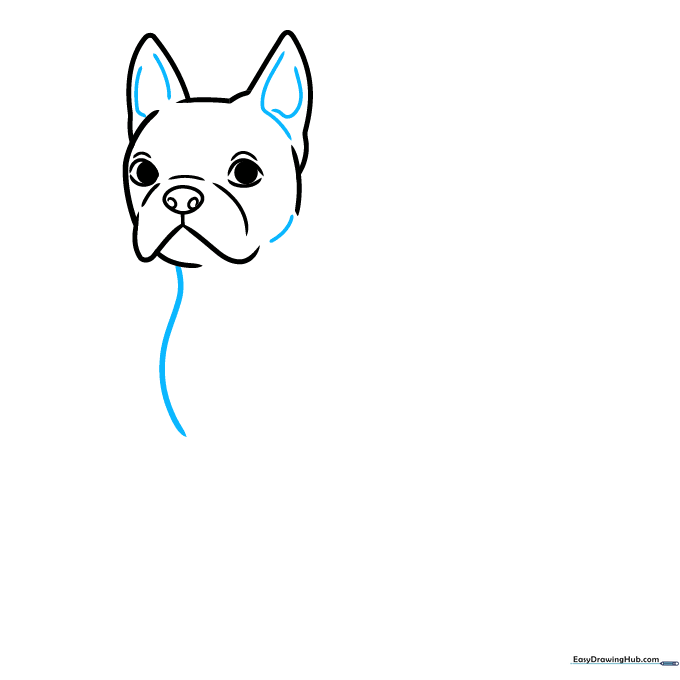
Add detail inside the ears and draw a smooth, curved line for the chest. Teacher's Tip: Think of the chest as a gentle 'U' shape to give the dog a sturdy, compact look.
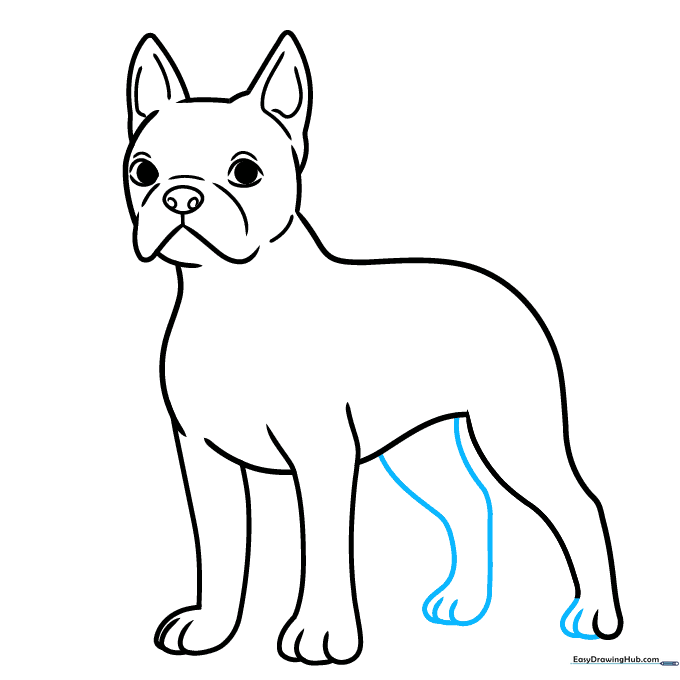
Step 5: Sketching the Front Leg
Use overlapping curved lines to draw the front leg and paw. Teacher's Tip: Keep the leg straight to show the dog is standing at attention.
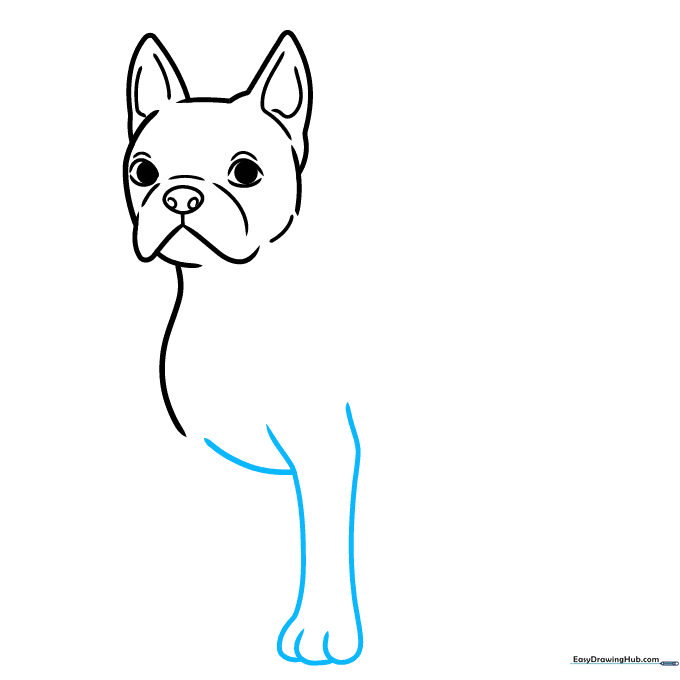
Step 6: Adding the Second Leg
Draw the second front leg slightly behind the first, then extend a line for the belly. Teacher's Tip: Overlapping lines create a sense of depth and 3D space.
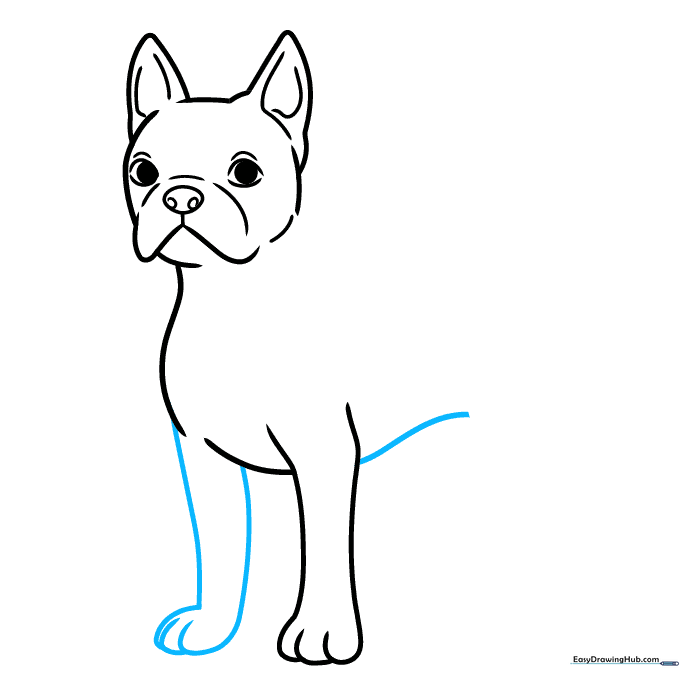
Step 7: Drawing the Back and Rear Leg
Extend a long, smooth line from the neck to form the back and the rear leg. Teacher's Tip: Make the back line slightly curved to give the dog a natural, athletic posture.
Step 8: Finishing the Legs
Complete the rear leg and add the final leg using overlapping curves. Teacher's Tip: Don't forget the tiny toes on the paws to make it look realistic!
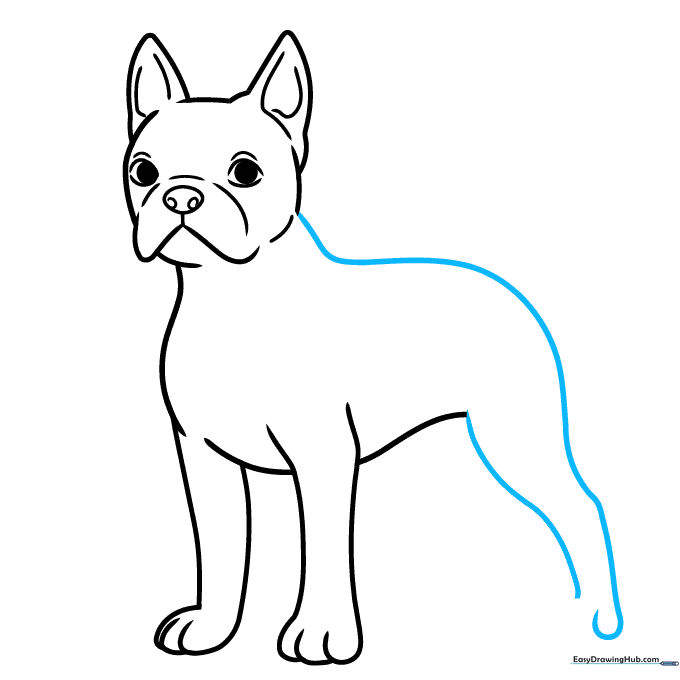
Step 9: Tail and Fur Markings
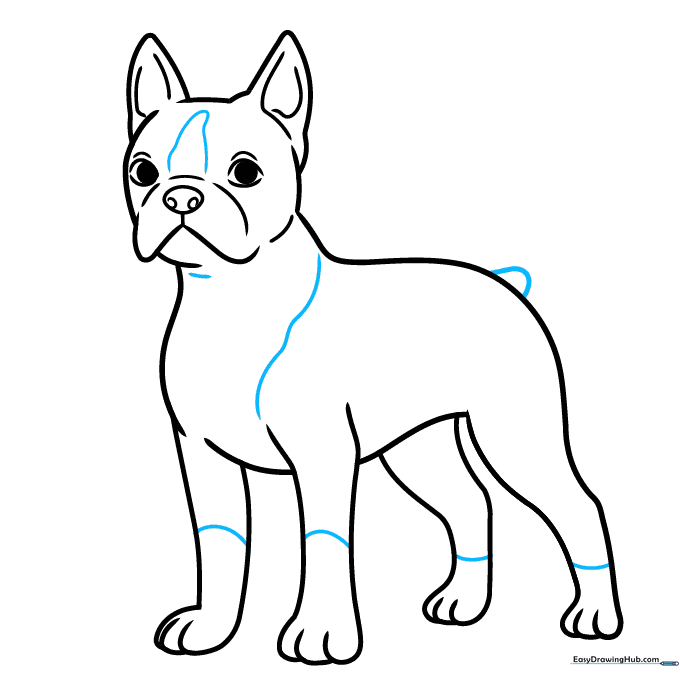
Add a short, stubby tail and draw the 'blaze' (the white stripe) on the face and 'socks' on the legs. Teacher's Tip: These markings are what make a Boston Terrier look like they are wearing a tuxedo!
Step 10: Coloring Your Masterpiece
Color your dog! Use black for the body and white for the face, chest, and paws. Teacher's Tip: Use a light grey for shading to give your drawing a professional, finished look.
More Tutorials


