How to Draw a Black Woman: Easy 9-Step Portrait Guide
Ready to practice your portrait skills? This tutorial is perfect for artists ages 8+ looking to draw expressive features and natural hair textures. Grab a pencil, an eraser, and a piece of paper to follow along as we build this portrait from the eyes down to the shoulders.
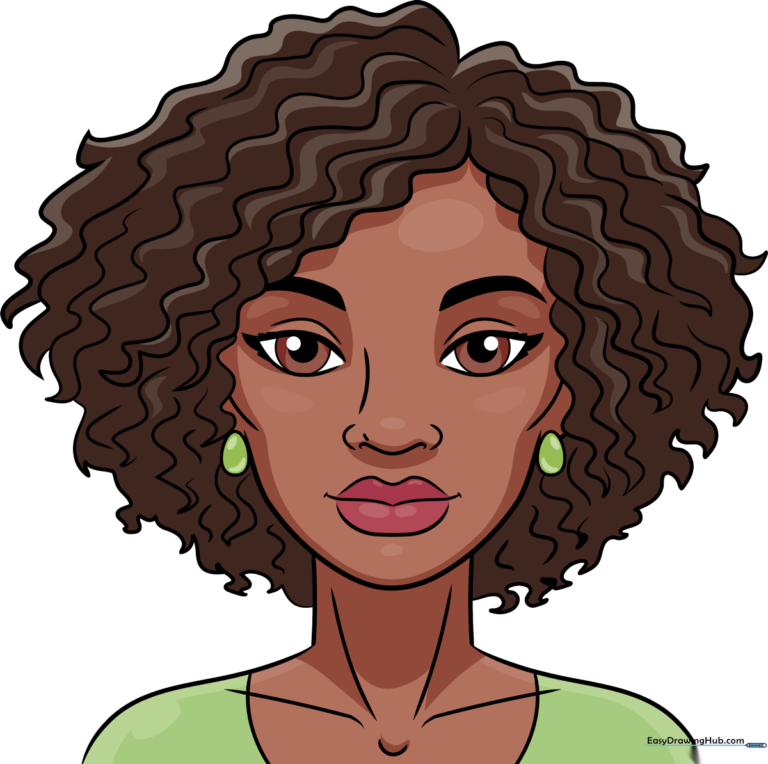
🎯 Final Result
Step-by-Step Instructions
Step 1: Sketching the Eyes
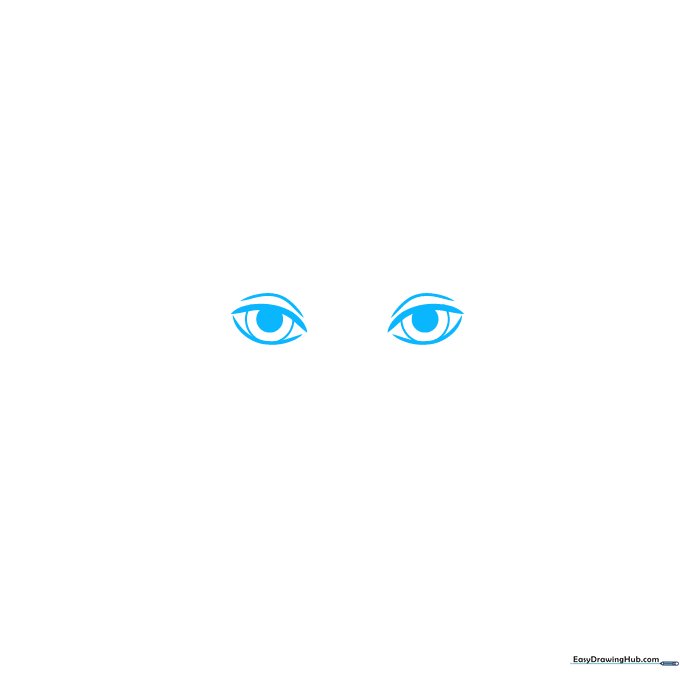
Start by drawing two almond-shaped outlines for the eyes. Don't let the lines meet at the corners. Add a curved eyelid line above each, and draw two partial circles inside for the irises. Teacher's Tip: Keep your pupils dark and bold to give the portrait life!
Step 2: Defining Brows and Nose
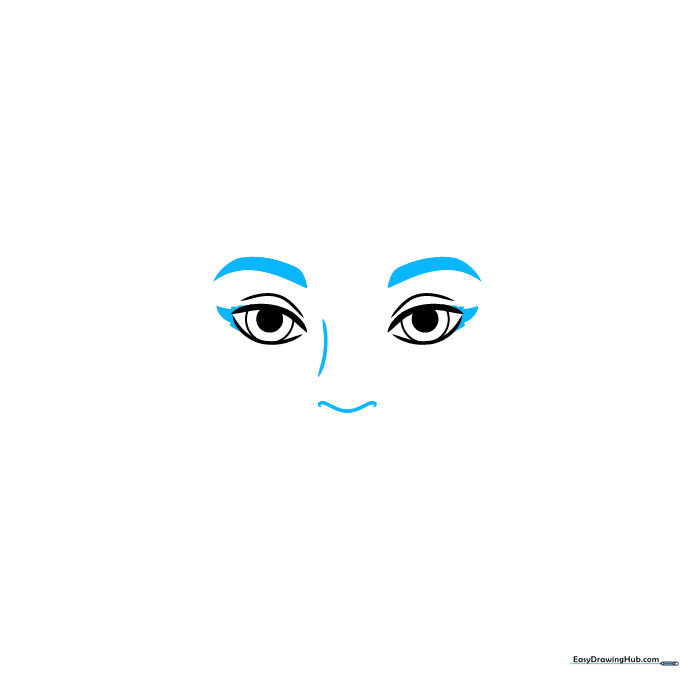
Draw thick, expressive eyebrows above the eyes. Add small triangles at the corners of the eyes for lashes. Use soft, curved lines to map out the bridge and nostrils of the nose. Tip: Use a light touch for the nose bridge so it looks natural, not harsh.
Step 3: Shaping the Face and Lips
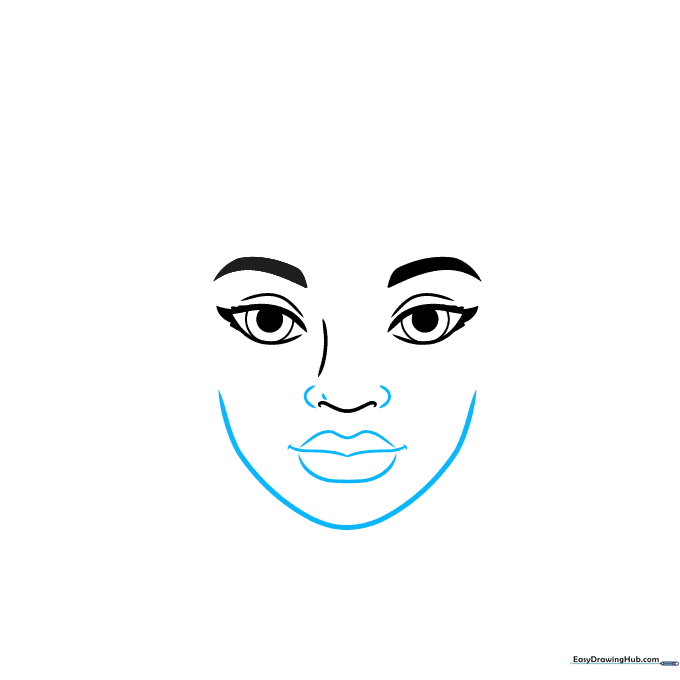
Outline the chin and cheeks with a long, smooth curve. Draw the mouth using a gentle 'V' shape for the center, then enclose the lips. Tip: The lips should be slightly wider than the nose for a realistic proportion.
Step 4: Starting the Hairline
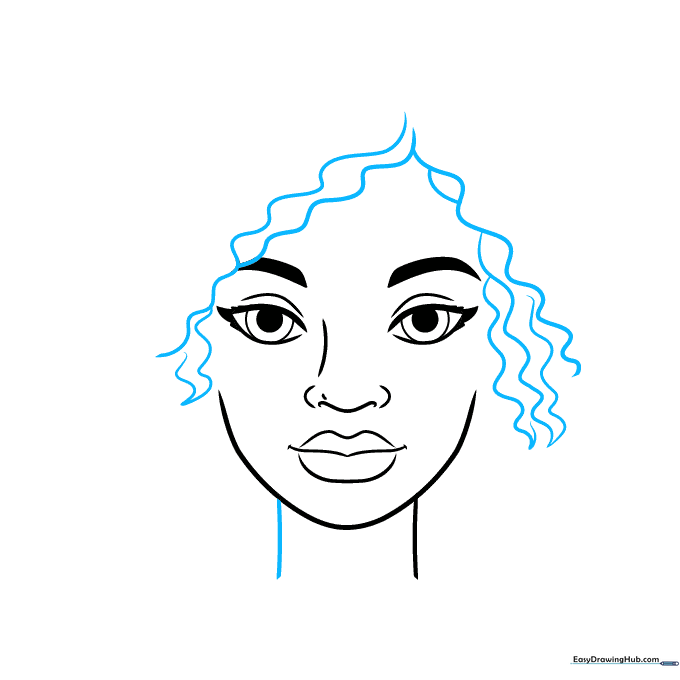
Use wavy, inverted 'V' lines to create the start of the hair. Erase any overlapping facial lines. Extend two lines down from the chin to form the neck. Tip: Don't worry about perfection; natural hair has lots of volume and movement!
Step 5: Adding Ears and Earrings
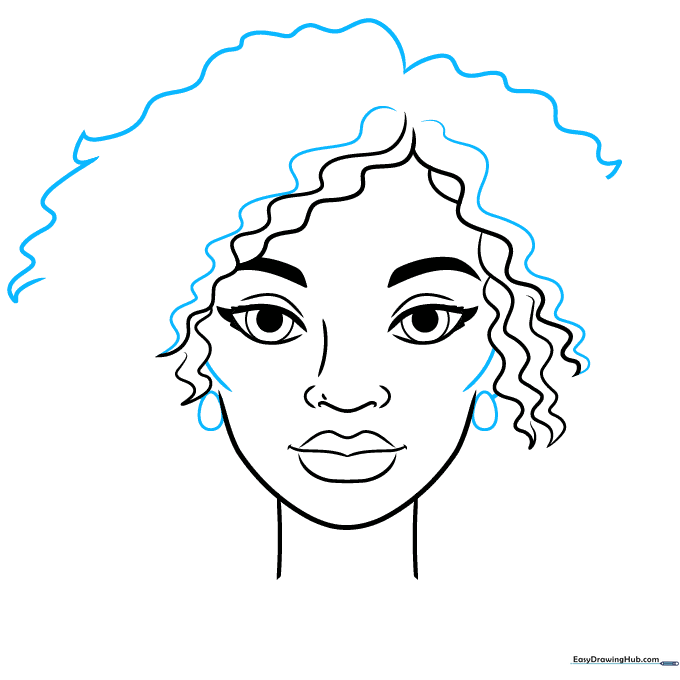
Sketch the ears on the sides of the face and add simple oval earrings. Continue building the hair volume with more wavy lines. Tip: Use your eraser to clean up any lines that cross through the earrings.
Step 6: Detailing the Hair
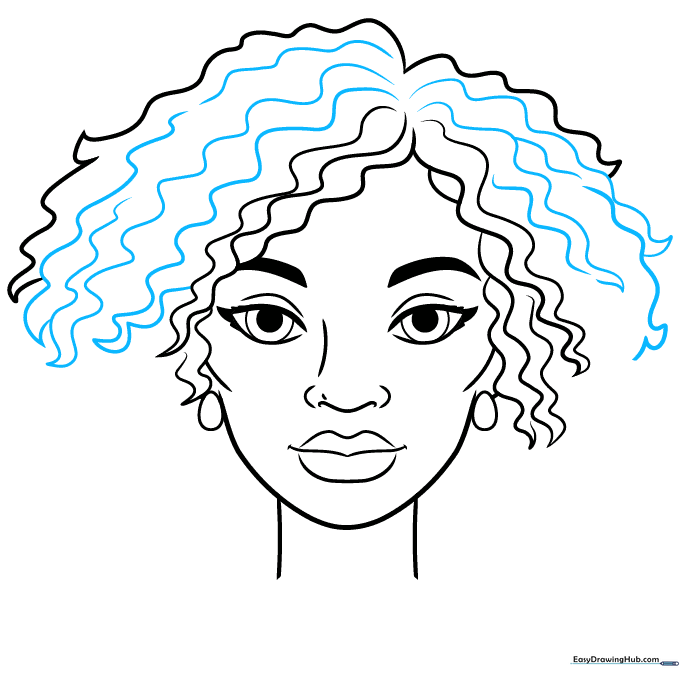
Fill in the hair area using pairs of wavy lines that meet at sharp points. This creates the texture of curly hair. Tip: Vary the size of your waves to make the hair look more realistic and less uniform.
Step 7: Shaping the Hairline
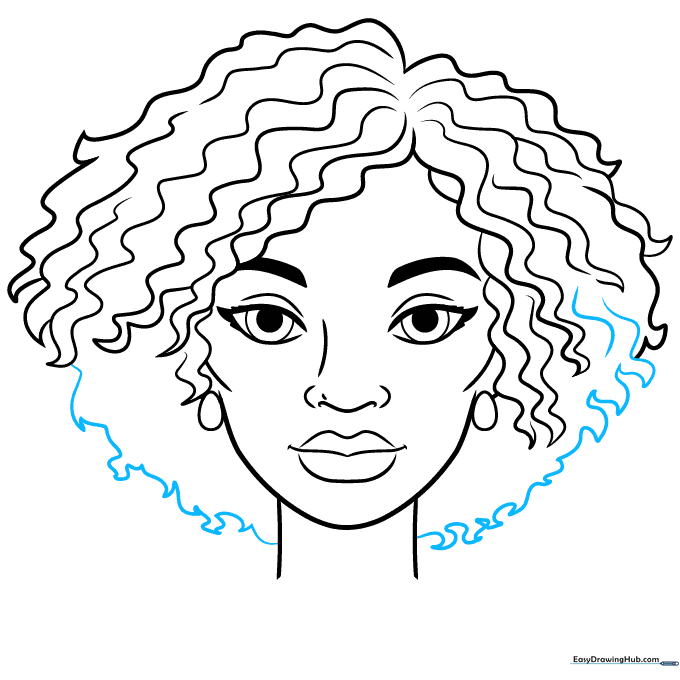
Connect the hair at the sides of the face down to the neck using short, pointed lines. This frames the face beautifully. Tip: Keep these lines light so they blend into the rest of the hair.
Step 8: Adding Shoulders
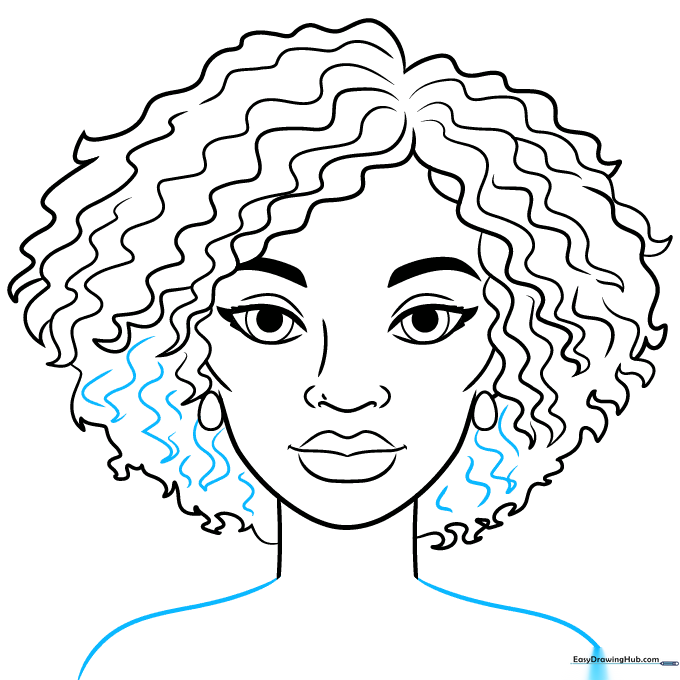
Continue adding wavy texture to the hair. From the base of the neck, draw two curved lines outward to form the shoulders. Tip: Make the shoulders slightly wider than the head for natural proportions.
Step 9: Finalizing the Shirt
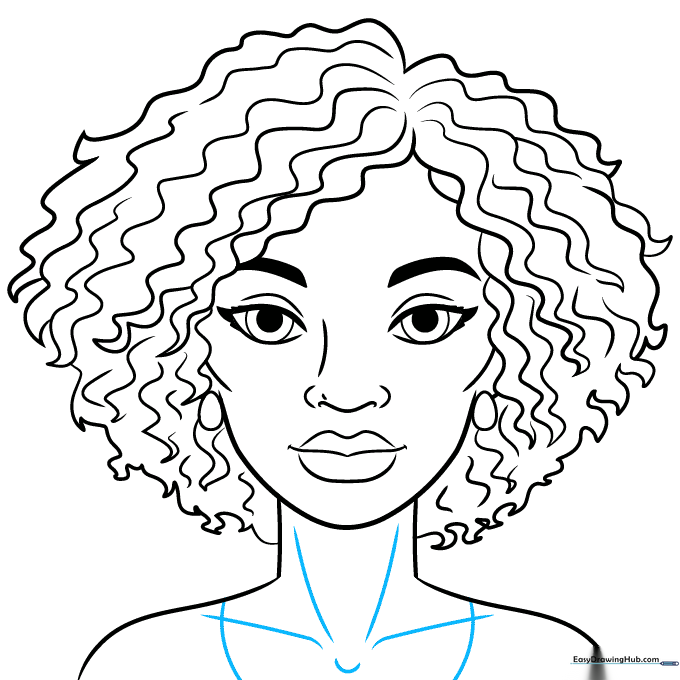
Draw a wide 'U' shape for the shirt neckline and add small curved lines for the collarbones. You're done with the outline! Tip: Use a darker pencil to go over your final lines before coloring.
Step 10: Bring Your Portrait to Life
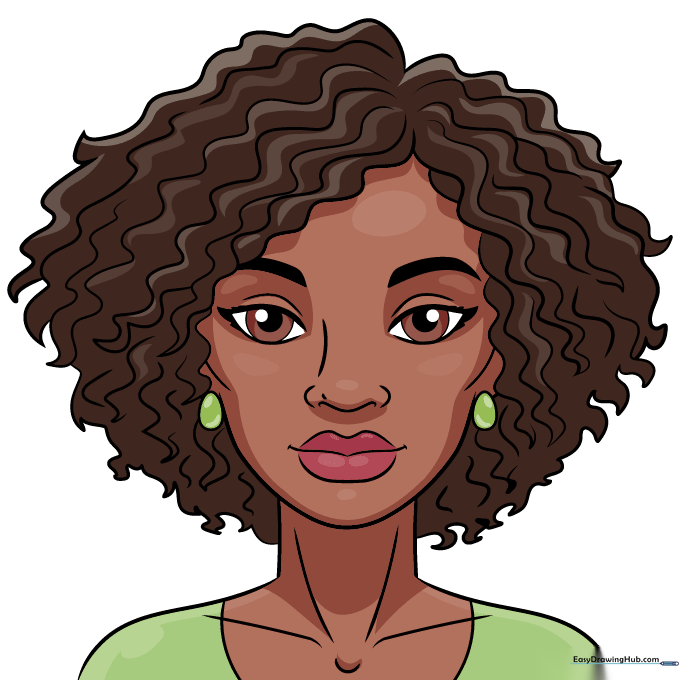
Time to add color! Use your favorite markers or colored pencils. Tip: Try using different shades of brown to add depth and shadow to the skin and hair.
More Tutorials


