How to Draw a Beyblade: Easy 10-Step Guide for Kids
Ready to design your own spinning top? This tutorial is perfect for young fans ages 7+ who want to bring their favorite battle toy to life on paper. Grab your pencil, eraser, and a black fine-liner, and let’s get drawing!
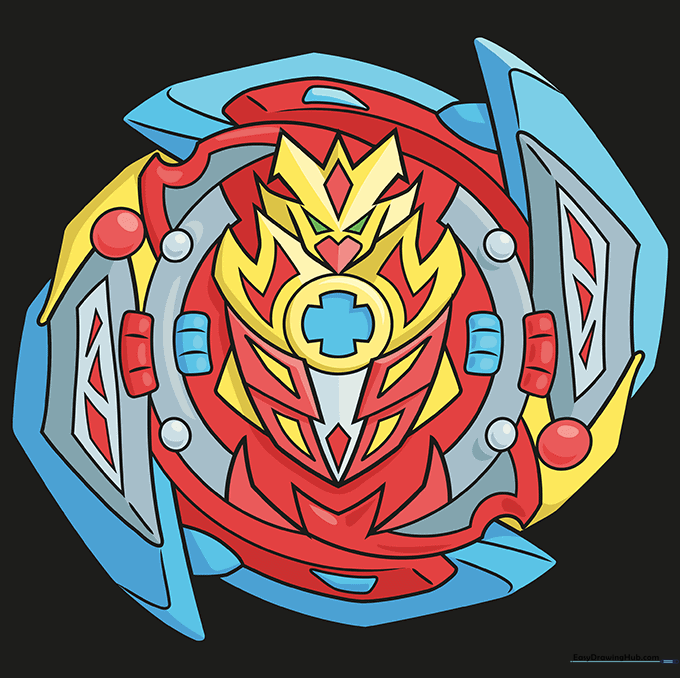
🎯 Final Result
Step-by-Step Instructions
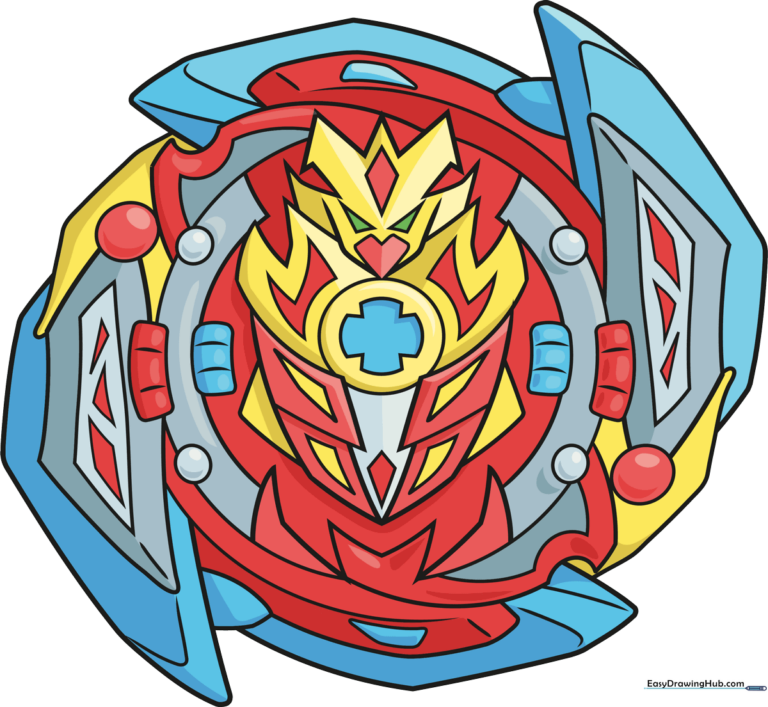
Step 1: Sketching the Gachi Chip

Start by sketching the Gachi chip, the heart of your Beyblade. Draw a 'W' shape for the top, then outline the sides with firm, confident strokes. Add a small diamond on the forehead and triangular eyes. Teacher's Tip: Keep the facial features centered so your character looks balanced.
Step 2: Defining the Torso and Shoulders
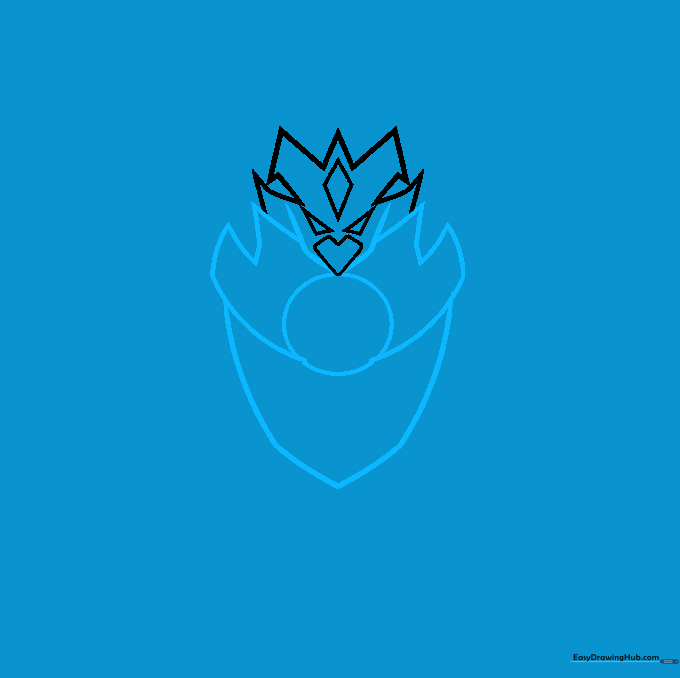
Complete the head outline and draw a circle beneath it to serve as the core. Use sharp, angular lines to sketch the spiked shoulder armor. Tip: Think of these as jagged lightning bolts to give your Beyblade an aggressive, battle-ready look.
Step 3: Adding Core Details
Draw a plus (+) sign in the center of your core circle. Add lightning-bolt shapes on either side to suggest speed. Use straight lines to enclose geometric triangles on the torso. Tip: Use a ruler if you find it hard to keep your lines straight!
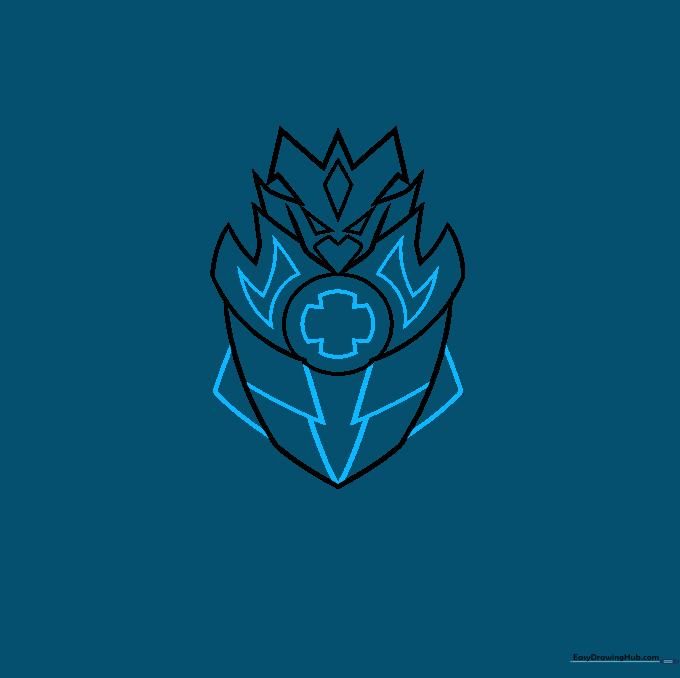
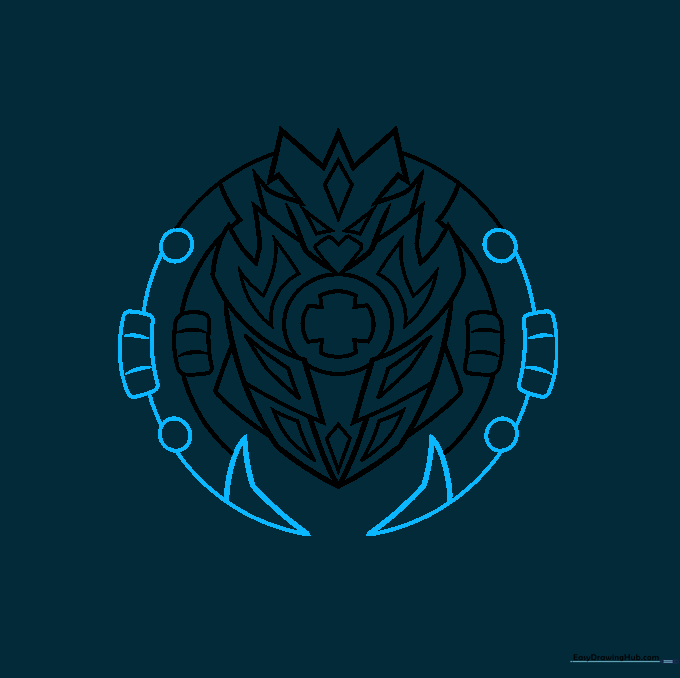
Step 4: Constructing the Blade Base
Outline the base using incomplete circles connected by curved lines. Add rounded rectangles on the sides, banding them with small curved lines to show depth. Tip: These bands create a 3D effect, making your drawing look like a real metal toy.
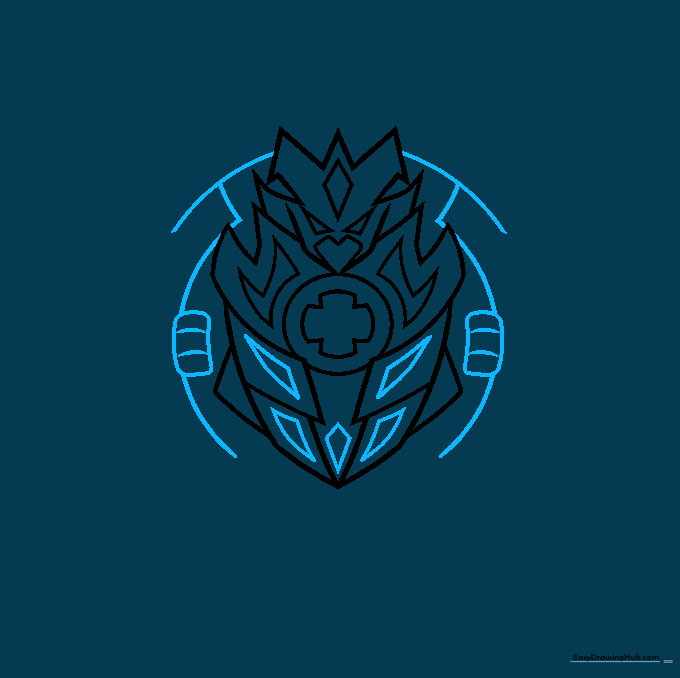
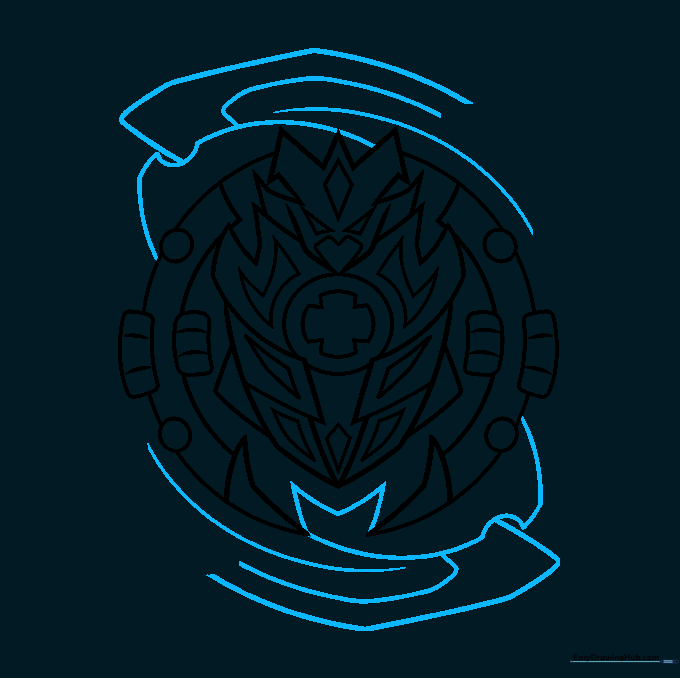
Step 5: Layering the Design
Extend your lines to create a larger outer circle. Add more rounded rectangles and small circles inside the design for extra detail. At the bottom, draw two bent triangles to act as the base tip. Tip: Keep your pencil pressure light here so you can easily adjust the spacing.
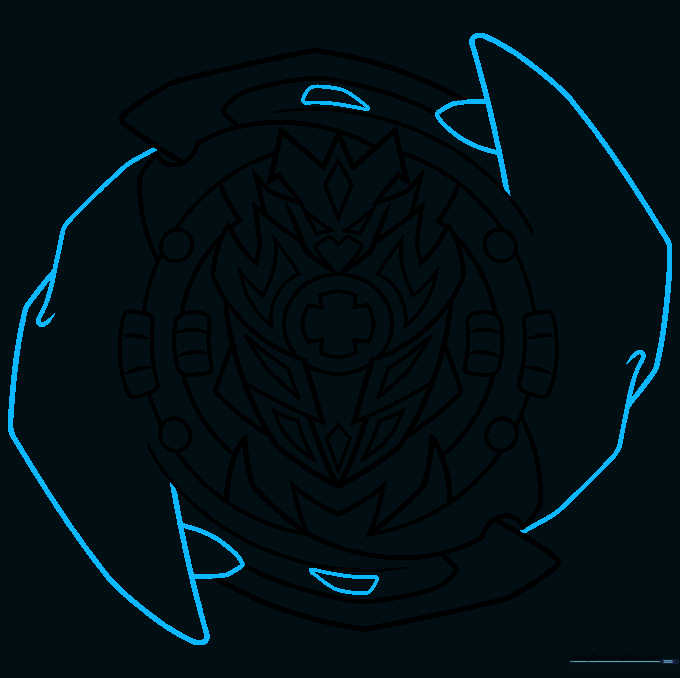
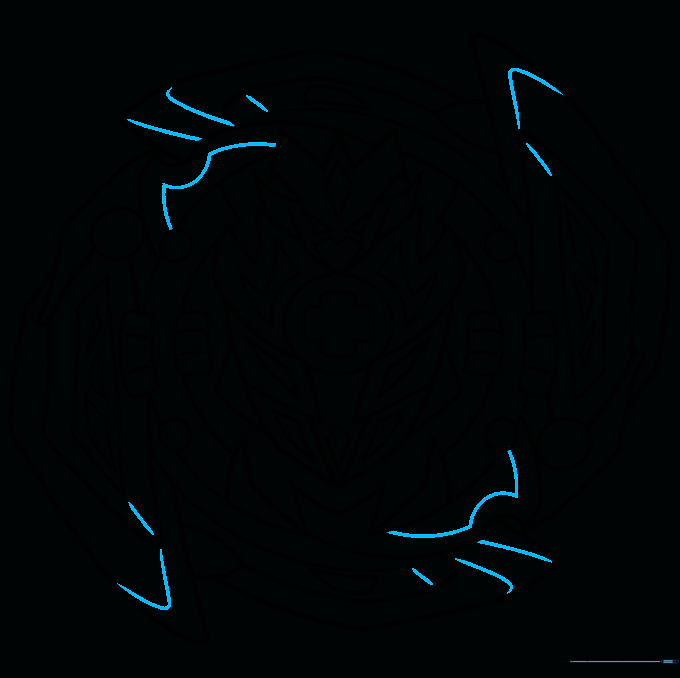
Step 6: Designing the Attack Ring
Now for the fun part: the attack ring! Use curved lines to create irregular, jagged shapes around the edge. Add two pairs of curved lines at the top and bottom to represent the weapon blades. Tip: Make these shapes look sharp to imply speed and power.
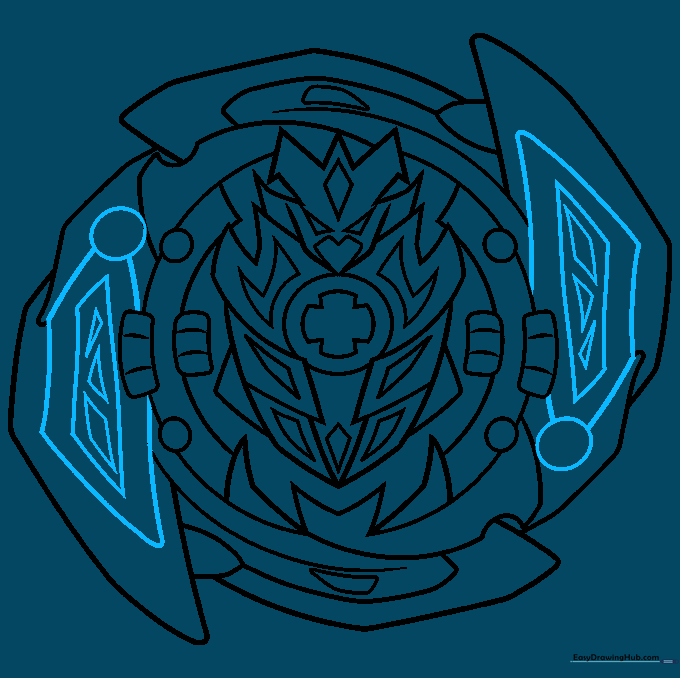
Step 7: Refining the Attack Ring
Use overlapping curved lines to enclose triangular shapes within the attack ring. This adds texture and makes the ring look solid. Tip: Overlapping lines are a great way to show that one part of the toy sits on top of another.
Step 8: Adding Mechanical Details
Add small circles and a series of shrinking trapezoids within the blades. Inside the smallest trapezoid, draw a parallelogram and a few tiny triangles. Tip: These small details make your Beyblade look like a complex piece of engineering.
Step 9: Final Outline
Go over your final lines with a black pen or marker. Erase any stray pencil marks. Tip: Take your time with the ink; slow, steady breaths help keep your hand from shaking.
Step 10: Bring It to Life with Color
Time to color! Use bright, energetic colors to make your Beyblade stand out. Think about where the light hits the metal and add a few white highlights for a shiny, metallic finish. Tip: Use a darker shade on the edges to give your drawing a sense of weight.
More Tutorials


