How to Draw a Bat: Easy 9-Step Guide for Beginners
Ready to draw a spooky-cute bat? This tutorial is perfect for artists ages 5 and up, requiring only a pencil, paper, and an eraser. Follow these simple steps to master the bat's unique wing shape and furry features while building your confidence as an illustrator.
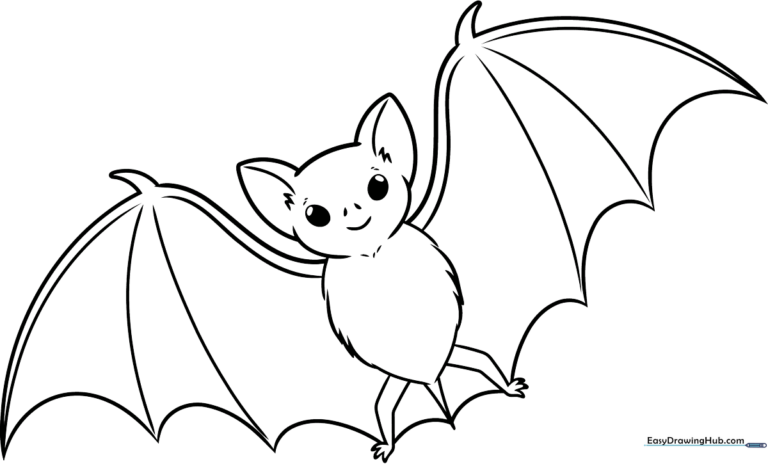
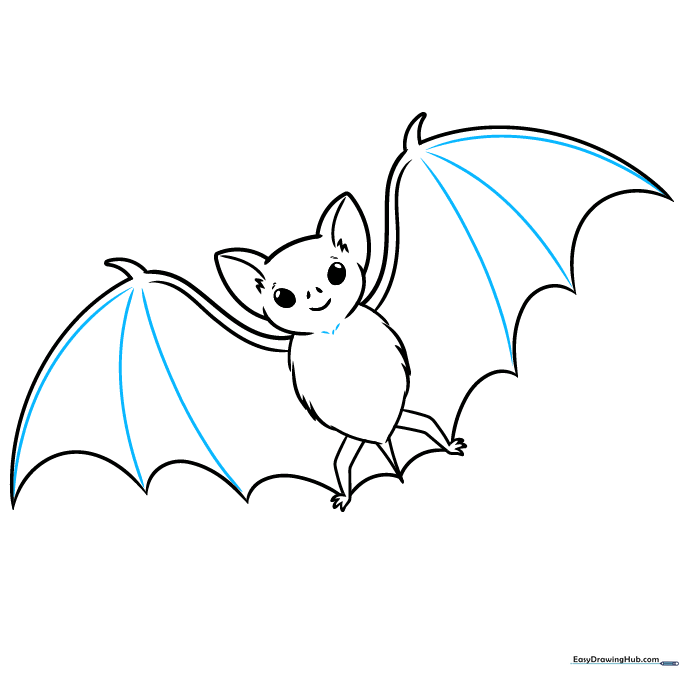
🎯 Final Result
Step-by-Step Instructions
Step 1: Sketching the Face

Start by drawing two ovals for the eyes, with smaller circles inside for pupils. Tip: Keep the eyes centered to give your bat a friendly, symmetrical look. Add two small teardrops for nostrils and a 'U' shape for a happy mouth.
Step 2: Adding Ears and Brows
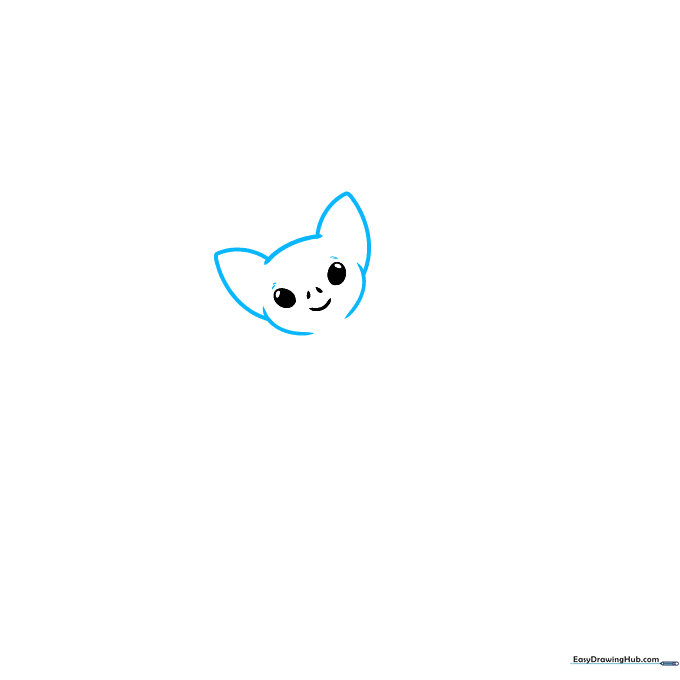
Draw two large 'V' shaped ears on top of the head. Connect them with a soft curve. Tip: Add two short, slanted lines above the eyes to give your bat some personality—it makes them look curious!
Step 3: Defining the Ears and Body
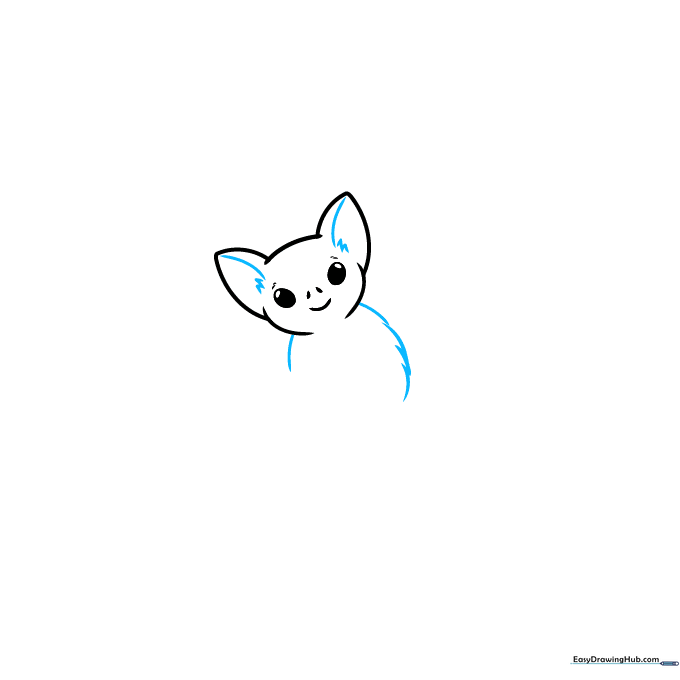
Add detail inside the ears with a zigzag line to show texture. Start the body using short, overlapping curved lines. Tip: Use a 'bumpy' motion with your pencil to mimic the look of soft fur.
Step 4: Starting the Wings
Continue the furry body lines downward. From the neck, draw long, sweeping curved lines outward. Tip: These lines are the 'arms' of the wings, so keep them smooth and graceful.
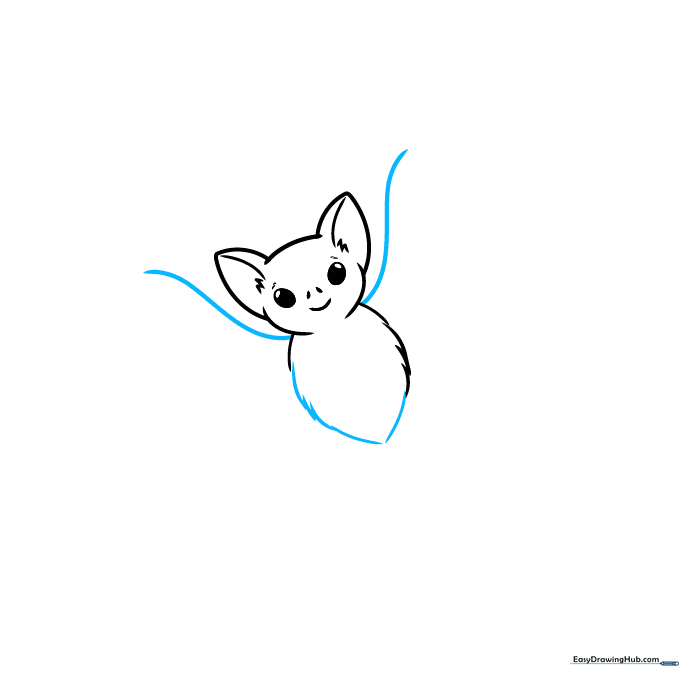
Step 5: The Thumb Claws
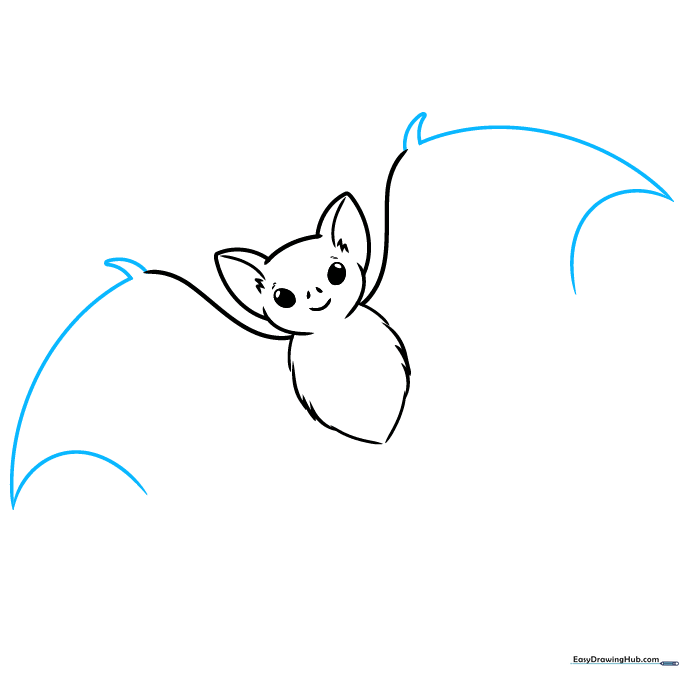
At the end of each wing line, draw a small, incomplete triangle. This represents the bat's thumb claw. Tip: Bats use these to hang onto surfaces, so make them look sharp!
Step 6: Enclosing the Wings
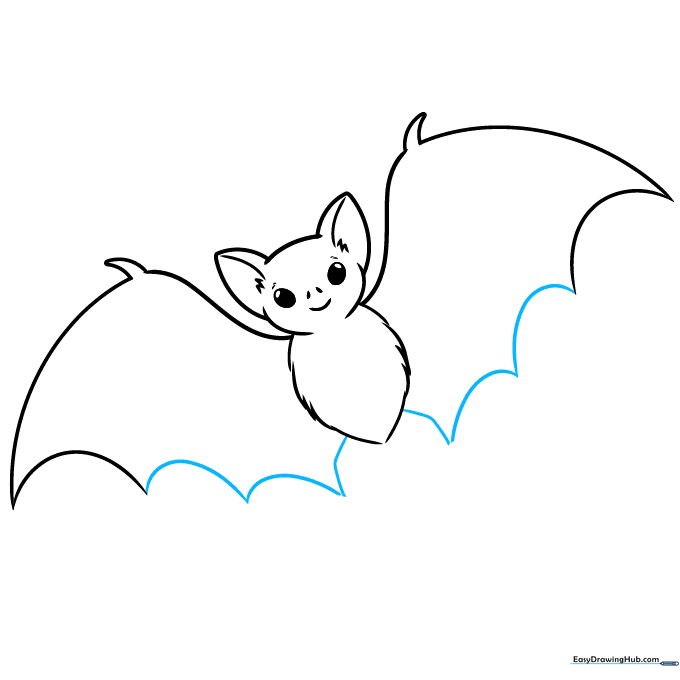
Connect the wing tips back to the body using a series of scalloped, curved lines. Tip: Think of these like the edge of an umbrella; they should look connected and fluid.
Step 7: Drawing the Feet
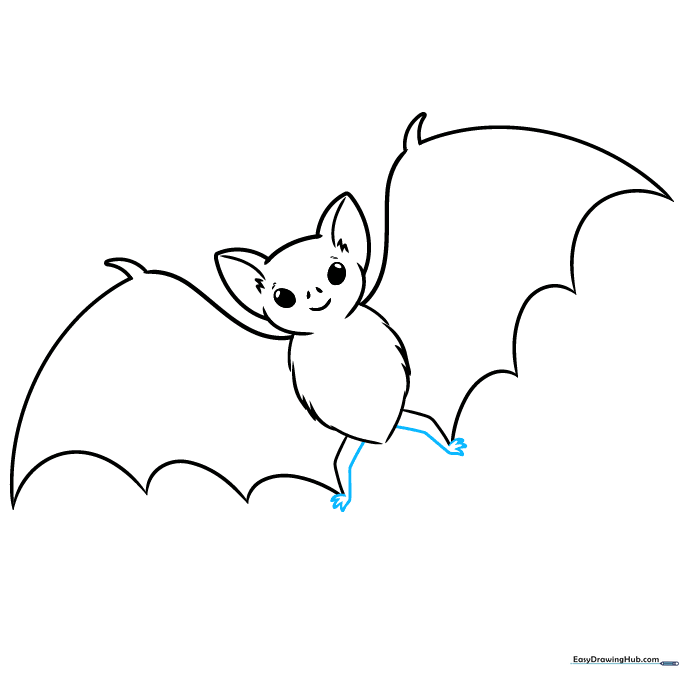
Draw small, jointed lines near the bottom of the wings for the legs. Use 'U' shapes to create the toes. Tip: Keep the feet small so the wings remain the focus of the drawing.
Step 8: Adding the Tail
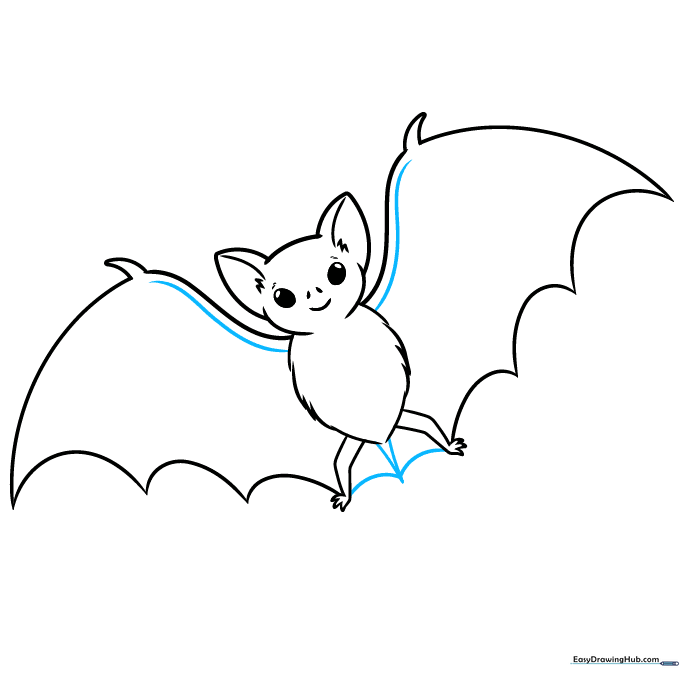
Draw a 'V' shape between the legs to indicate the tail. Connect the legs and tail with soft, curved lines to finish the lower body outline. Tip: This creates the membrane that helps the bat fly.
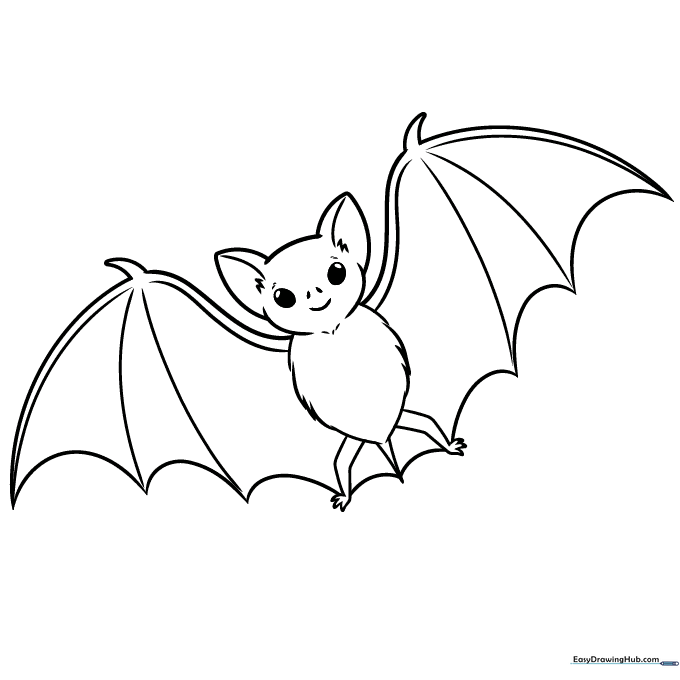
Step 9: Final Details
Draw lines across the wings to represent the finger bones. Add a few short, quick strokes under the chin for extra fluff. Tip: Vary the length of your lines to make the fur look natural and soft.
Step 10: Color Your Bat
Your outline is ready! Use dark colors like charcoal, brown, or deep purple for the body. Tip: Use a lighter shade of grey for the wing membranes to create contrast.
More Tutorials


