How to Draw a Bass: Easy 10-Step Guide for Kids
Ready to bring a freshwater bass to life? This tutorial is perfect for young artists ages 6+ looking to practice their line work and fish anatomy. Grab a pencil, an eraser, and some paper to start sketching this iconic game fish today.
🎯 Final Result

Step-by-Step Instructions
Step 1: Sketching the Lips

Start by drawing the fish's lips using two long, curved lines that form a sideways heart shape. Teacher's Tip: Keep your pencil pressure light here so you can easily adjust the shape if the mouth looks too wide.
Step 2: Defining the Mouth

Add detail to the mouth by drawing a sideways 'Y' shape for the edges of the lips. Include a small curved line for the tongue and a smile line at the corner. Tip: Use short, quick strokes to make the mouth look more natural.
Step 3: Shaping the Face

Outline the face using curved lines for the lower jaw and eye ridges. The brow should be an enclosed semi-circle. Tip: Imagine the fish is looking slightly upward to help you place the brow correctly.
Step 4: Drawing the Eye

Draw the eye by creating two nested circles, then shade the inner circle for the pupil. Tip: Leave a tiny white dot unshaded inside the pupil to give the fish a 'sparkle' or lifelike look.
Step 5: Outlining the Body

Connect two long, curved lines to form the body, tapering them as you reach the tail. Tip: Keep your lines fluid to mimic the streamlined shape of a swimming fish.
Step 6: Adding the Dorsal Fin
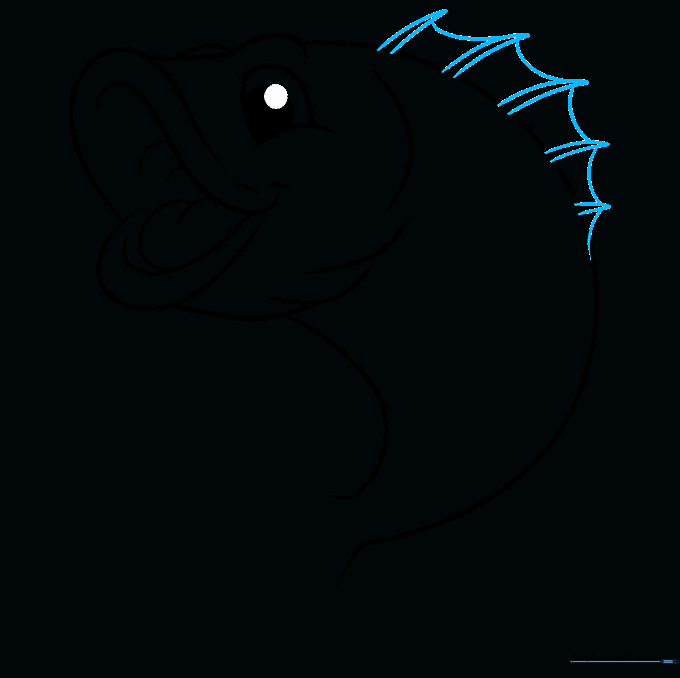
Draw the spiky dorsal fin on the back using pairs of curved lines that meet at sharp points. Tip: Vary the height of the spikes slightly to make the fin look more realistic.
Step 7: Pelvic and Anal Fins
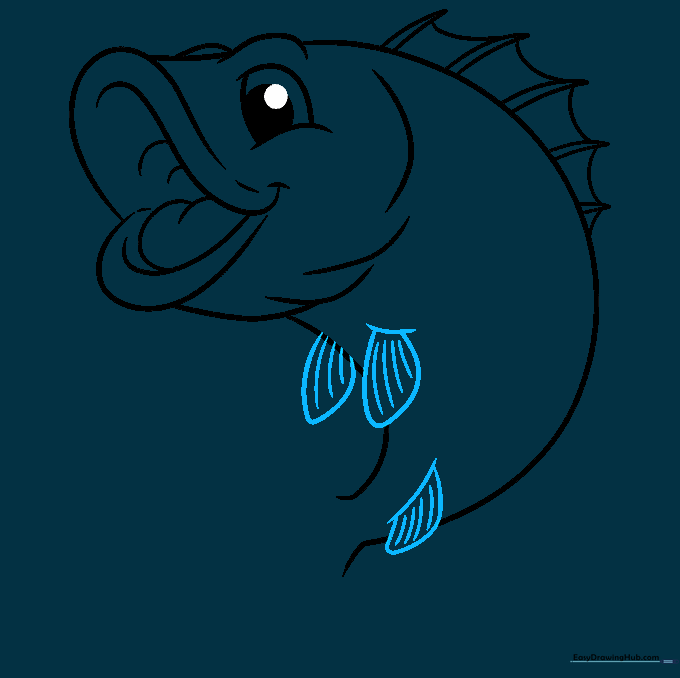
Add the pelvic and anal fins along the belly. Use curved lines to create an irregular, fan-like shape. Tip: Erase any overlapping body lines inside the fins to keep your drawing clean.
Step 8: Pectoral Fins

Draw the pectoral fin on the side of the body. Start with a curved base and add internal lines for texture. Tip: Think of this fin as a small wing that helps the fish steer.
Step 9: The Tail Fin
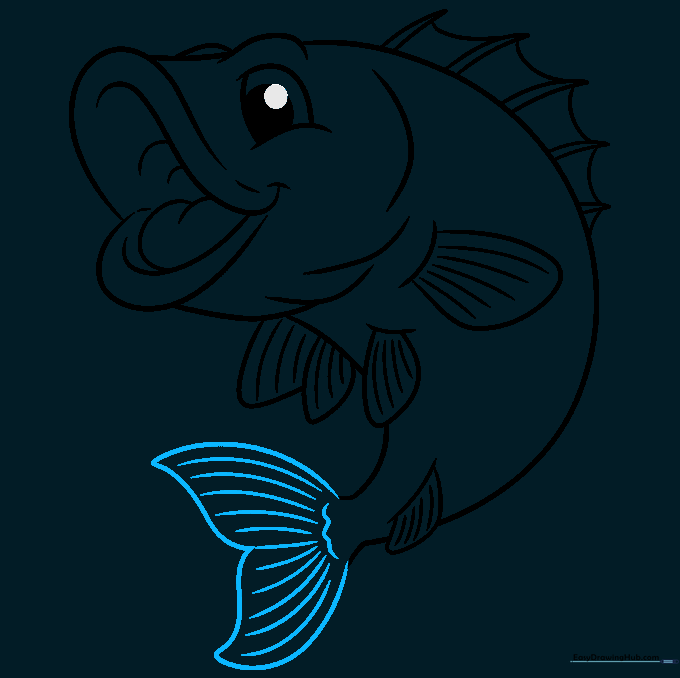
Finish the tail with a sweeping 'V' shape and add a wavy line at the base to separate it from the body. Tip: Add small, parallel curved lines inside the tail to represent the fin rays.
Step 10: Coloring Your Bass

Bring your fish to life with color! Use shades of olive green, brown, and cream. Tip: Use a darker green for the back and a lighter cream for the belly to create a realistic 3D effect.
More Tutorials


