How to Draw a Baby Tiger: Easy 10-Step Guide for Kids
Bring a playful tiger cub to life with this beginner-friendly drawing tutorial. Designed for young artists ages 5 and up, this activity requires only a pencil, paper, and an eraser. Follow along to build confidence in basic shapes while creating your own adorable jungle friend.
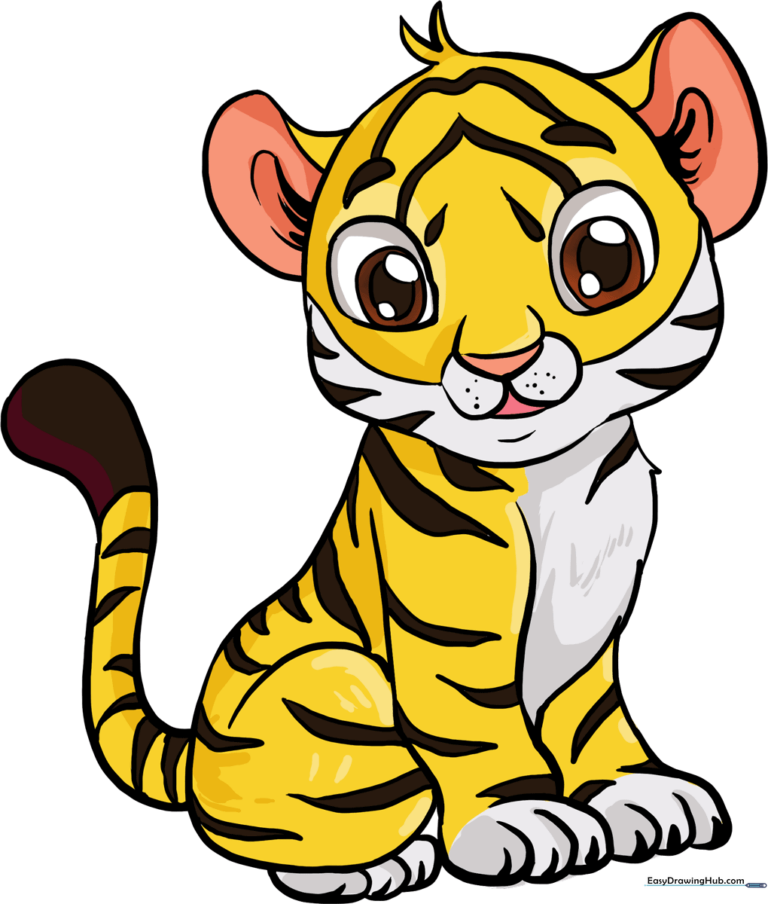
🎯 Final Result
Step-by-Step Instructions
Step 1: Sketching the Head Shape

Draw a rounded shape for the head, including a slight bulge for the chin and cheeks. Add small, sharp triangles at the top to represent tufts of fur. Teacher's Tip: Keep your pencil pressure light here so you can easily refine the shape later.
Step 2: Defining the Face

Sketch two egg-shaped ovals for the eyes. Use overlapping 'U' shapes to form the snout and mouth. Add a small line for the nose and a horizontal line for the chin. Tip: Use the eyes as a guide for spacing—keep them level with each other.
Step 3: Adding the Ears
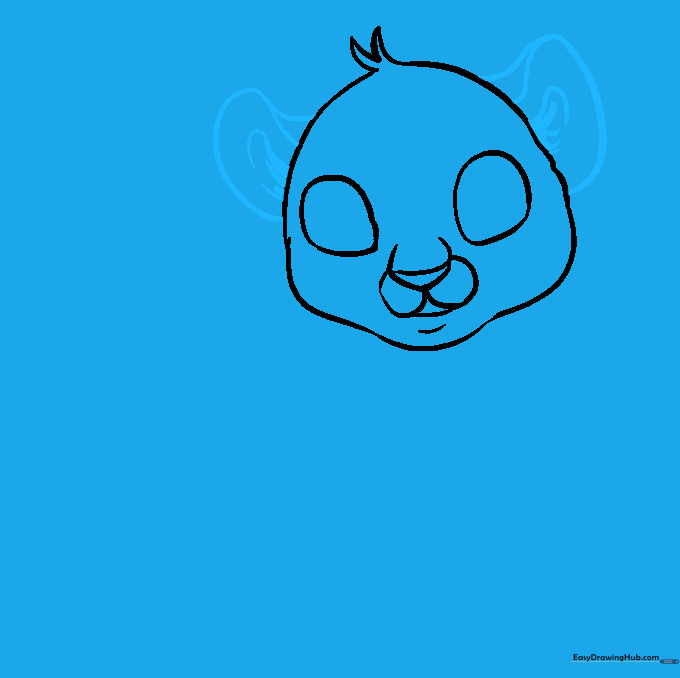
Draw two large, curved lines at the top of the head to create the ears. Add a smaller curved line inside each for depth. Tip: Think of these as semi-circles; keep them symmetrical to make the tiger look balanced.
Step 4: Drawing the Chest and First Paw
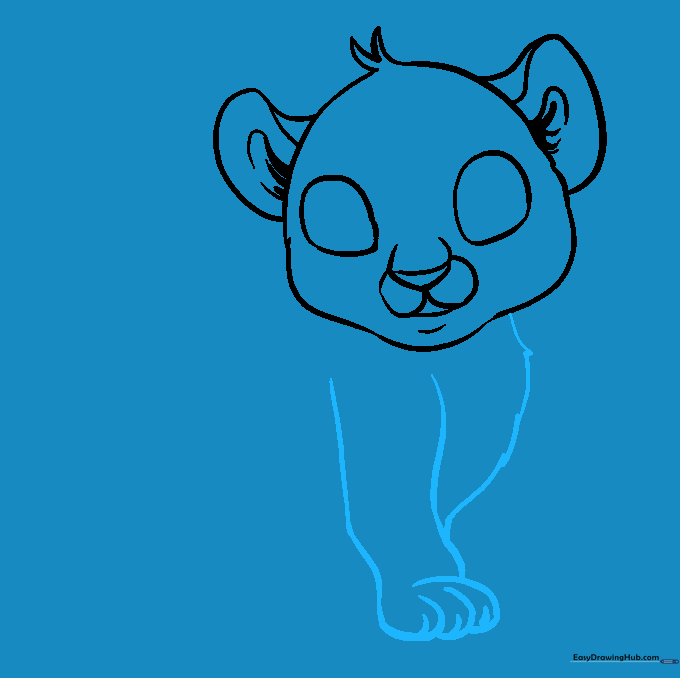
Sketch the chest with soft, curved lines. Draw two long lines for the leg, finishing with 'U' shapes for the toes. Add a tiny line on each toe for the claw. Tip: Make the paw look 'chunky' to emphasize that it's a baby tiger.
Step 5: Adding the Second Foreleg

Draw the second foreleg next to the first one, repeating the 'U' shape technique for the toes. Tip: Ensure the paws are at the same height so your tiger looks like it is standing on flat ground.
Step 6: Sketching the Back and Hip
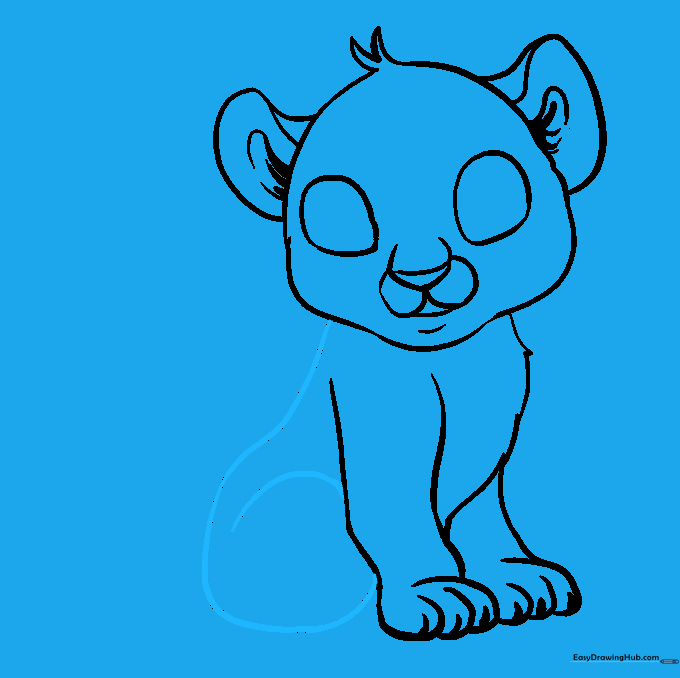
Use a long, sweeping curved line to form the tiger's back and rear hip. Tip: Imagine the curve of a letter 'C' to get the right shape for the hip.
Step 7: Adding the Rear Paw
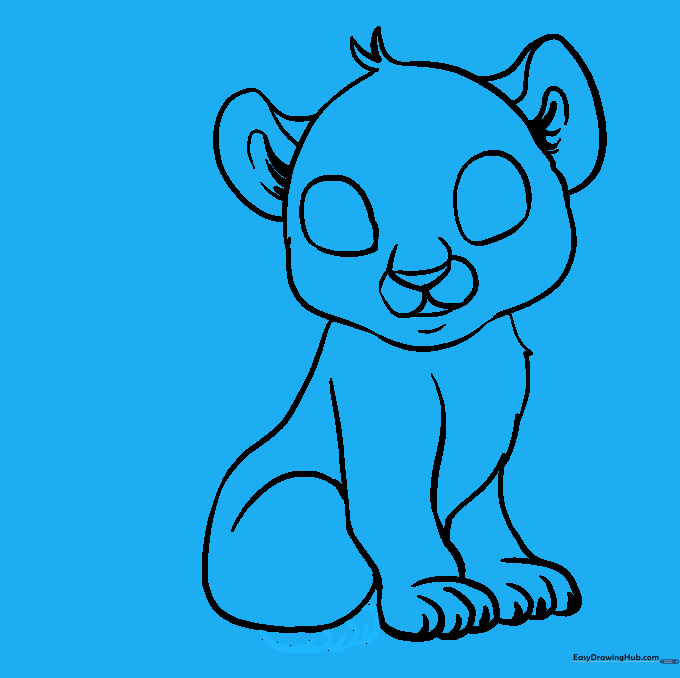
Enclose several overlapping rounded shapes beneath the hip to create the back paw. Add small lines for the claws. Tip: Keep the paw slightly smaller than the front ones to show perspective.
Step 8: The Tail and Stripes

Draw a long, curved tail and add stripes across the body. Stripes should be two curved lines meeting at a point. Tip: Vary the length of the stripes to make the fur look natural.
Step 9: Final Facial Details

Add whiskers, dots on the muzzle, and refine the eyes with smaller circles inside. Tip: Use a darker pencil or a fine-liner pen to make these final details pop.
Step 10: Coloring Your Masterpiece
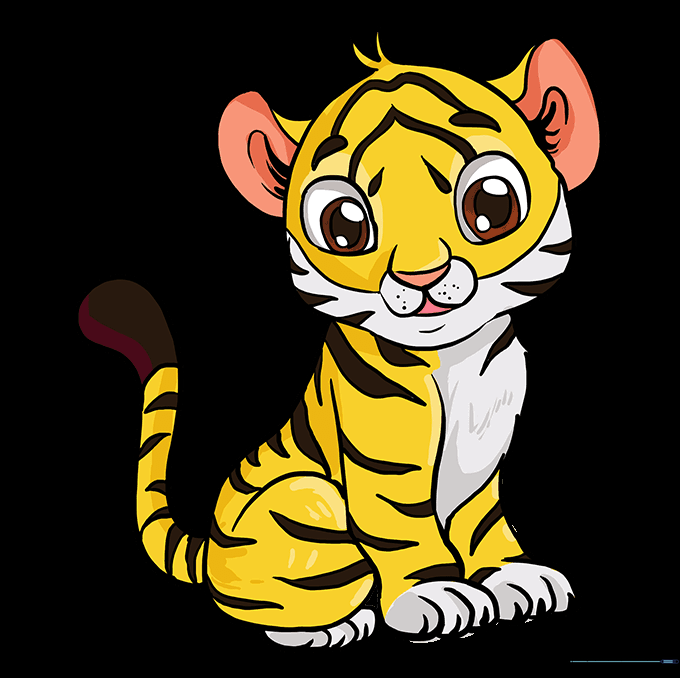
Bring your tiger to life! Use bright orange for the body and black for the stripes. Tip: Leave the belly and muzzle white for a realistic look.
More Tutorials


