How to Draw a Baby Seal: Easy 10-Step Guide for Kids
Bring a charming baby seal to life with this simple, step-by-step drawing tutorial designed for ages 5 and up. You only need a pencil, an eraser, and a piece of paper to get started. Follow along to develop your sketching confidence and create a lovable arctic friend.
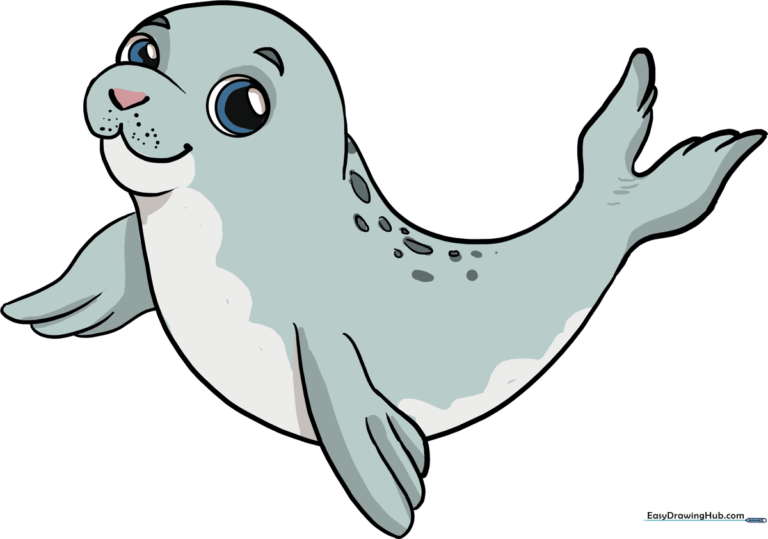
🎯 Final Result
Step-by-Step Instructions
Sketching the Head and Back

Draw two gentle, overlapping curved lines to form the top of the head and the back. Teacher's Tip: Keep your pencil grip loose and light so you can easily adjust the shape later.
Defining the Snout

Use small 'U' shaped lines to sketch the snout, creating a soft 'W' shape for the upper lip. Teacher's Tip: Think of this as the seal's cute, wiggly nose area.
Forming the Body

Extend a long, smooth curved line from the chin to create the belly, tapering it toward the tail. Teacher's Tip: Try to make this one continuous, fluid motion for a more natural look.
Adding the Tail Flippers

Draw a central 'U' shape at the tail base and connect it with short, overlapping curves to create the flippers. Teacher's Tip: Overlapping lines help create the illusion of depth and texture.
Sketching the First Flipper
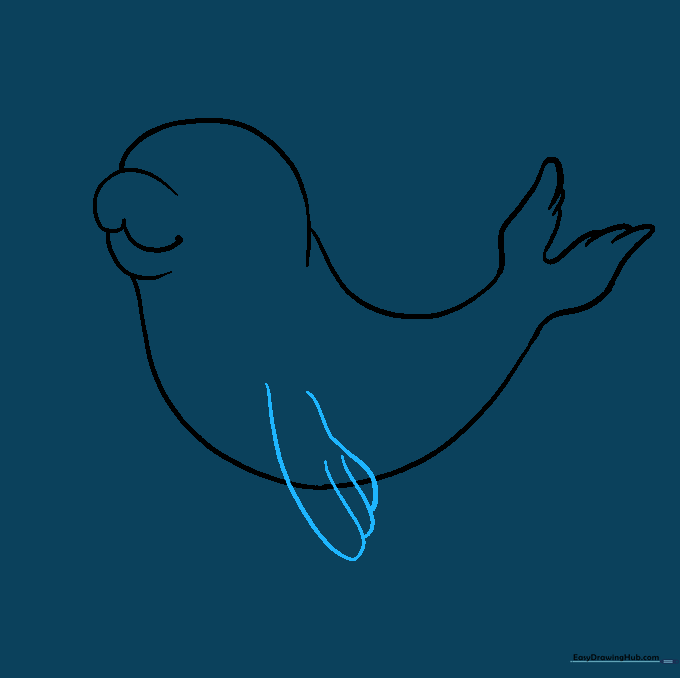
Extend a curved line from the torso to form the side flipper, using overlapping strokes to give it shape. Teacher's Tip: Imagine the flipper is resting on the ice.
Cleaning Up

Gently erase any overlapping guide lines inside the flipper to make your drawing look clean and professional. Teacher's Tip: Use a soft eraser and brush away the crumbs with your hand or a clean cloth.
Drawing the Second Flipper

Add the second flipper near the neck using similar overlapping curved lines. Teacher's Tip: This adds a sense of perspective, showing the seal is turning slightly.
Adding Expressive Eyes

Draw large circles for the eyes, adding smaller circles and ovals inside for the pupils. Add a curved line above for the eyebrow. Teacher's Tip: The eyes are the soul of your drawing—take your time to make them look bright and friendly!
Adding Nose and Texture
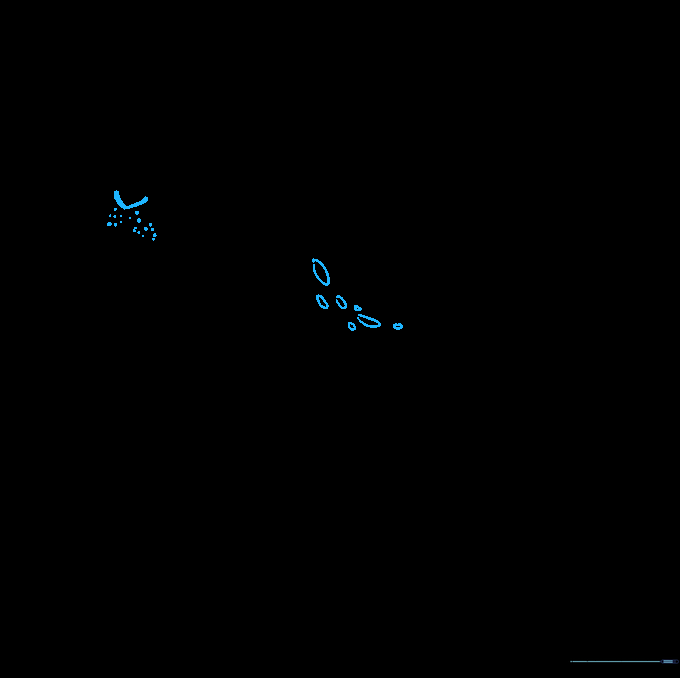
Draw a 'V' shaped nose, add dots for whiskers, and sprinkle small circles on the back for spots. Teacher's Tip: Vary the size of the spots to make the fur look more realistic.
Bringing Your Seal to Life with Color

Add color to your seal! Use shades of grey, brown, or white to give it a natural look. Teacher's Tip: Use light, circular motions with your colored pencils for a smooth, even coat.
More Tutorials


