How to Draw a Baby Giraffe: Easy 10-Step Guide for Kids
Bring the safari home with this simple, step-by-step guide designed for young artists ages 5 and up. You only need a pencil, an eraser, and a piece of paper to get started. Follow along to build confidence and develop essential fine motor skills while creating your own adorable baby giraffe.
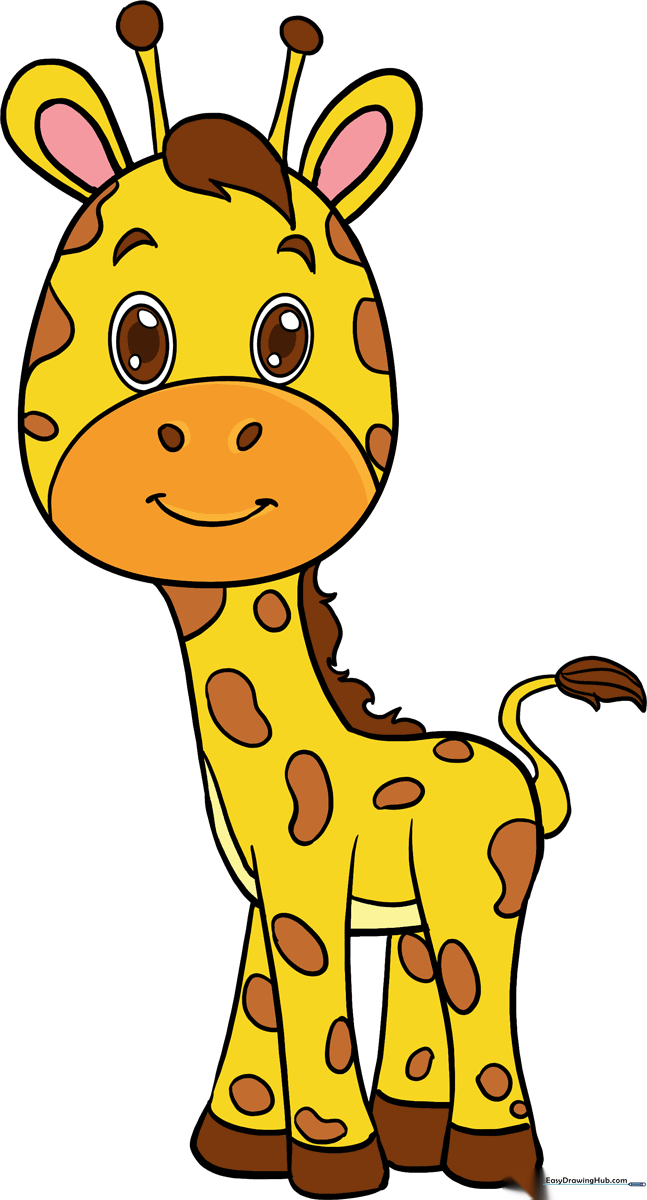
🎯 Final Result
Step-by-Step Instructions
Step 1: Sketching the Head

Draw a light circle to serve as the base for the head. Teacher's Tip: Keep your pencil strokes very faint so you can easily erase them later—think of this as a 'ghost' line.
Step 2: Defining the Snout
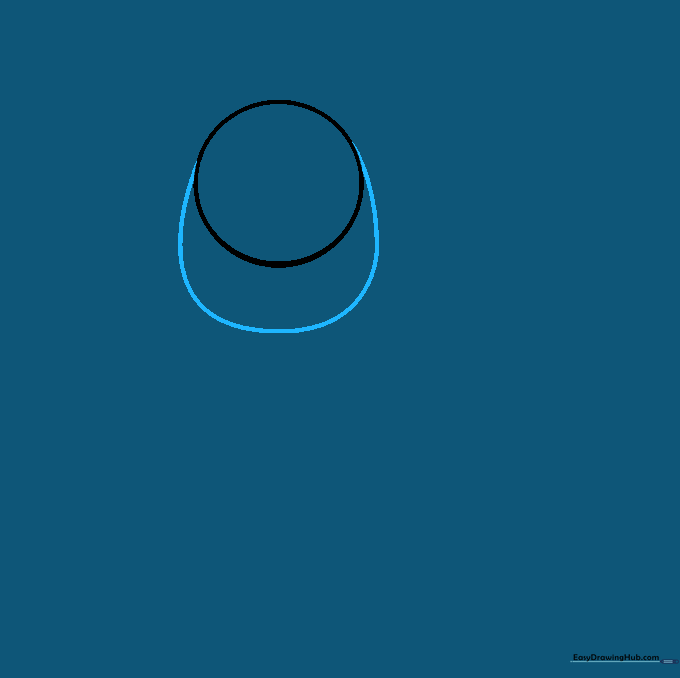
Extend a long, curved line from one side of the circle to the other, dipping beneath it to create the snout. Tip: Make sure the curve is smooth to give the giraffe a friendly, rounded look.
Step 3: Cleaning the Outline

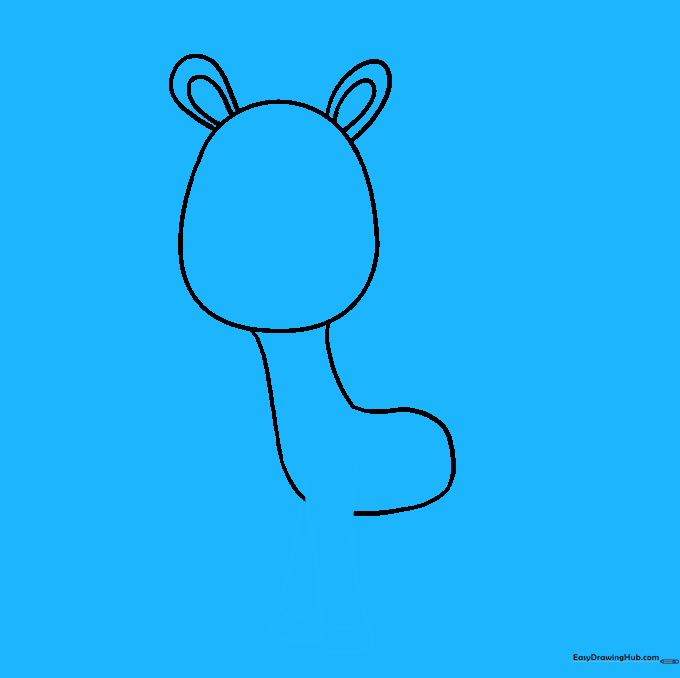
Carefully erase the overlapping guide lines inside the head shape to leave a clean, egg-like outline. Tip: Use a soft eraser and gentle pressure to keep your paper smooth.
Step 4: Adding Ears

Draw two 'U' shaped lines on the sides of the head for ears, then add smaller 'U' shapes inside for detail. Tip: Giraffe ears are quite large; don't be afraid to make them nice and tall!
Step 5: Forming the Neck and Body
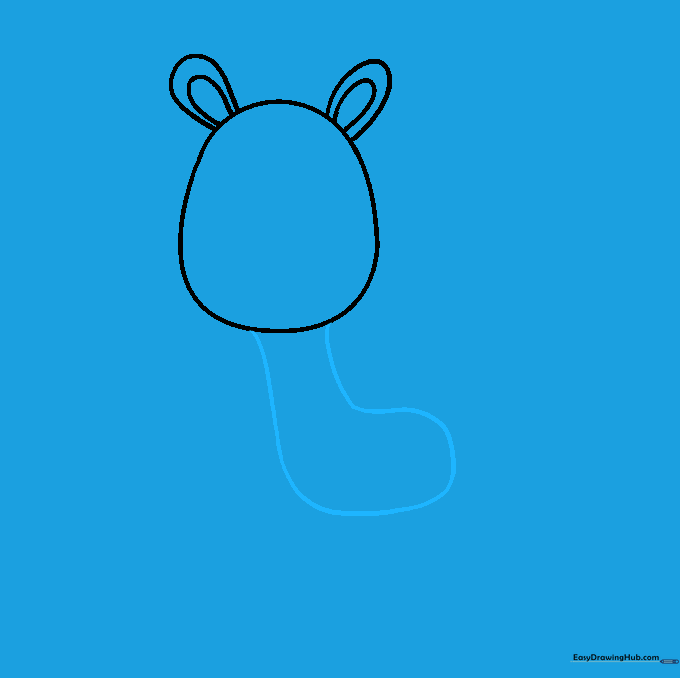
Draw a long, curved line down from the head, doubling back to create a rounded 'L' shape for the neck and body. Tip: Keep the neck thick enough to support the head; giraffes have very strong necks!
Step 6: Drawing Front Legs
Sketch two pairs of curved lines for the forelegs, adding a small horizontal band at the bottom for hooves. Tip: Make the legs slightly wider at the top than the bottom for a realistic look.
Step 7: Adding Rear Legs
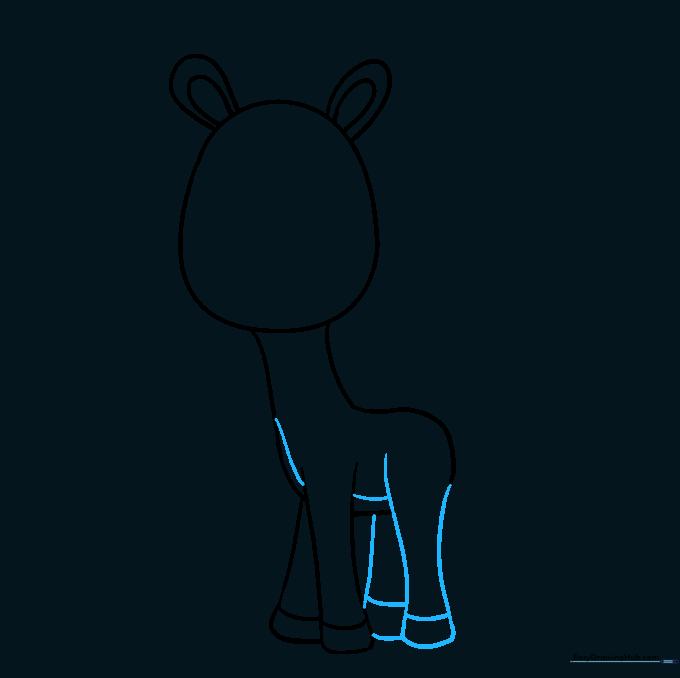
Draw the back legs using curved lines, ensuring they look sturdy. Add the hoof bands just like you did for the front legs. Tip: If the legs look a bit stiff, add a slight curve to the joints to show movement.
Step 8: Horns, Mane, and Tail
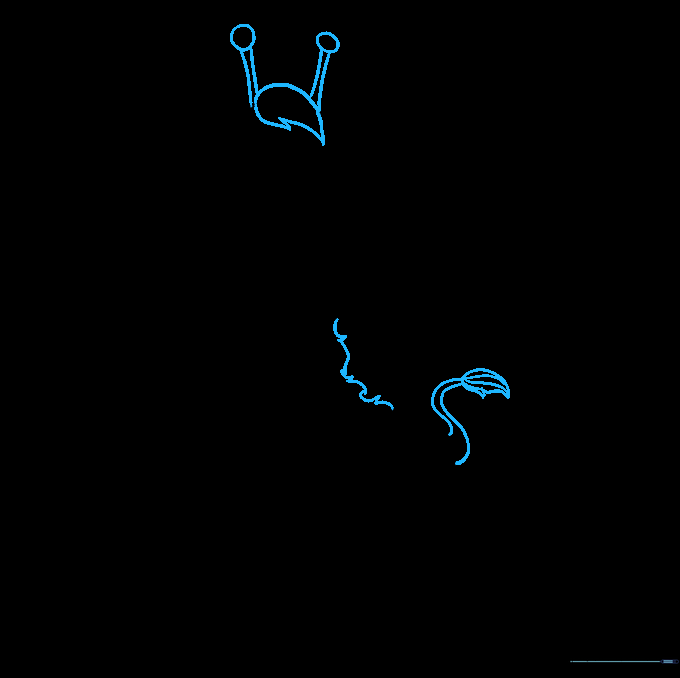
Add the ossicones (horns) with small circles on top, a jagged mane along the neck, and a swishy tail with a tufted end. Tip: The tail tuft should look like a little teardrop shape!
Step 9: Facial Features and Spots
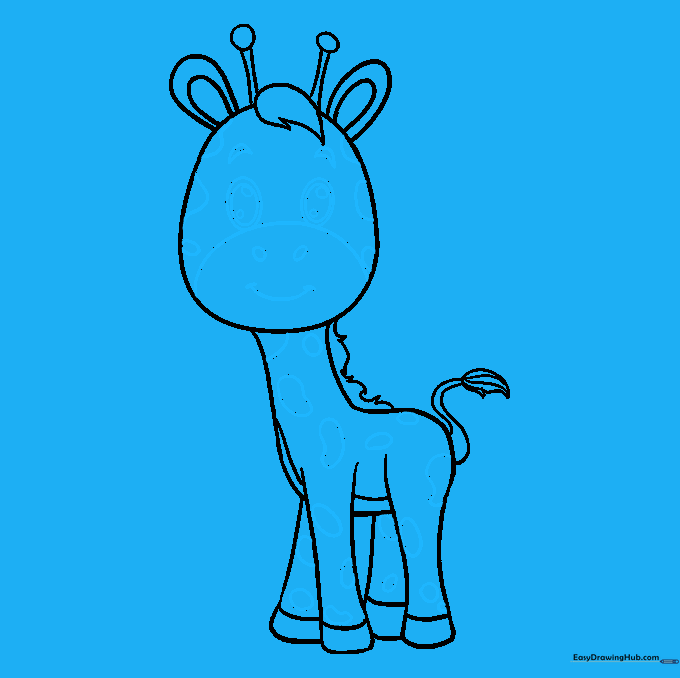
Draw expressive eyes, a smiling mouth, and nostrils. Finally, add irregular shapes all over the body for spots. Tip: Vary the size of the spots to make your giraffe look more natural.
Step 10: Bringing It to Life with Color
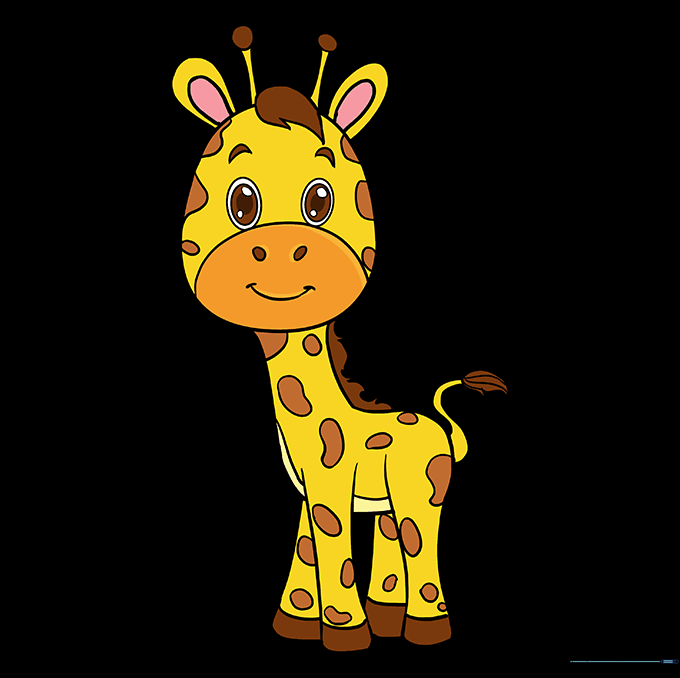
Color your giraffe! Use warm yellows and tans for the body, and rich browns for the spots. Tip: Try using light orange or reddish-brown for a unique, vibrant look.
More Tutorials


