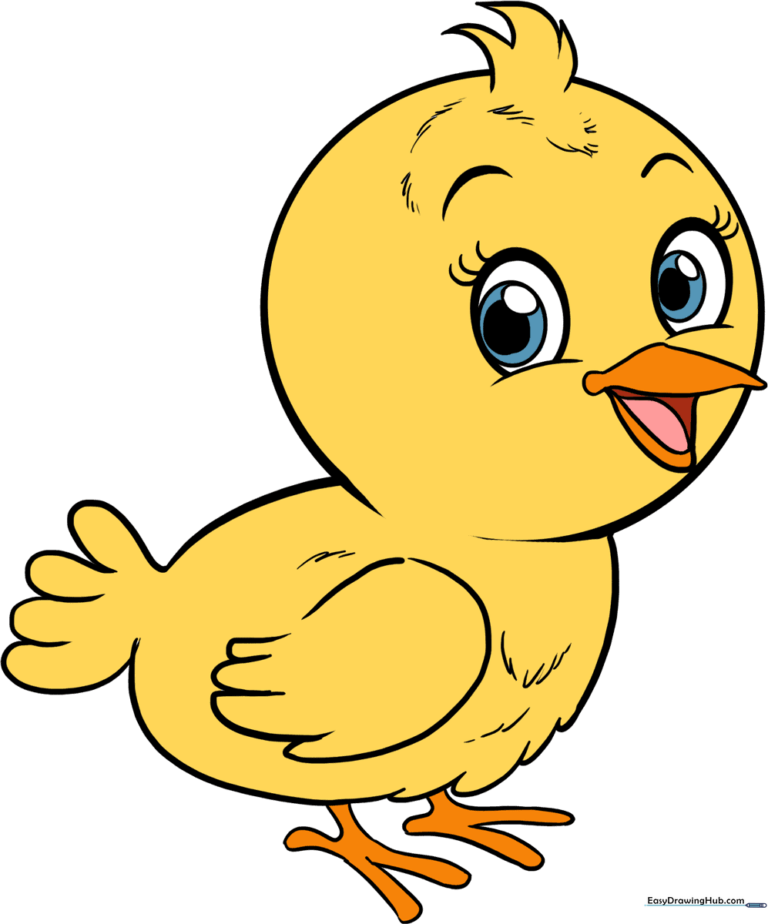
How to Draw a Baby Bird: Easy 10-Step Guide for Kids
Bring a chirpy little friend to life with this simple, 10-step drawing guide designed for young artists. All you need is a pencil, an eraser, and a piece of paper to get started. By the end of this lesson, you'll have mastered basic shapes and feather textures while building your artistic confidence.
🎯 Final Result
Step-by-Step Instructions
Step 1: Sketching the Head

Draw a light circle to form the bird's head. Teacher's Tip: Keep your pencil strokes very soft so you can easily erase any overlapping lines later.
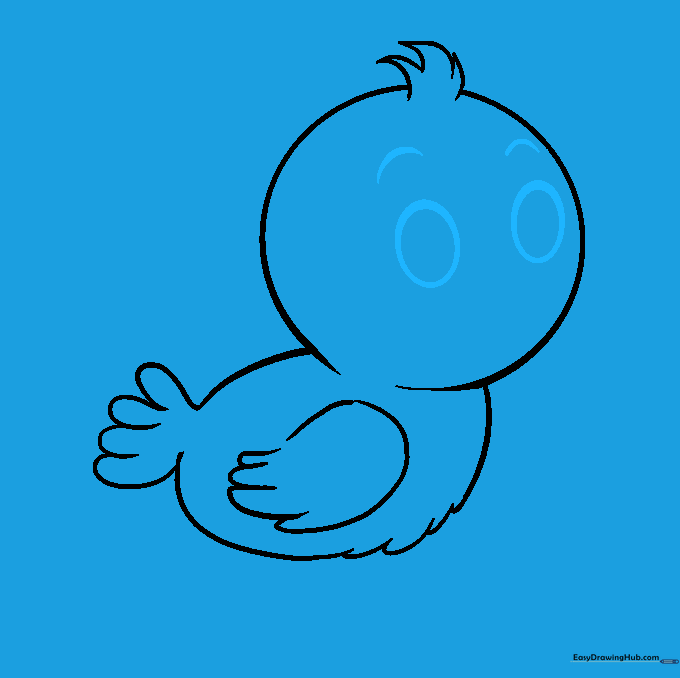
Step 2: Shaping the Body
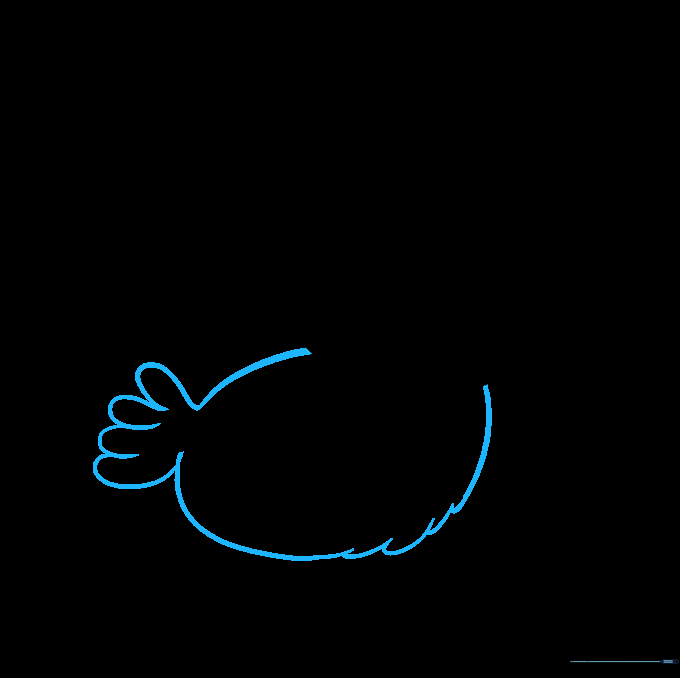
Use curved lines to sketch the body. Create a long 'U' shape for the tail and overlapping curves for the belly. Teacher's Tip: Think of these as soft, rounded bumps to make your bird look fluffy.
Step 3: Drawing the Wing
Draw the shoulder of the wing with a 'U' shape, then add long, curved lines for the feathers. Teacher's Tip: Make the wing look like a gentle wave to capture that soft, baby-bird look.
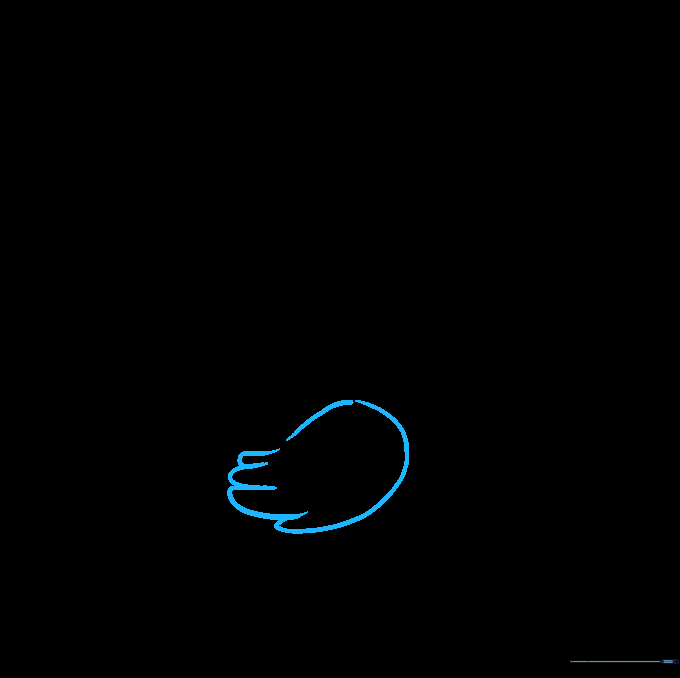
Step 4: Refining the Outline

Carefully erase the part of the head circle that overlaps with the body. Teacher's Tip: Use a clean eraser and gentle pressure so you don't smudge your paper.
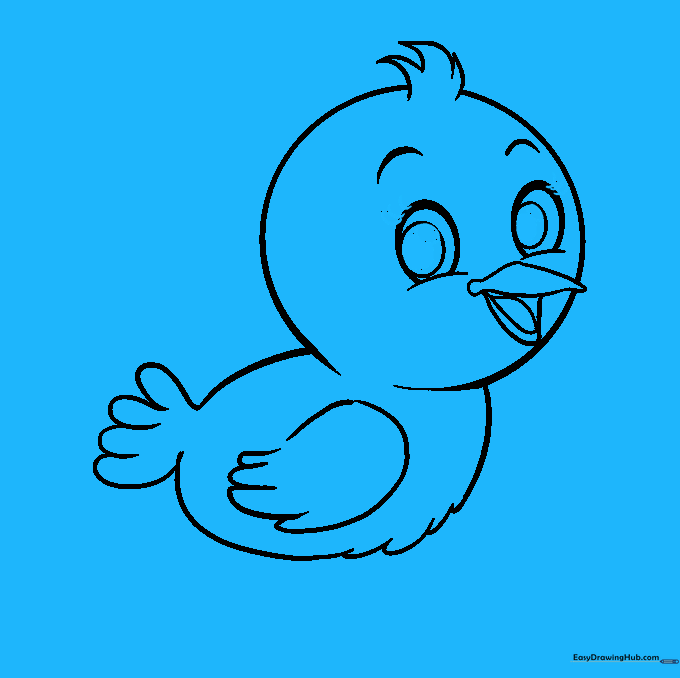
Step 5: Adding Head Feathers
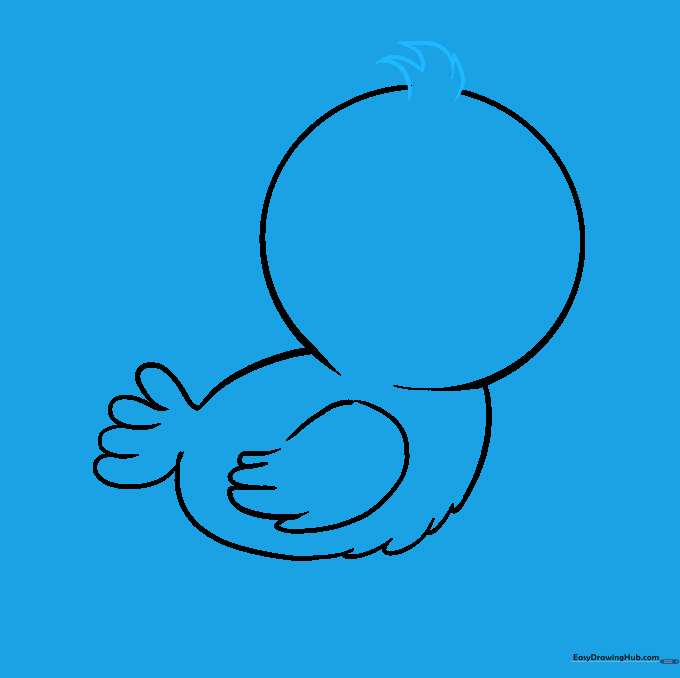
Add a cute tuft of feathers on top of the head using short, sharp, curved lines. Teacher's Tip: Vary the length of the lines to make the feathers look natural and messy.
Step 6: Sketching the Eyes
Draw two large ovals for the eyes and a curved line above each for eyebrows. Teacher's Tip: Placing the eyes slightly lower on the head makes the bird look younger and cuter!
Step 7: Drawing the Beak

Refine the eyes, then sketch the beak using two curved triangles. Add a line inside for the mouth and a small curve for the tongue. Teacher's Tip: Keep the beak small to emphasize the 'baby' features.
Step 8: Adding Eye Details
Add pupils and eyelashes to give your bird personality. Teacher's Tip: Shade the pupils dark, but leave a tiny white dot uncolored to make the eyes look shiny and alive.
Step 9: Drawing the Feet
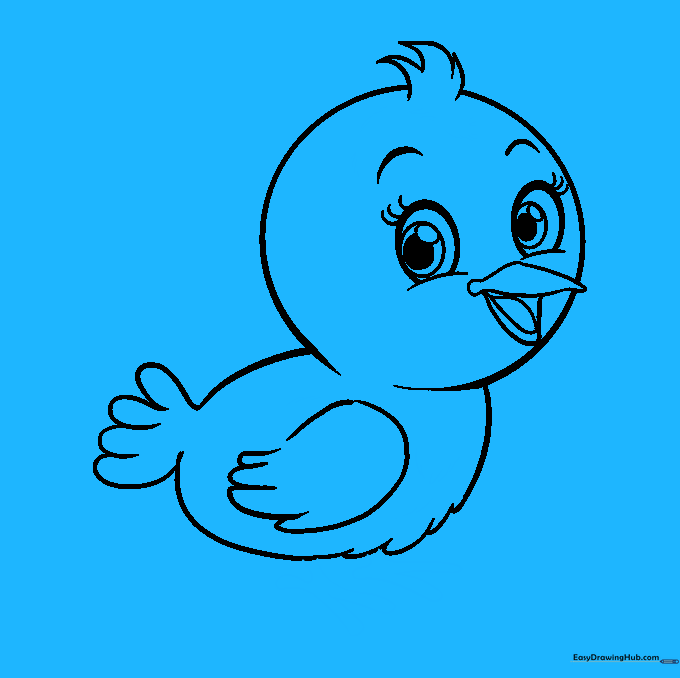
Draw the feet using simple 'X' or 'K' shapes connected to the body. Add some hatching lines for feather texture. Teacher's Tip: Don't worry about perfect feet; simple shapes work best for cartoon birds!
Step 10: Adding Color
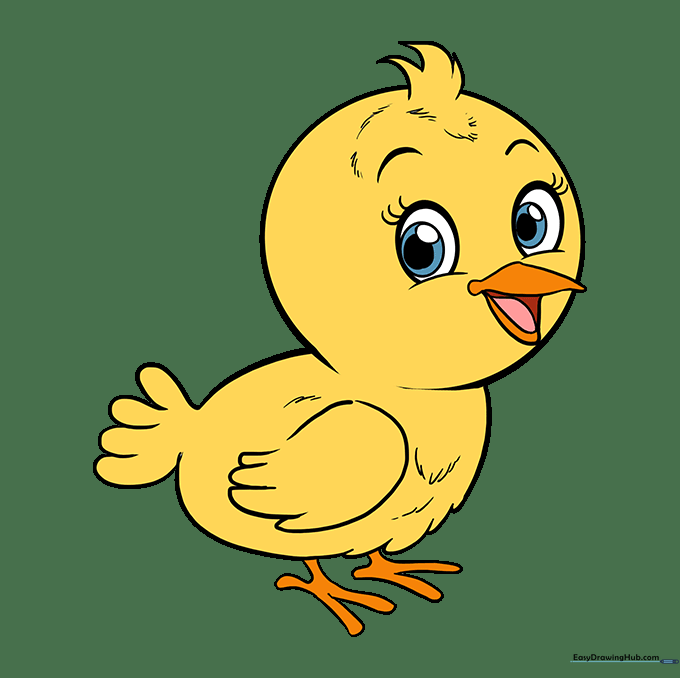
Bring your bird to life with color! Yellow is classic for baby birds, but feel free to experiment with speckles or stripes. Teacher's Tip: Use light pressure with your colored pencils to create soft, blended gradients.
More Tutorials


