How to Draw a 3D House: Easy Step-by-Step Guide
Ready to bring your drawings to life? This 3D house tutorial is perfect for artists ages 5 and up looking to master basic perspective. Grab a pencil, an eraser, and a piece of paper to build your own architectural masterpiece in just a few simple steps.
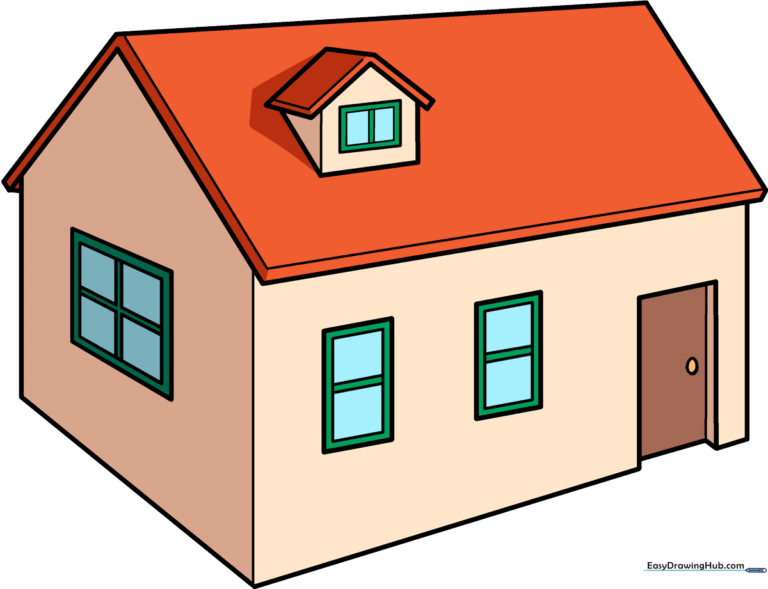
🎯 Final Result
Step-by-Step Instructions
Step 1: Sketching the Front Door
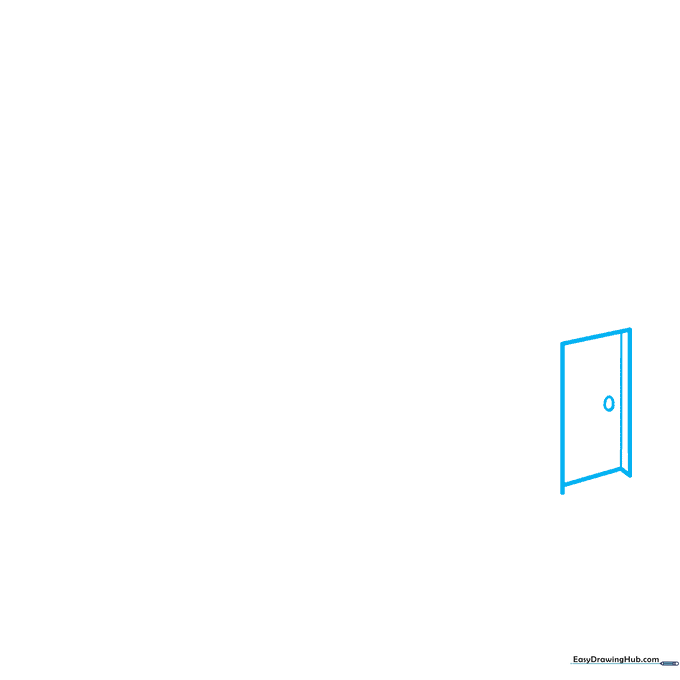
Start by drawing an angled rectangle for the door. Add short lines protruding from three corners and connect them to create depth. Tip: Keep your pencil pressure light so you can easily adjust the angles later.
Step 2: Defining the Walls
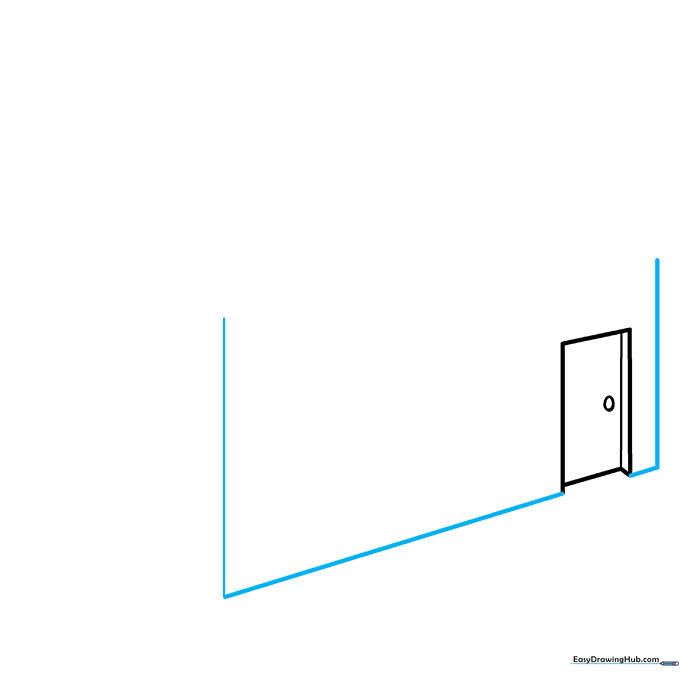
Extend diagonal lines from the bottom corners of your door to establish the base of the house. Draw vertical lines upward from these points to create the front walls. Tip: Ensure your vertical lines are parallel to keep the house looking sturdy.
Step 3: Creating the Roofline
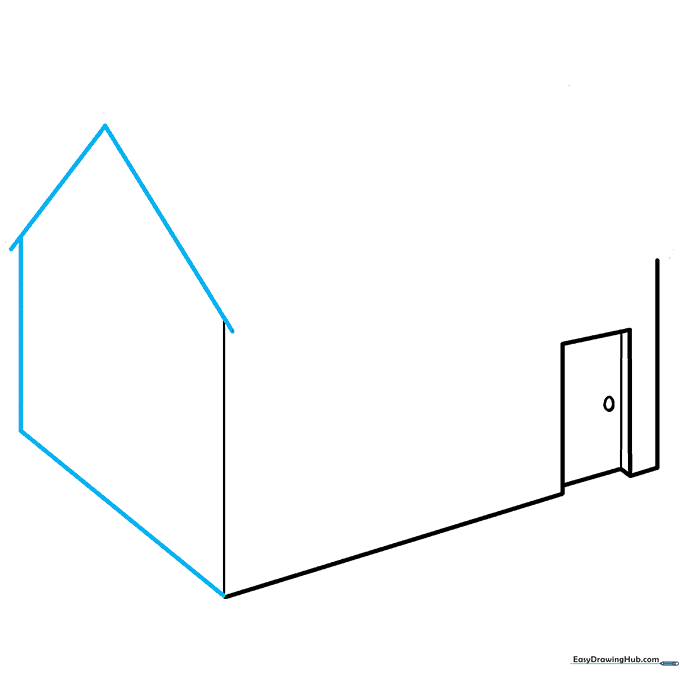
Draw a straight line from the near corner and extend it vertically to close the side wall. Add a 'V' shaped line above the walls to form the peak of your roof. Tip: Imagine the roof is a tent—keep the 'V' centered for a balanced look.
Step 4: Connecting the Roof
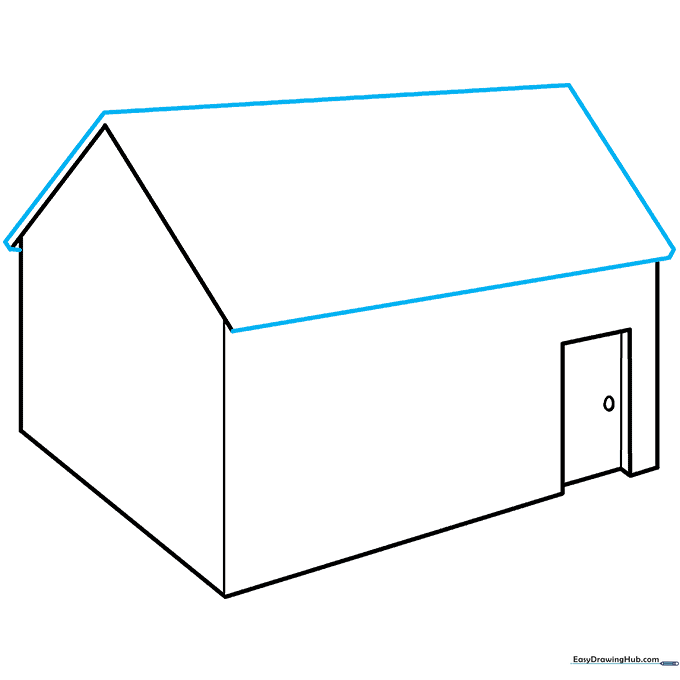
Draw two lines parallel to the front of the house to define the roof's thickness. Connect these to the 'V' shape with diagonal lines. Tip: Think of this as drawing a box on top of your house structure.
Step 5: Adding Roof Depth
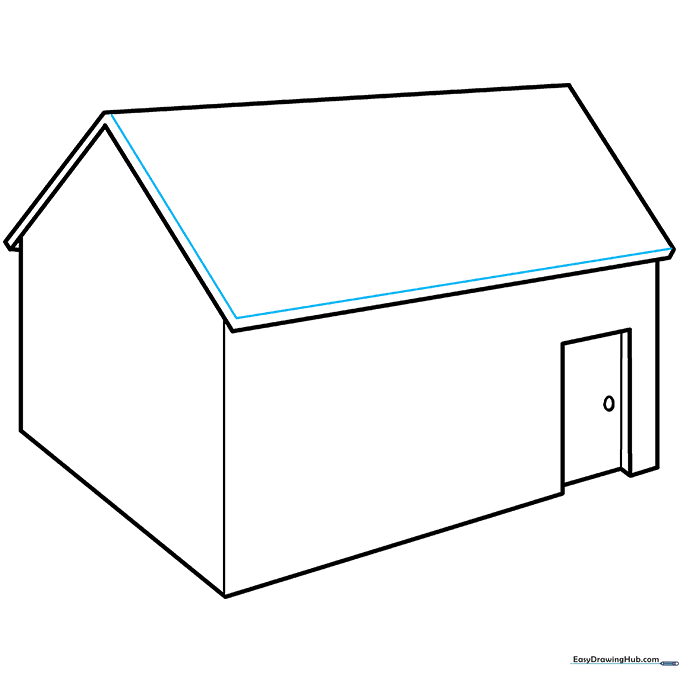
Draw an 'L' shaped line along the edge of the roof to give it a realistic 3D overhang. Tip: This small detail makes the roof look like it has actual material thickness.
Step 6: First Window Detail

Draw a rectangle on the side wall, then add a smaller rectangle inside it. Draw two horizontal lines through the center to create window panes. Tip: Use a light touch for the panes so they don't overpower the house outline.
Step 7: Adding a Second Window
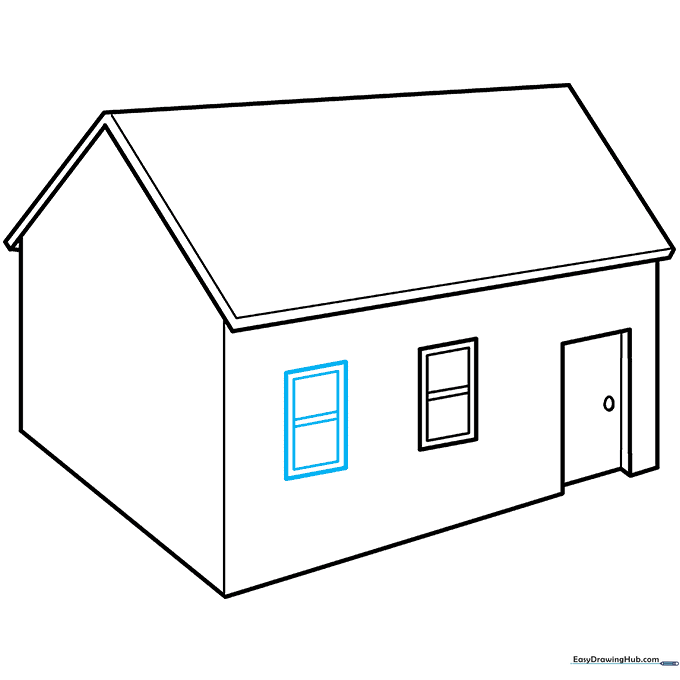
Repeat the process from Step 6 to add a matching window next to the first one. Tip: Try to keep the windows aligned horizontally to make the house look architecturally sound.
Step 8: Large Feature Window
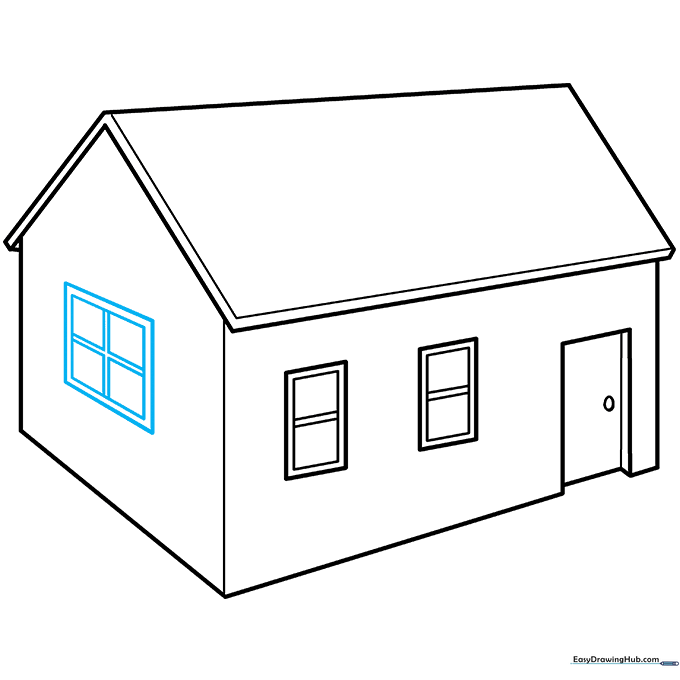
Draw a larger rectangle on the other side. Inside, draw a plus sign (+) to create a four-paned window. Tip: A larger window adds variety and makes the drawing more interesting.
Step 9: Adding a Dormer Window
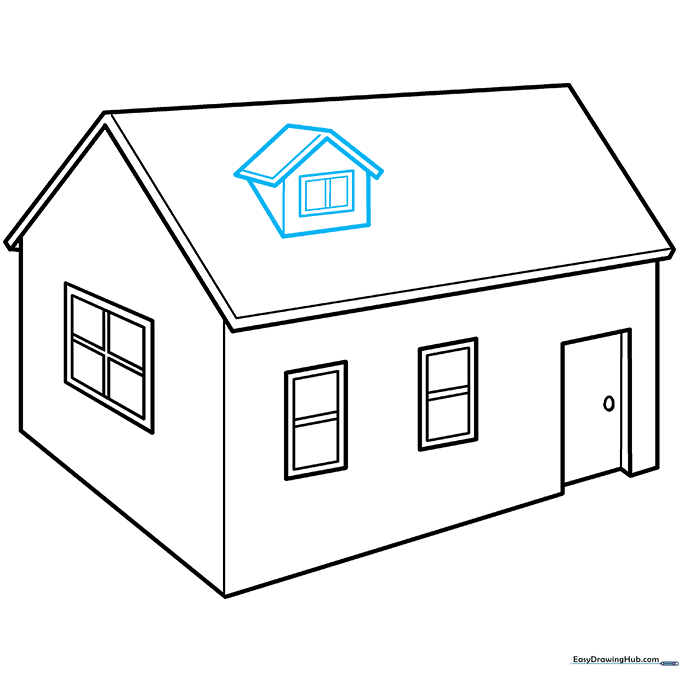
Draw a small rectangle on the roof, frame it with a pentagon shape, and add vertical lines to create a dormer window. Tip: This adds a 'storybook' feel to your house design.
Step 10: Bringing it to Life with Color
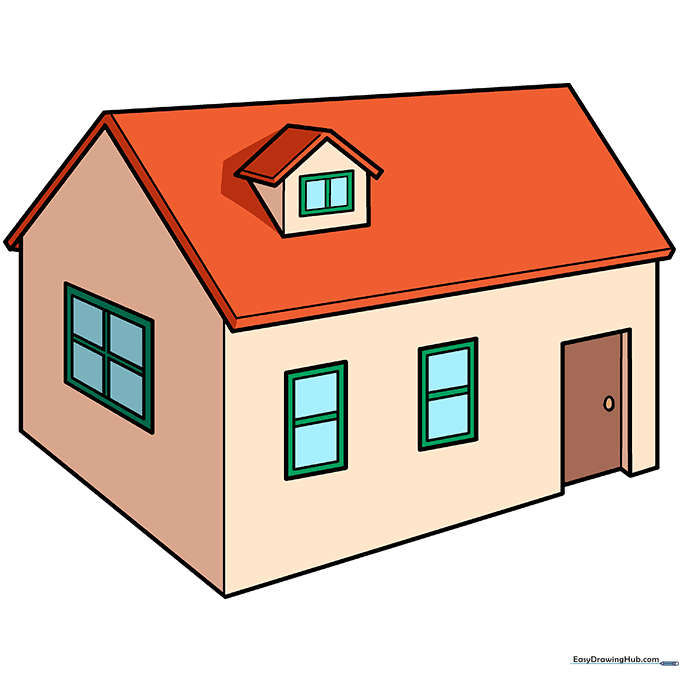
Time to color! Use cream for the walls, orange for the roof, and green for the frames. Tip: Use darker shades on the side of the house facing away from the 'sun' to enhance the 3D effect.
More Tutorials


