How to Draw a 3D Hole: Easy Optical Illusion Guide
Ready to trick your eyes? This 3D hole tutorial is a fantastic way for artists ages 8+ to explore perspective and depth. You only need a pencil, a ruler, and a piece of paper to create this classic optical illusion that looks like it's popping right off the page.
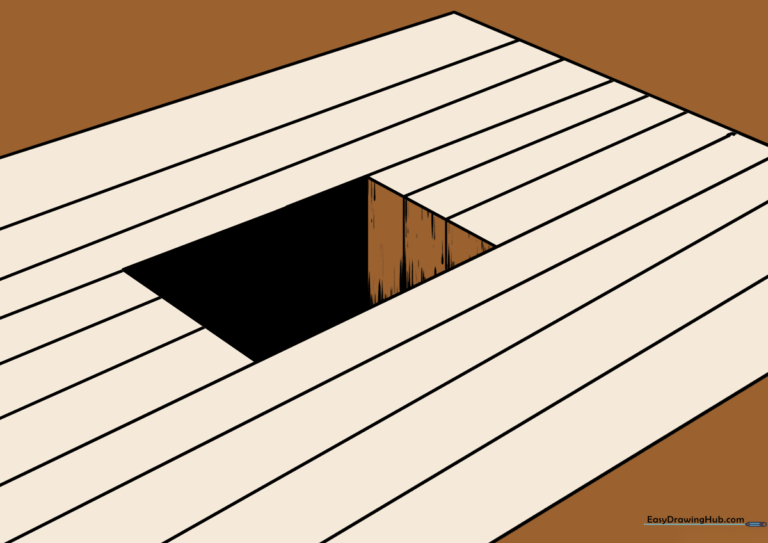
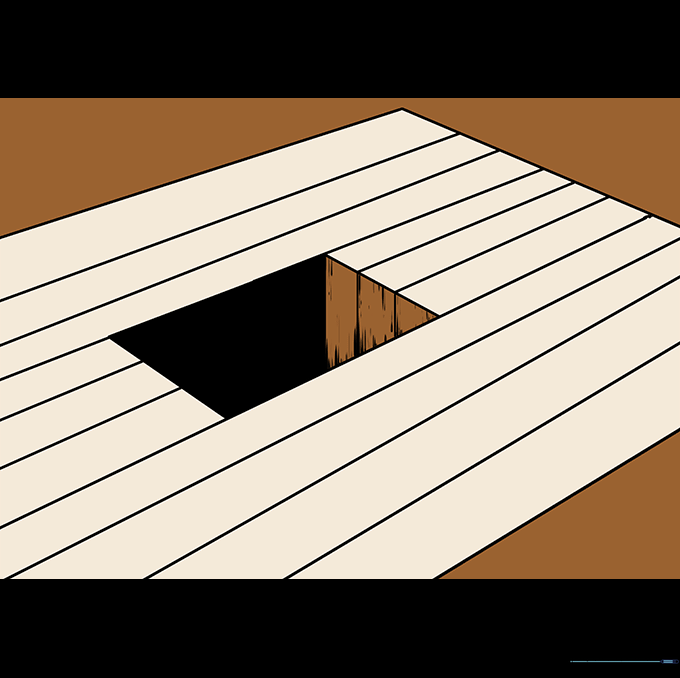
🎯 Final Result
Step-by-Step Instructions
Step 1: Establishing the Back Corner
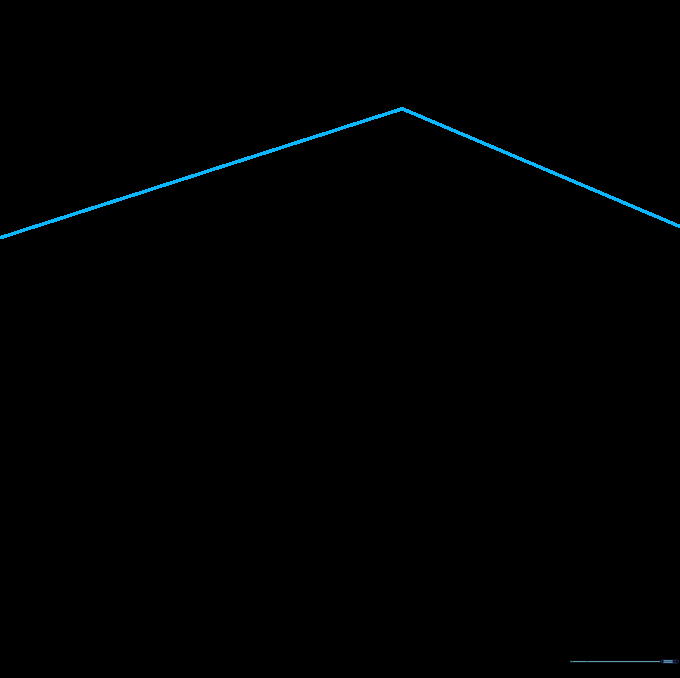
Draw two straight lines meeting at an angle, like the corner of a room. Make one line slightly longer than the other. Teacher's Tip: Use a ruler to keep these lines crisp; precision here is the secret to making the illusion work later!
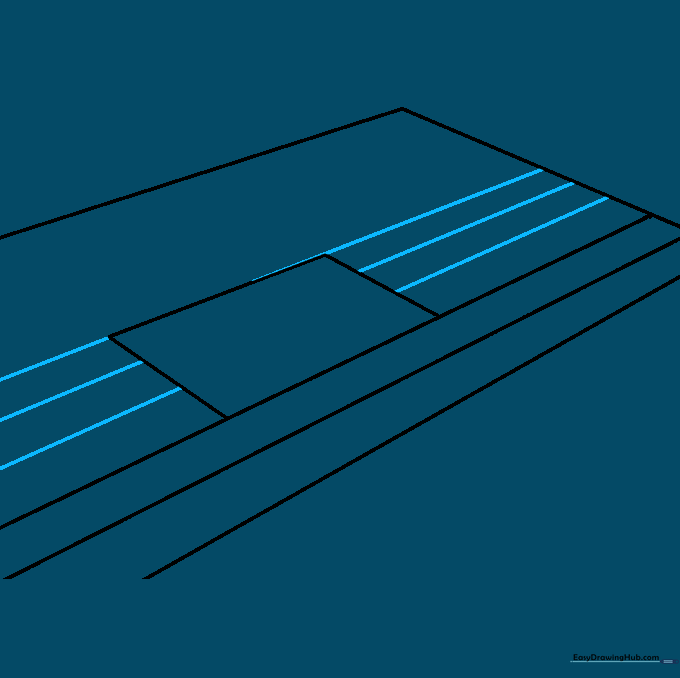
Step 2: Adding Floor Boards
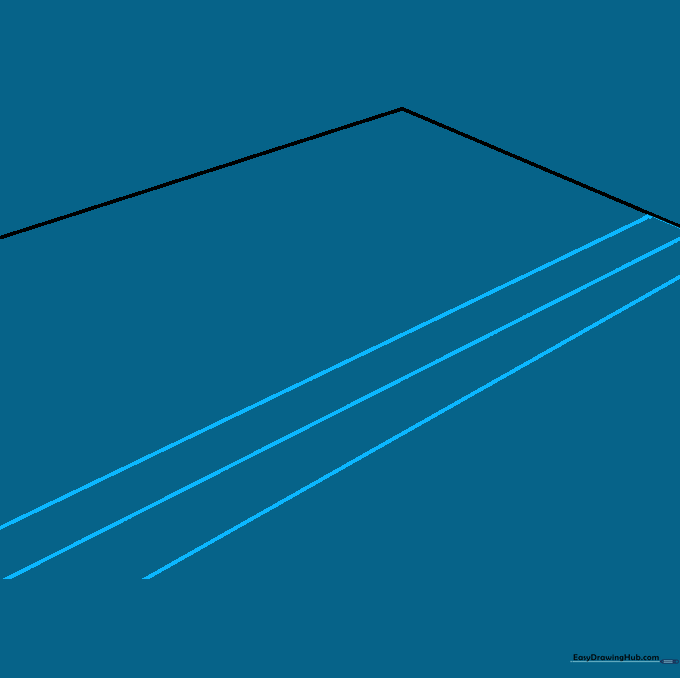
Draw straight lines extending from the shorter wall line, keeping them parallel to the longer one. These represent floorboards. Tip: Keep your spacing consistent to help the viewer's eye track the perspective correctly.
Step 3: Framing the Hole
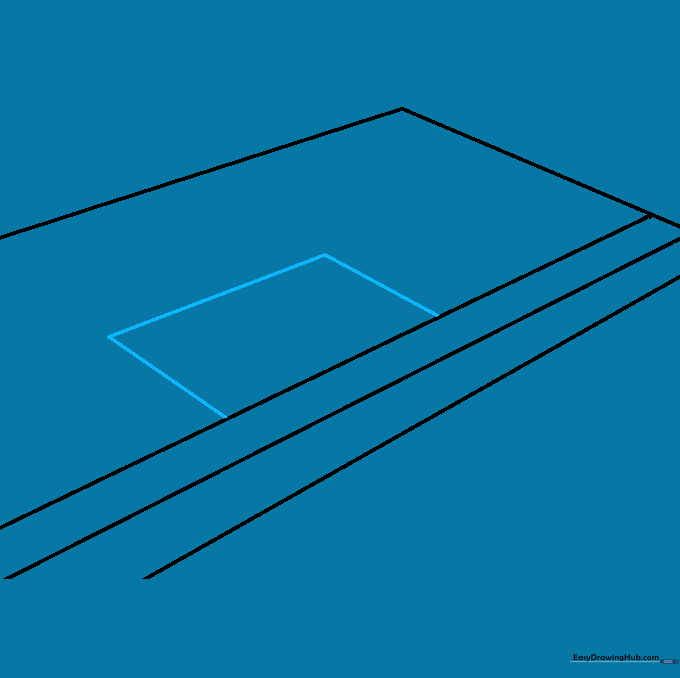
Draw a rectangle on the floor using three straight lines. This empty space will soon become your 'hole.' Tip: Lightly sketch this first so you can adjust the size if it looks too small or large.
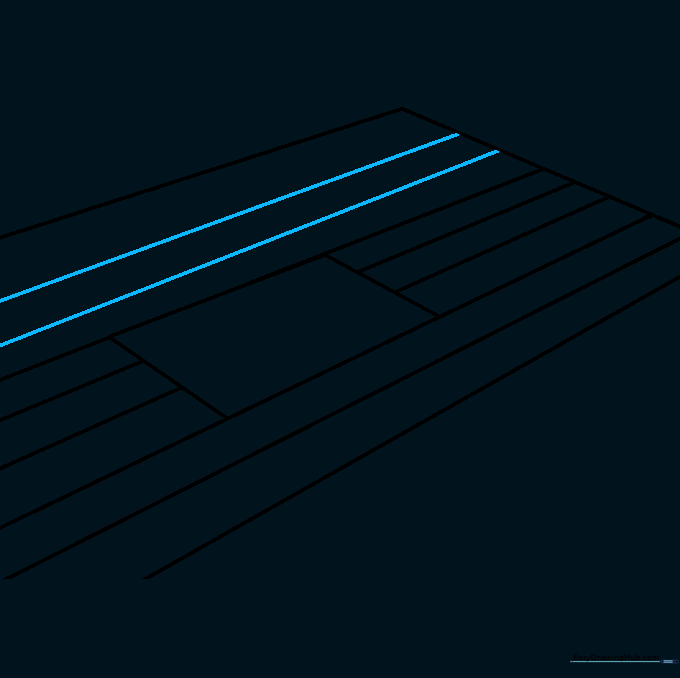
Step 4: Continuing the Floor Pattern
Continue drawing your parallel floorboard lines across the rest of the floor, but stop when you hit the rectangle. Tip: Don't draw inside the rectangle; keeping it blank is essential for the depth effect.
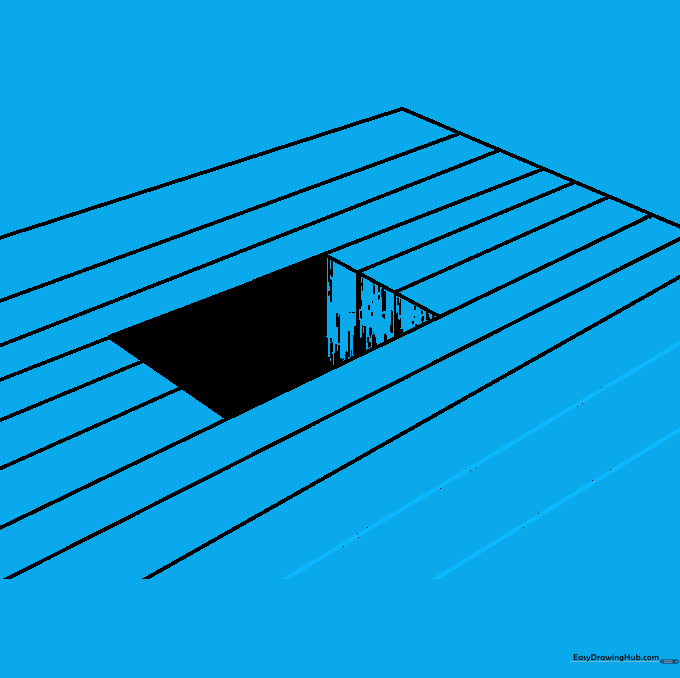
Step 5: Filling the Floor
Fill the entire floor area with your parallel lines. Tip: If your lines start to look wobbly, slow down. The straighter the lines, the more professional your finished illusion will look.
Step 6: Creating Depth

Draw vertical lines descending from the short edge of your rectangle. Align these with your floorboards to create the 'walls' of the hole. Tip: This is the 'Aha!' moment where the drawing starts to look like a real hole in the ground.
Step 7: Adding Shadows

Begin shading the inside of the hole. Focus on making the bottom corners darker. Tip: Use the side of your pencil lead for smooth, even shading rather than the tip.
Step 8: Refining Texture
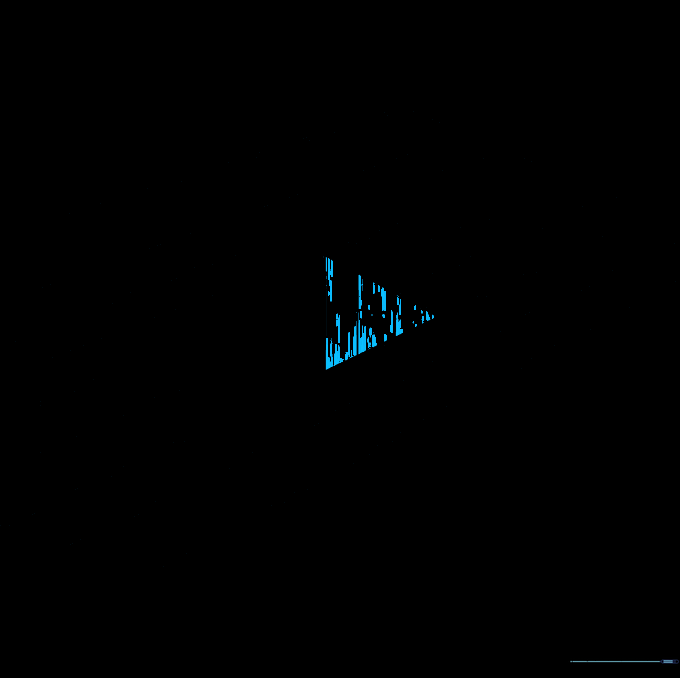
Add short, varied lines inside the hole to suggest texture. This makes the hole look deep and mysterious. Tip: Vary your pressure—darker at the bottom, lighter as you move up toward the opening.
Step 9: Final Touches
Extend your floor lines as far as you like to complete the room. Tip: Check that all lines are parallel; if one is crooked, it can break the 3D illusion.
Step 10: Color and Contrast
Add color or deepen your shading to make the hole pop. A dark, moody color inside the hole works best. Tip: Use a black marker for the deepest shadows to maximize the contrast!
More Tutorials


