How to Draw Woodstock: Easy 10-Step Peanuts Guide
Bring Snoopy’s loyal sidekick to life with this simple, step-by-step tutorial designed for young artists. You only need a pencil, an eraser, and a piece of paper to get started. Follow along to master Woodstock's iconic messy feathers and cheerful expression while building your drawing confidence.
🎯 Final Result

Step-by-Step Instructions
Sketching the Beak and Face

Start by drawing a curved line shaped like a backward "S." This forms the top of Woodstock's beak and his forehead. Teacher's Tip: Keep this line light and loose; it’s the foundation for his whole head shape.
Defining the Neck and Torso

Extend that curved line downward to create the neck and the front of his small torso. Teacher's Tip: Try to make this a continuous, smooth motion to keep his body looking fluid.
Adding the Back and Feathers

Draw another "S" shaped line for the back of his body, adding little tufts of feathers at the base of his head. Teacher's Tip: Leave a small gap at the bottom for the legs.
Drawing the First Leg
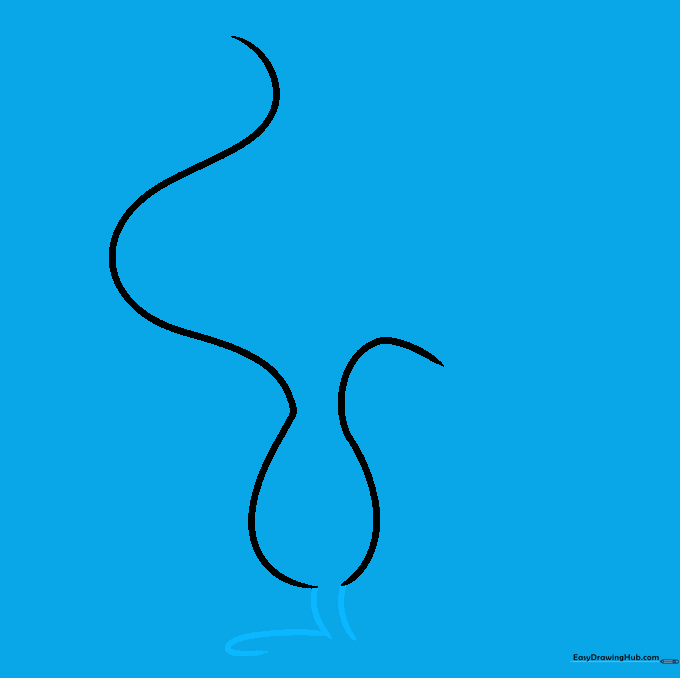
Extend two short lines from the bottom gap to create the leg, then double the line back to form the foot. Teacher's Tip: Keep the foot small and rounded to match his cute, cartoonish proportions.
Completing the Feet

Add a second, overlapping curved line to create the toes and finish the foot structure. Teacher's Tip: Overlapping lines create a sense of depth, making your drawing look more professional.
Adding the Wing and Head Feathers
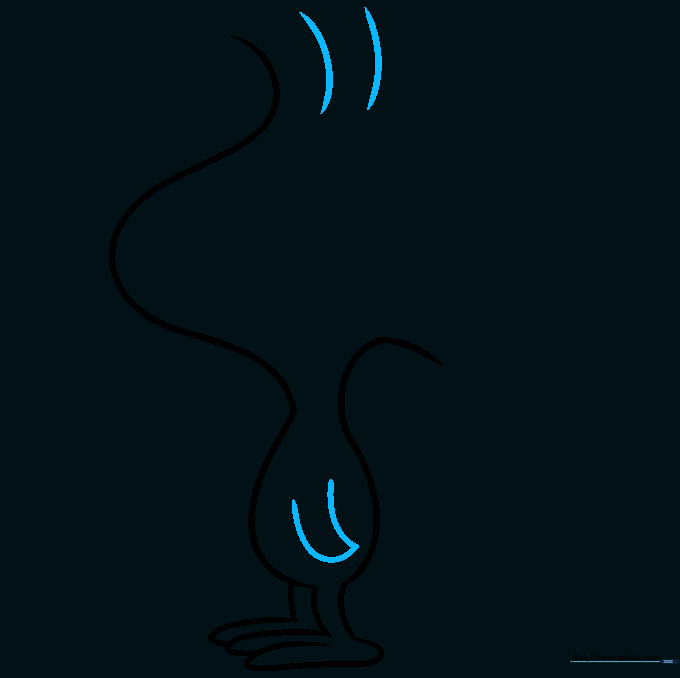
Draw a pointed wing using two curved lines, then start adding the signature messy feathers on top of his head. Teacher's Tip: Make the feathers look slightly different lengths for a more natural, 'ruffled' look.
Refining the Head Feathers
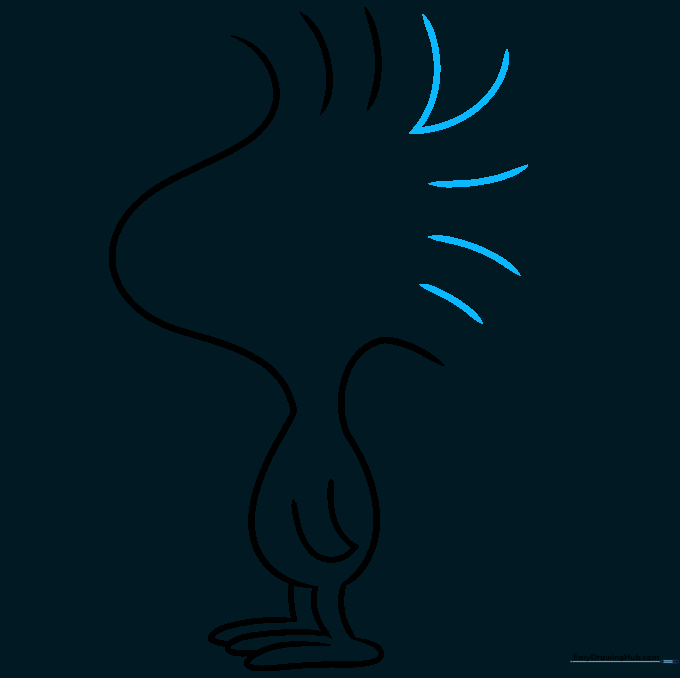
Continue adding small, disconnected curved lines to fill out the top of his head. Teacher's Tip: Don't worry about connecting these lines; the 'messy' look is exactly what makes Woodstock look like Woodstock!
Drawing the Face

Add two small, shaded ovals for eyes and a wide 'U' shape for his happy smile. Teacher's Tip: Place the eyes slightly above the beak line to give him a friendly, alert expression.
Adding the Tail

Use three curved lines to enclose a small, triangular tail shape at the back. Teacher's Tip: Keep the tail small so it doesn't distract from his head and body.
Coloring Your Woodstock

Bring your drawing to life with bright yellow! Use a consistent pressure to keep the color smooth. Teacher's Tip: If you want to add texture, use slightly darker yellow or orange shading near the wing and tail.
More Tutorials


