How to Draw Wednesday Addams: Easy 9-Step Guide
Bring the iconic Wednesday Addams to life with this step-by-step drawing tutorial designed for young artists and fans. You will need a pencil, an eraser, and a piece of paper to master her signature stoic expression and braided hairstyle. This activity is a fantastic way to practice symmetry and character proportions.
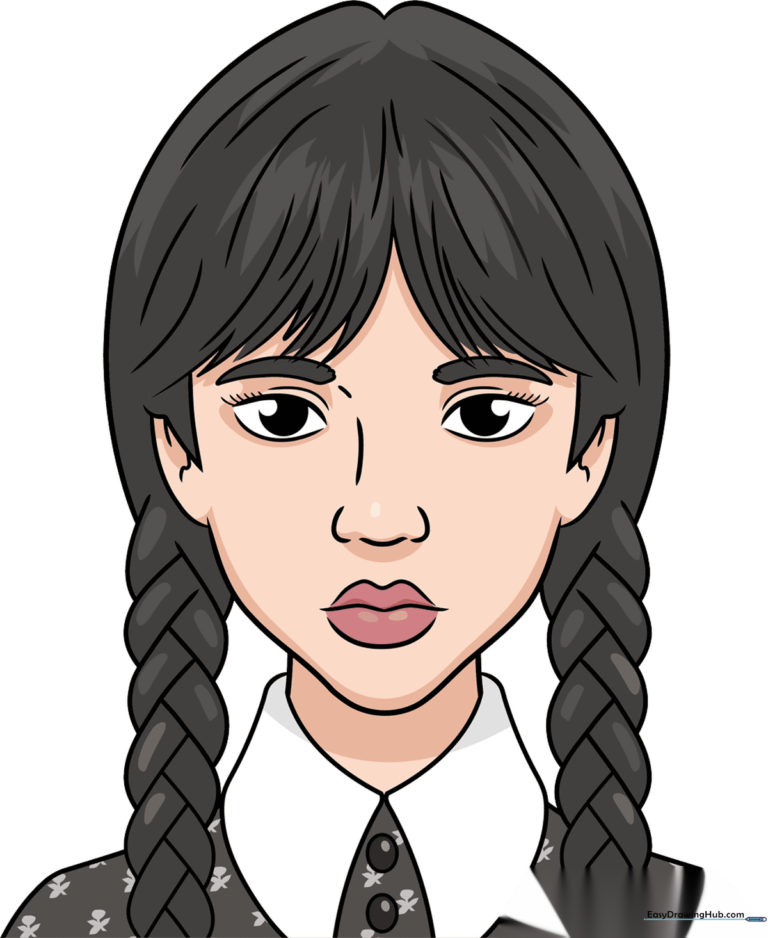
🎯 Final Result
Step-by-Step Instructions
Step 1: Sketching the Almond Eyes
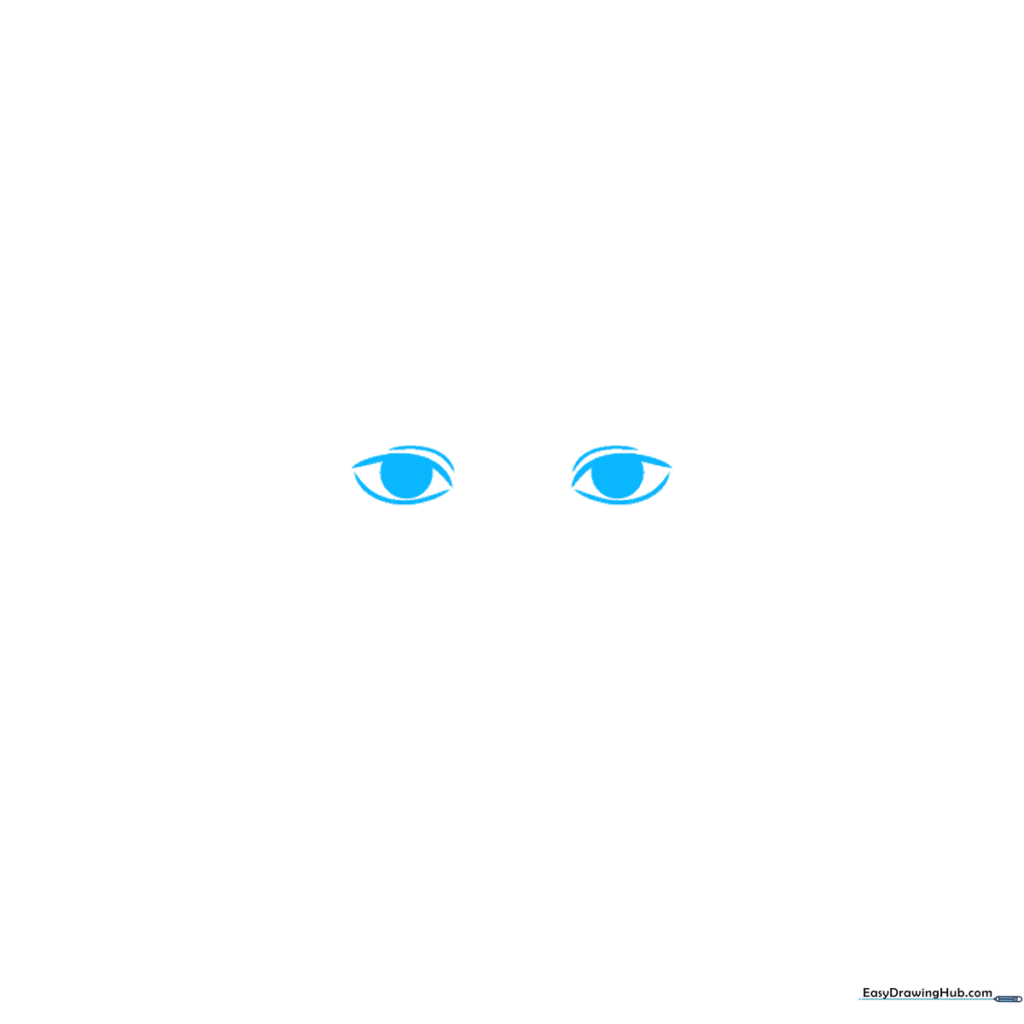
Start by drawing two almond-shaped eyes using double-curved lines. Tip: Leave the corners slightly open to give her a more stylized, cartoon look. Add a partial circle inside for the iris and a soft curve above for the eyelid.
Step 2: Brows and Nose Details
Draw two elongated teardrop shapes for the eyebrows and add tiny flicks for eyelashes. For the nose, use a series of small, unconnected curved lines to suggest the bridge and nostrils without over-detailing. Tip: Keep the nose lines subtle to maintain a youthful, cartoon aesthetic.
Step 3: Defining the Face and Lips
Trace a smooth, curved line for the chin and cheeks. Create her serious expression using two 'M' shapes for the upper lip and a 'U' for the lower. Add jagged lines at the top to start the hair. Tip: Use a light touch for the lips so they don't look too heavy.
Step 4: Framing the Face with Hair
Continue the hair across the forehead with jagged, meeting lines to create a natural part. Add triangular shapes at the sides of the face to represent the hair tucking behind the ears. Tip: Ensure the hair strands look slightly uneven to mimic real hair texture.
Step 5: Adding Ears and Braids
Outline the top of the head with long, sweeping curves. Draw the ears with simple curved lines and start the base of the braids. Tip: The braids should start just below the ears to keep the proportions balanced.
Step 6: Developing the First Braid
Create the braid using a repeating pattern of overlapping curved lines. Move from one side of the braid to the other to create the 'woven' look. Tip: Keep the lines consistent in size to make the braid look uniform.
Step 7: Mirroring the Second Braid
Repeat the same overlapping curved line pattern for the second braid on the opposite side. Tip: Ensure both braids hang at a similar length to maintain symmetry.
Step 8: Adding the Collar and Shoulders
Draw two short lines for the neck, then sketch the parallelogram shapes of her classic pointed collar. Extend curved lines outward for the shoulders. Tip: Make the collar points sharp to match her signature style.
Step 9: Final Details and Texture
Add final texture lines to the hair and draw two small buttons on the collar. Tip: Use a darker pencil for these final details to make them stand out against the rest of the drawing.
Step 10: Coloring Your Masterpiece
Time to color! Use deep blacks and greys for her hair and outfit. Keep the skin tone pale to stay true to the character. Tip: Leave a small white highlight on the hair to show shine.
More Tutorials


