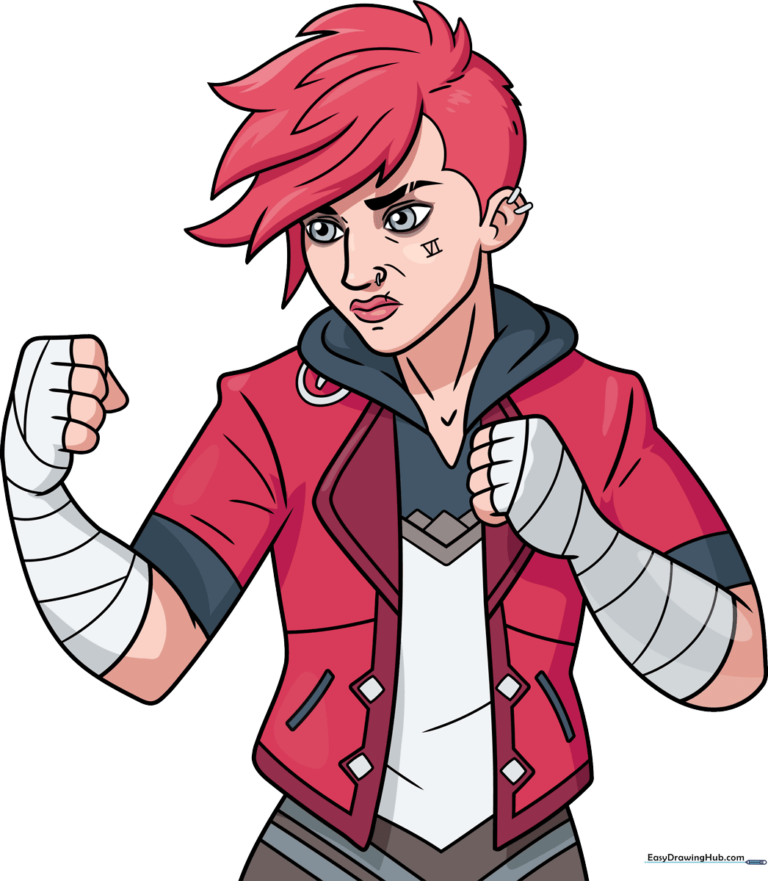
How to Draw Vi from Arcane: Easy Step-by-Step Guide
Ready to bring the Piltover enforcer to life? This tutorial is designed for young artists and fans of Arcane who want to capture Vi’s iconic look. Grab your pencil, eraser, and paper, and follow these steps to build her features from simple shapes to a finished portrait.
🎯 Final Result
Step-by-Step Instructions
Step 1: Establishing the Facial Structure
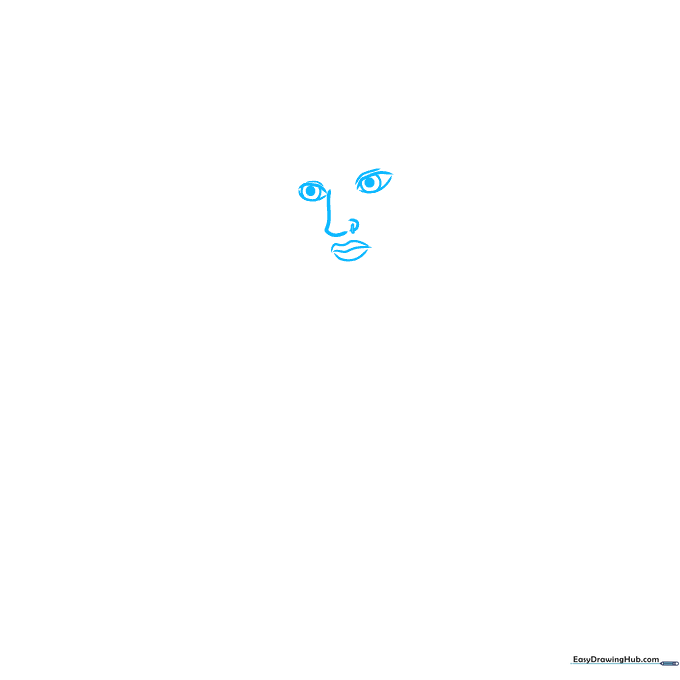
Draw two lemon-shaped eyes with circles above them for the lids, then add small dashes for lashes. Sketch a hook shape for the nose and a wavy line for the mouth. Teacher's Tip: Keep your pencil pressure light here so you can easily adjust the proportions if the face looks a bit lopsided.
Step 2: Adding Brows and Face Shape
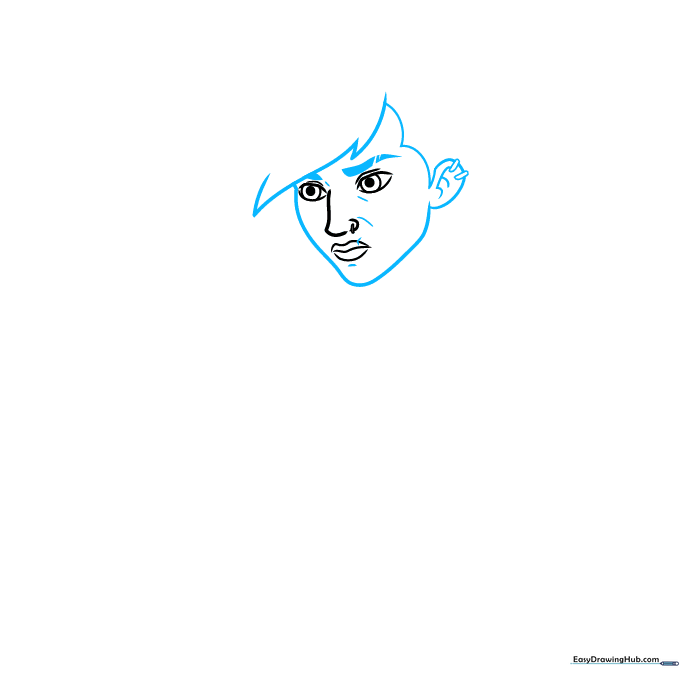
Add two triangles above the eyes for brows, then sketch the ear using an oval and inner curves. Define the jawline with a loose heart shape. Teacher's Tip: Use thick, confident strokes for the eyebrows to capture Vi’s determined expression.
Step 3: Sketching the Neck and Hair
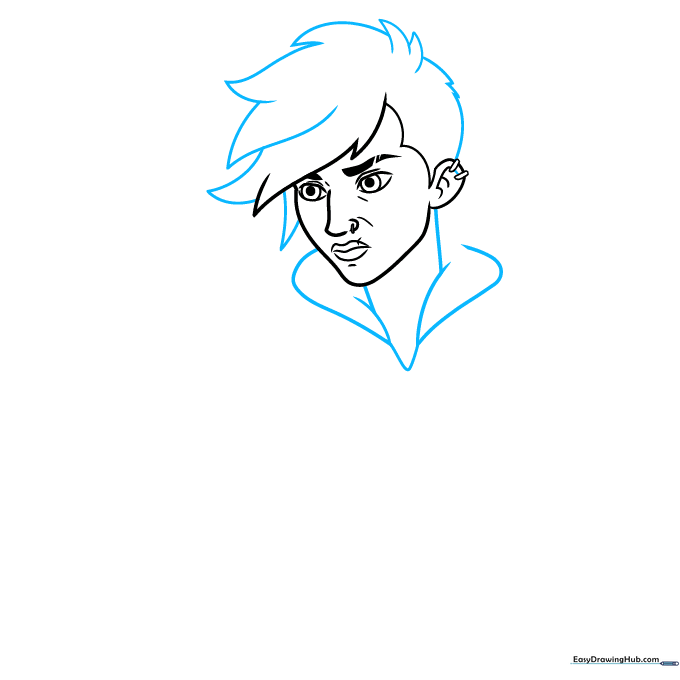
Draw two vertical lines for the neck and add rounded triangles around the collar area. Outline the hair using loose, jagged triangles to give it that signature edgy look. Teacher's Tip: Don't worry about making the hair perfect; Vi’s style is meant to look a bit messy and textured.
Step 4: Building the Shoulders and Arms
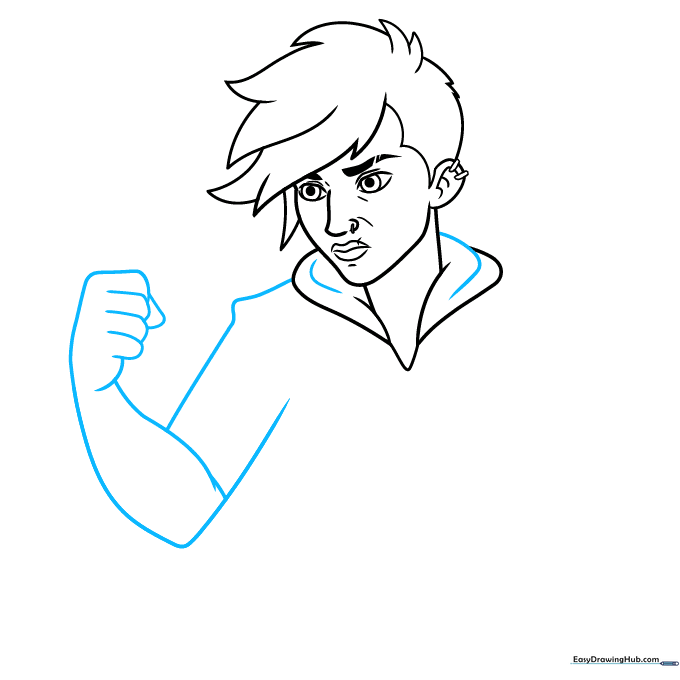
Add curves to the collar, then sketch the shoulders using pointed lines. Draw the forearm with two smooth curves and use simple cylinders to represent the fingers. Teacher's Tip: Cylinders are a great way to map out limbs—think of them like tubes of toothpaste!
Step 5: Refining the Arms and Sleeves
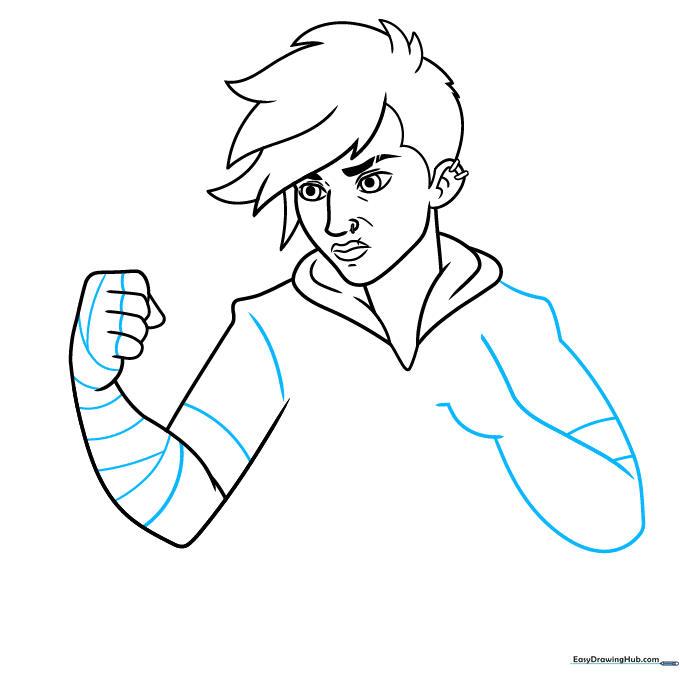
Sketch curved lines on the left arm for muscle definition. Draw a triangle for the right shoulder and outline the sleeve with horizontal curves. Teacher's Tip: Keep your lines fluid to make the character look like she is in motion.
Step 6: Adding Hand and Clothing Details
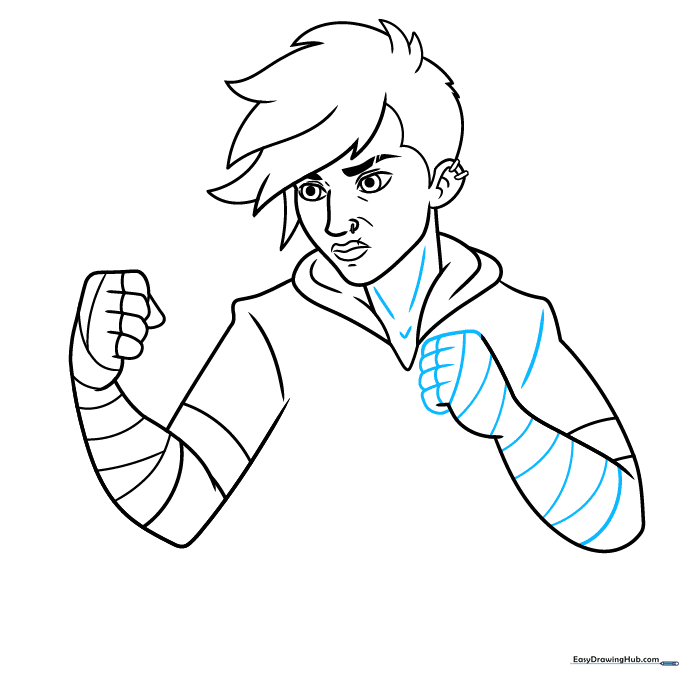
Refine the cylinder shapes into fingers and add curves inside the right arm to show depth. Add small dashes on the shoulder and neck for texture. Teacher's Tip: Adding these small details helps your drawing look less like a flat sketch and more like a real character.
Step 7: Designing the Jacket
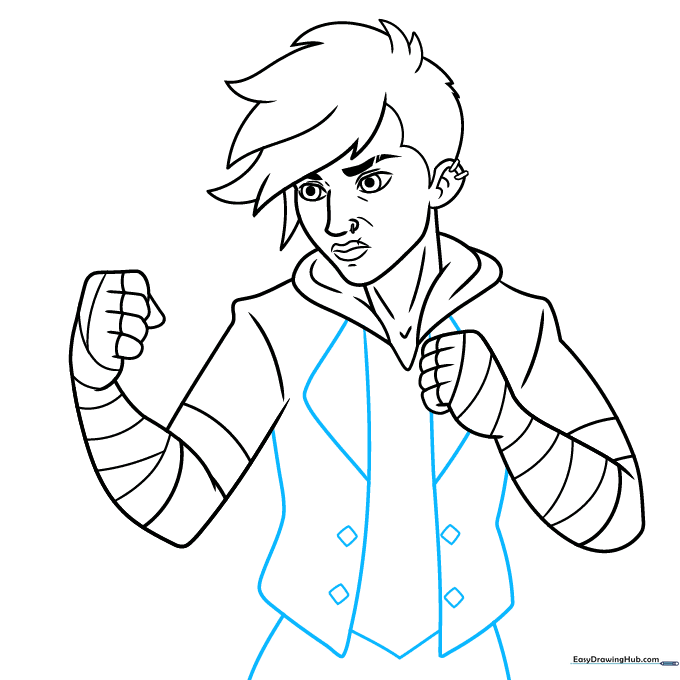
Draw vertical and diagonal lines for the jacket panels, connecting them with triangles and diamonds. Add vertical curves between the jacket sections. Teacher's Tip: Use a ruler if you find it hard to keep your jacket lines straight, but try freehand first for a more natural look!
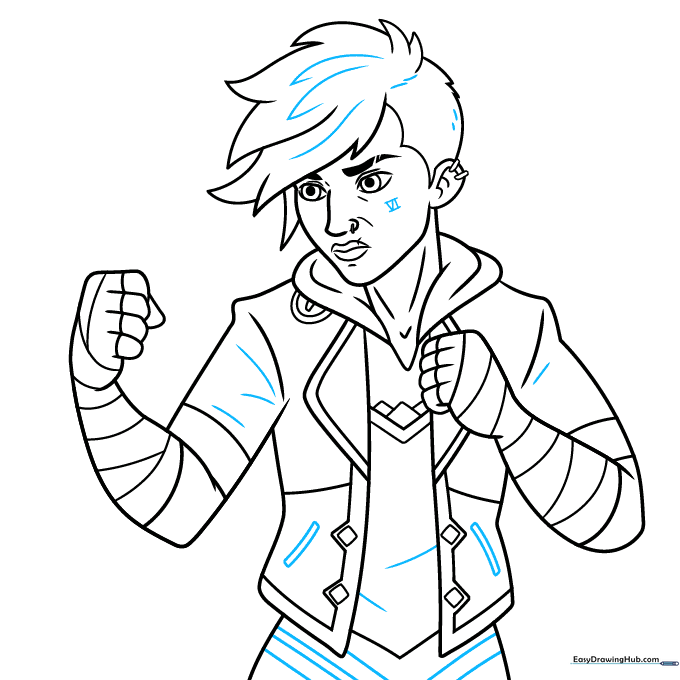
Step 8: Adding Final Clothing Details
Include small triangles and semicircles inside the clothing to represent buckles and seams. Teacher's Tip: Focus on the symmetry of the jacket to keep the character looking balanced.
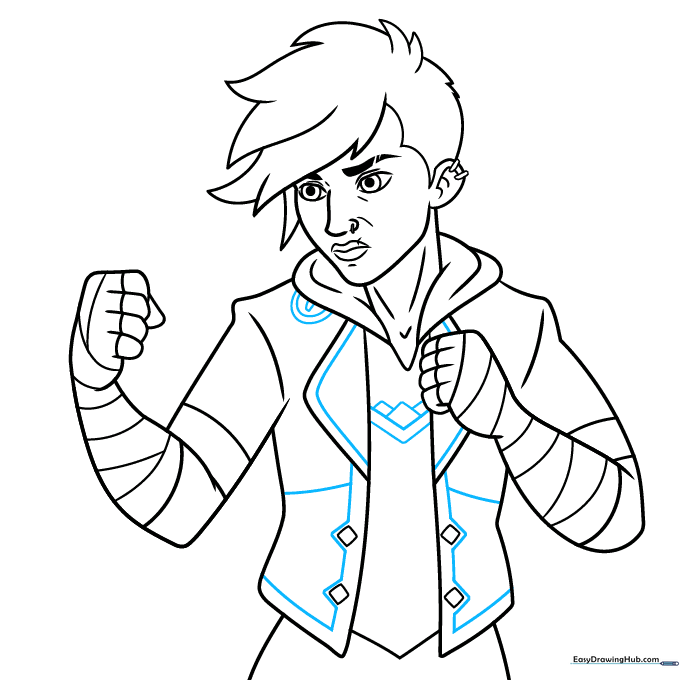
Step 9: Finalizing the Outline
Add any remaining lines to the body to complete the form. Once you are happy with your sketch, go over your lines with a black ink pen. Teacher's Tip: Let the ink dry completely before erasing your pencil marks to avoid smudging.
Step 10: Bringing Vi to Life with Color
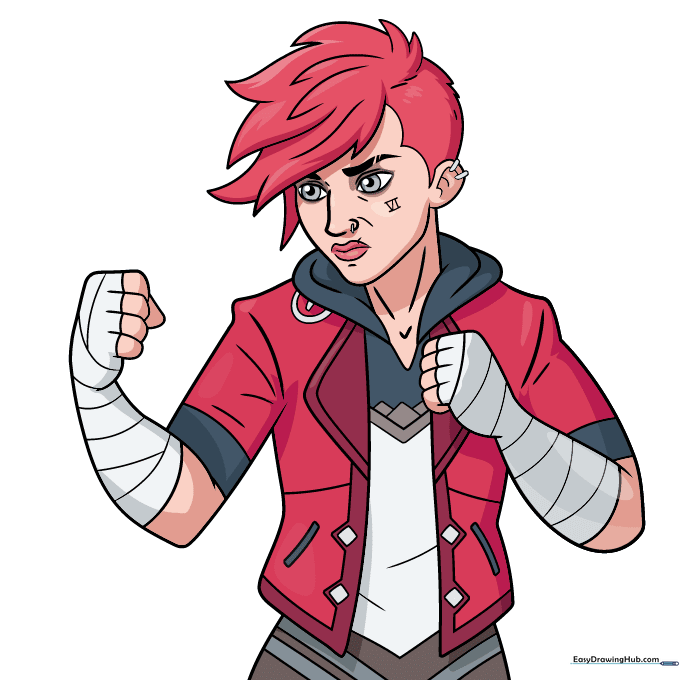
Color your drawing using pale skin tones, vibrant pink for her hair, and striking blue for her eyes. Use red for the jacket, and add accents of white, grey, and navy blue to finish the outfit. Teacher's Tip: Use colored pencils for a soft, blended look, or markers for bold, comic-book style colors!
More Tutorials


