How to Draw Tycoco: Easy 10-Step Labubu Tutorial
Bring the charming Tycoco from The Monsters Labubu to life with this beginner-friendly drawing guide. Designed for artists ages 5 and up, all you need is a pencil, an eraser, and your favorite markers to get started. Follow these steps to master the character's signature look and expressive features.
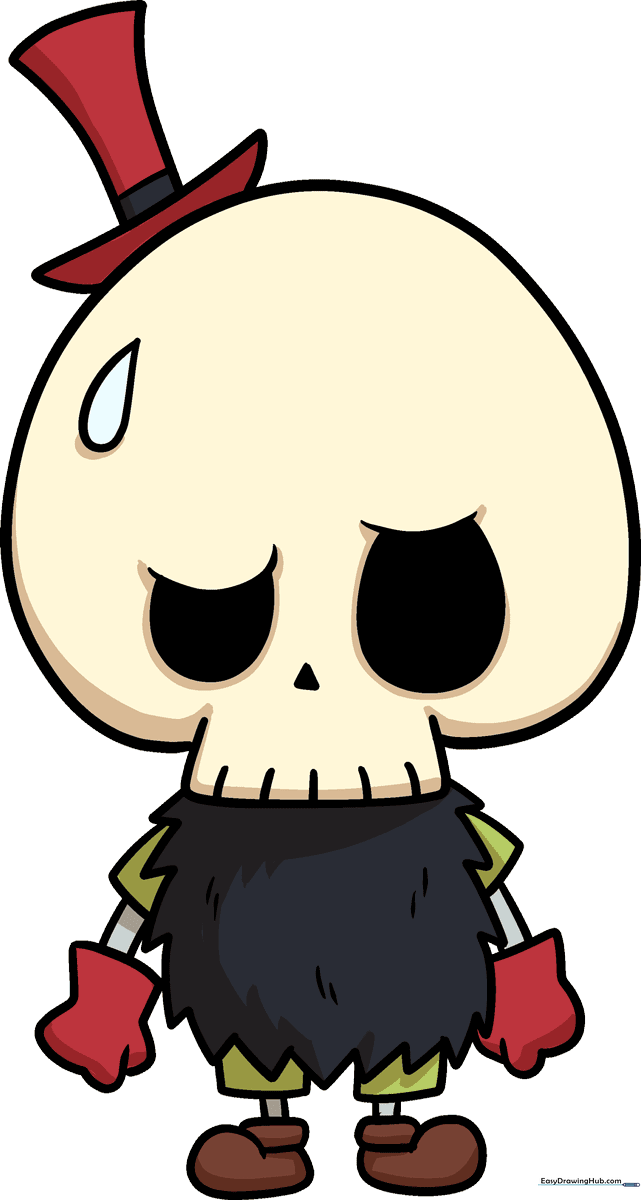
🎯 Final Result
Step-by-Step Instructions
Step 1: Sketching the Face

Start by drawing two curved lines for the brows. Add partial ovals beneath them for the eyes, making one slightly larger for character. Sketch a small triangle between them for the nose. Teacher's Tip: Keep your pencil pressure light so you can easily adjust the symmetry later.
Step 2: Defining the Head
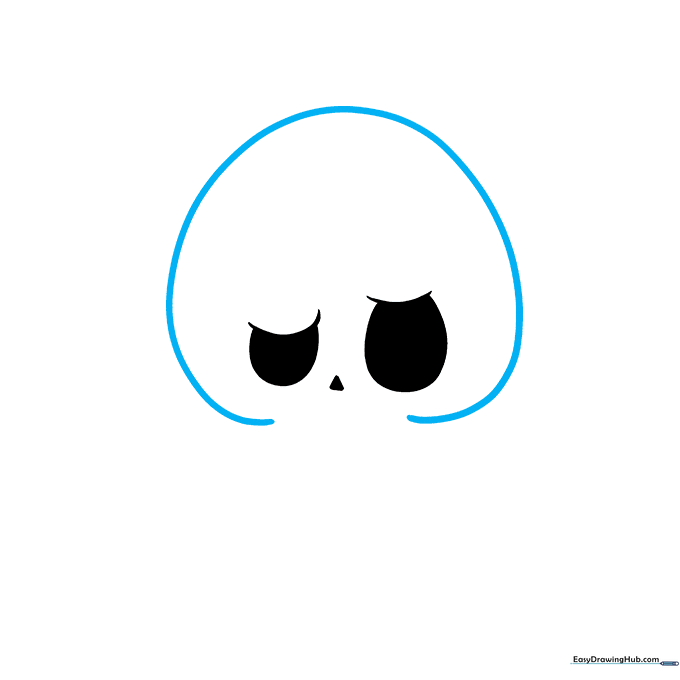
Draw a long, smooth curved line to form the top of the head. Tip: Think of this as an upside-down 'U' shape; try to draw it in one fluid motion to keep the line clean.
Step 3: Adding the Hat and Details
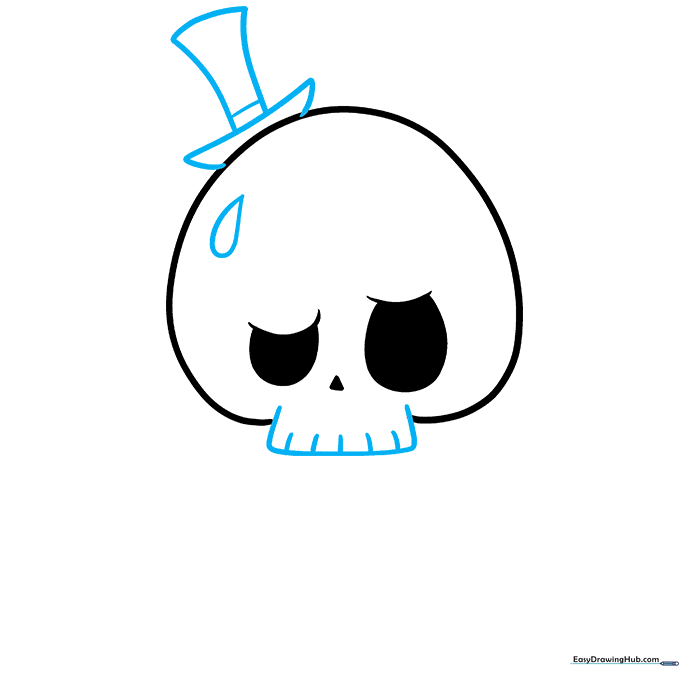
Close the face shape with a curved line and add small marks for teeth. Sketch a top hat tilted on the head using a rectangular crown and a curved brim. Add a teardrop shape on the forehead. Tip: Use a ruler if you struggle with the straight lines of the hat crown!
Step 4: Sketching the Furry Body
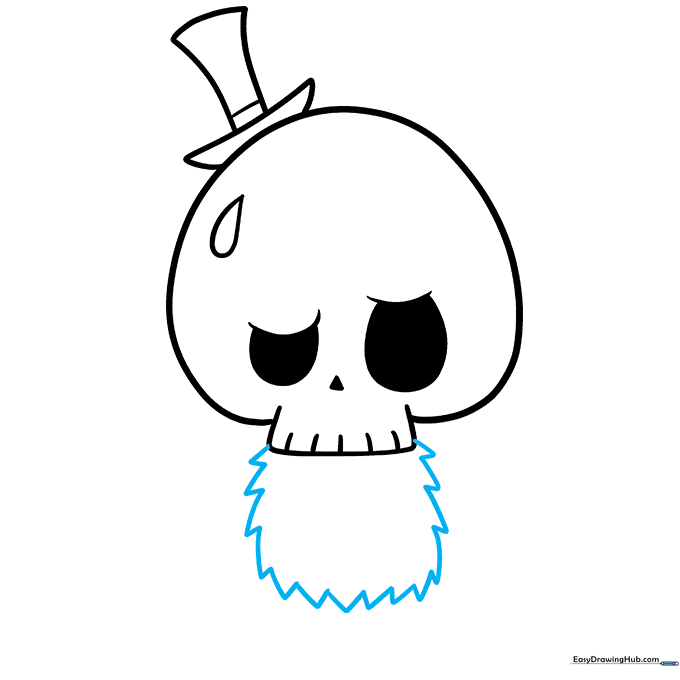
Draw the body using short, jagged lines to create a furry texture. Tip: Don't worry about making every 'fur' spike perfect; the slight irregularity makes it look more natural.
Step 5: Drawing the First Arm
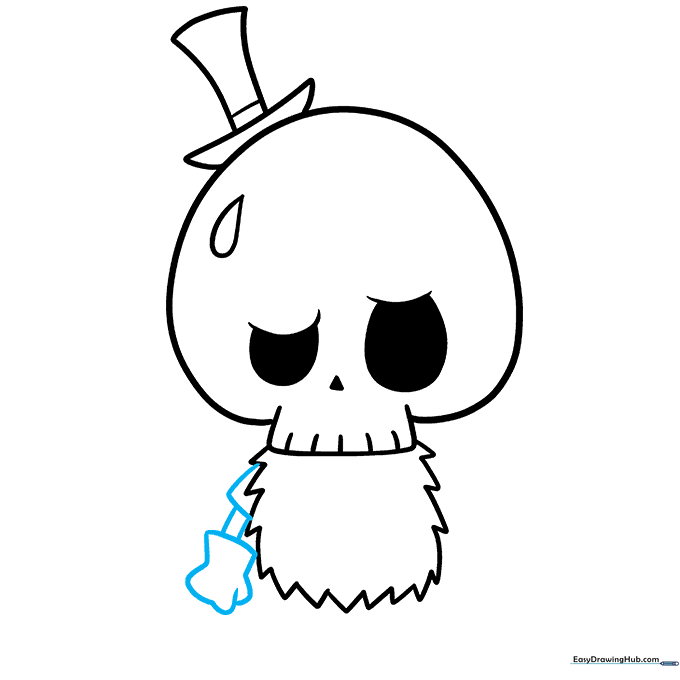
Create the arm using an 'L' shaped line for the sleeve, followed by two lines for the lower arm and overlapping curves for the gloved hand. Tip: Keep the glove rounded to give it that soft, toy-like appearance.
Step 6: Drawing the Second Arm
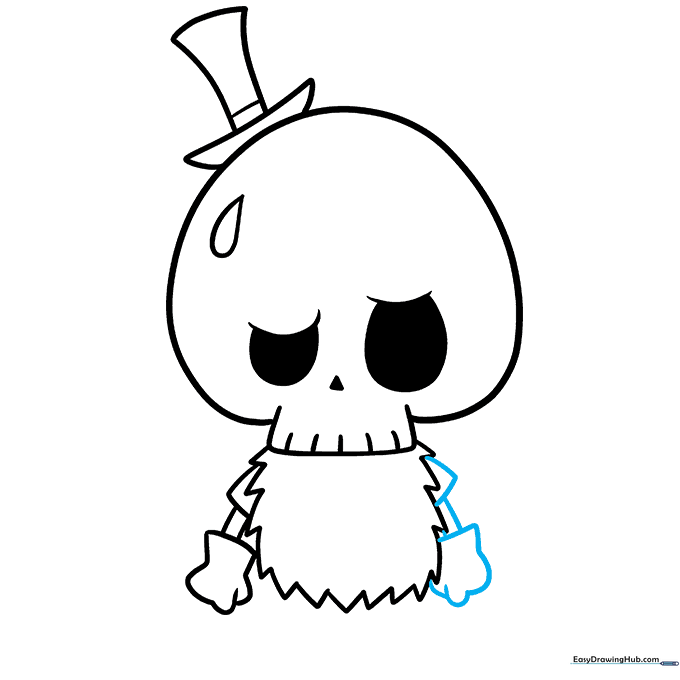
Repeat the process for the opposite arm to maintain balance. Ensure the sleeve and glove match the style of the first arm. Tip: Check that both arms are roughly the same length before moving on.
Step 7: Drawing the First Leg
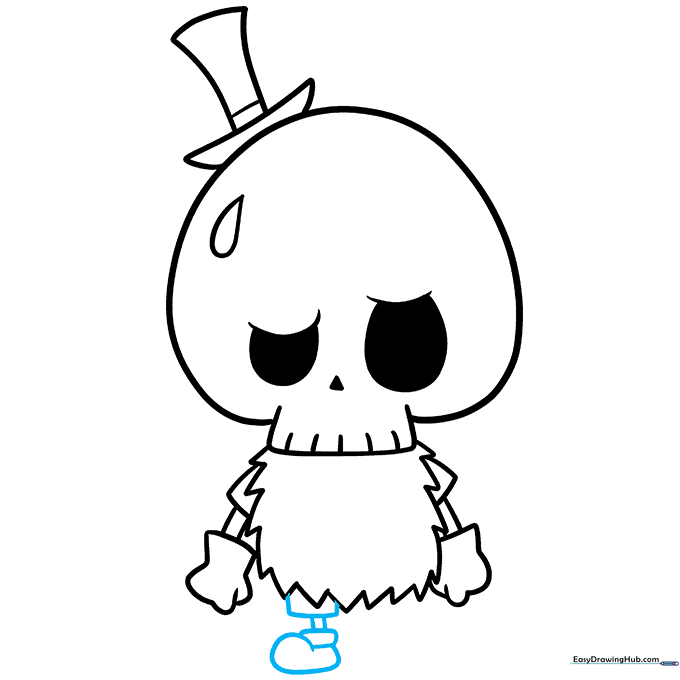
Sketch a rectangular shape for the upper leg, two lines for the lower leg, and overlapping curves for the shoe. Tip: Focus on the 'shoe' shape—it should look slightly chunky to match the character's proportions.
Step 8: Drawing the Second Leg
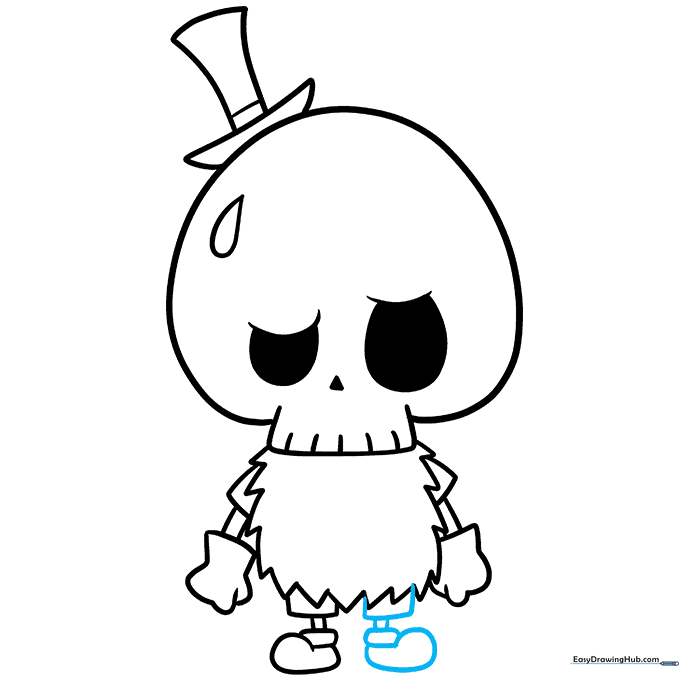
Mirror the first leg on the other side. Keep the proportions consistent with the first leg. Tip: If the legs look uneven, use your eraser to soften the lines and redraw until they look balanced.
Step 9: Final Texturing
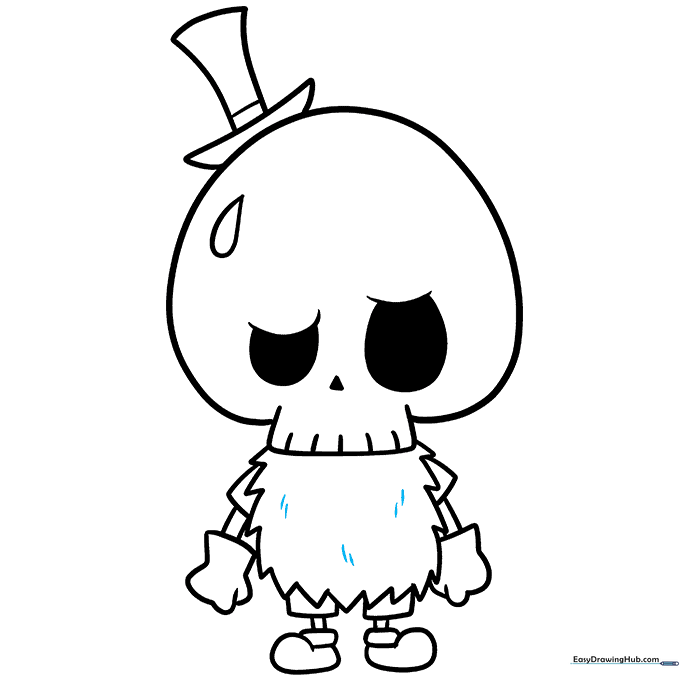
Add final touches of fur texture across the body using short, quick strokes. Tip: Vary the length of your lines to make the fur look more realistic and less uniform.
Step 10: Bring Tycoco to Life with Color
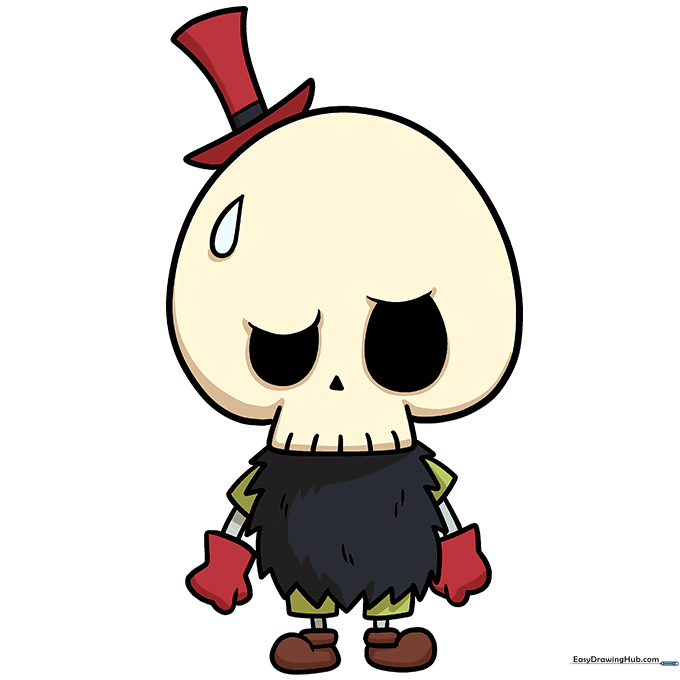
Your outline is complete! Now, choose your favorite colors to bring Tycoco to life. Tip: Use light, circular motions when coloring to keep the pigment smooth and even.
More Tutorials


