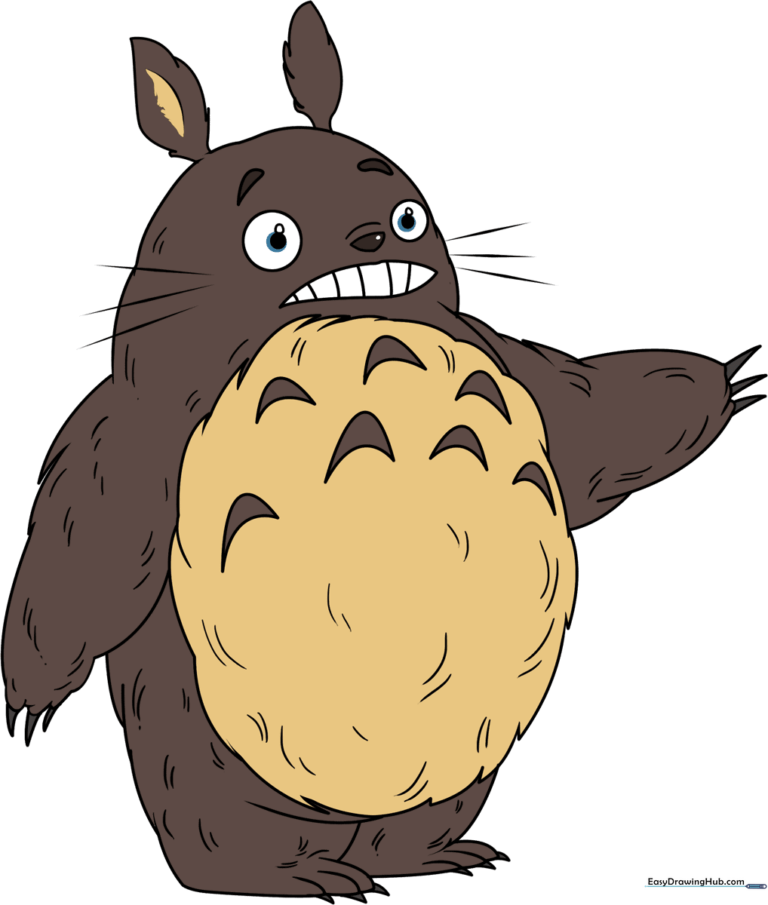
How to Draw Totoro: Easy 10-Step Guide for Beginners
Bring the forest spirit to life with this simple drawing guide, perfect for artists ages 5 and up. You only need a pencil, an eraser, and a sheet of paper to get started. Follow these steps to build your character from basic shapes into a finished, lovable Totoro.
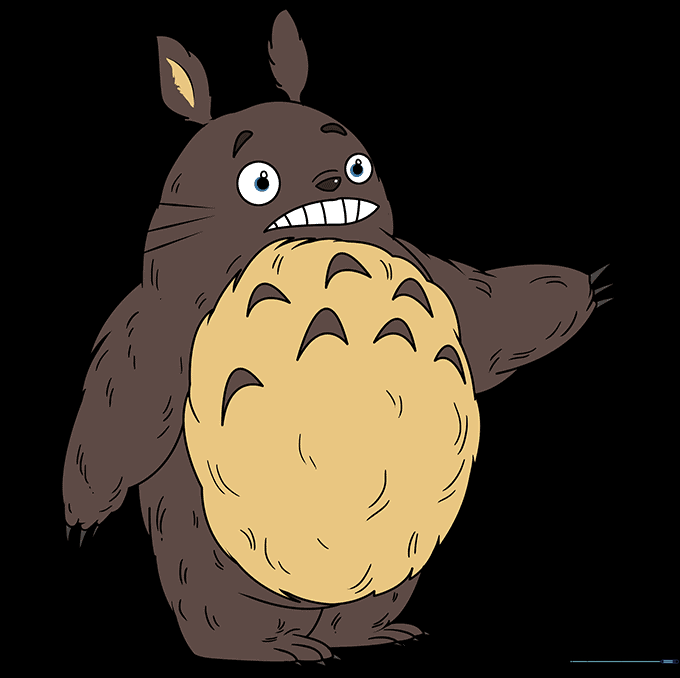
🎯 Final Result
Step-by-Step Instructions
Step 1: Sketching the Base Shapes

Draw a light circle for the head and a larger oval for the body. Teacher's Tip: Keep your pencil strokes very light so you can easily erase these guidelines later!
Step 2: Defining the Silhouette

Draw a wide semicircle over the head circle and a rough oval inside the body shape to define his belly. Teacher's Tip: Use smooth, flowing motions to connect the shapes naturally.
Step 3: Adding the Arms
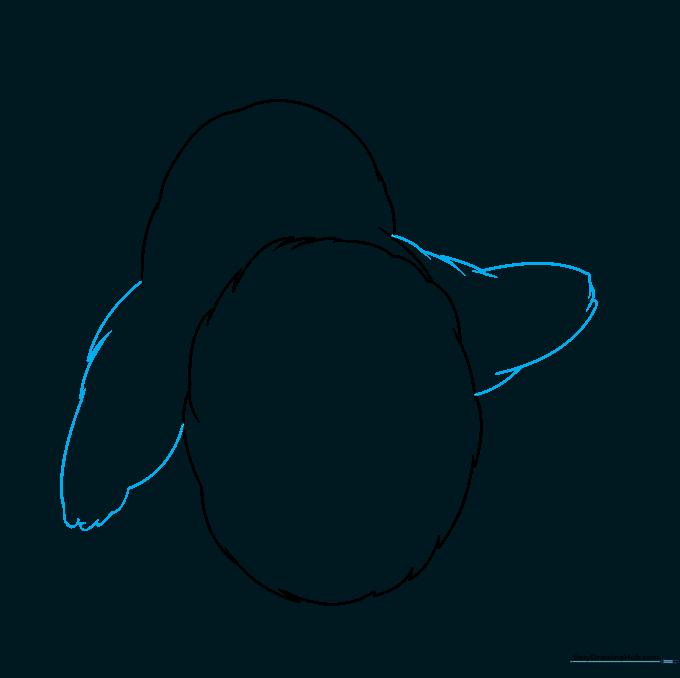
Erase your original guide lines. Now, sketch two short, wide arms on the sides of the body. Teacher's Tip: Think of them as soft, rounded mittens.
Step 4: Drawing Claws and Feet
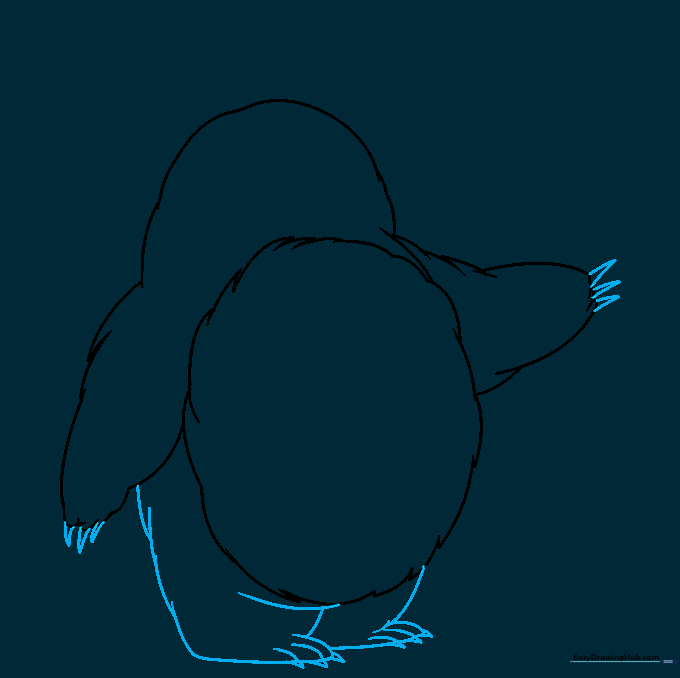
Add small triangles at the end of the arms for claws. Then, draw the large feet at the base of the body with tiny triangles for toenails. Teacher's Tip: Keep the toes rounded to maintain Totoro's soft, friendly look.
Step 5: Creating the Eyes
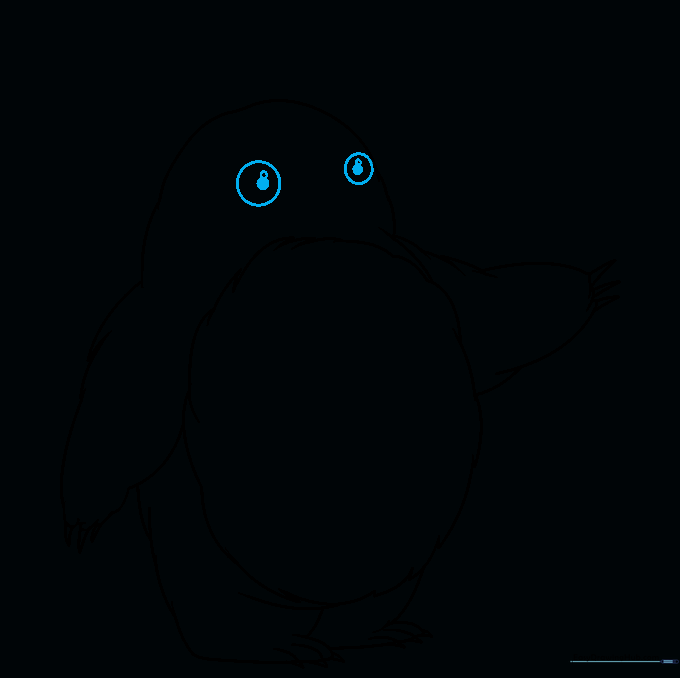
Draw two large circles on the face, then add smaller circles inside for the pupils. Shade the pupils in. Teacher's Tip: Placing the eyes wide apart makes him look surprised and curious!
Step 6: Facial Expressions
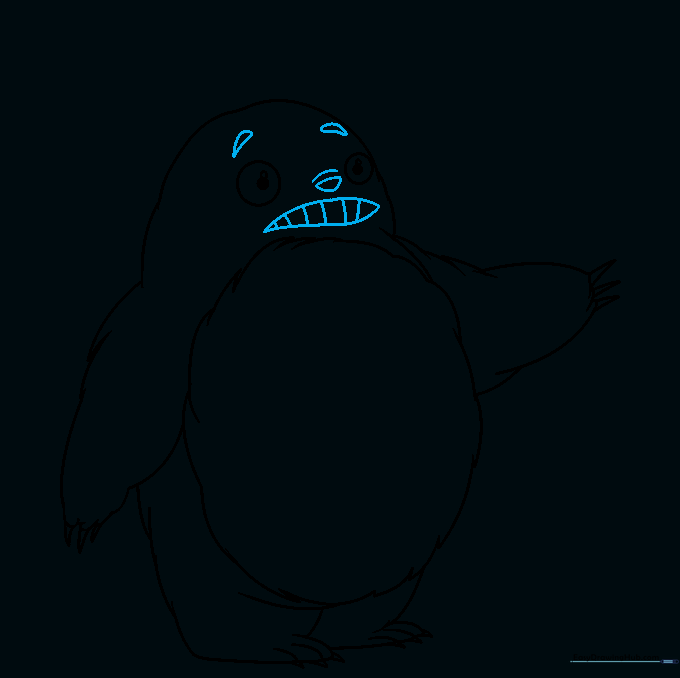
Sketch the pointed eyebrows, a small nose, and a wide, surprised mouth. Add vertical lines inside the mouth for teeth. Teacher's Tip: Use a light touch for the teeth so they don't look too sharp.
Step 7: Ears and Whiskers
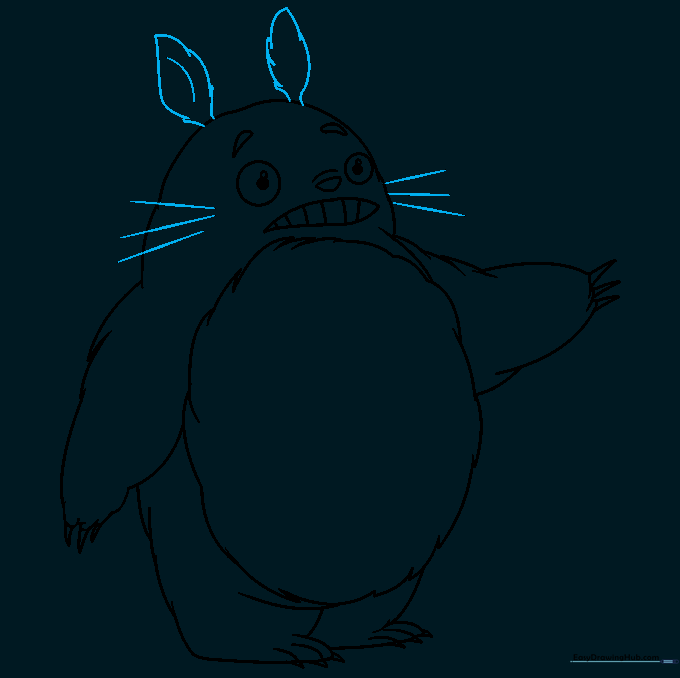
Draw two tall, rabbit-like ears on top of the head and three whiskers on each cheek. Teacher's Tip: Make the whiskers quick, flicking motions with your pencil for a natural look.
Step 8: Chest Markings
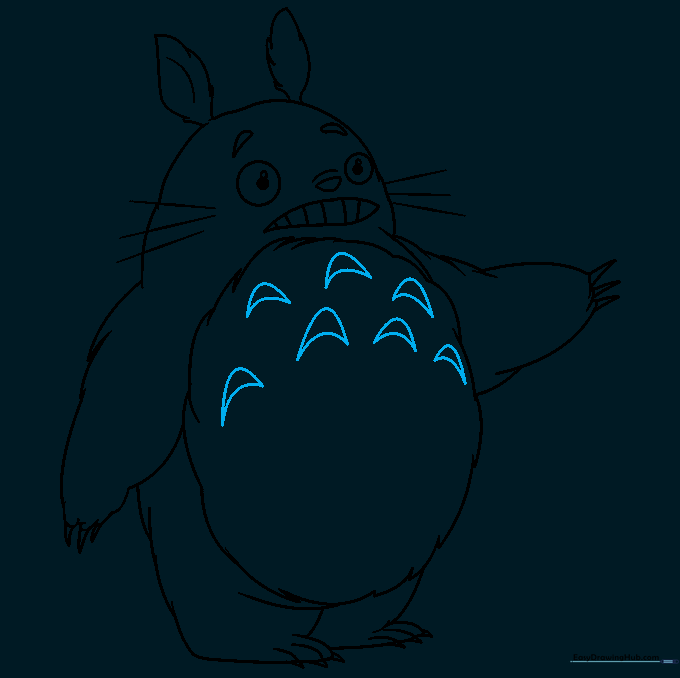
Add several curved, boomerang-shaped markings across his chest. Teacher's Tip: Vary the size of these shapes to make them look more organic.
Step 9: Adding Fur Texture
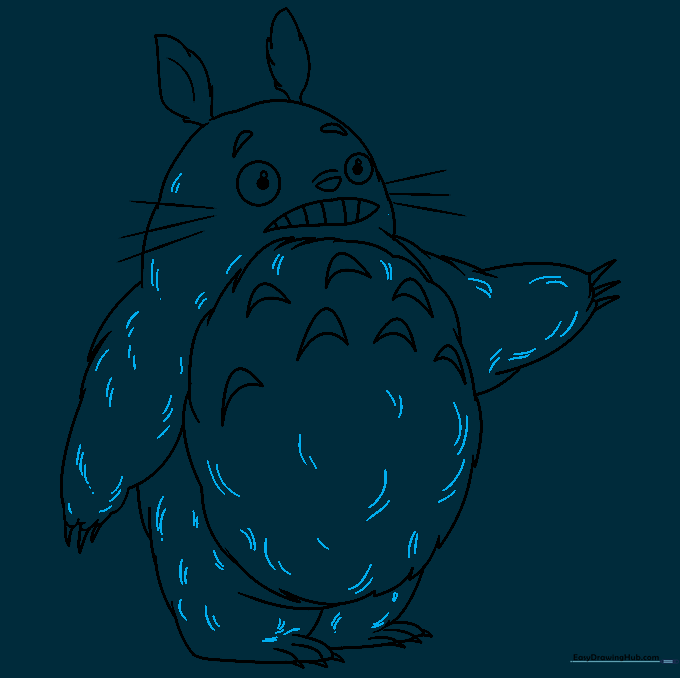
Add small, short curved lines around the edges of his body to give him a fuzzy, furry texture. Teacher's Tip: Don't overdo it—a few lines go a long way!
Step 10: Bringing Totoro to Life with Color
Color your Totoro using greyish-brown for his fur and a soft cream color for his belly. Teacher's Tip: Use light, circular coloring motions to keep the texture smooth.
More Tutorials


