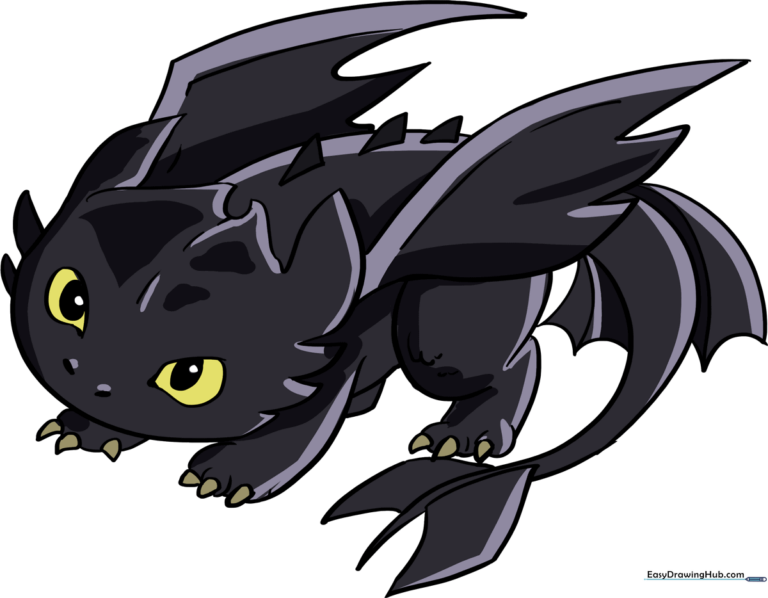
How to Draw Toothless: Easy 10-Step Dragon Tutorial
Bring the Night Fury to life with this step-by-step guide designed for young artists and fans of the franchise. You will need a pencil, an eraser, and a piece of paper to complete this character study. Follow along to build confidence in your sketching skills and capture Toothless’s iconic look.
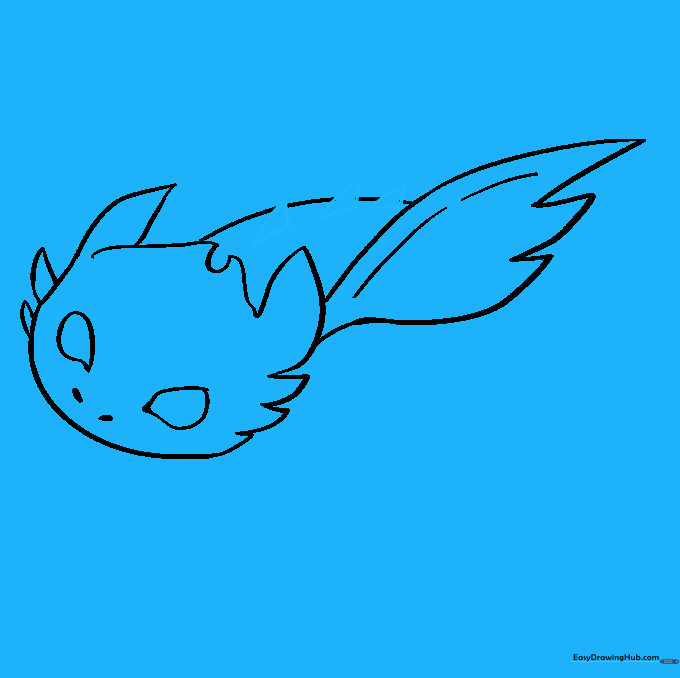
🎯 Final Result
Step-by-Step Instructions
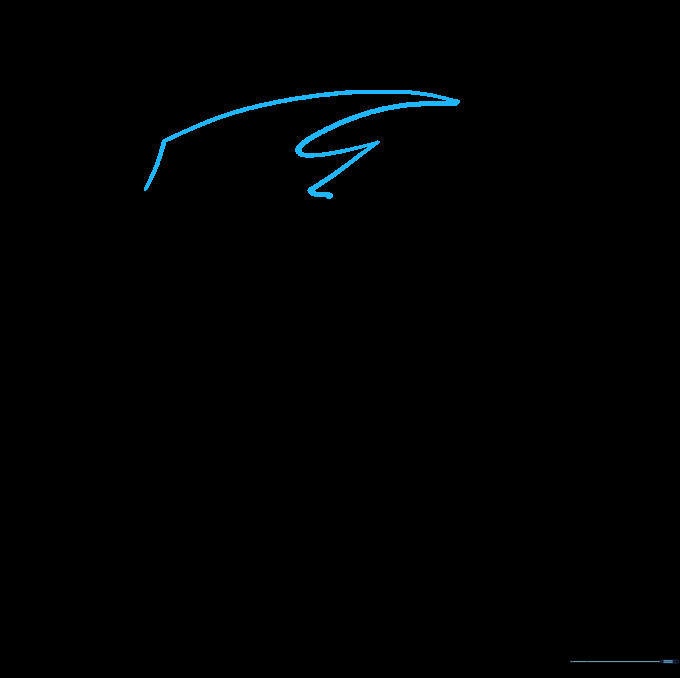
Step 1: Sketching the Head and Ears
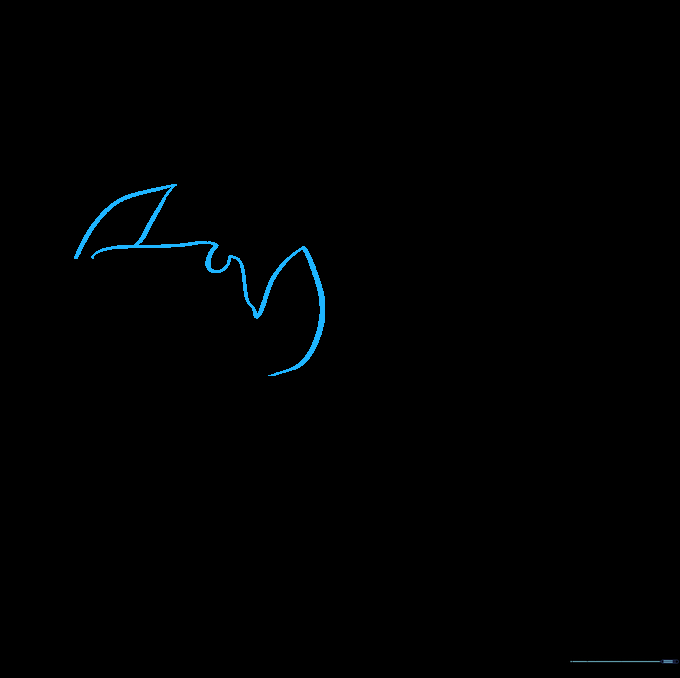
Start by sketching the top of the head. Use pairs of curved lines that meet at a point to form his ears. Tip: Keep your pencil pressure light so you can easily adjust the shape of the horns later.
Step 2: Defining the Face Shape
Enclose the head by adding small, jagged spikes along the sides of the face. Use a long, smooth curved line to connect them at the chin. Tip: Use short, quick strokes for the spikes to give them a natural, textured look.
Step 3: Adding Facial Features

Add the eyes and nostrils. Draw large, irregular teardrop shapes for the eyes and small, thick lines for the nostrils. Tip: Make sure the eyes are symmetrical to give Toothless his friendly, curious expression.
Step 4: Sketching the Wings and Back
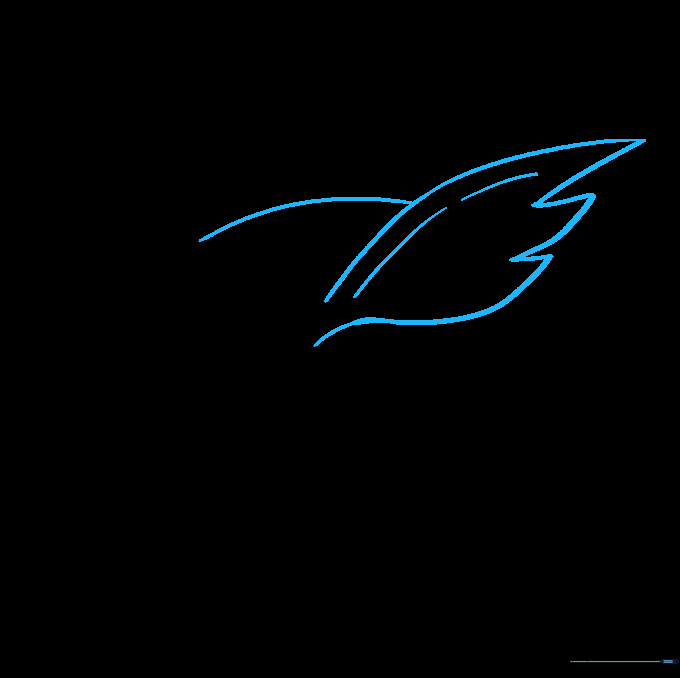
Draw the top of the wing using a long, sweeping curved line. Add jagged edges for the wing membrane and connect the head to the wing to form the back. Tip: Imagine the wing as a large, leathery leaf shape to help keep your lines fluid.
Step 5: Adding Back Spikes
Draw small, triangular spikes along the spine. Tip: Erase any overlapping guide lines from the back to keep your drawing clean and professional.
Step 6: Drawing the Second Wing
Draw the wing on the opposite side using long, curved lines that meet at sharp points. Tip: Since this wing is further away, keep the lines slightly less bold to create a sense of depth.
Step 7: Drawing Legs and Belly
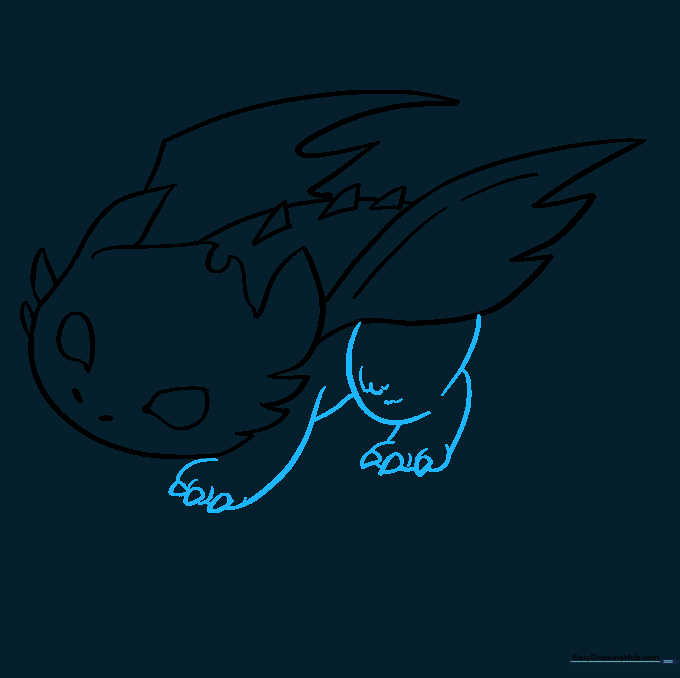
Sketch the legs using overlapping curved lines. Add 'U' shapes for the toes and triangular claws. Connect the legs with a curved line for the belly. Tip: Add a few small, curved lines on the knees to suggest scales.
Step 8: Finishing the Feet
Draw the remaining feet using the same technique as the first. Tip: Ensure the claws are sharp and pointed to give Toothless his powerful dragon look.
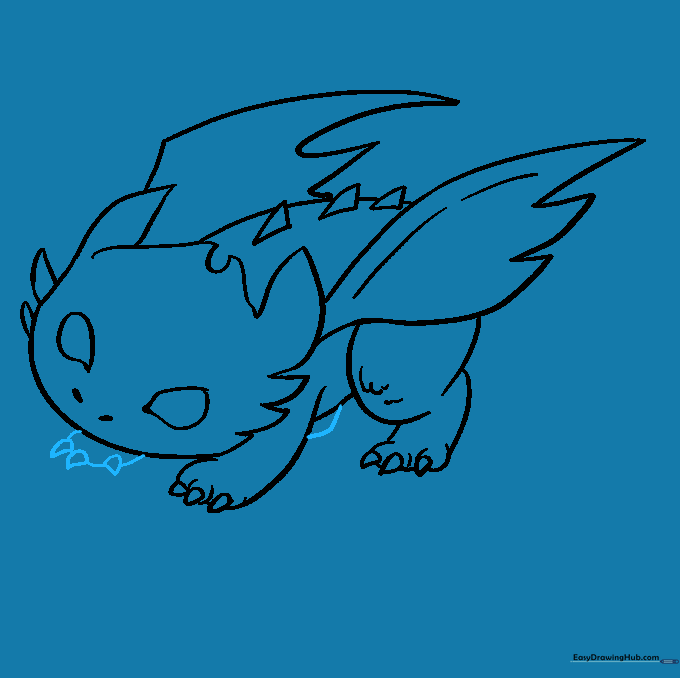
Step 9: Adding Tail and Eye Detail
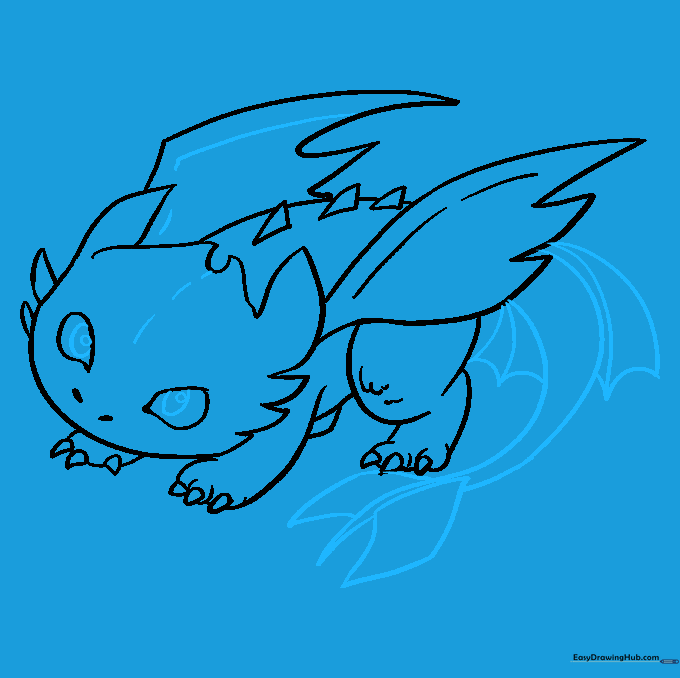
Extend the tail from behind the wing and add the tail winglets. Finish the eyes by drawing an oval within an oval for the pupils. Tip: Take your time on the pupils—this is what gives Toothless his personality!
Step 10: Coloring Your Dragon
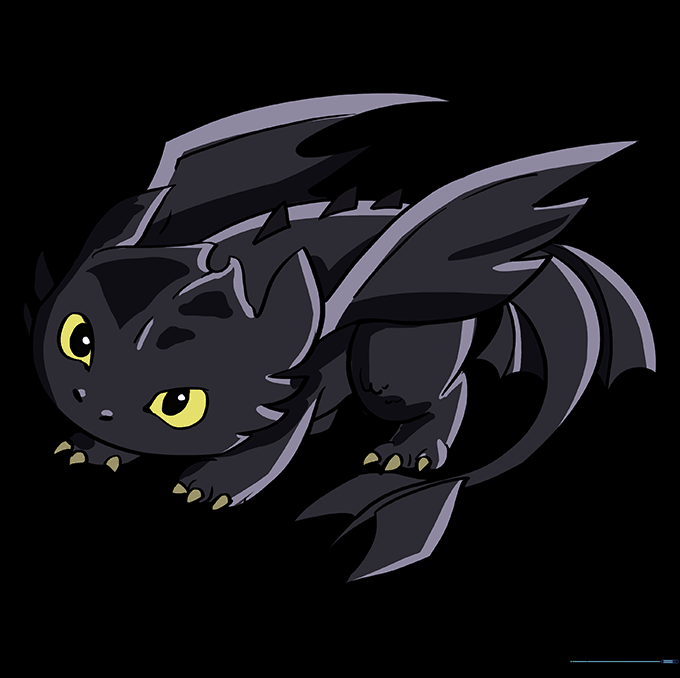
Color your Toothless using deep blacks and grays, with bright yellow for his eyes. Tip: Use a light touch with your black pencil to create shading, leaving small white spots for highlights to make him look shiny.
More Tutorials


