How to Draw Chuck the Yellow Angry Bird: Easy 10-Step Guide
Ready to bring Chuck, the speedy yellow bird, to life? This tutorial is perfect for young artists ages 5 and up who want to master cartoon character proportions. Grab a pencil, an eraser, and some markers, and follow along to build your drawing skills through simple geometric shapes.
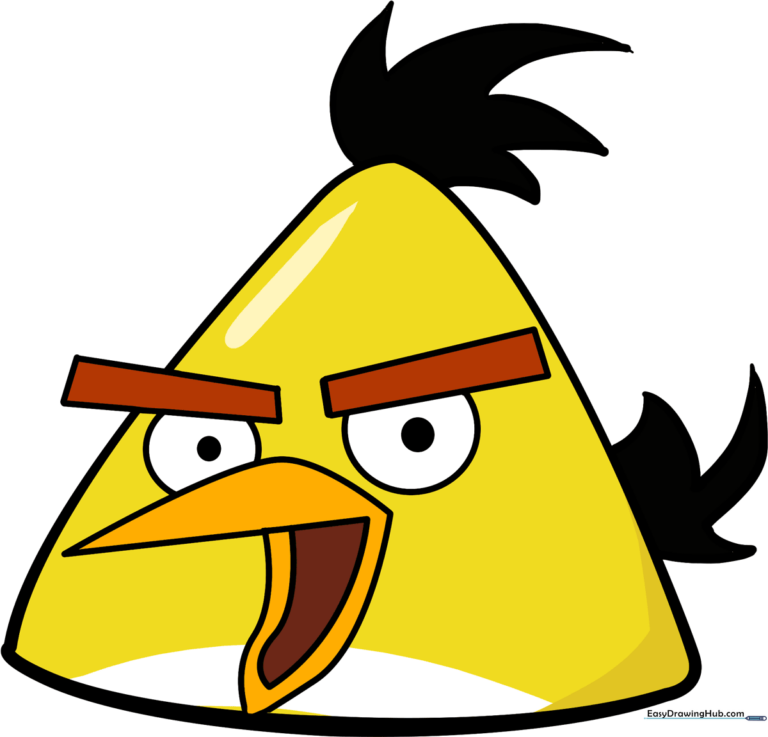
🎯 Final Result
Step-by-Step Instructions
Step 1: Sketching the Triangular Body

Draw a large, rounded triangle to serve as the body. Tip: Keep your pencil pressure light so you can easily erase the guide lines later; aim for a shape that looks like a slice of pizza with soft corners.
Step 2: Adding the Head Tuft
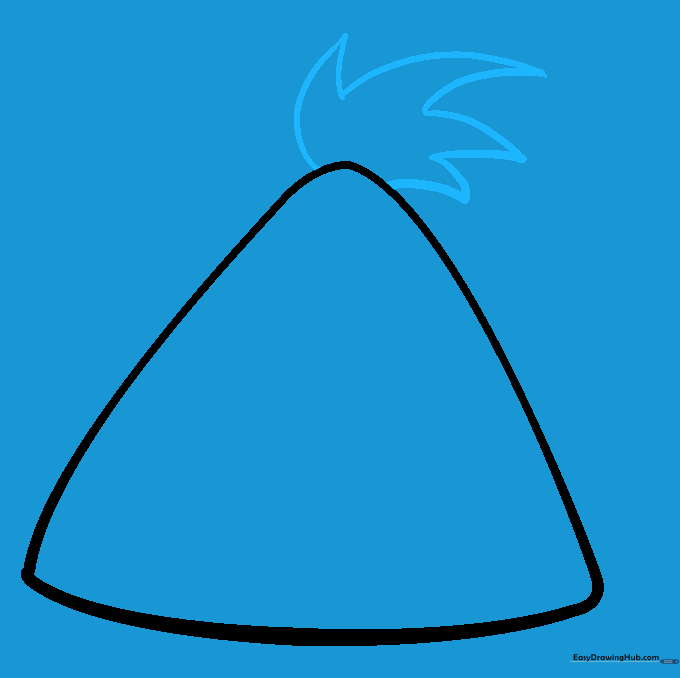
Draw the iconic tuft of feathers on top of the head using a series of connected 'V' shapes. Tip: Make these spikes look sharp and energetic to match Chuck's fast personality.
Step 3: Drawing the Tail Feathers

Extend curved lines from the side of the body to create the tail, finishing with sharp, pointed 'V' shapes. Tip: Ensure the tail points slightly upward to give the character a sense of motion.
Step 4: Sketching the First Eyebrow
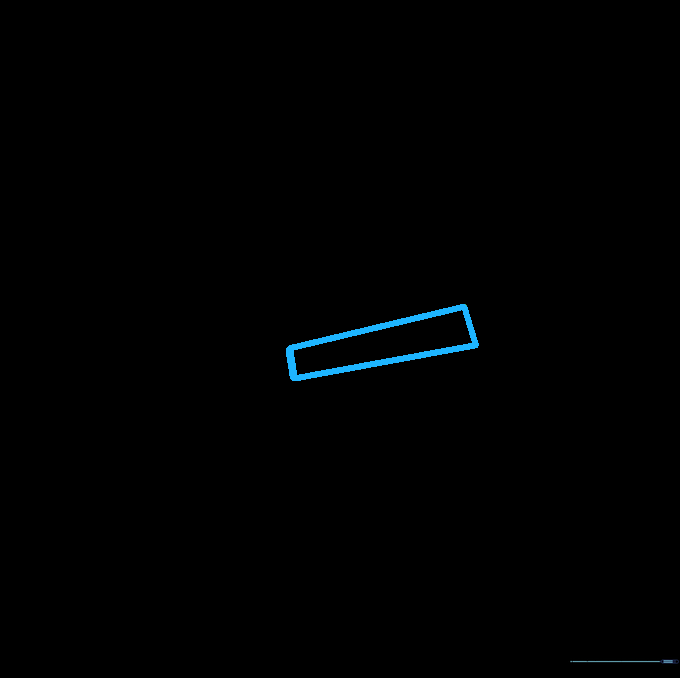
Draw a narrow, slanted rectangle near the top of the triangle for the eyebrow. Tip: Placing this at a steep angle is the secret to getting that classic 'angry' expression.
Step 5: Adding the Second Eyebrow

Sketch the second eyebrow slightly overlapping the first. Tip: Don't worry if it crosses the body line; you can erase the overlapping part once you're finished to make it look clean.
Step 6: Constructing the Beak
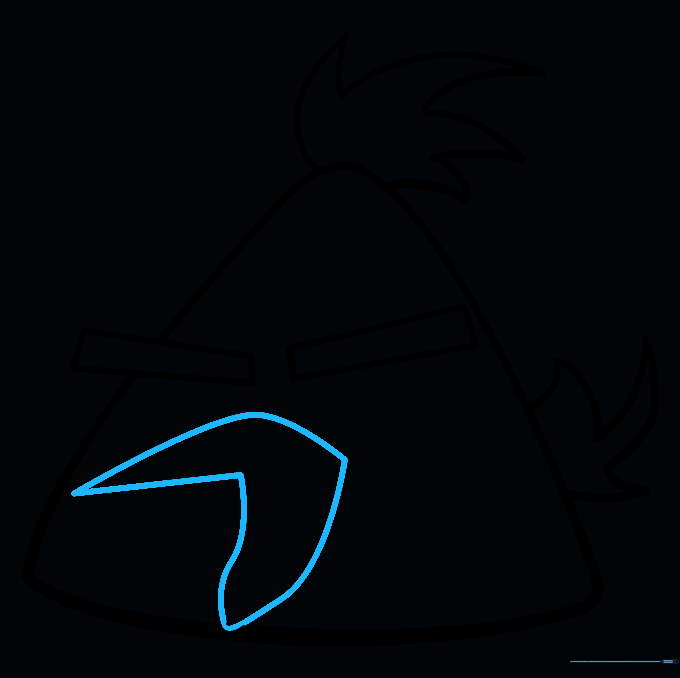
Draw two curved lines meeting at a point to form the outer beak, then add a crooked 'V' inside for the open mouth. Tip: Keep the beak shape wide to give him a funny, expressive look.
Step 7: Detailing the Mouth
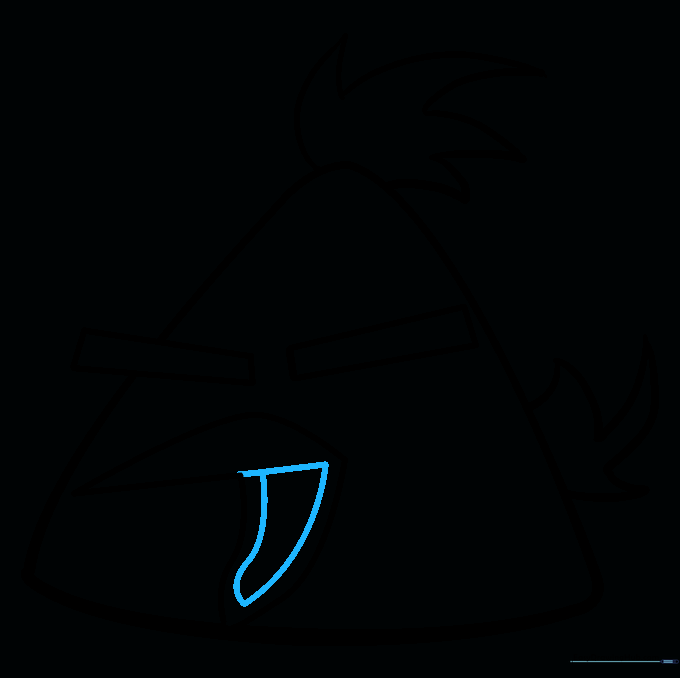
Extend a line from the inner 'V' to define the beak's opening, then add a curved line for the tongue. Tip: Adding this small detail makes the character look much more three-dimensional.
Step 8: Drawing the First Eye

Draw a partial circle under the first eyebrow and shade a small dot for the pupil. Tip: Make sure the pupil is centered to give him a focused, intense gaze.
Step 9: Drawing the Second Eye

Repeat the process for the second eye, placing it between the brow and the beak. Tip: Keep the eyes close together to maintain that 'angry' cartoon look.
Step 10: Adding Color
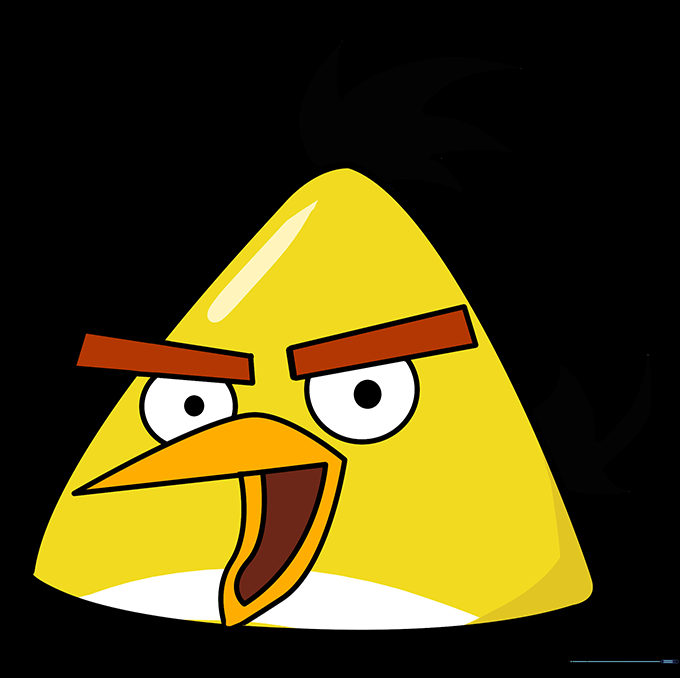
Time to color! Use bright yellow for the body, orange for the beak, and red for the eyebrows. Tip: Use a black marker to outline your work for a professional, comic-book finish.
More Tutorials


