How to Draw the White House: Easy 10-Step Guide for Kids
Bring history to life with this fun, screen-free drawing activity perfect for ages 6 and up. You will need a pencil, eraser, paper, and your favorite coloring markers to recreate this iconic landmark. Follow along to build confidence in architectural drawing while mastering basic geometric shapes.
🎯 Final Result

Step-by-Step Instructions
Step 1: Establishing the Roofline

Start by drawing a wide triangle for the roof, then nest a smaller triangle inside it. Add a thin rectangle beneath for the trim. Teacher's Tip: Keep your pencil pressure light so you can easily adjust the proportions if the roof looks a bit lopsided.
Step 2: Constructing the Columns
Draw the vertical columns by sketching two small circles connected by a rectangle, then extend them downward with straight lines. Teacher's Tip: Use a ruler to ensure your columns are evenly spaced, which gives the building its classic, sturdy look.
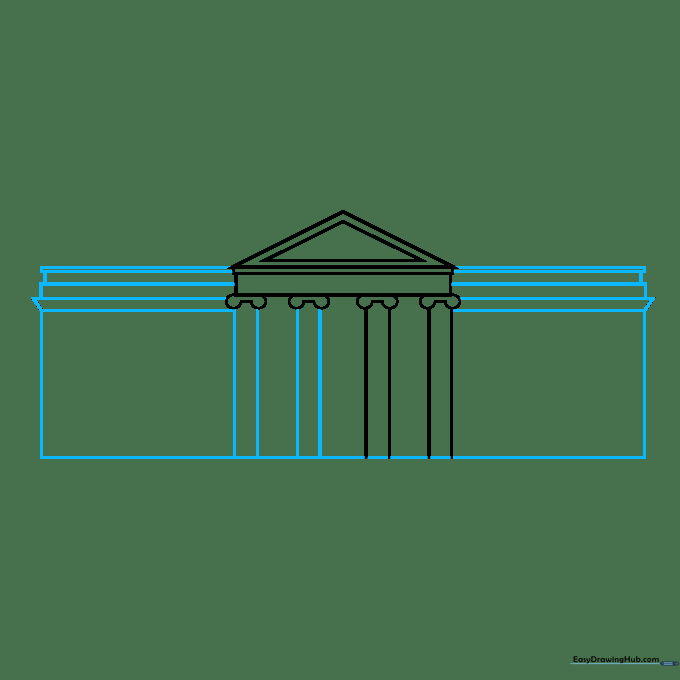
Step 3: Adding Structural Depth

Sketch rectangles on the left side to represent the building's wings. Add horizontal lines near the roof to create the cornice detail. Teacher's Tip: Think of the building as a collection of boxes stacked together—this makes complex architecture much easier to draw.
Step 4: Sketching the Windows

Draw small boxes across the front to serve as window frames, then add vertical lines inside them for the glass panes. Teacher's Tip: Keep your windows uniform in size to maintain the building's formal, symmetrical appearance.
Step 5: Completing the Facade

Continue adding windows across the remaining wall space and draw a larger rectangle for the main entrance door. Teacher's Tip: Double-check that your door is centered between the columns for better balance.
Step 6: Adding Architectural Ornaments

Draw a vertical line on the roof peak, then add decorative wavy lines and small domes over the windows. Teacher's Tip: These small details add character, so take your time and don't rush the curves.
Step 7: Landscaping and Flag

Draw fluffy, cloud-like shapes at the base for shrubs, and sketch a small flag with stars and stripes. Teacher's Tip: Let the shrubs overlap the building slightly to create a sense of depth and perspective.
Step 8: Adding the Fountain

Sketch a large oval in front of the building to represent the fountain, adding wavy lines for the water. Teacher's Tip: Use light, sketchy lines for the water to give it a sense of movement.
Step 9: Final Touches

Add soft, rounded clouds in the sky behind the building to frame your scene. Teacher's Tip: Keep the clouds simple so they don't distract from the main building.
Step 10: Bringing it to Life with Color

Outline your drawing with a black marker for a clean look. Use grey for shadows, blue for the sky and water, and vibrant green for the grass. Teacher's Tip: Use light grey shading on one side of the building to give it a 3D effect!
More Tutorials


