How to Draw the Water Cycle: Easy Science Art Lesson
Bring science to life with this engaging water cycle drawing tutorial, perfect for students ages 7 and up. You will only need paper, a pencil, and an eraser to map out the journey of a water droplet. This screen-free activity helps reinforce key environmental concepts through visual learning.
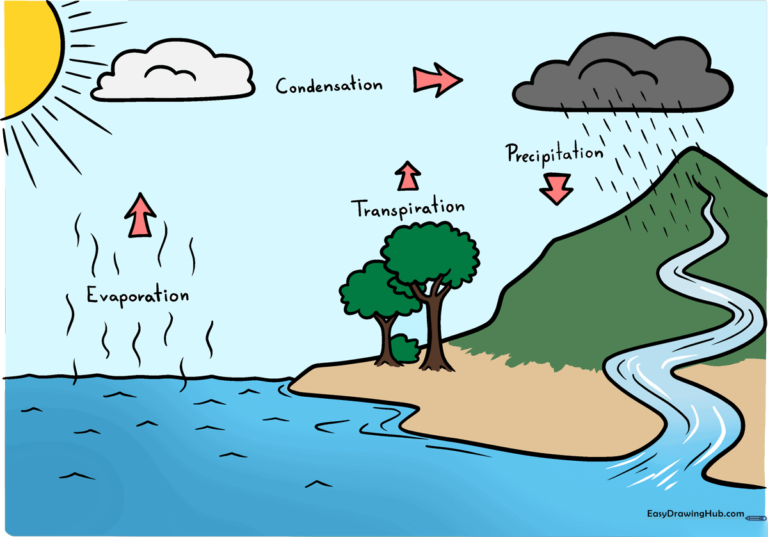
🎯 Final Result
Step-by-Step Instructions
Step 1: Sketching the Landscape

Start by drawing the basic geography. Use a long, wavy curved line to create the slope of a mountain and a flat horizontal line for the sea. Tip: Keep the mountain peak off-center to make your landscape look more natural.
Step 2: Adding the River
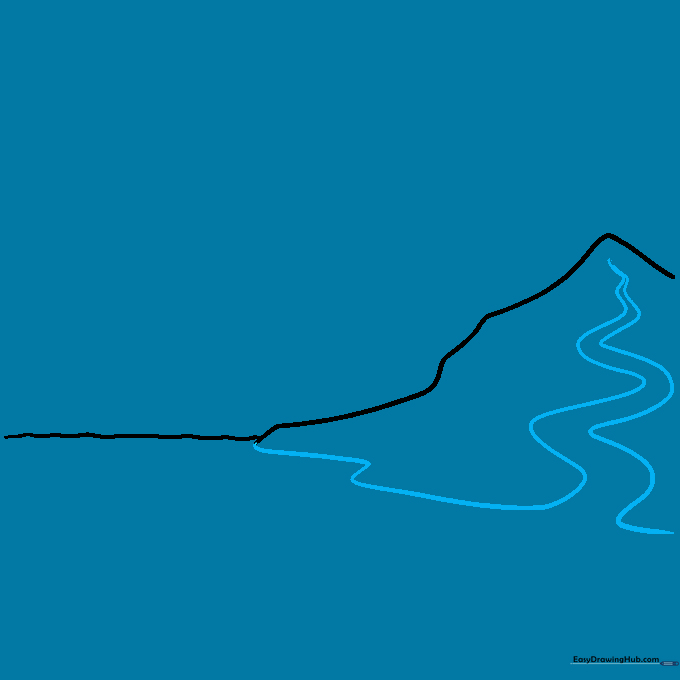
Draw a winding river flowing down from the mountain. Use two parallel curved lines that meet near the top. Tip: Make the river wider as it approaches the sea to show it gathering more water.
Step 3: Adding Vegetation
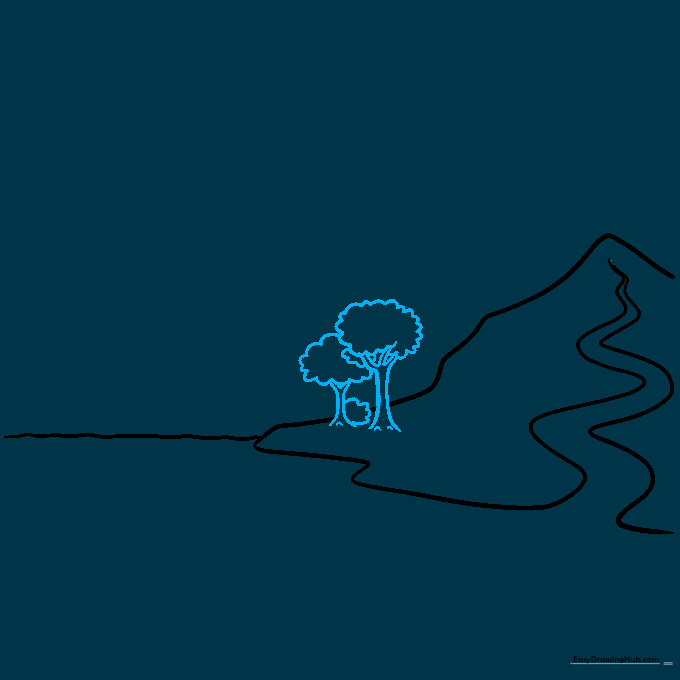
Sketch trees at the base of the mountain. Use simple, rounded shapes for the leafy crowns and vertical lines for the trunks. Tip: Vary the size of the trees to create a sense of depth in your drawing.
Step 4: Creating Water Texture
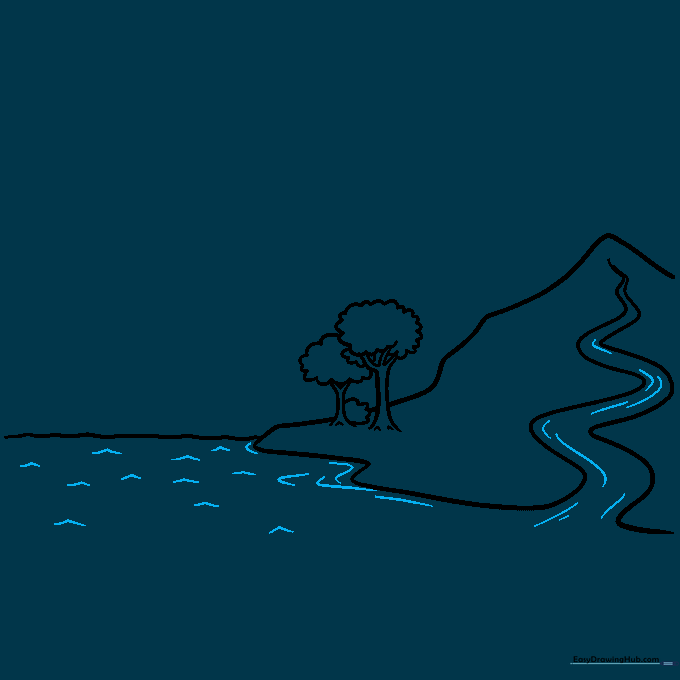
Add movement to your water. Draw small 'V' shapes on the ocean surface to represent waves and short, curved lines along the river bank. Tip: Don't overdo it; a few well-placed marks are enough to suggest flowing water.
Step 5: The Sun and Evaporation
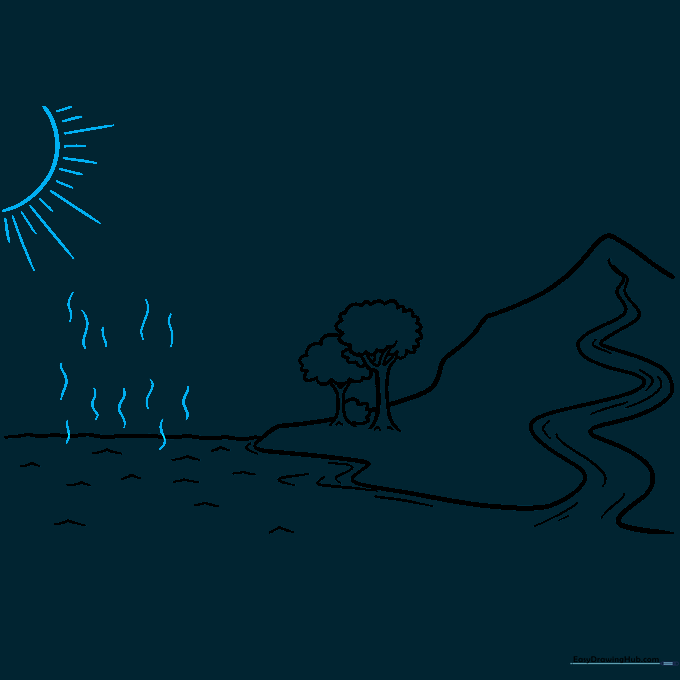
Draw a semi-circle sun in the corner with straight rays. Below it, add squiggly, rising lines over the sea to represent water vapor. Tip: These squiggles are the visual key for 'evaporation,' so keep them light and airy.
Step 6: Adding Clouds
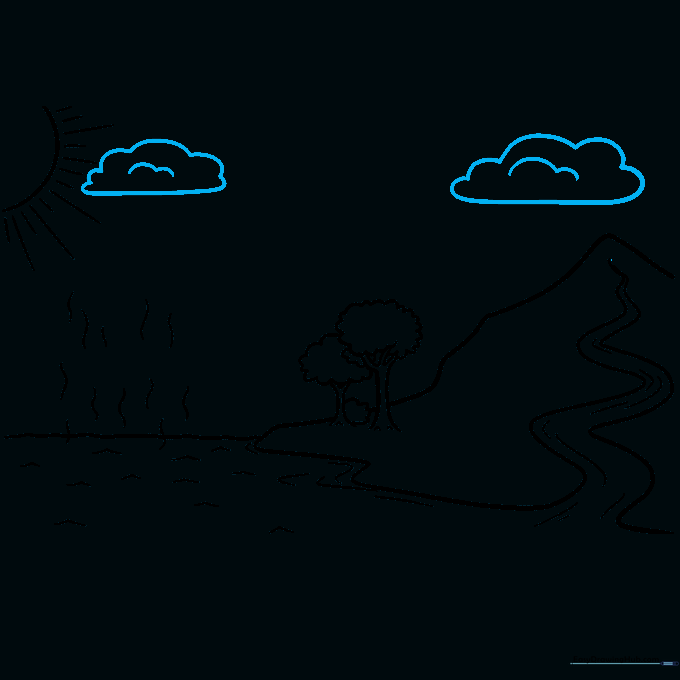
Draw two fluffy clouds—one over the ocean and one over the mountain. Use soft, rounded loops to give them a puffy appearance. Tip: Clouds are irregular, so don't worry about making them perfect circles.
Step 7: Illustrating Precipitation
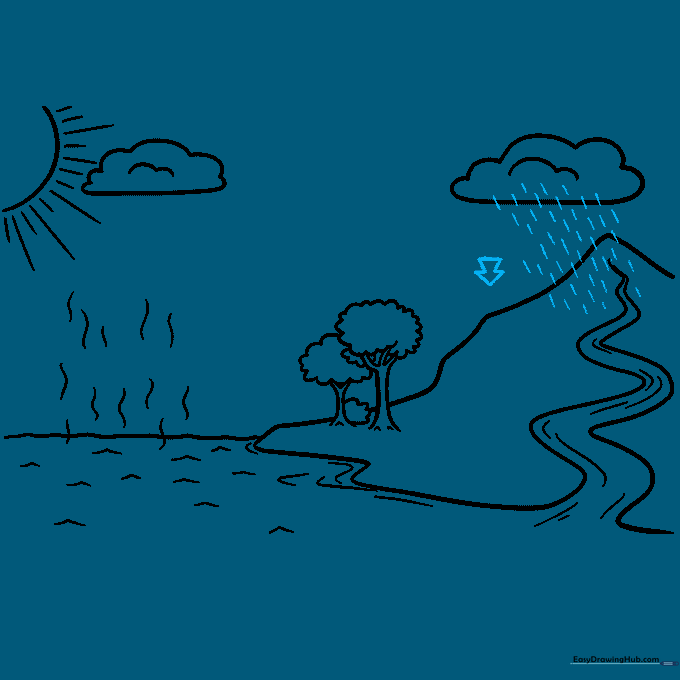
Draw short, vertical lines falling from the mountain cloud to show rain. Add a downward-pointing arrow to show the direction of the water. Tip: Keep the rain lines spaced evenly to make them look like a steady shower.
Step 8: Adding Directional Arrows
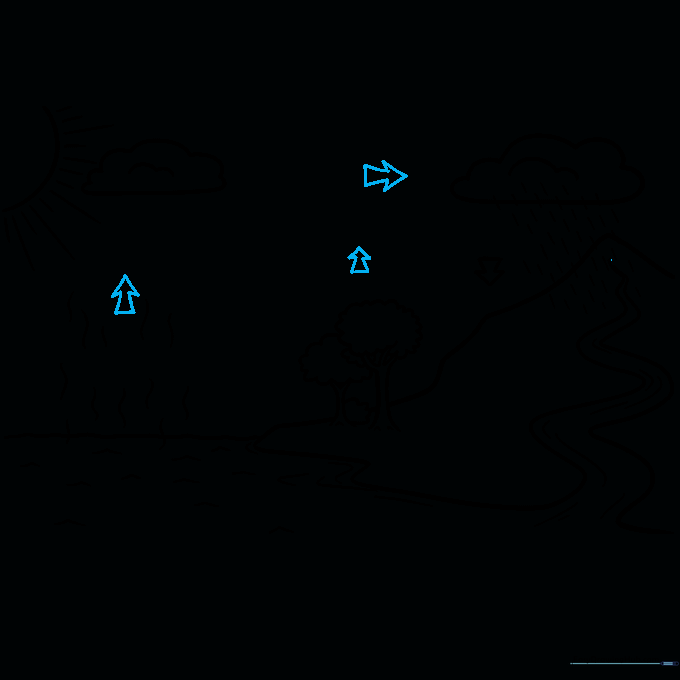
Draw arrows connecting the different parts of your drawing. These arrows guide the viewer's eye through the cycle. Tip: Draw them clearly so they don't get lost in the background details.
Step 9: Labeling the Cycle

Write the scientific terms near their corresponding parts: 'Evaporation' by the vapor, 'Transpiration' near the trees, 'Condensation' by the clouds, and 'Precipitation' by the rain. Tip: Use neat, block letters for readability.
Step 10: Adding Color
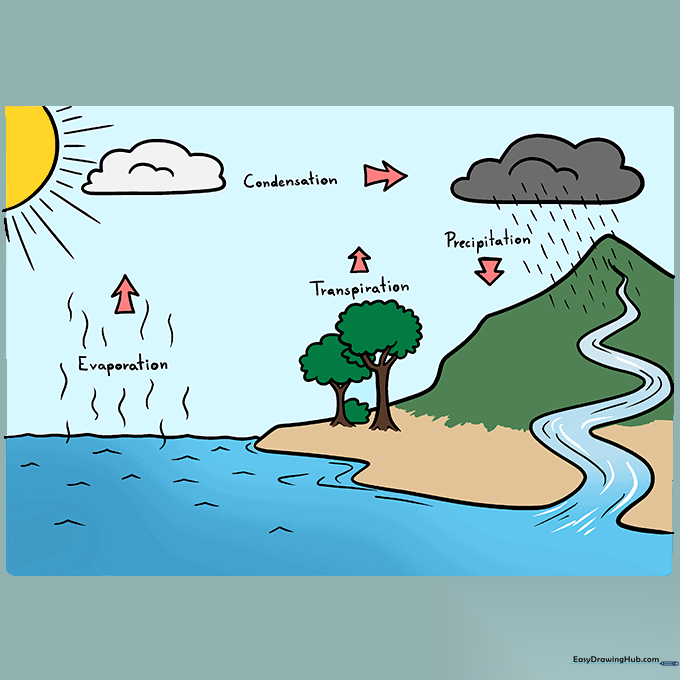
Bring your diagram to life with color! Use blues for water, greens for plants, and yellows for the sun. Tip: Use light blue for the water vapor to distinguish it from the liquid water in the ocean.
More Tutorials


