How to Draw the Respiratory System: Easy Science Diagram Guide
Looking for a fun way to help students visualize human anatomy? This guide is perfect for ages 8+ to learn the respiratory system through drawing. You will need a pencil, eraser, and colored pencils to map out the path of air from the nose to the lungs.
🎯 Final Result
Step-by-Step Instructions
Sketching the Profile Outline
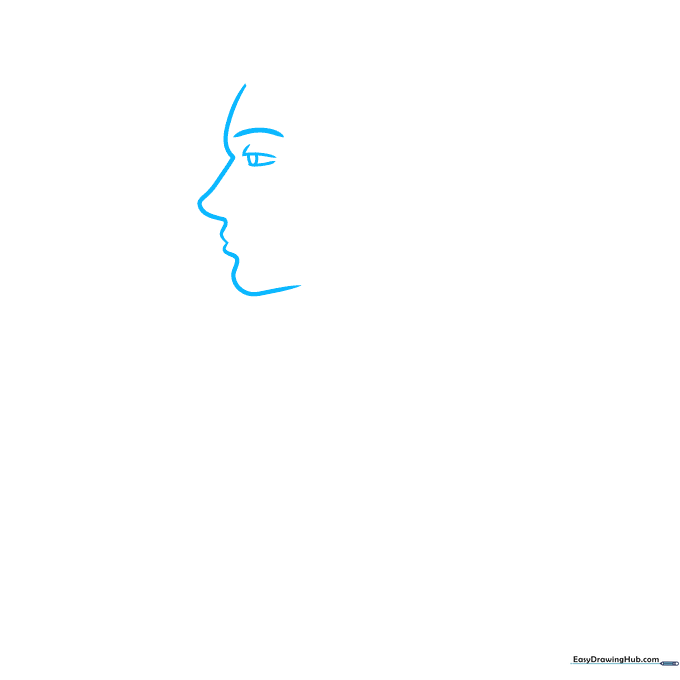
Start by drawing a gentle, curved line for the forehead and nose in profile. Add the eye and eyebrow to give your figure character. Teacher's Tip: Keep your pencil pressure light so you can easily adjust the nose shape if needed.
Defining the Head and Hair
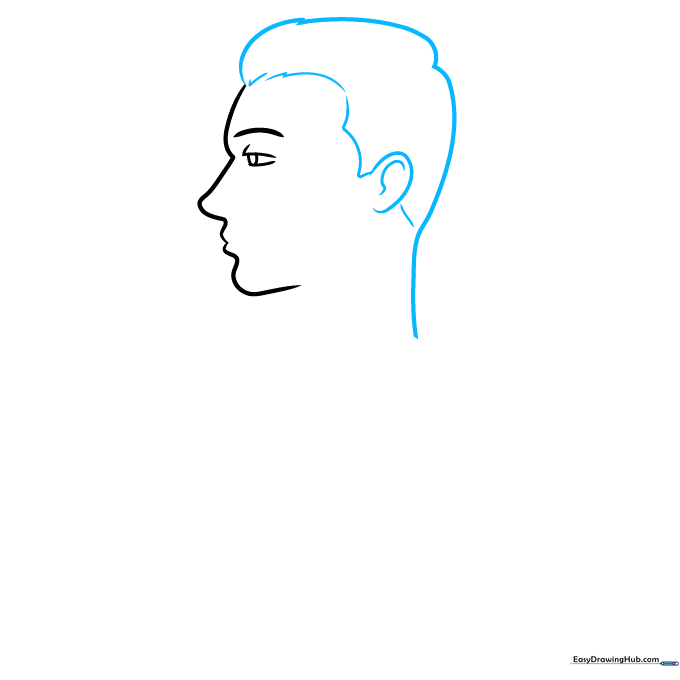
Draw the back of the head, ear, and hairline using short, jagged strokes. Teacher's Tip: Use quick, flicking motions with your pencil to create a natural, textured look for the hair.
Mapping the Torso and Airway
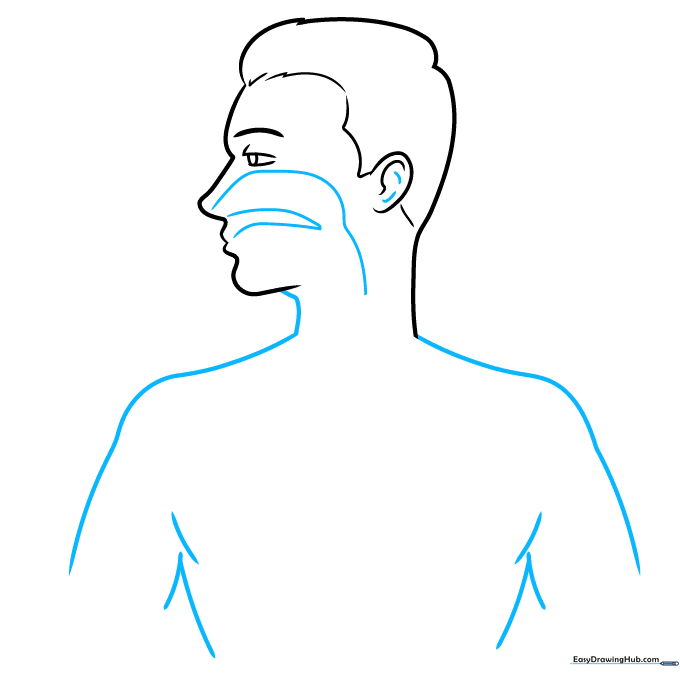
Sketch the shoulders and chest area. Begin the internal diagram by drawing a line from the nose and a 'V' shape behind the mouth. Teacher's Tip: Think of this as a map—these lines represent the path air travels into the body.
Drawing the Lungs
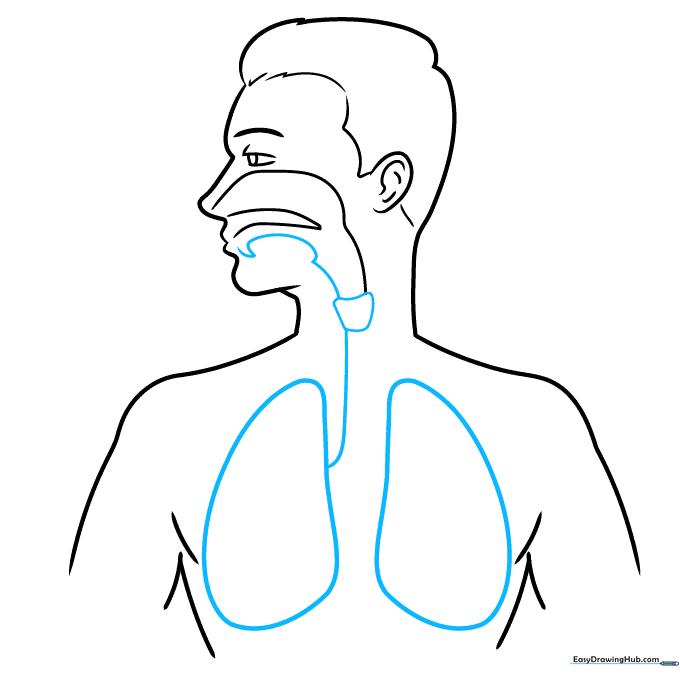
Connect the airway to a rounded trapezoid shape, then draw two large, rounded shapes for the lungs. Teacher's Tip: Keep the lung shapes symmetrical to make the diagram easier to label later.
Starting the Bronchial Tree
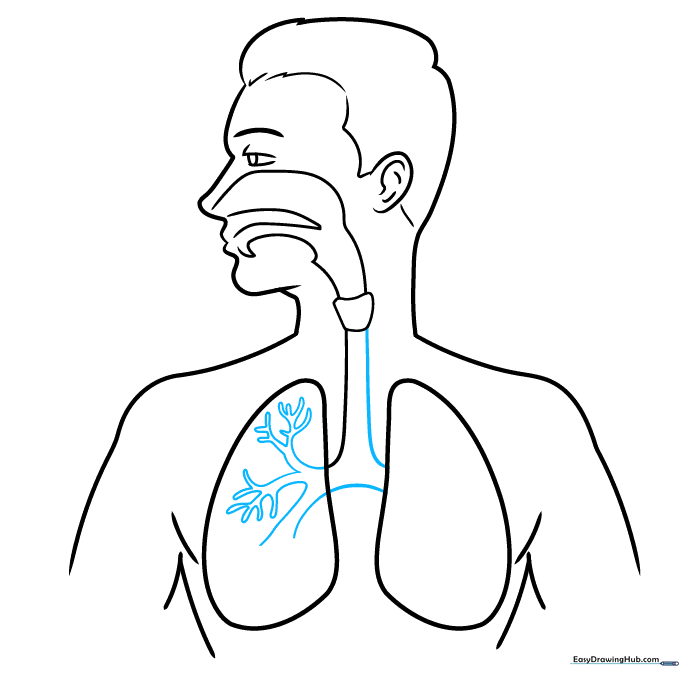
Draw curved lines connecting the lungs to the central airway. Inside the first lung, start sketching small, branching lines. Teacher's Tip: These branches represent the bronchioles; keep them thin and delicate.
Expanding the Bronchial Network
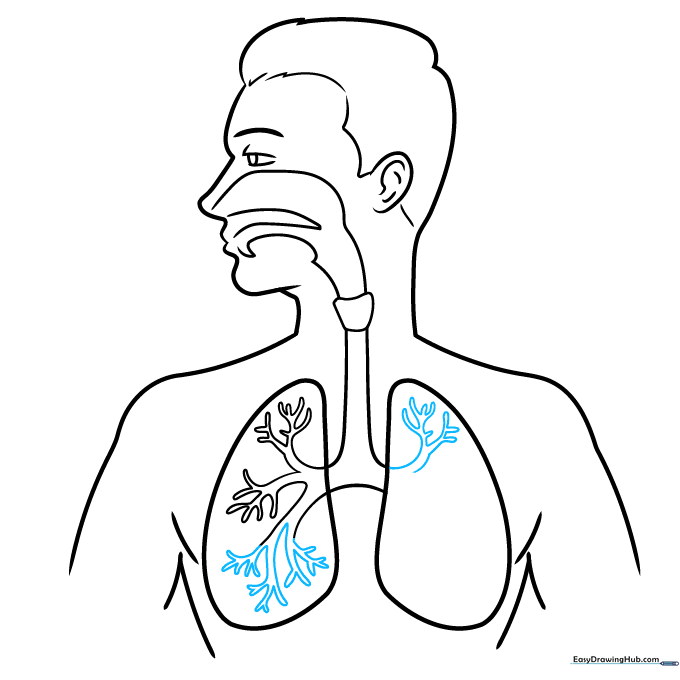
Continue the branching pattern in the first lung and replicate it in the second. Teacher's Tip: Don't worry about making them perfectly identical; nature is rarely perfectly symmetrical!
Refining the Internal Structure
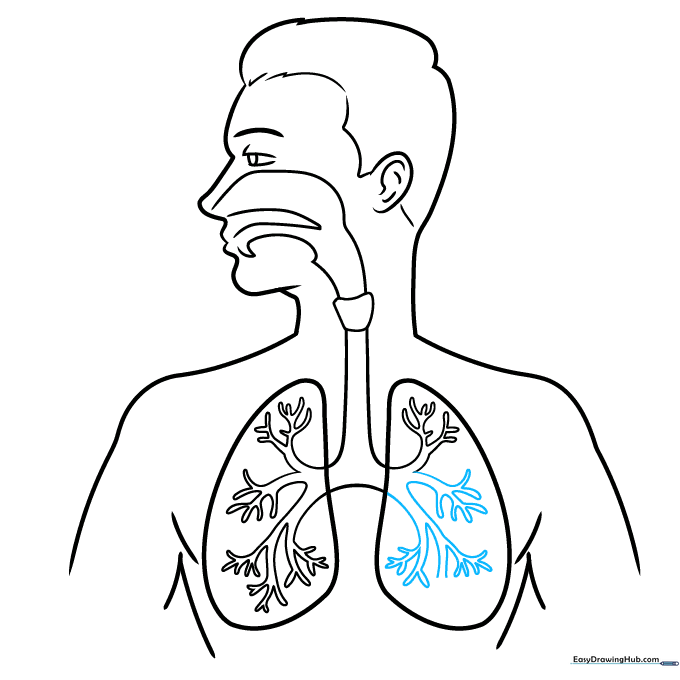
Add more detail to the branching structure to show how air reaches all parts of the lungs. Teacher's Tip: Use a sharper pencil point here to keep the lines clean and distinct.
Adding Labels and Trachea Details
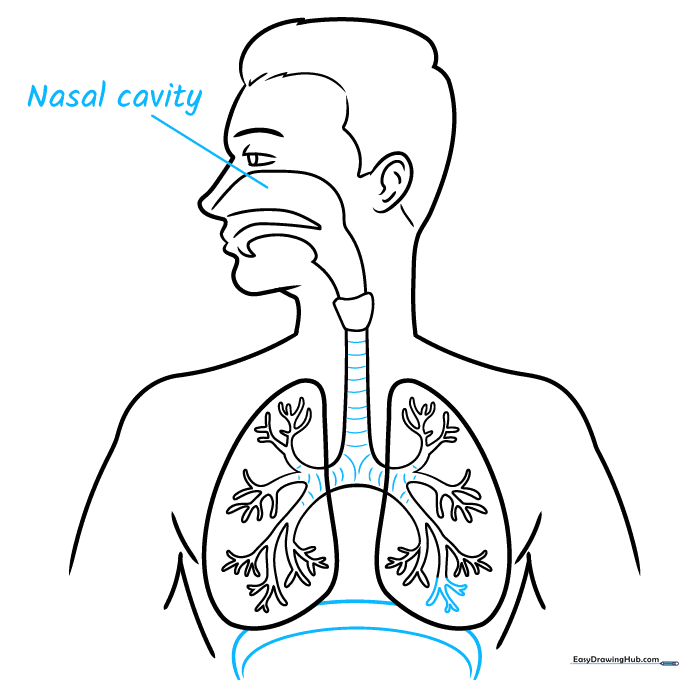
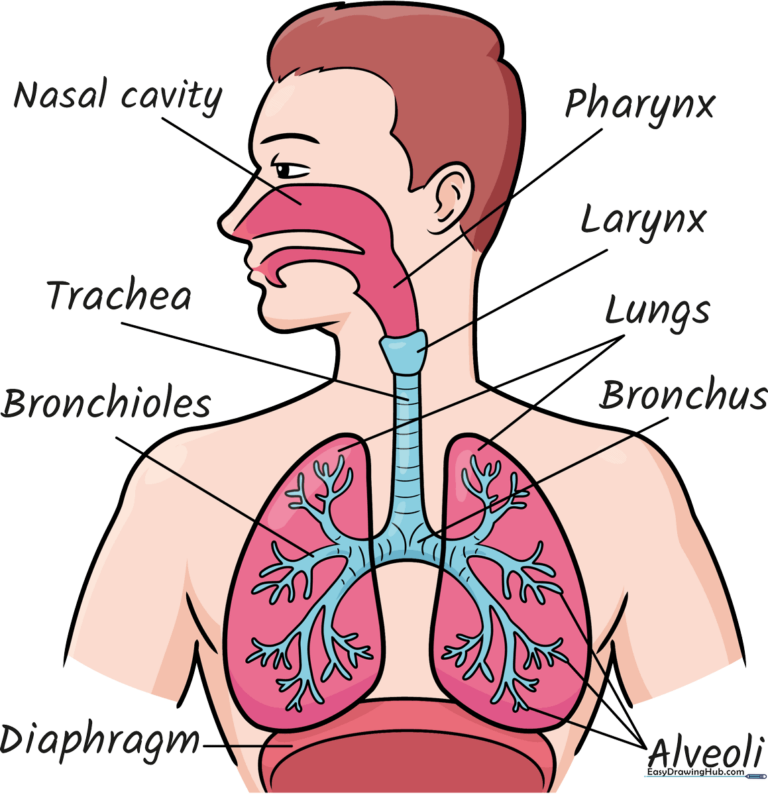
Band the trachea and bronchus with curved lines to show their structure. Add a 'C' shape below the lungs for the diaphragm and begin labeling the nasal cavity. Teacher's Tip: Use a ruler for your label lines to keep the diagram looking professional.
Completing the Labels
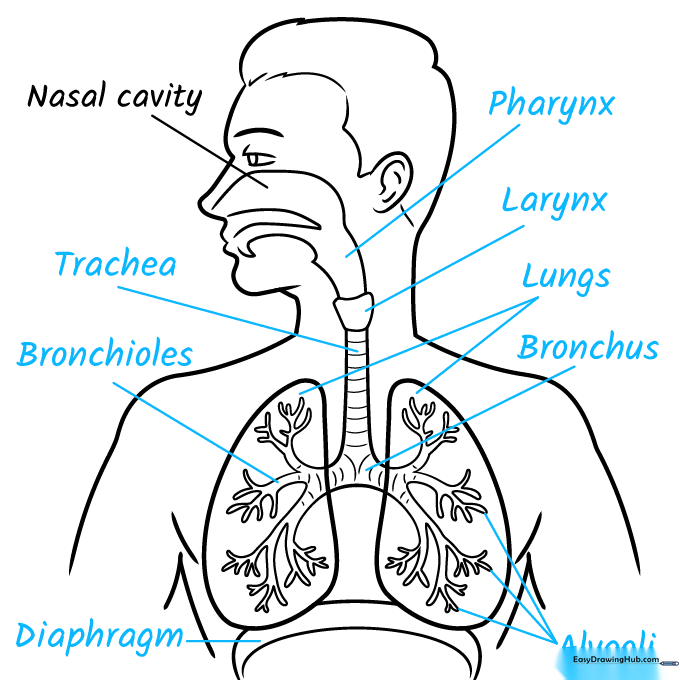
Finish labeling the diagram: diaphragm, bronchioles, trachea, pharynx, larynx, lungs, bronchus, and alveoli. Teacher's Tip: Check your spelling carefully—this is a great way to reinforce science vocabulary!
Adding Color
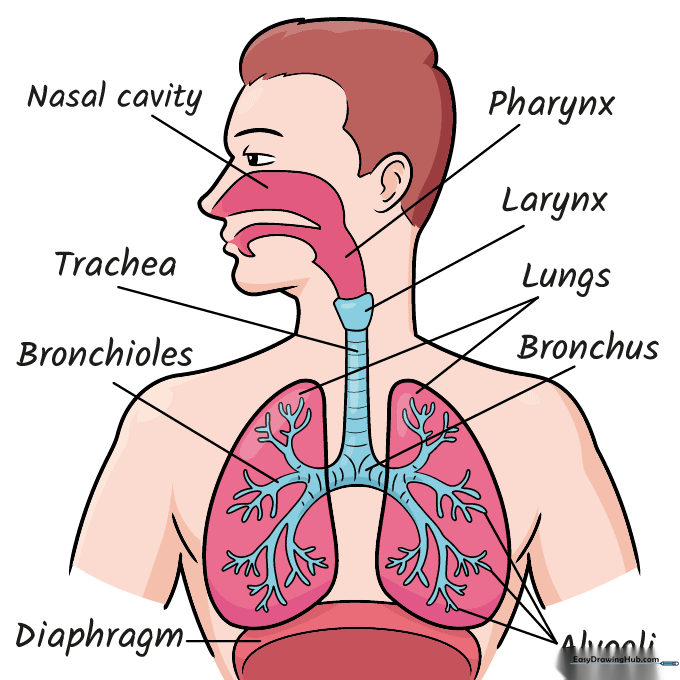
Bring your diagram to life with color. Use distinct colors for each part to help differentiate the structures. Teacher's Tip: Use a color key at the bottom of your page to make it a true scientific reference tool.
More Tutorials


