How to Draw the Genie from Aladdin: Easy Step-by-Step Guide
Bring the magic of Agrabah to your sketchbook! This tutorial is designed for young artists and beginners to master the Genie’s expressive features and iconic pose. You will need a pencil, an eraser, and a piece of paper to complete this fun, screen-free character study.
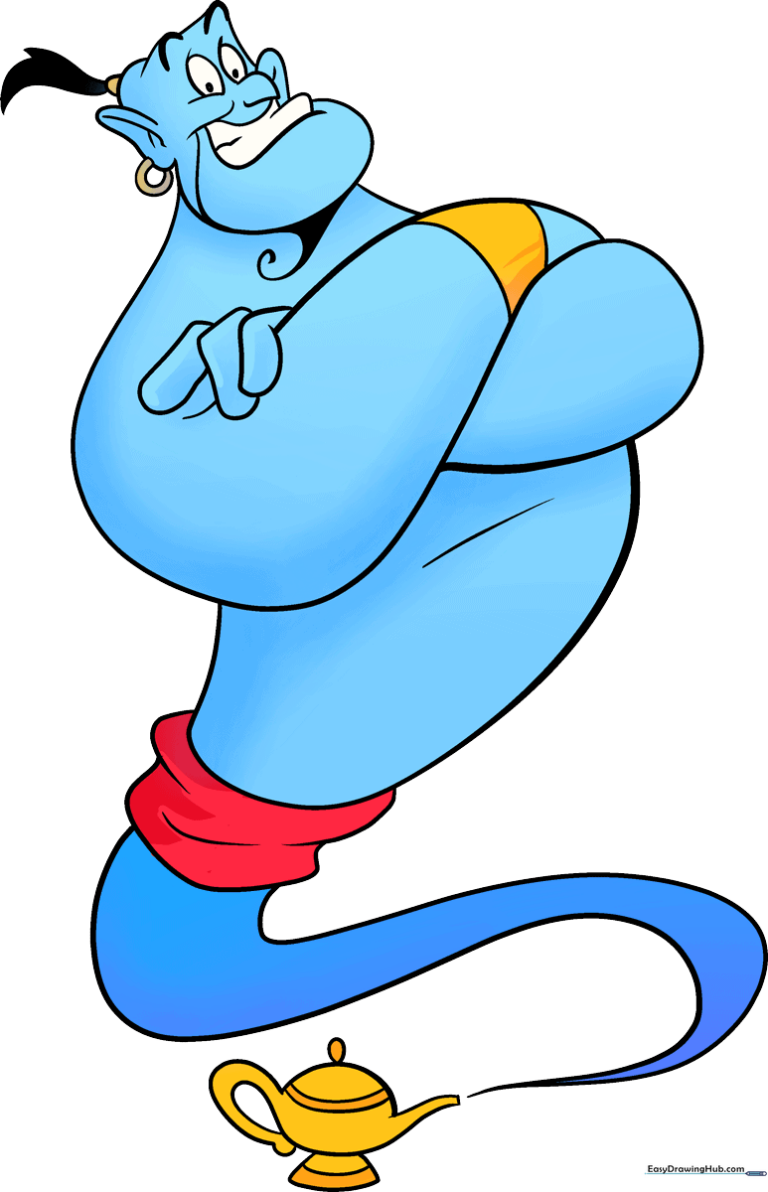
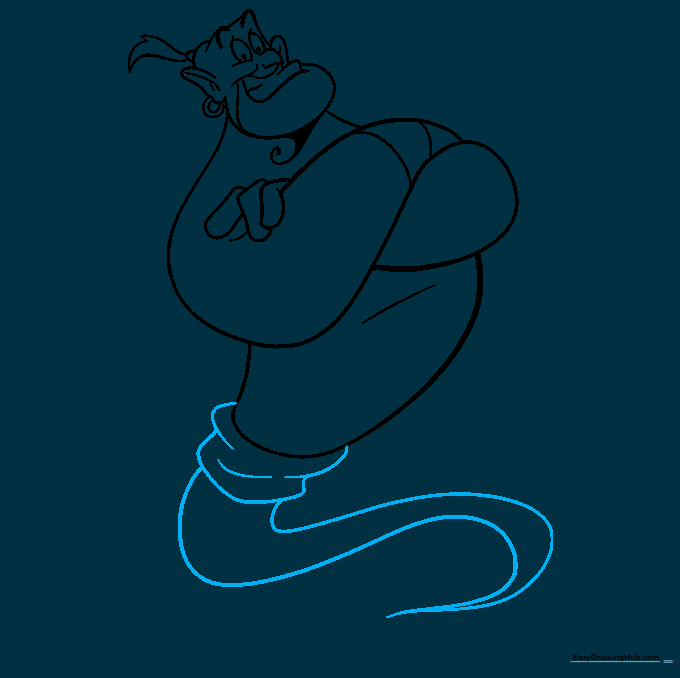
🎯 Final Result
Step-by-Step Instructions
Step 1: Sketching the Expressive Eyes

Start by drawing two ovals for the eyes. Add curved lines above and below to create his signature wide-eyed look, and place a small circle inside each for the pupils. Teacher's Tip: Keep your pencil lines light—if you make a mistake, it’s much easier to erase without leaving marks on your paper.
Step 2: Drawing the Wide Grin

Use smooth, curved lines to outline his large, joyful mouth. Add a horizontal line to separate the upper and lower teeth. Teacher's Tip: The Genie is known for his big personality, so don't be afraid to make the mouth nice and wide!
Step 3: Defining the Head and Ear
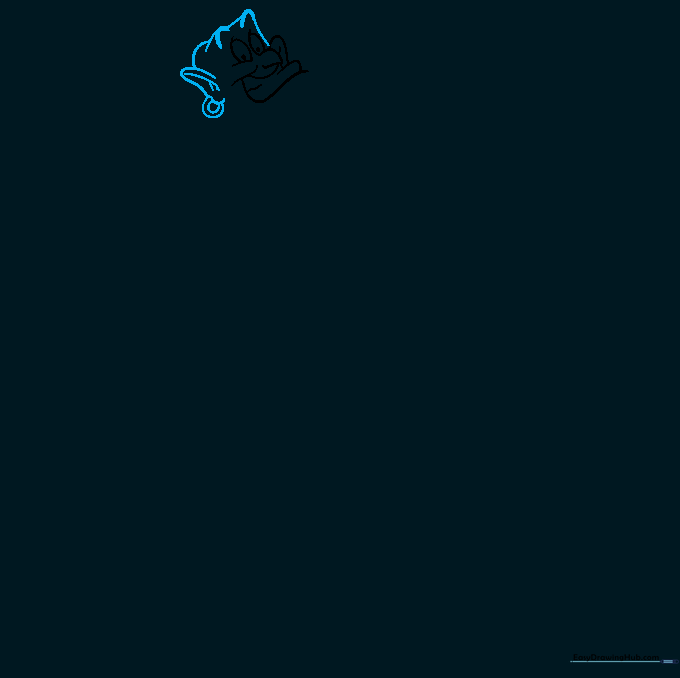
Sketch the brow, head, and ear using overlapping curves. Add a 'Y' shape inside the ear for detail and two 'C' shapes for his gold earring. Teacher's Tip: Use thick, bold lines for the eyebrows to capture his energetic expression.
Step 4: Adding Hair and Beard

Add a small half-circle on top for hair and a curved 'V' shape to connect it. Outline the jaw and draw the beard as a curved triangle that ends in a spiral. Teacher's Tip: The spiral at the end of the beard is a key detail—take your time to make it look smooth.
Step 5: Sketching the Crossed Arms
Draw a long, curved line from below the ear that loops back to form an incomplete figure-eight. This creates the base for his crossed arms. Teacher's Tip: Think of this as a 'folded' shape; keeping the lines fluid helps the arms look natural.
Step 6: Adding Shackles and Hands
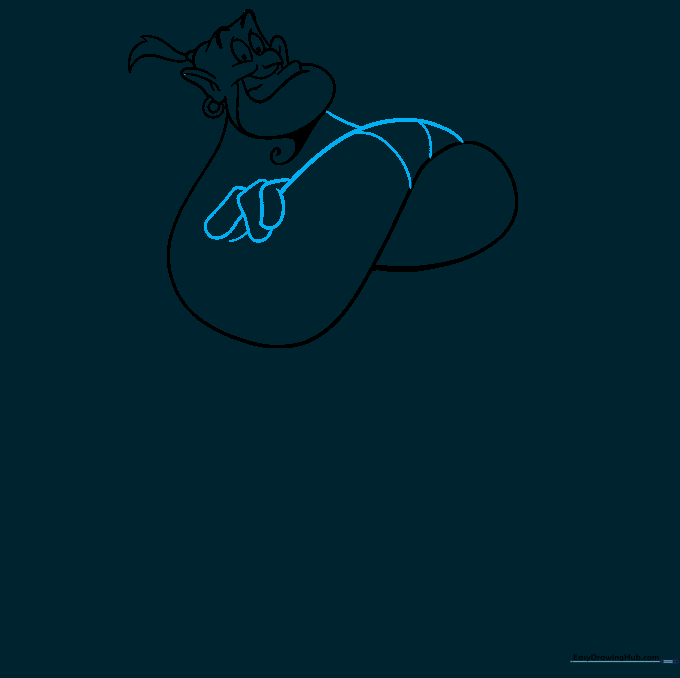
Draw curved lines across the wrists to represent his shackles, then sketch the fingers using rounded, doubled-back lines. Teacher's Tip: Don't worry about perfect fingers; focus on the rounded, cartoonish shape of his hands.
Step 7: Outlining the Torso
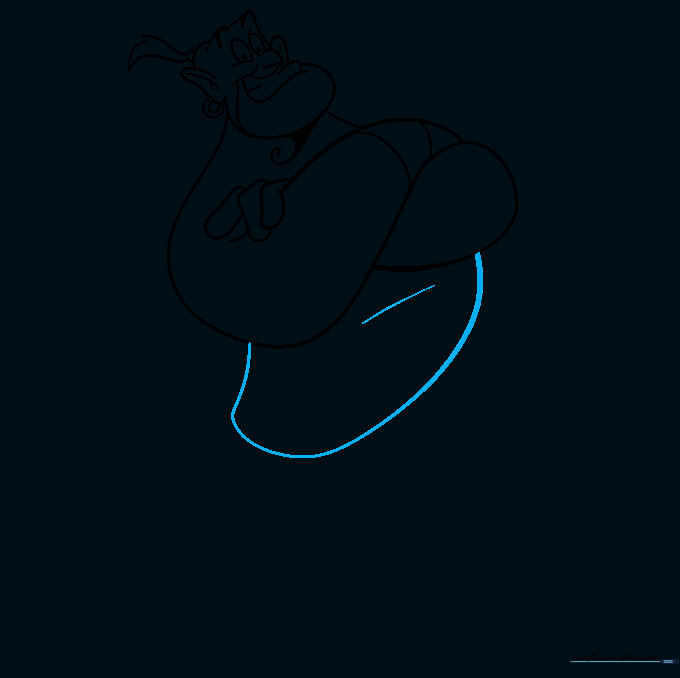
Use a long, sweeping curved line to define the Genie's torso. Add a subtle curve at the top of the stomach to show his posture. Teacher's Tip: Keep this line continuous to give the character a sense of movement.
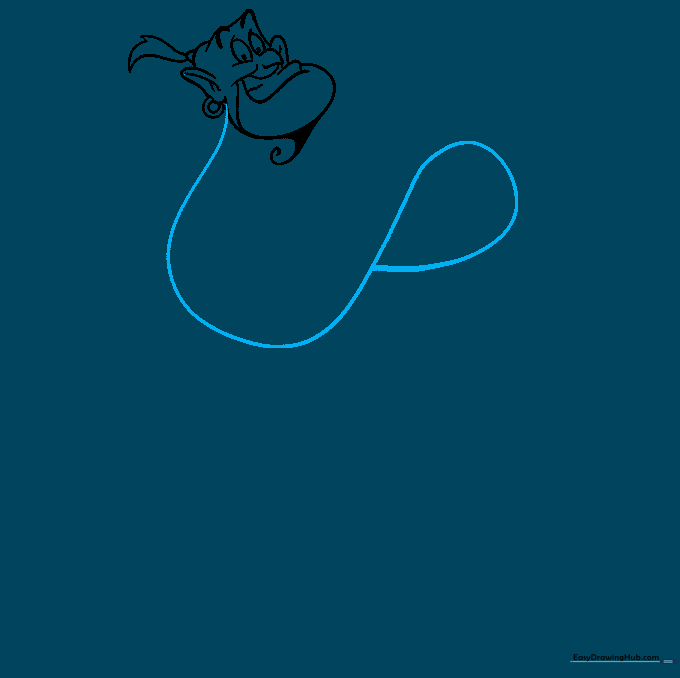
Step 8: Drawing the Sash and Tail
Draw overlapping curves for the belt/sash, then extend two lines that meet at a point to create his magical, smoke-like tail. Teacher's Tip: Since the tail is made of smoke, feel free to make the lines a bit wavy and organic.
Step 9: Adding the Magic Lamp
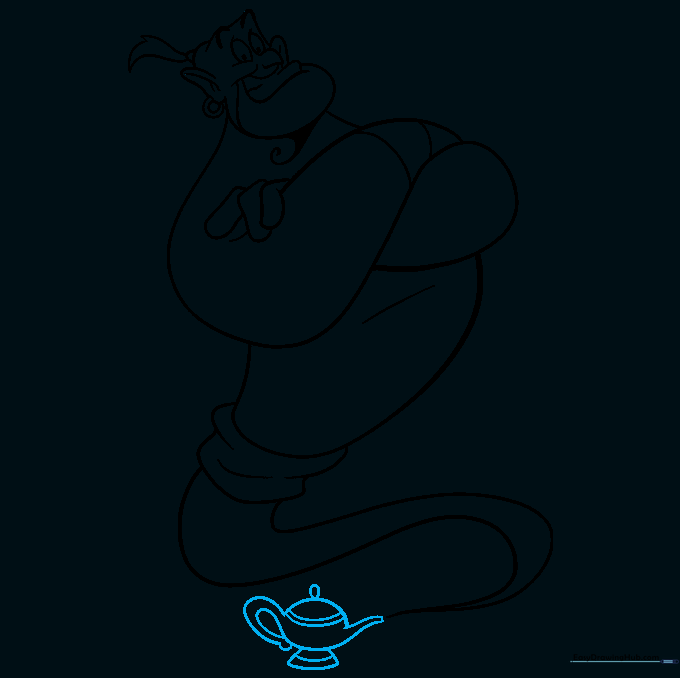
Draw the iconic lamp using a teapot shape: a round body, narrow spout, and curved handle. Add an inverted teardrop on top for the lid. Teacher's Tip: Use light construction lines first to get the proportions of the lamp right before darkening them.
Step 10: Bringing the Genie to Life with Color

Time to color! Use a vibrant blue for the Genie's skin and a bright gold for his lamp and wrist shackles. Teacher's Tip: Use light pressure with your colored pencils to create smooth, even layers of color.
More Tutorials


