How to Draw a Demogorgon: Easy Step-by-Step Guide
Ready to bring the Upside Down to your sketchbook? This tutorial is perfect for fans ages 8+ looking to practice character design using basic geometric shapes. Grab a pencil, an eraser, and a piece of paper to follow along as we break down this iconic monster into manageable, fun steps.
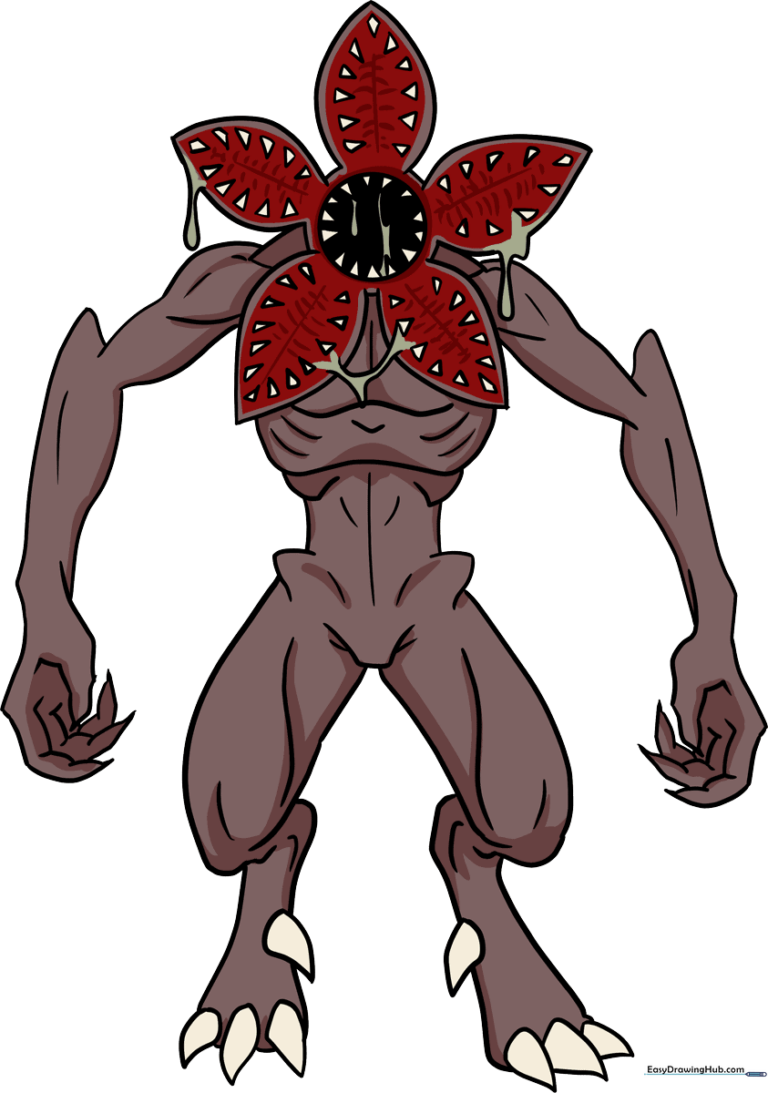
🎯 Final Result
Step-by-Step Instructions
Step 1: Establishing the Mouth Base

Draw a circle near the top of your page, then nest a smaller circle inside it. Teacher's Tip: Keep your lines faint! These are just guides for the Demogorgon's signature petal-mouth, and you'll want them easy to erase later.
Step 2: Shaping the Petals

Sketch five rounded, petal-like shapes radiating from the center. Teacher's Tip: Try to space them evenly like a star; this creates the iconic 'flower' look of the creature's face.
Step 3: Adding Sharp Teeth
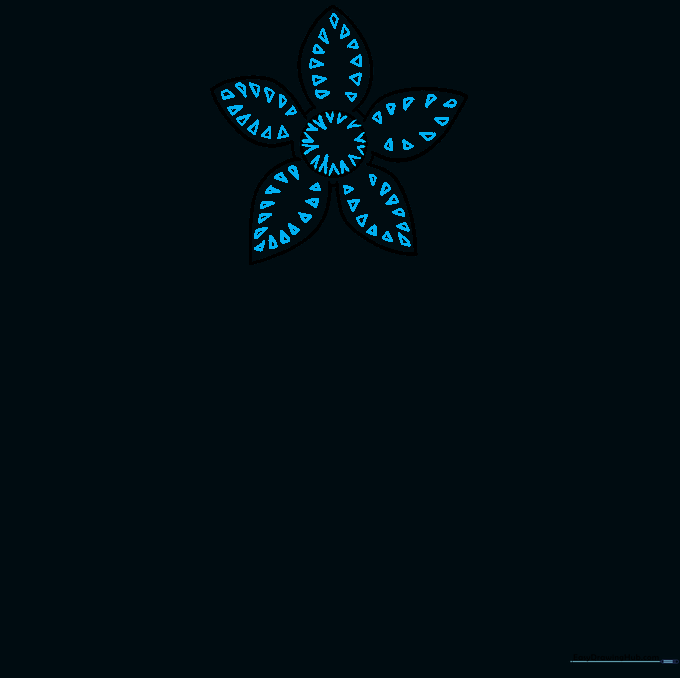
Fill the petals and the inner circle with sharp, triangular teeth. Teacher's Tip: Don't worry about making them perfect! Varying the sizes of the teeth makes the creature look more organic and menacing.
Step 4: Sketching the Body Frame
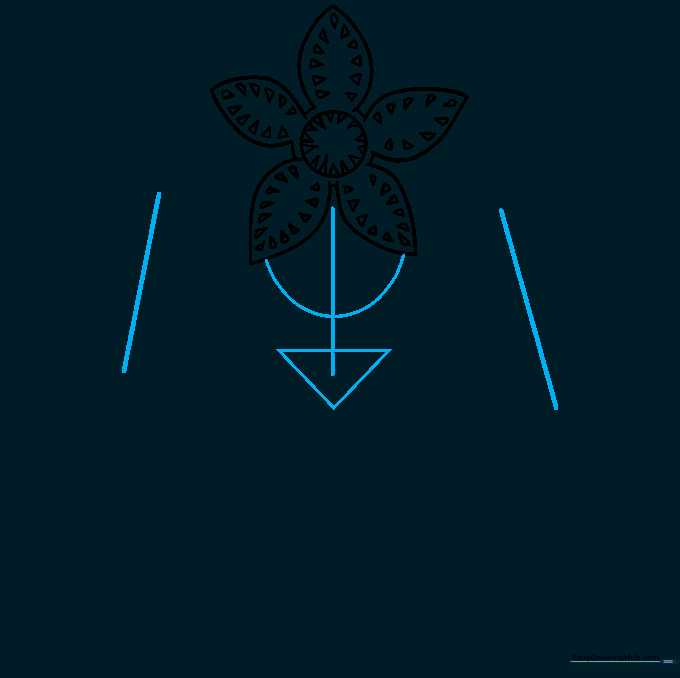
Draw a triangle for the torso, a circle for the hip area, and two lines for the arms. Teacher's Tip: Keep these lines very light—these are just 'skeleton' guides to help you get the proportions right before adding detail.
Step 5: Defining the Torso
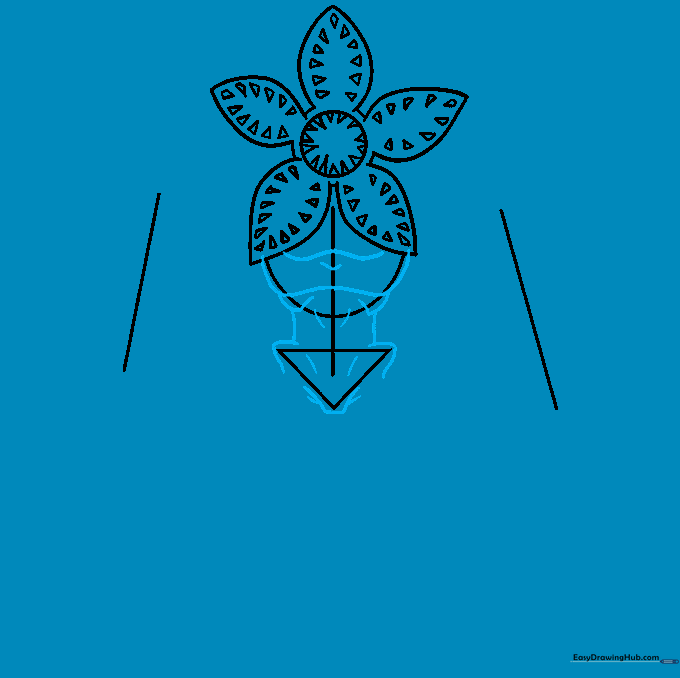
Outline the chest and hips using your guide shapes. Teacher's Tip: The Demogorgon is famously bony; draw the waist narrow and the chest broad to capture that eerie, skeletal silhouette.
Step 6: Adding Arm Detail
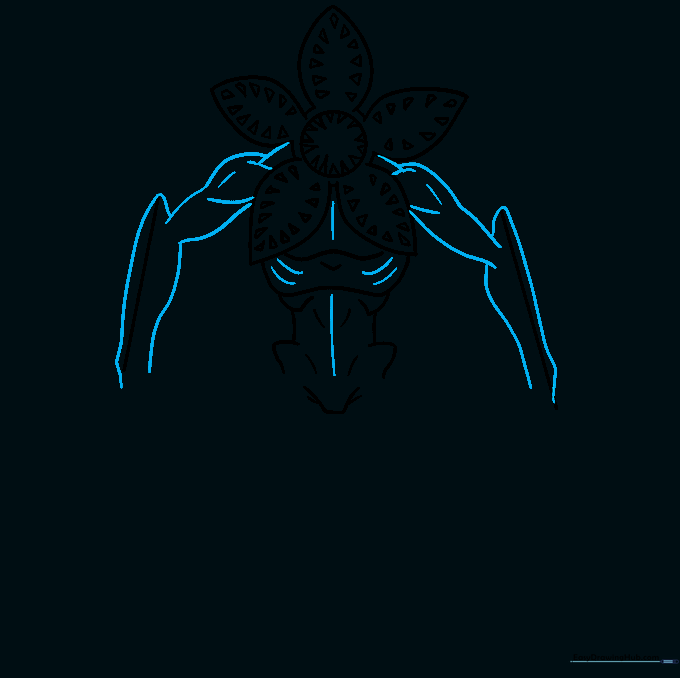
Refine the arms, giving them a sharp, angular point at the elbows. Teacher's Tip: Use long, slightly curved lines to make the limbs look thin and powerful, emphasizing the creature's reach.
Step 7: Drawing the Claws
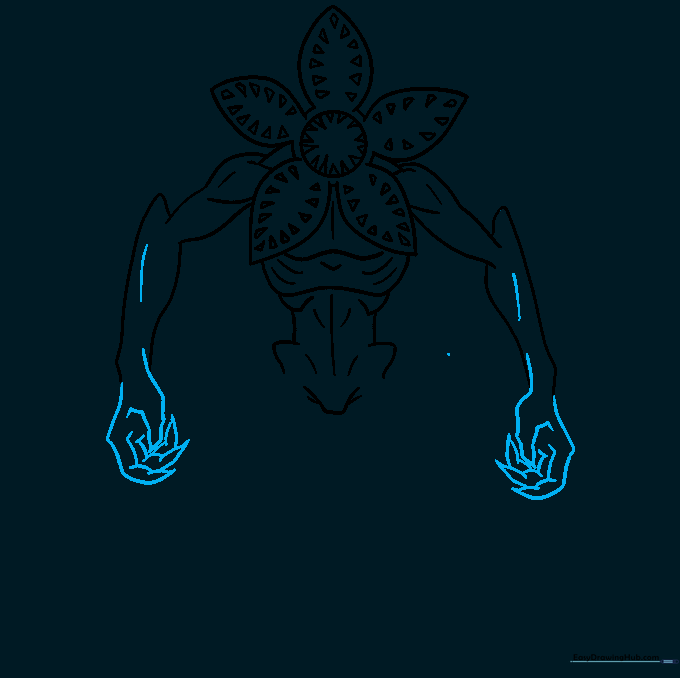
Erase your initial arm guides, then draw large hands with curved, sharp claws. Teacher's Tip: Make the hands slightly oversized to emphasize the creature's intimidating nature.
Step 8: Adding the Legs
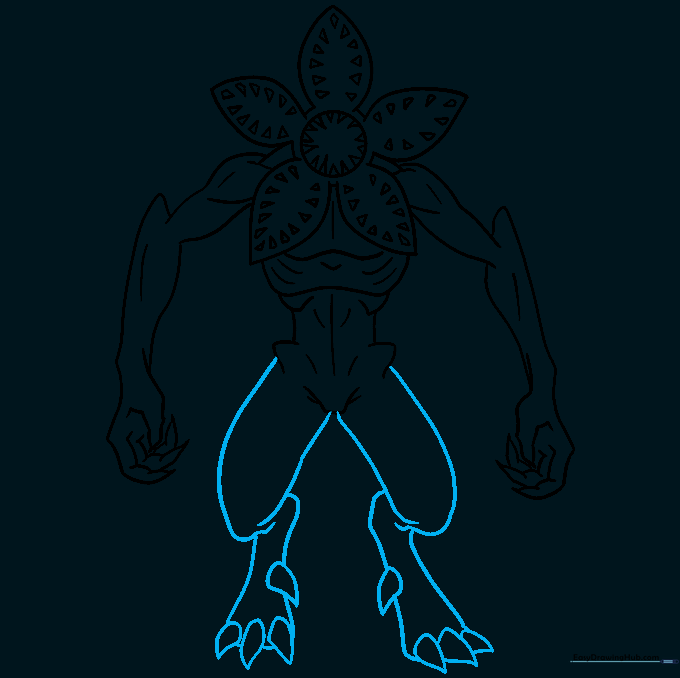
Add long, bent legs with four large claws on each foot. Teacher's Tip: The bend at the knee should look a bit unnatural to give the creature that 'otherworldly' movement.
Step 9: Final Details
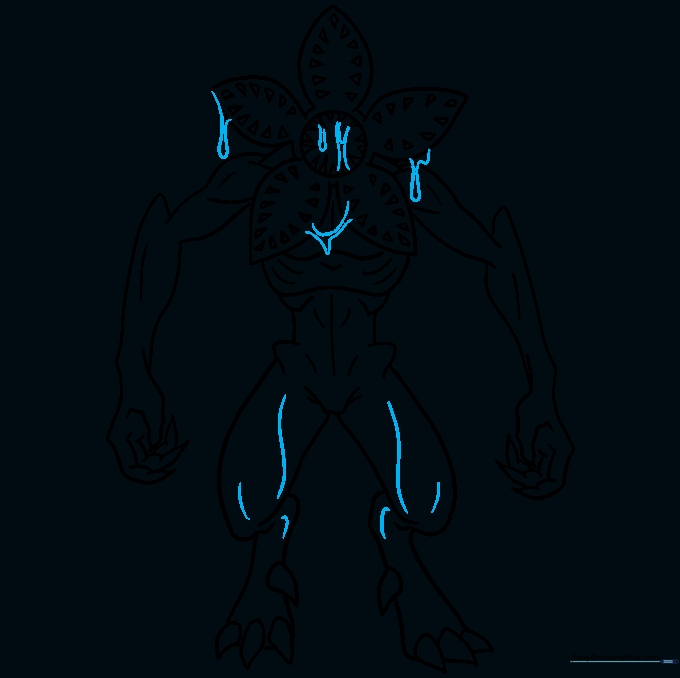
Define the leg muscles and add some 'slime' details around the mouth. Teacher's Tip: Use short, squiggly lines for the slime to give it a wet, gross texture that really sells the monster look.
Step 10: Color and Finish
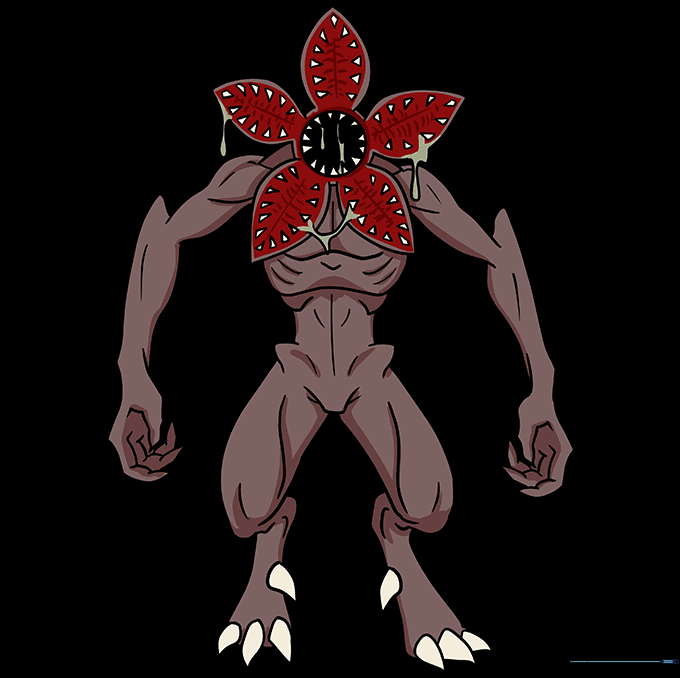
Your outline is complete! Now, use shades of grey, brown, and dark red to bring your monster to life. Teacher's Tip: Use a darker color for the shadows in the mouth to make the teeth pop!
More Tutorials


