How to Draw the Big Bad Wolf: Easy 9-Step Guide
Bring this classic fairy tale villain to life with our easy, step-by-step drawing tutorial. Designed for young artists ages 6 and up, this project requires only a pencil, paper, and an eraser. Follow along to master character proportions and expressive line work.
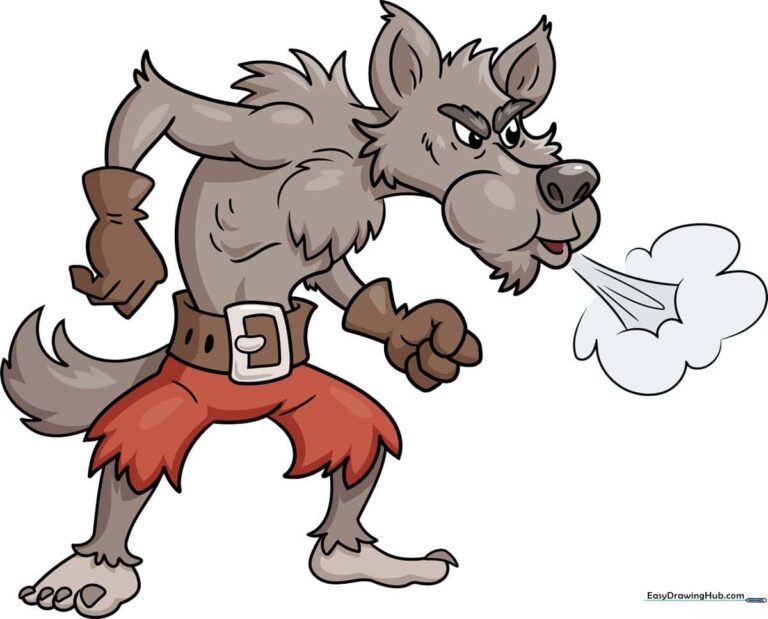
🎯 Final Result
Step-by-Step Instructions
Step 1: Sketching the Snout and Eyes
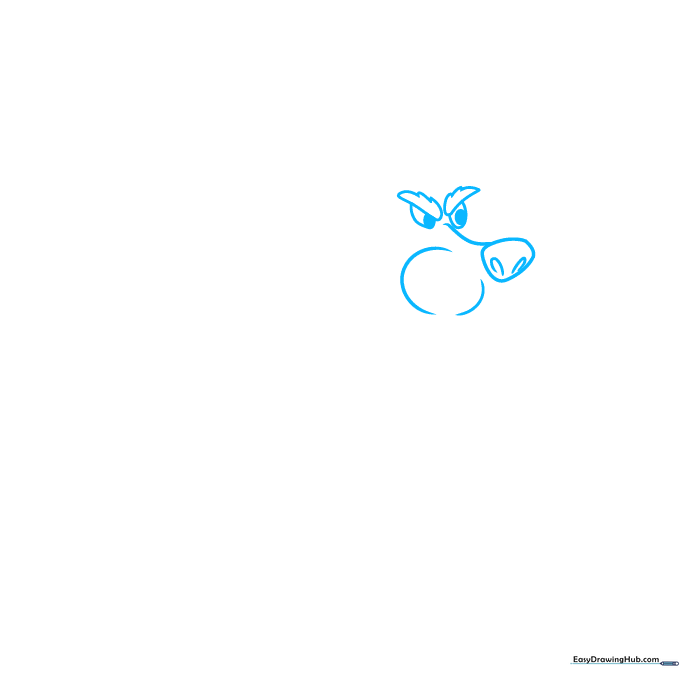
Draw a light semicircle for the top of the head, then add an oblong triangle for the snout. Tip: Keep your pencil strokes very light here so you can easily erase the construction lines later.
Step 2: Defining the Face Shape
Add a vertical line down the center of the snout to define the mouth. Use curved lines to build out the cheeks. Tip: Use short, jagged strokes to give the wolf a 'furry' texture.
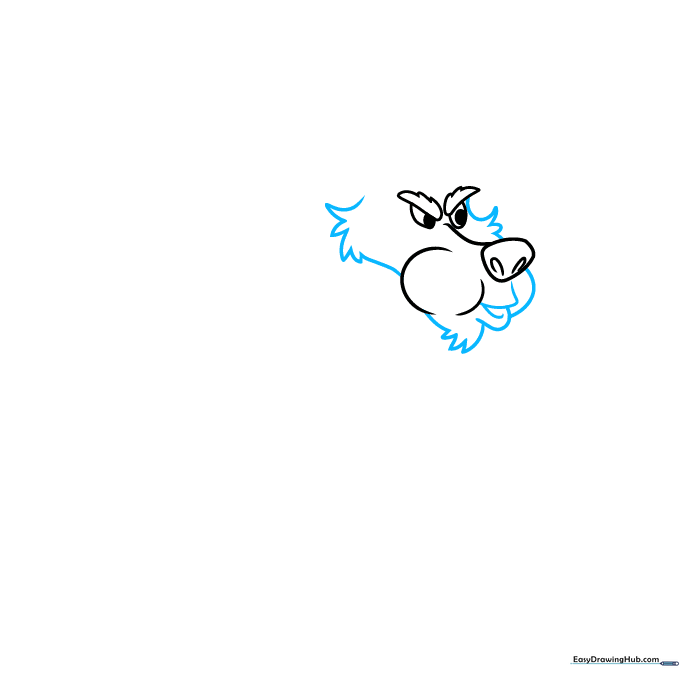
Step 3: Adding Ears and Neck

Draw two lemon-shaped ears on top of the head. Add a few loose, sketchy triangles between them to represent tufts of fur. Tip: Vary the size of your fur triangles to make the wolf look more natural.
Step 4: Sketching the Arms
Start the arms with semicircles and extend them with horizontal curves. Add small triangles at the wrists for cuffs. Tip: Think of the arm shapes as simple tubes to keep the proportions balanced.
Step 5: Drawing the Hands
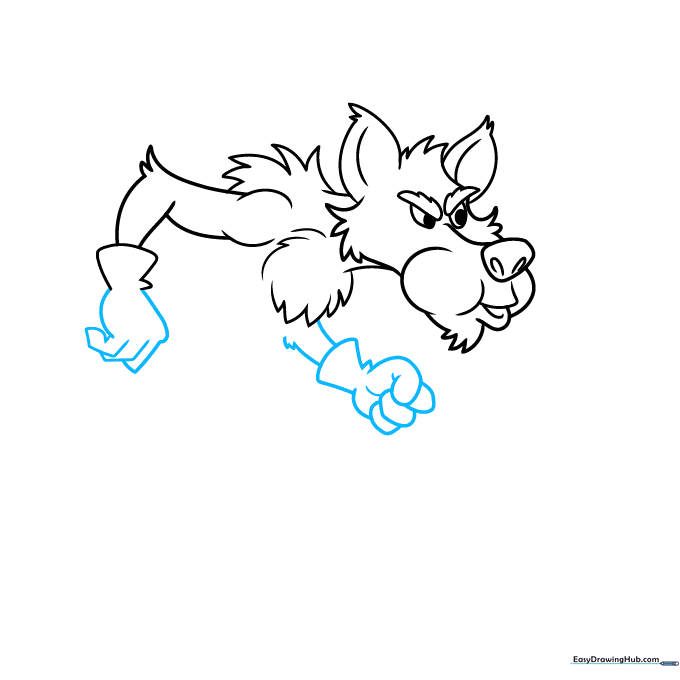
Use blocky, rectangular shapes for the fingers. Don't worry about perfection; focus on getting the placement right. Tip: Draw the fingers slightly curved to make the wolf look like he's reaching out.
Step 6: Adding the Belt and Body
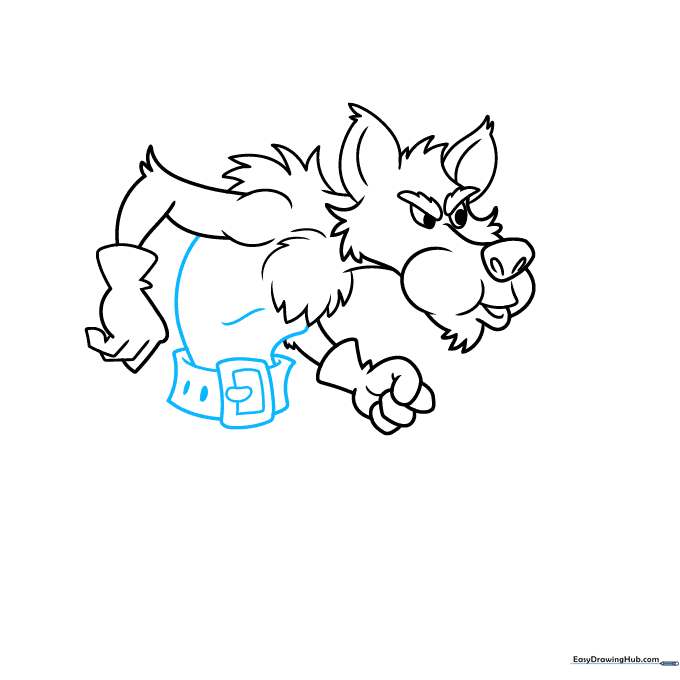
Draw a rectangle for the belt buckle with a bean shape inside. Outline the torso with two long, sweeping curves. Tip: Ensure the belt sits at the waist to give the character a clear silhouette.
Step 7: Sketching the Legs
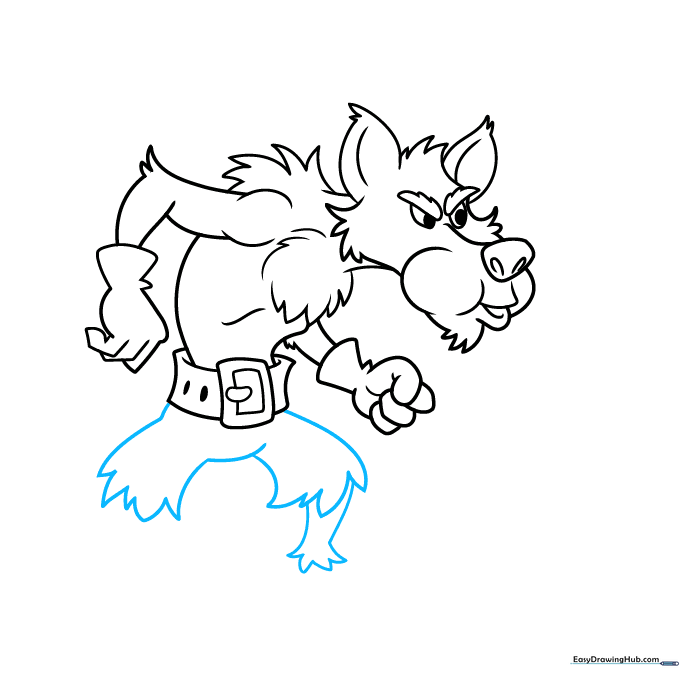
Draw two curved lines for the pant legs, connecting them with small, sketchy triangles to suggest fabric folds. Tip: Keep the legs slightly wider at the top to show movement.
Step 8: Drawing Feet and Claws
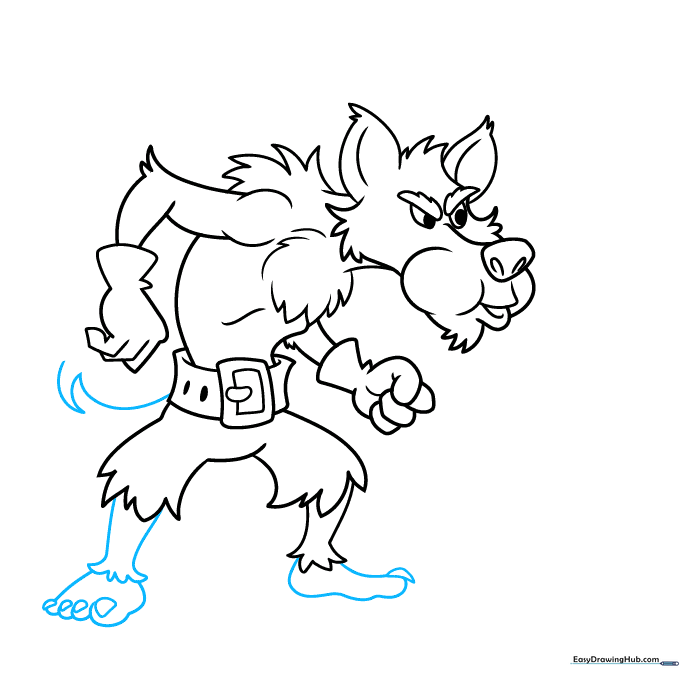
Use large ovals for the feet and add sharp triangles for the claws. Tip: Make the claws look slightly curved to give the wolf a more menacing, cartoonish look.
Step 9: Final Details and Inking
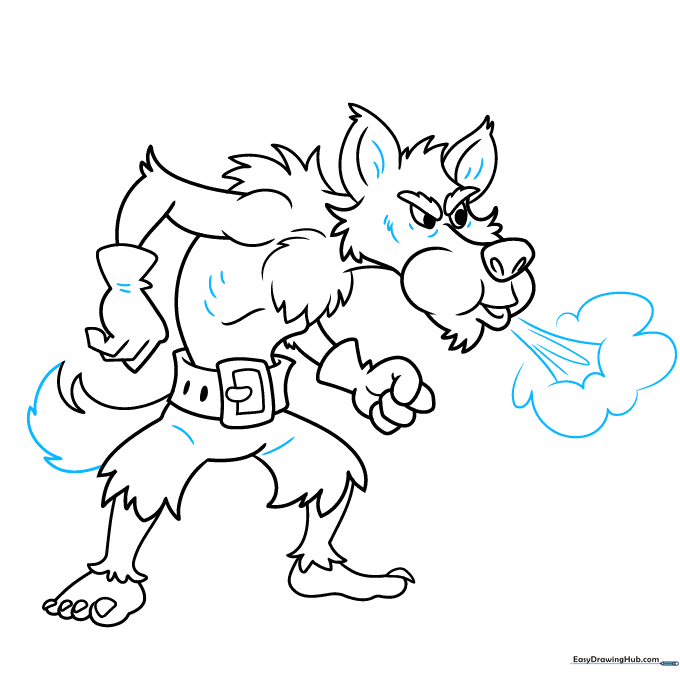
Add a bushy tail, some fur dashes on the body, and a puff of breath. Once you're happy with the sketch, trace over your lines with a black pen. Tip: Use a steady hand for the final outline to make your drawing pop!
Step 10: Coloring Your Wolf
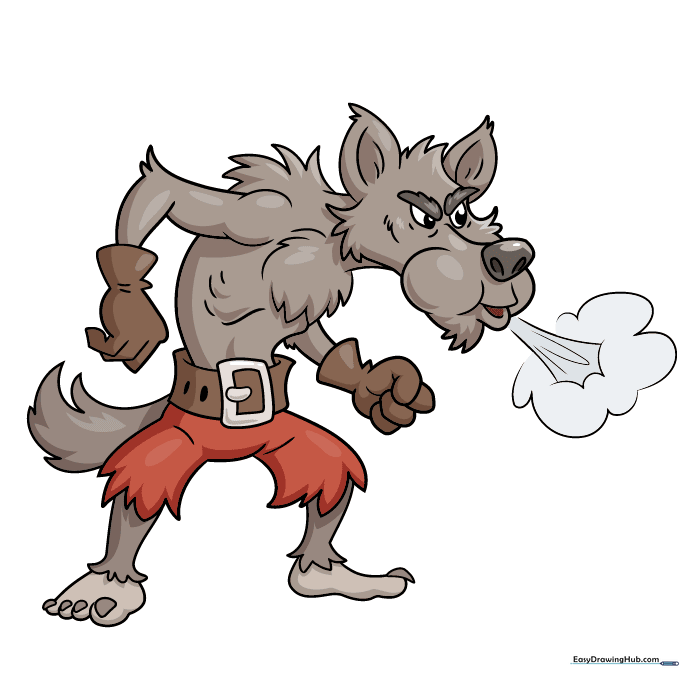
Bring your wolf to life with color! Use a greyish-brown for the fur, a darker brown for the belt and gloves, and a bold red for the pants. Tip: Use light, circular motions with your colored pencils for an even, smooth finish.
More Tutorials


