How to Draw Steven Universe: Easy Step-by-Step Guide
Ready to bring the Crystal Gems' leader to life? This tutorial is perfect for young artists ages 6+ looking to master cartoon proportions. Grab your favorite pencil, an eraser, and some paper to start building Steven's iconic look through simple, geometric shapes.
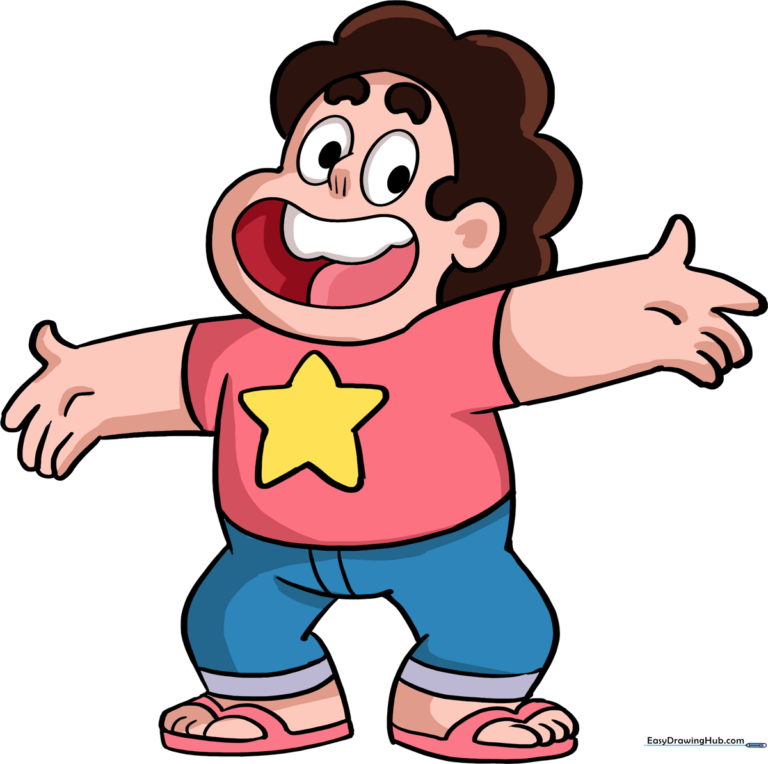
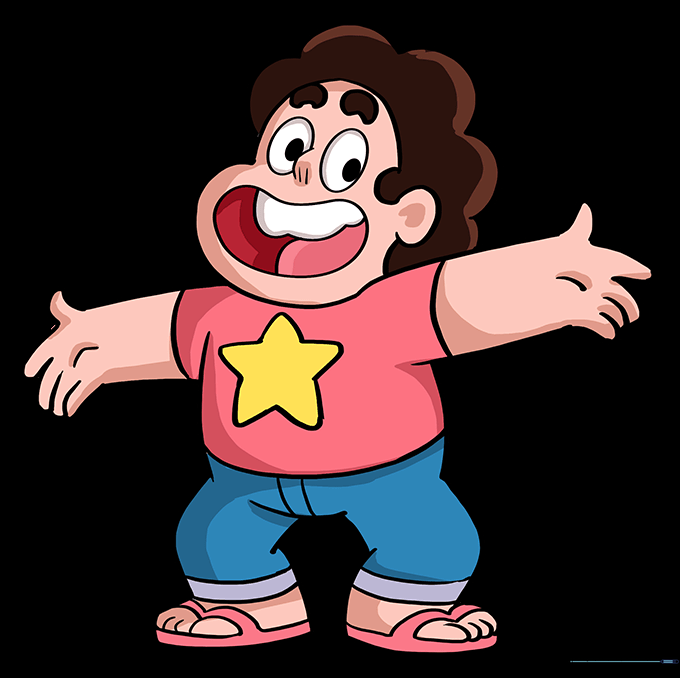
🎯 Final Result
Step-by-Step Instructions
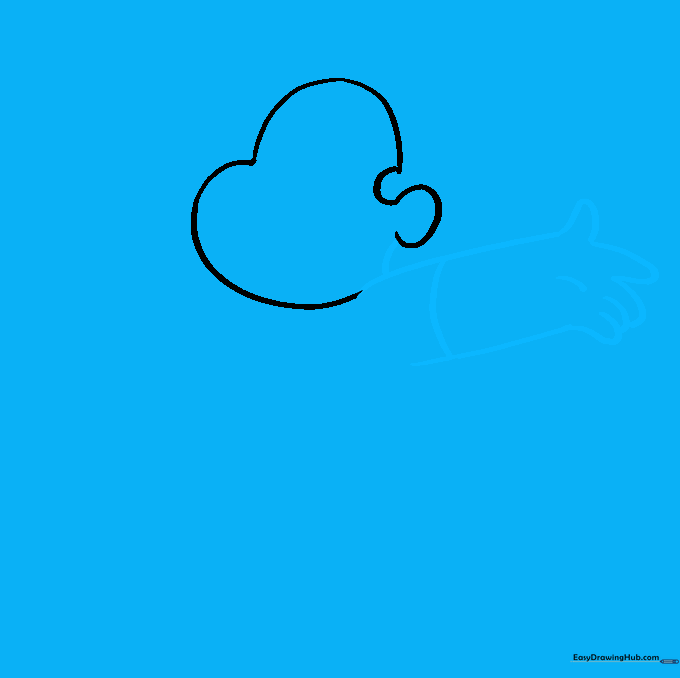
Step 1: Sketching the Head Shape

Lightly sketch the shape of Steven's head. Use soft, curved lines to outline his ear, sideburns, and jawline. Teacher's Tip: Keep your pencil grip loose to ensure these lines stay light and easy to adjust later.
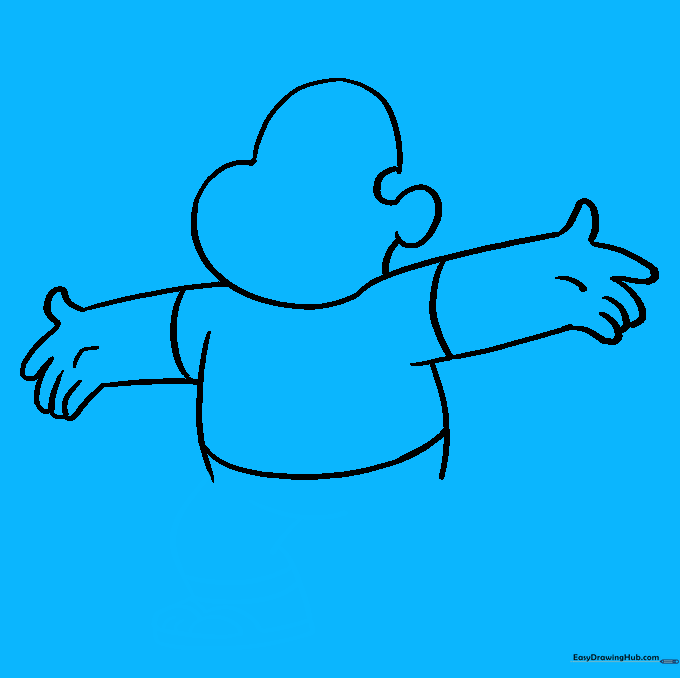
Step 2: Forming the First Arm
Extend two parallel lines down from the neck to create the arm. Use small 'U' shapes for the fingers. Tip: Draw the fingers slightly rounded to give them a natural, cartoonish look.
Step 3: Adding the Second Arm

Repeat the process on the other side of the head to form the second arm. Ensure the sleeve length matches the first arm for balance. Tip: Check that your hand size is consistent with the first one you drew.
Step 4: Defining the Torso
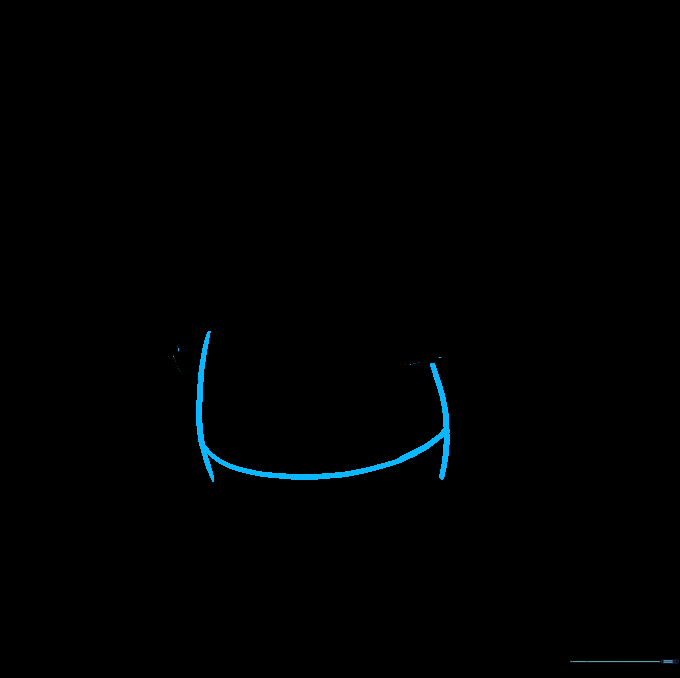
Draw vertical lines below the arms to outline the abdomen. Add a horizontal curved line to separate the shirt from the pants. Tip: Keep this line slightly curved to suggest the roundness of Steven's belly.
Step 5: Sketching the First Leg
Outline the leg bent at the knee and draw the sandal. Add details for the toes and sandal straps. Tip: Use short, quick strokes for the sandal straps to make them look like fabric.
Step 6: Adding the Second Leg

Draw the second leg and sandal to match the first. Add two small vertical lines at the top of the pants for the zipper detail. Tip: Ensure the legs are spaced evenly to keep the character looking balanced.
Step 7: Drawing the Star Emblem

Draw a five-pointed star on the center of the shirt. Tip: If you struggle with the star, draw a light circle first and place the points of the star along the edge of the circle.
Step 8: Adding the Hair

Use connected, wavy lines to enclose Steven's signature curly hair. Tip: Don't worry about making it perfectly symmetrical; Steven's hair is naturally messy and fun!
Step 9: Facial Features

Draw the eyes, nose, and mouth. Add teeth and a tongue inside the mouth for extra detail. Tip: Draw the pupils as small, dark circles to give him an expressive, happy look.
Step 10: Bringing Him to Life with Color
Time to color! Use pink for the shirt and sandals, yellow for the star, and blue for the jeans. Tip: Use a light peach or tan for his skin to complete the classic look.
More Tutorials


