How to Draw Sonic.EXE: Easy Step-by-Step Guide
Ready to capture the eerie look of Sonic.EXE? This tutorial is perfect for young artists and fans of the character who want to practice their line work and character design. You will only need a pencil, an eraser, and a piece of paper to bring this iconic character to life.
🎯 Final Result

Step-by-Step Instructions
Step 1: Sketching the Eyes and Nose
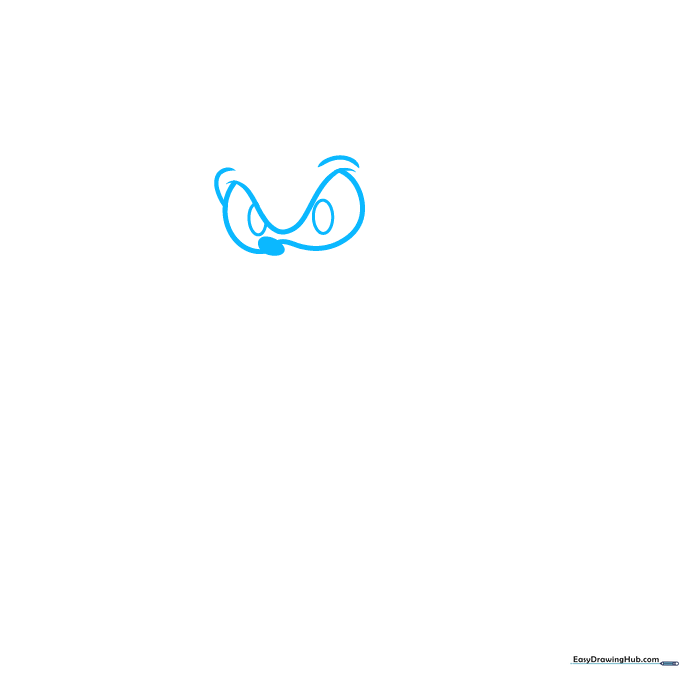
Draw a wide U-shape with two loops underneath for the eyes. Add small ovals for the nose and pupils. Teacher's Tip: Keep your pencil lines very light so you can easily adjust the shape of the eyes later if they look uneven.
Step 2: Defining the Head and Mouth
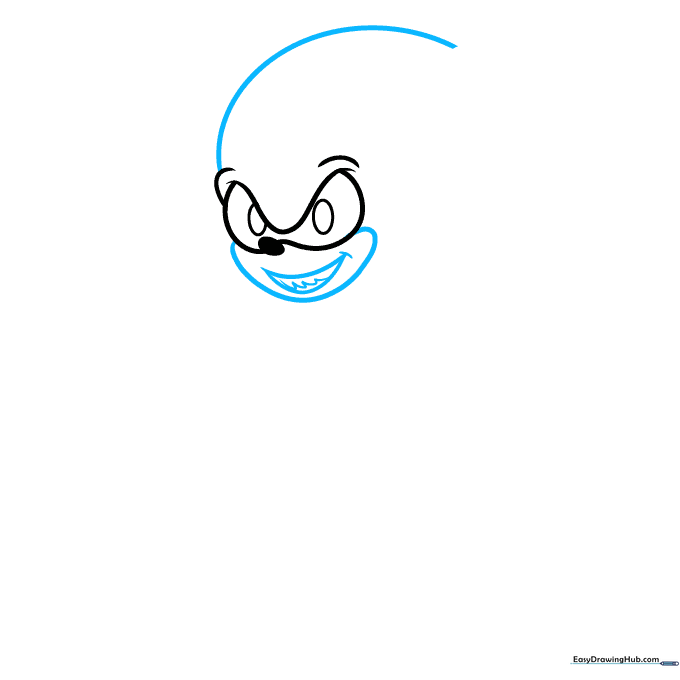
Outline the top of the head with a smooth curve. Add another loop below the eyes, then sketch two curves for the mouth. Add sharp, pointy shapes for the teeth. Teacher's Tip: Use short, quick strokes for the teeth to give them a jagged, menacing look.
Step 3: Adding the Ears
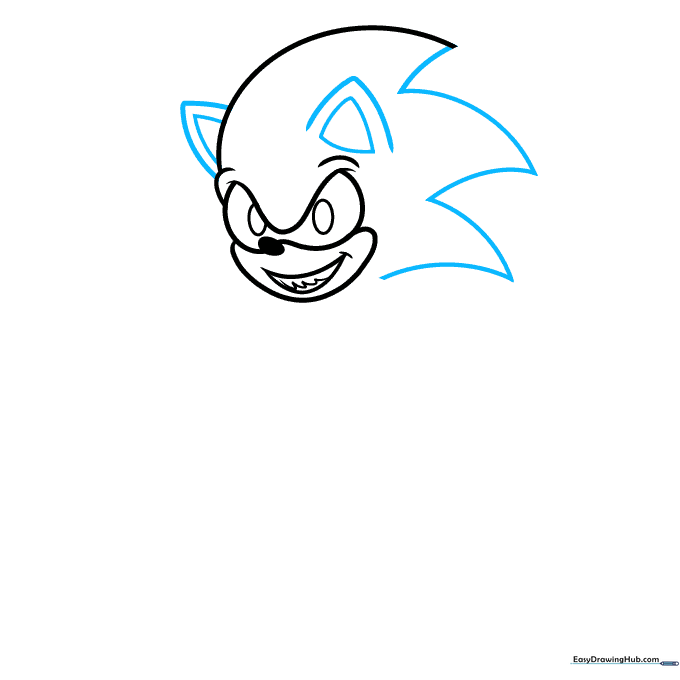
Use curves to draw wide triangles on the right side of the head. Sketch rounded triangles for the ears. Teacher's Tip: Make sure the ears are symmetrical to maintain the character's balance.
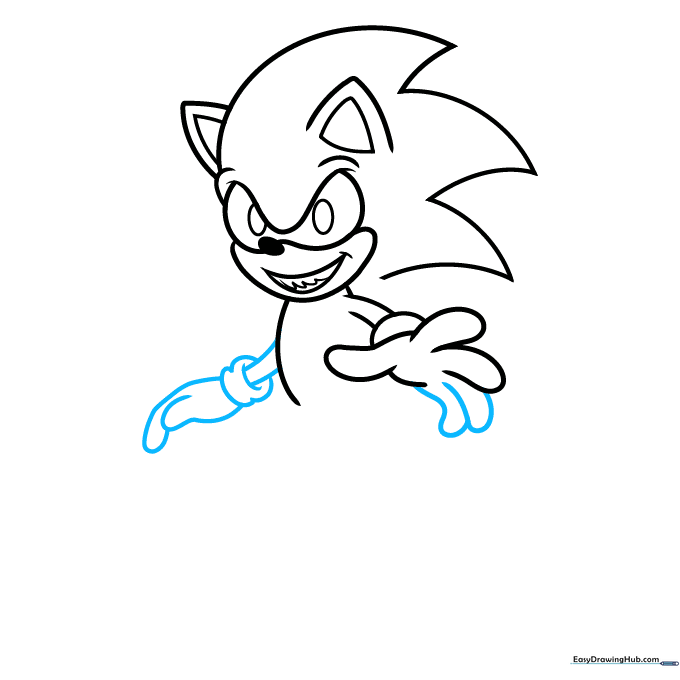
Step 4: Starting the Body and Arm
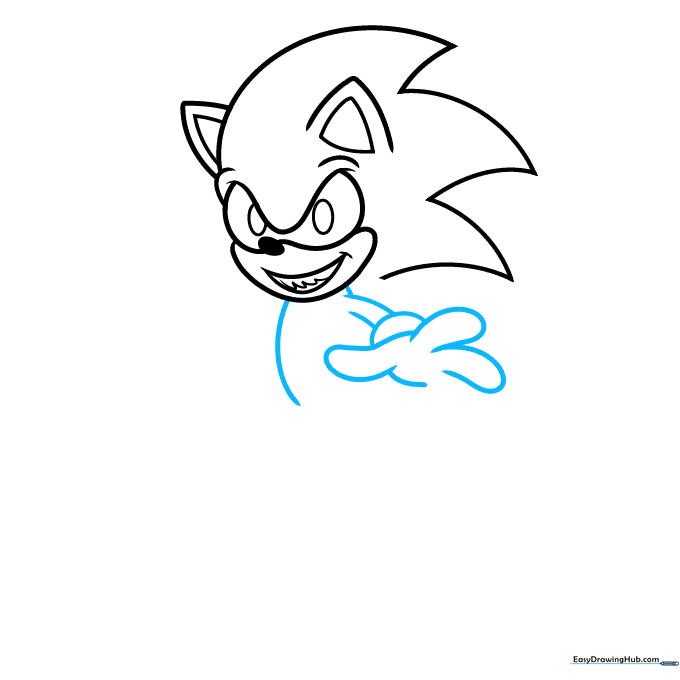
Begin the body with a curve on the left. Outline the fingers with large, rounded 'hot dog' shapes, then draw a curve for the wrist and two parallel lines for the arm. Teacher's Tip: Think of the fingers as simple sausages to keep the proportions easy to manage.
Step 5: Completing the Hands
Complete the right hand with two more rounded shapes. Draw overlapping shapes for the fingers on the left hand, using circles for the wrists. Teacher's Tip: Overlapping your shapes helps create the illusion of depth in the hands.
Step 6: Adding Legs and Tail
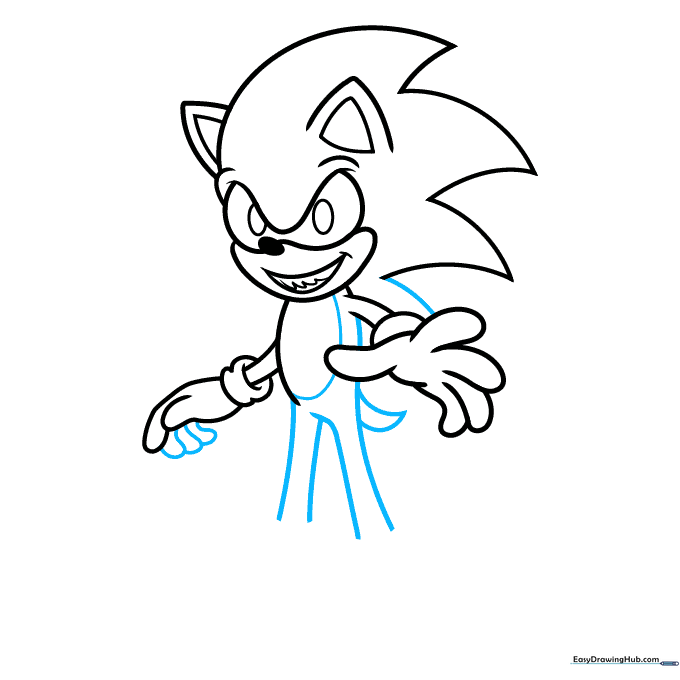
Sketch three more rounded shapes to finish the fingers. Draw an oval on the body, add vertical lines for the legs, and sketch a rounded triangle for the tail. Teacher's Tip: Keep the tail shape simple; it doesn't need to be perfect to look like a hedgehog tail.
Step 7: Drawing the Shoes
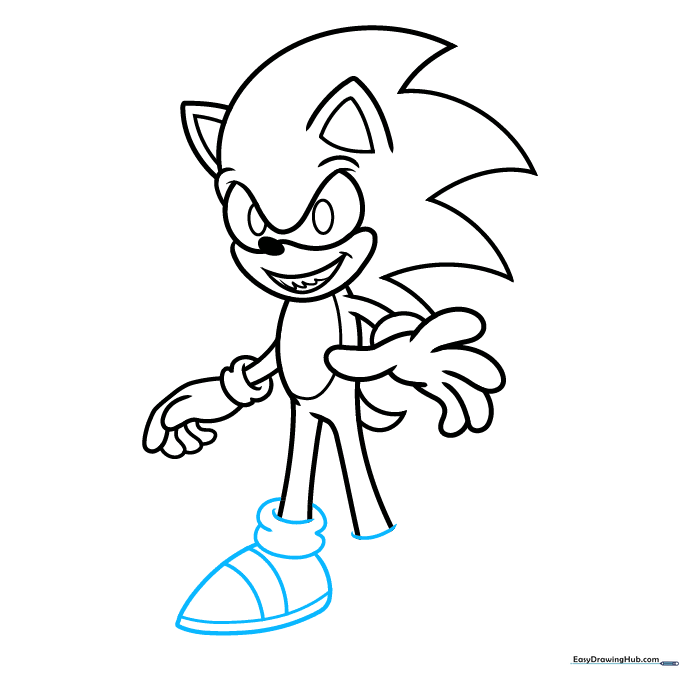
Sketch the left ankle with circles. Create a wide, rounded triangle for the shoe, similar to a giant seed shape. Add curved lines inside for detail. Teacher's Tip: The 'seed' shape is a great way to represent the bulky look of cartoon shoes.
Step 8: Adding Final Details
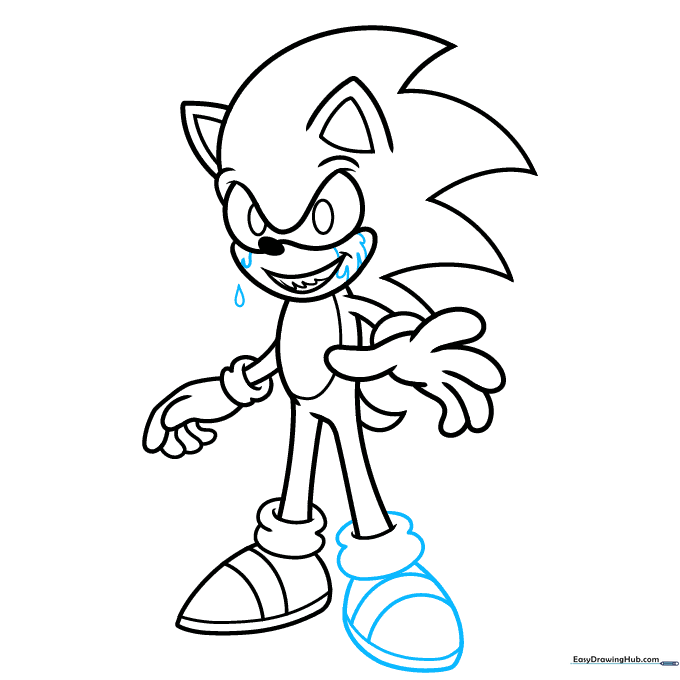
Draw loops for the right ankle and a second shoe pointing toward the viewer. Add loops and teardrop shapes around the mouth for the blood effect. Teacher's Tip: Vary the size of your teardrop shapes to make the blood look more natural and flowing.
Step 9: Refining the Outline

Outline the rest of the blood with loose, wavy shapes to complete the look. Teacher's Tip: Use a steady hand for these wavy lines to ensure they look intentional.
Step 10: Coloring Your Drawing

Outline your drawing in black and erase any remaining pencil marks. Use red for the eyes and blood, blue and tan for the body, and white for the gloves and shoes. Teacher's Tip: Use light pressure when coloring to keep the colors smooth and even.
More Tutorials


