How to Draw a Skateboarder: Easy 10-Step Guide for Kids
Ready to capture the energy of a skateboarder on paper? This tutorial is perfect for young artists ages 6+ looking to master character proportions. All you need is a pencil, an eraser, and a piece of paper to bring this action-packed skater to life.
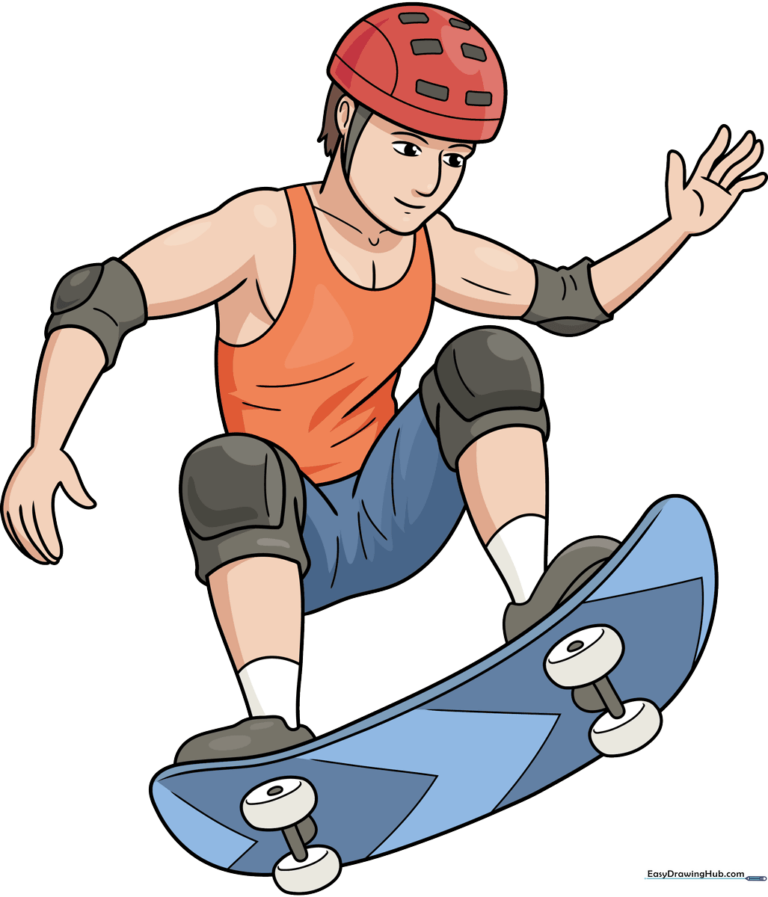
🎯 Final Result
Step-by-Step Instructions
Step 1: Sketching the Head and Face
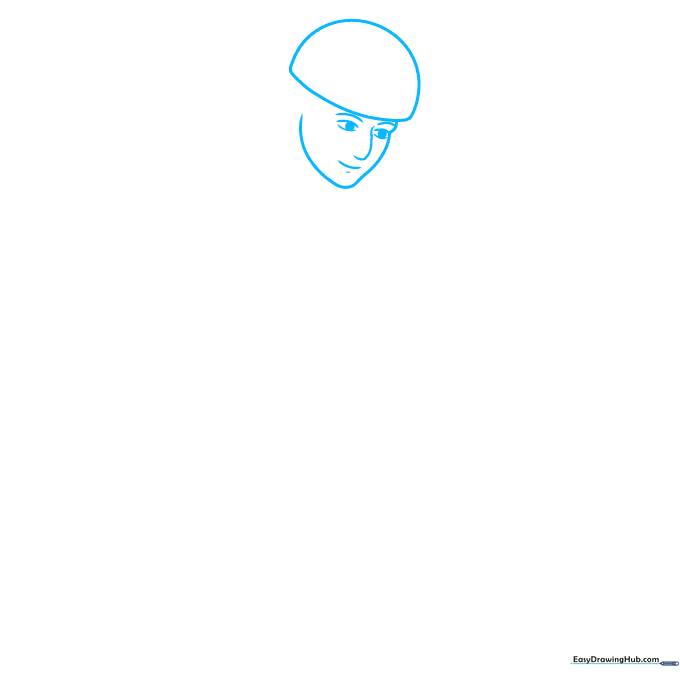
Draw two lemon-shaped eyes with circular pupils. Place a small hook between them for the nose, then add gentle curves above and below. Outline the face with a soft, rounded triangle shape and top it with a dome for the helmet. Tip: Keep your pencil pressure light so you can refine the face shape later.
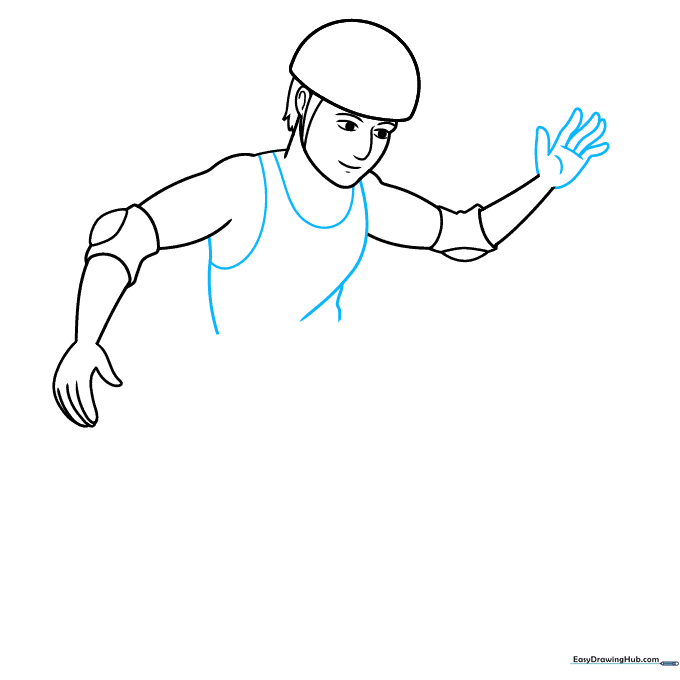
Step 2: Adding the Neck and Arm
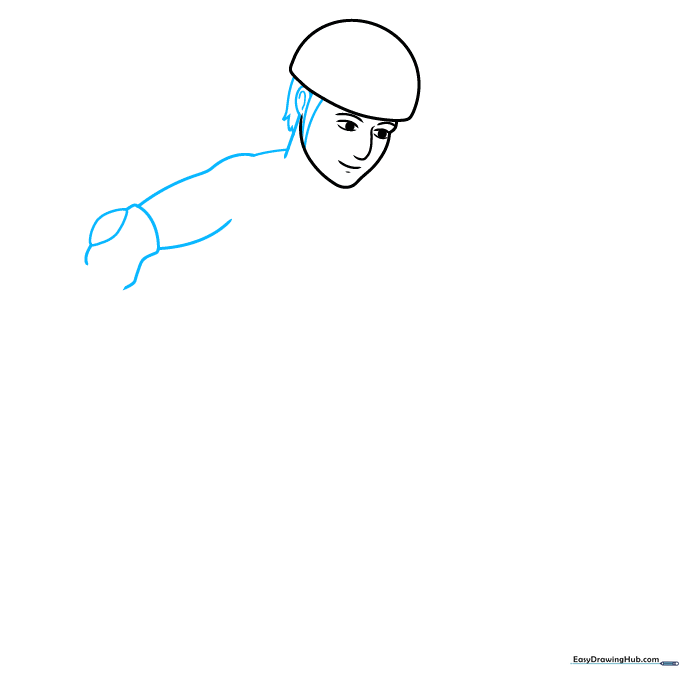
Draw an oval with a slight curve for the ear, then add triangles around it for detail. Sketch a diagonal line for the neck. Use wavy lines to form the arm, and add a diamond shape to represent the protective glove. Tip: Think of the arm as a flexible tube to keep the movement natural.
Step 3: Defining the Arms and Elbows
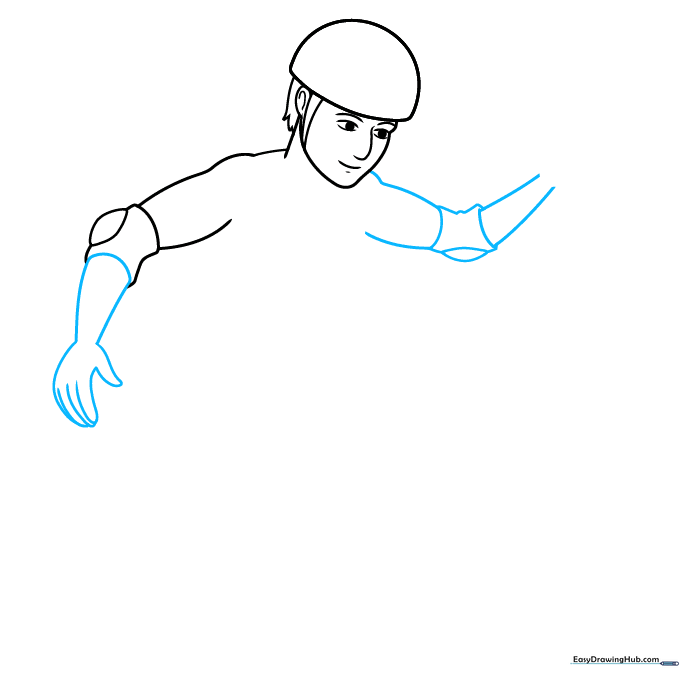
Sketch two diagonal lines with a curve between them to build the arm structure. Add the fingers using soft, overlapping noodle shapes. Outline the right arm with curves and add a semi-oval to represent the elbow pad. Tip: Elbow pads are bulky, so make that oval nice and rounded!
Step 4: Sketching the Torso
Draw the right hand with five noodle-like fingers and two small dashes on the palm for detail. Add a U-shape under the neck for the shirt collar, and outline the torso with smooth curves. Add a backward C-shape near the shoulder for the sleeve. Tip: Keep your lines fluid to show the skater is in motion.
Step 5: Drawing the Legs and Knee Pads
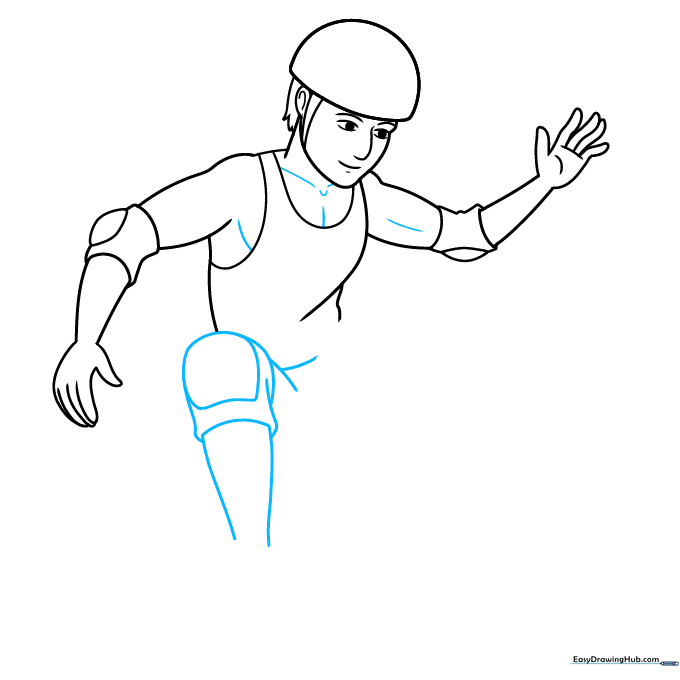
Define the leg muscles with curved lines. Sketch a rounded rectangle on the knee to represent the protective pad, then add a hood-like shape around it. Add short lines behind the knee for depth. Tip: The knee pad should look like it's sitting on top of the leg, not inside it.
Step 6: Connecting the Lower Body
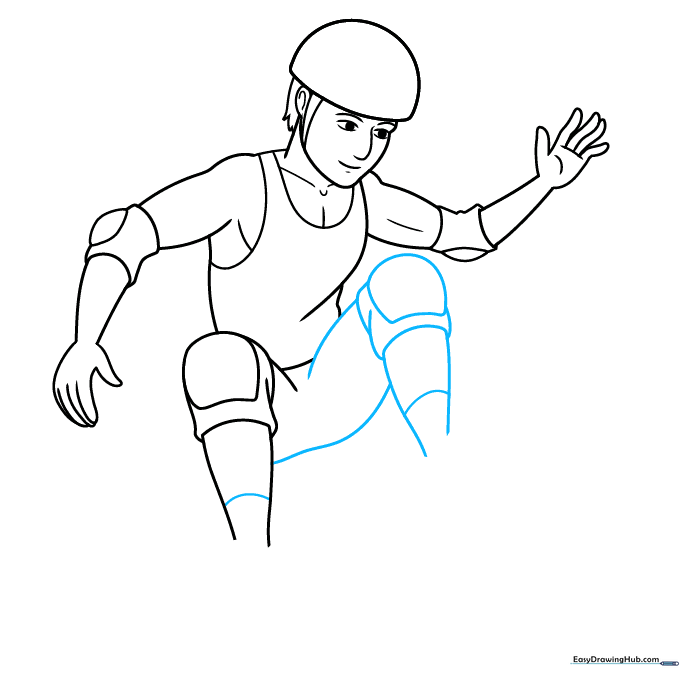
Draw a curve at the left ankle. Repeat the leg-drawing process for the right side, then connect the legs with a wavy line to show the skater's stance. Tip: Ensure the legs look balanced so the skater doesn't look like they are falling over!
Step 7: Adding the Skateboard
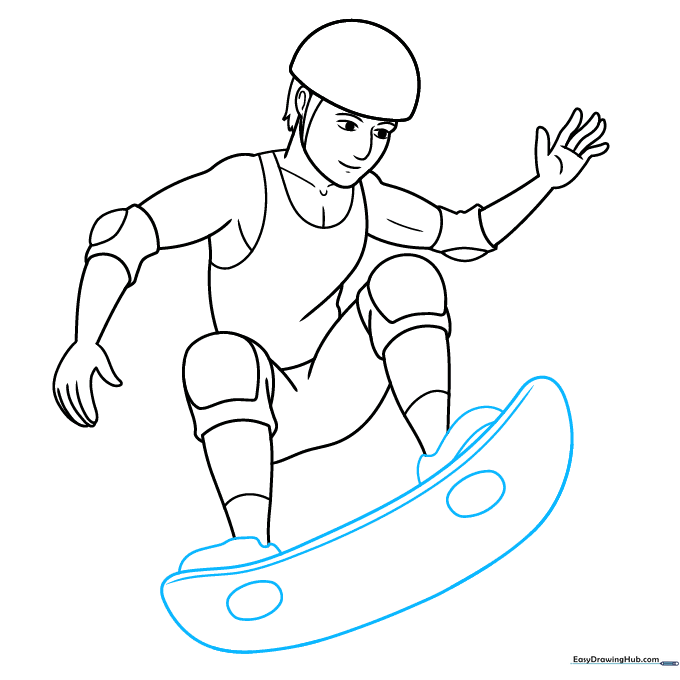
Draw a wide banana shape beneath the feet for the skateboard deck. Add two ovals inside for the wheels and a curved line near the top for the grip tape. Use oblong ovals for the shoes. Tip: The board should be slightly tilted to show the skater is mid-trick.
Step 8: Finalizing Wheels and Helmet
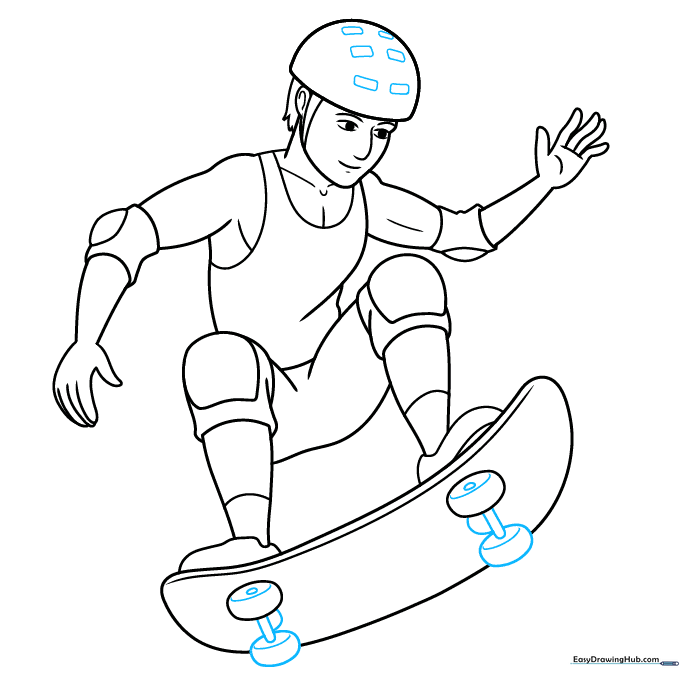
Add two more ovals to the skateboard and connect the wheels with straight lines. Sketch small hills behind the wheels to show ground contact. Add six small rectangles to the helmet for extra detail. Tip: Adding these small details makes your drawing look much more professional.
Step 9: Outlining Your Masterpiece
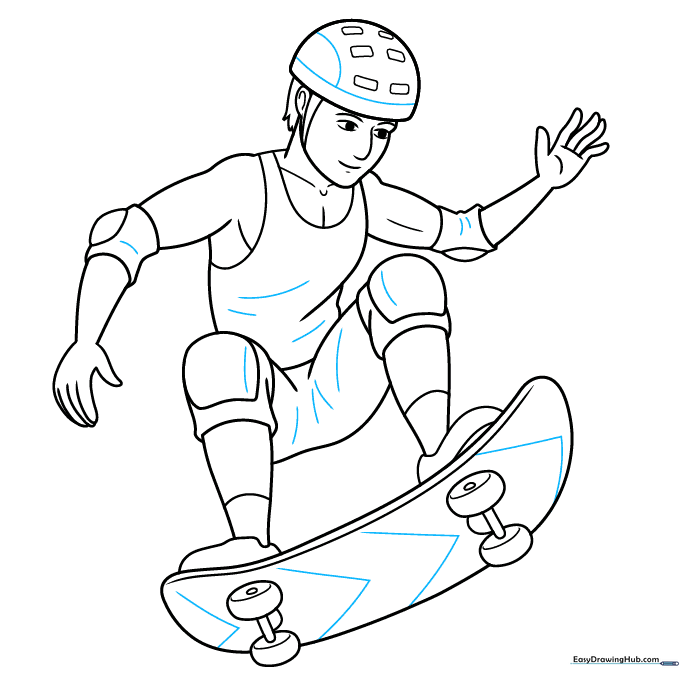
Draw triangles on the board, curves on the helmet, and small dashes throughout the body to suggest texture. Now, use a black ink pen to trace over your pencil lines. Tip: Take your time with the ink; slow, steady strokes look much cleaner than fast, shaky ones.
Step 10: Bringing it to Life with Color
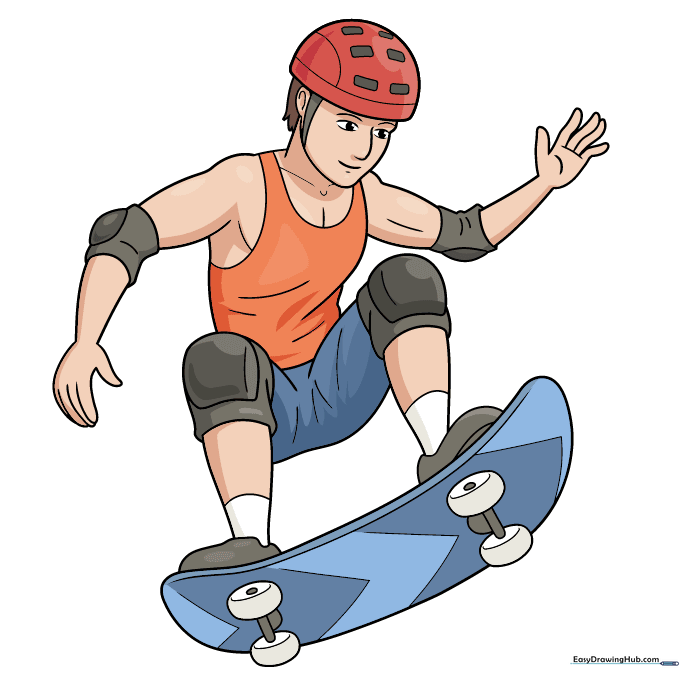
Time to color! Use red and brown for the helmet and safety gear. Make the shirt orange and the pants blue. Fill the skateboard with two shades of blue and keep the wheels off-white. Tip: Use a darker shade of blue on the edges of the pants to create a simple shadow effect.
More Tutorials


