How to Draw Santa’s Sleigh: Easy 9-Step Guide for Kids
Bring the magic of the North Pole to your sketchbook! This tutorial is perfect for artists ages 6 and up who want to practice drawing curved lines and 3D shapes. All you need is a pencil, an eraser, and your favorite coloring supplies to create a festive holiday masterpiece.
🎯 Final Result

Step-by-Step Instructions
Sketching the Sleigh Front
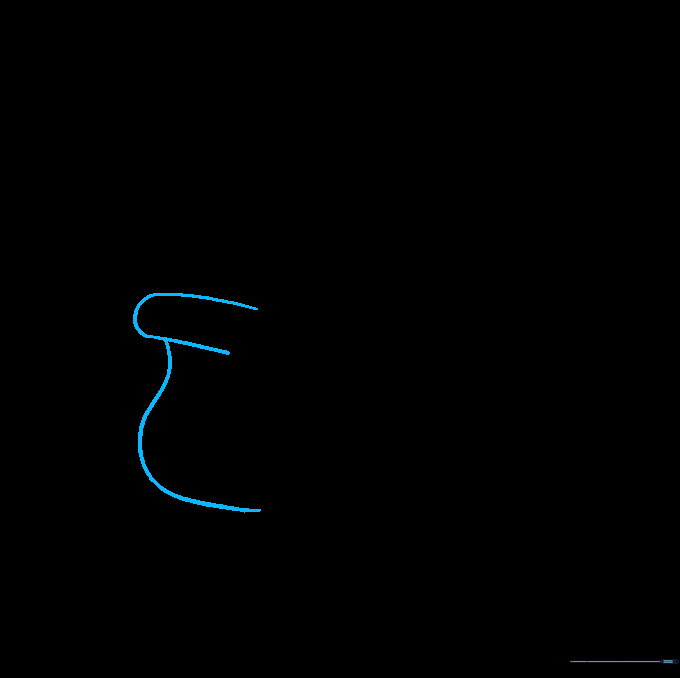
Start by drawing two overlapping curved lines to create the front cowl of the sleigh. Teacher's Tip: Keep your pencil pressure light so you can easily adjust the shape if it looks a bit lopsided.
Defining the Side Panels
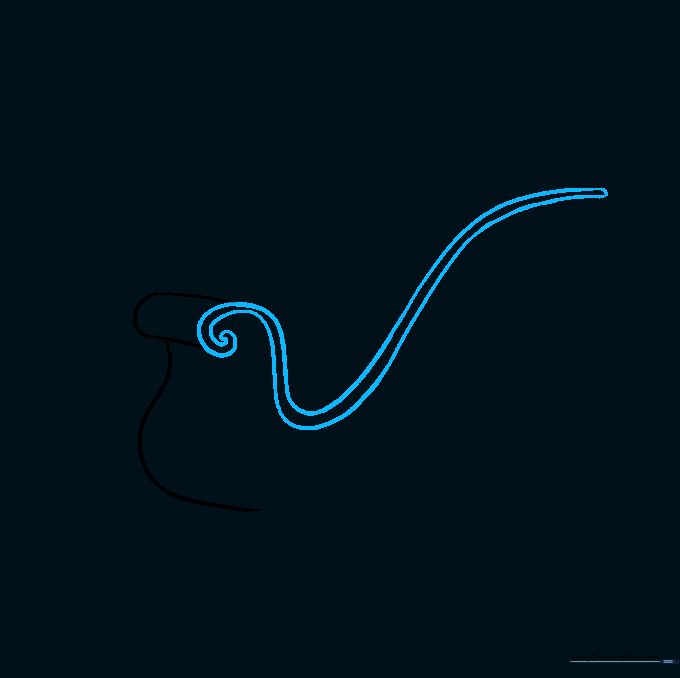
Draw a pair of narrowly spaced, curved parallel lines that spiral slightly at the end. This creates the decorative side panel of the sleigh. Tip: Focus on keeping the gap between the lines consistent for a professional look.
Connecting the Body
Connect the front and side sections with a long, sweeping curved line. This defines the main hull of the sleigh. Tip: Use a smooth, fluid motion with your wrist rather than short, choppy strokes.
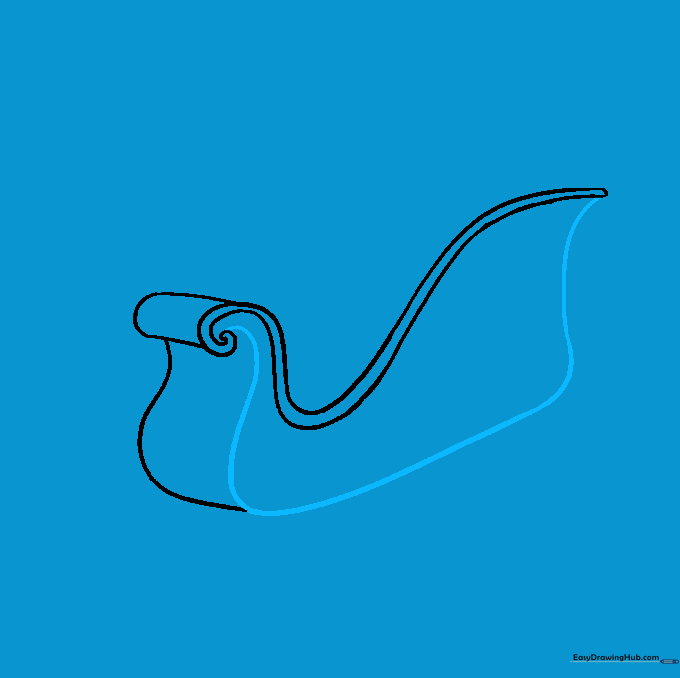
Adding Decorative Flourishes

Add two curved lines in a spiral pattern on the side panel, meeting at a sharp point. This adds a classic, elegant touch to the sleigh's design.
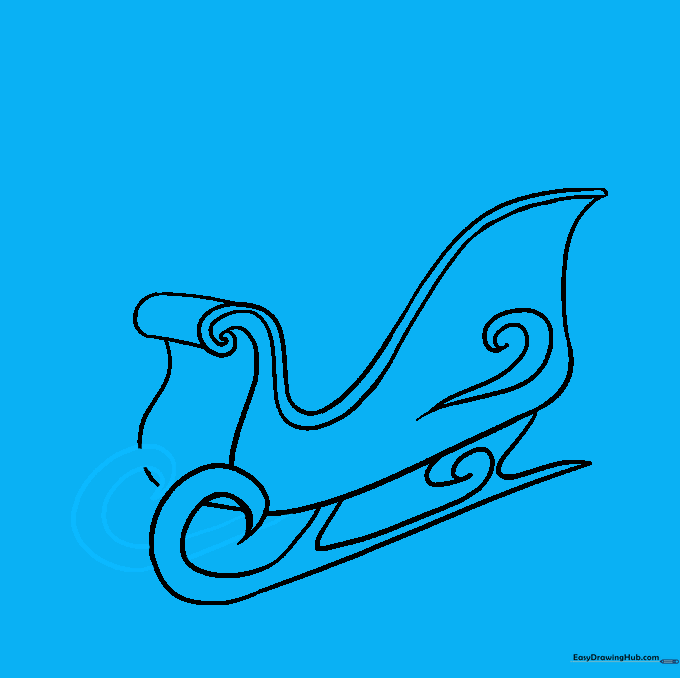
Constructing the Runners

Draw a straight line beneath the sleigh, curling it at the front to form the runner. Use small connecting lines to attach the runner to the body. Tip: Make sure the runner looks sturdy enough to hold all those presents!
Cleaning Up Your Sketch

Carefully erase any overlapping guide lines within the runner area to make your drawing look clean and finished. Tip: Use a kneaded eraser if you have one—it's gentler on the paper.
Adding the Second Runner
Draw the second runner behind the first using similar curved lines and a spiral tip. This creates a sense of depth and perspective in your drawing.
Loading the Presents
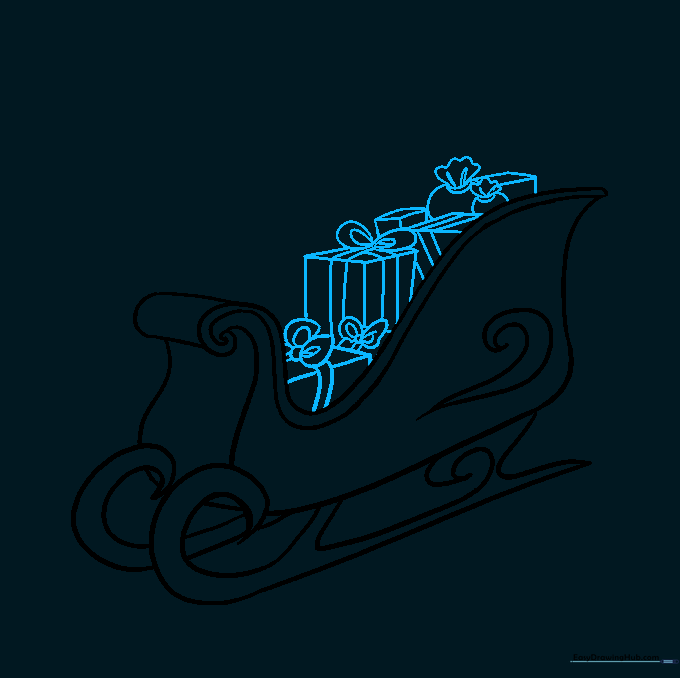
Fill the sleigh with gifts! Draw various rectangles and cubes, then add crisscross lines for ribbons and small loops for bows. Tip: Vary the sizes of the boxes to make the pile look more realistic.
Adding the Christmas Tree
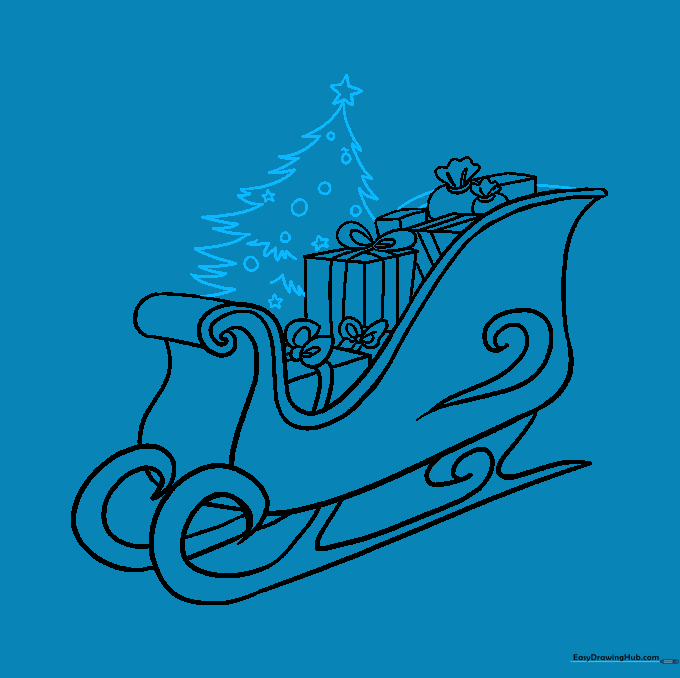
Complete the scene by drawing a Christmas tree in the back of the sleigh. Add a star on top and small circles for ornaments. Tip: Use short, jagged lines for the tree branches to give it a pine-needle texture.
Coloring Your Masterpiece

Bring your drawing to life with color! Use classic Christmas red for the sleigh and bright greens for the tree. Why not add a reindeer or two to pull it? Happy drawing!
More Tutorials


