How to Draw Santa Claus: Easy 10-Step Guide for Kids
Bring the magic of the holidays to your sketchbook with this friendly Santa Claus drawing. Designed for ages 5 and up, this activity requires only a pencil, paper, and an eraser. Follow along to build confidence in character design and festive illustration.
🎯 Final Result

Step-by-Step Instructions
Step 1: Sketching the Eyes and Brows
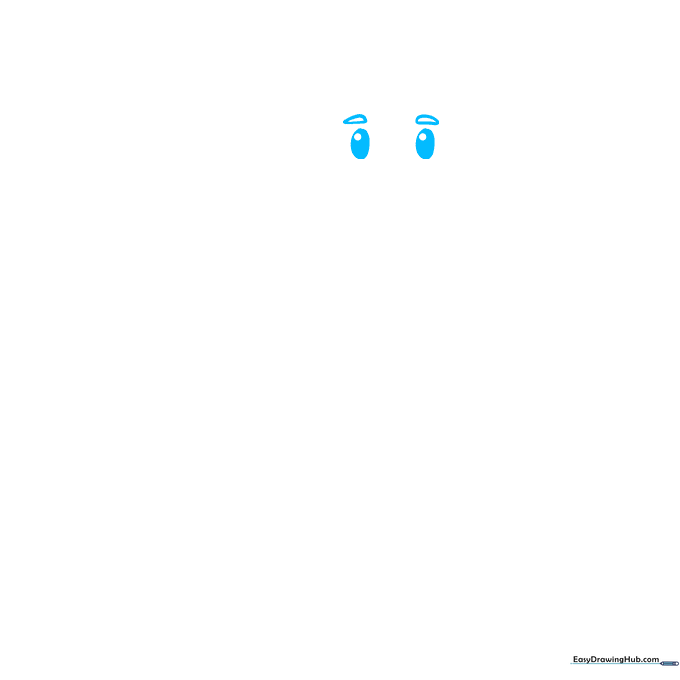
Draw two small ovals for the eyes with tiny circles inside for pupils. Shade the pupils, then add a teardrop shape above each eye for the eyebrows. Teacher's Tip: Keep the eyes close together to give Santa a friendly, focused expression.
Step 2: Adding the Nose and Mustache
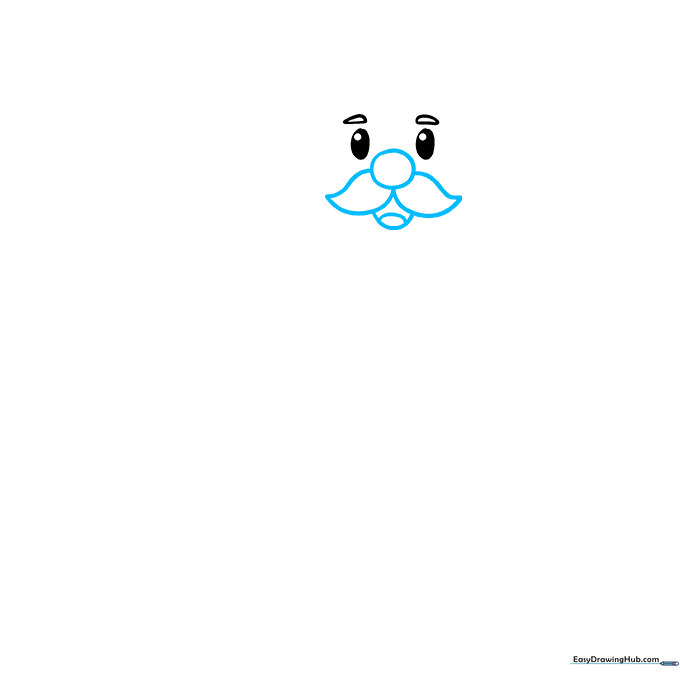
Place a small circle between the eyes for the nose. Connect two teardrop shapes to the nose to form the mustache, then add a curved line below for the mouth. Teacher's Tip: Use short, rounded strokes to make the mustache look soft and fluffy.
Step 3: Outlining the Beard
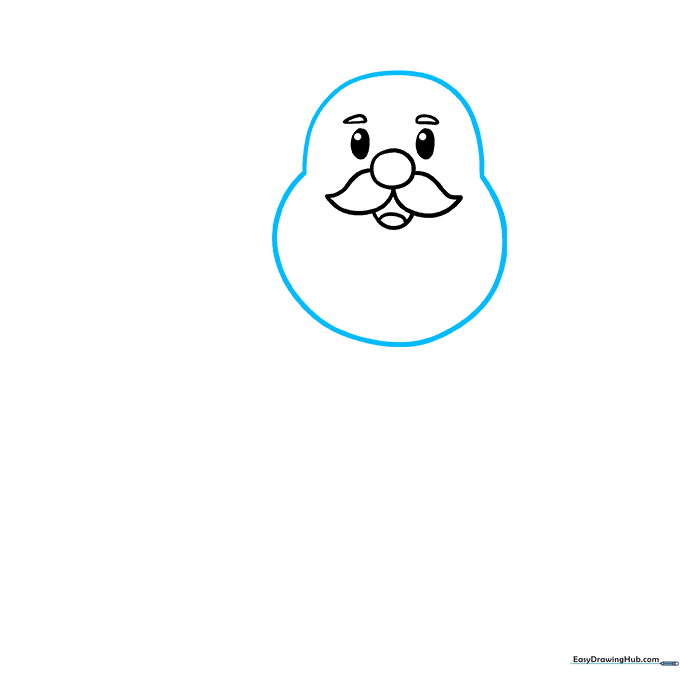
Draw a large, rounded shape around the face to define the beard and head. Teacher's Tip: Don't worry about making it perfectly symmetrical; a slightly uneven beard looks more natural and cozy.
Step 4: Defining the Hat and Ears
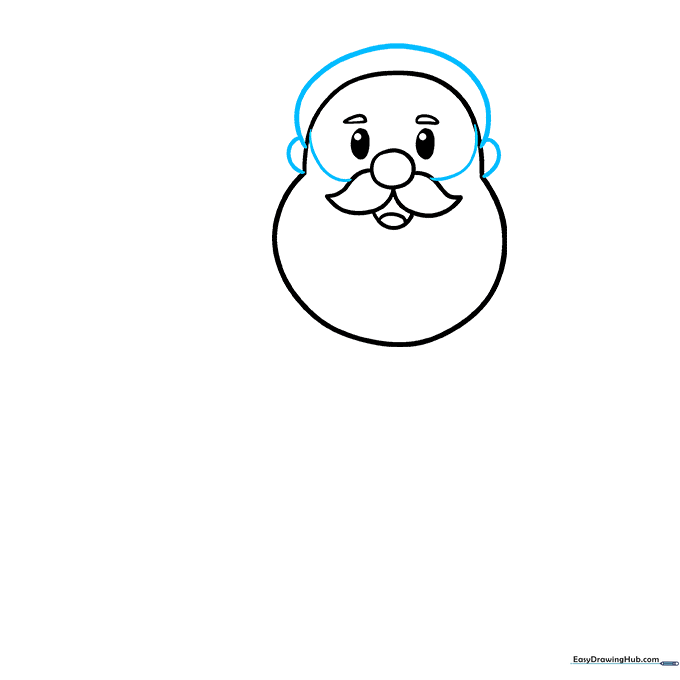
Draw an oval across the top of the head for the hat brim and add small curves on the sides for ears. Teacher's Tip: Make sure the hat brim sits low enough to touch the top of the nose area.
Step 5: Completing the Hat and Torso
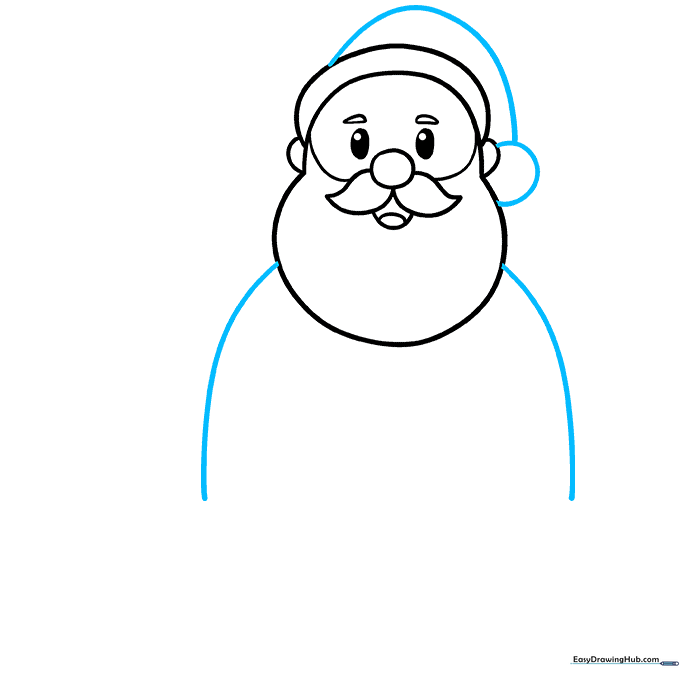
Draw the top of the hat and extend lines downward from the beard to start the body. Teacher's Tip: Use a gentle curve for the hat to give it a 'floppy' look.
Step 6: Adding the Belt and Trim
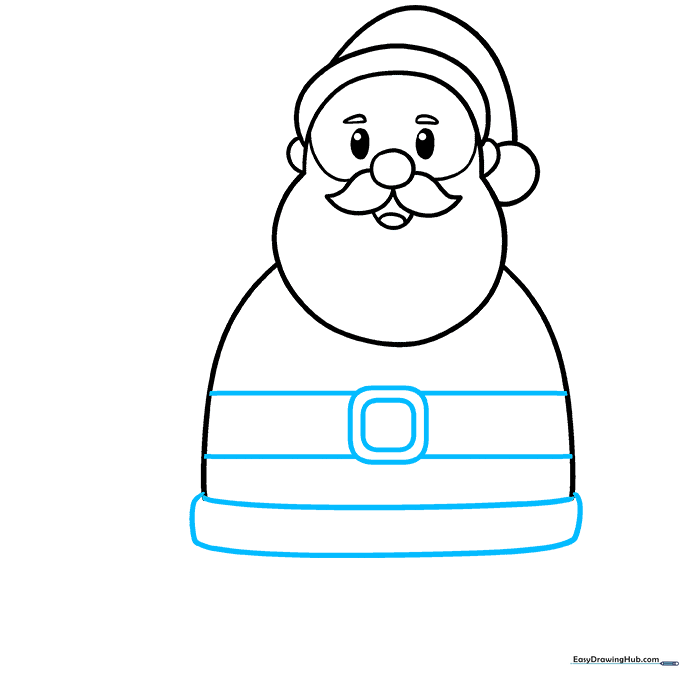
Draw a square buckle on the torso with a belt running across. Add a rectangular strip at the bottom for the coat trim. Teacher's Tip: Keep the buckle centered to help balance the drawing.
Step 7: Sketching the Upraised Arm
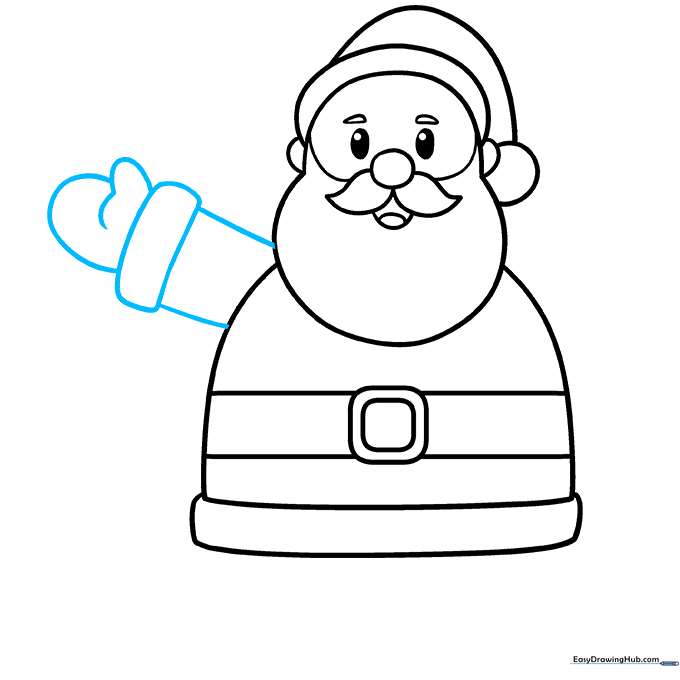
Draw an arm reaching upward using a rounded rectangle, then add a mitten at the end. Teacher's Tip: Think of the mitten as a simple thumb-and-palm shape.
Step 8: Adding the Second Arm
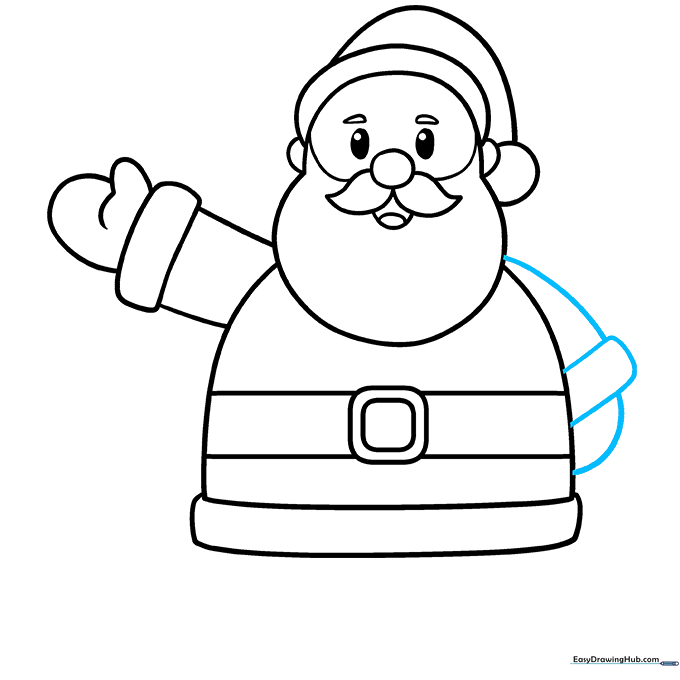
Draw the second arm resting at his side. Use simple curved lines to show the sleeve and mitten. Teacher's Tip: Keep the arm close to the body to maintain the character's proportions.
Step 9: Drawing the Legs
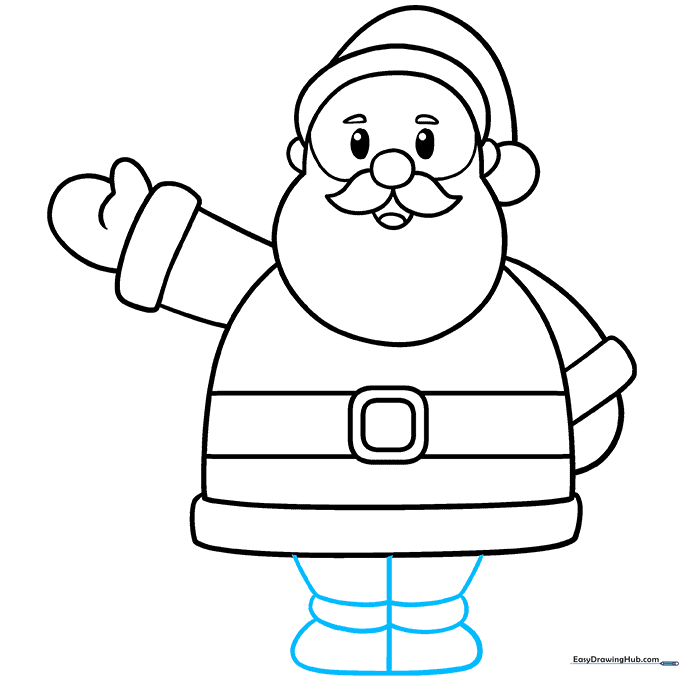
Draw two legs below the torso using vertical lines and irregular shapes for the boots. Teacher's Tip: Use three layers of curved lines to create the look of fluffy boot cuffs.
Step 10: Bringing Santa to Life with Color

Color your Santa using classic red for the suit and hat, white for the beard and trim, and a soft peach or tan for the face. Teacher's Tip: Use a light pink for rosy cheeks to make him look extra jolly!
More Tutorials


