How to Draw Rubber Boots: Easy 10-Step Guide for Kids
Ready to splash into some art? This tutorial is perfect for young artists ages 5+ to practice basic shapes and symmetry. All you need is a pencil, an eraser, and your favorite markers or crayons to bring these rainy-day essentials to life.
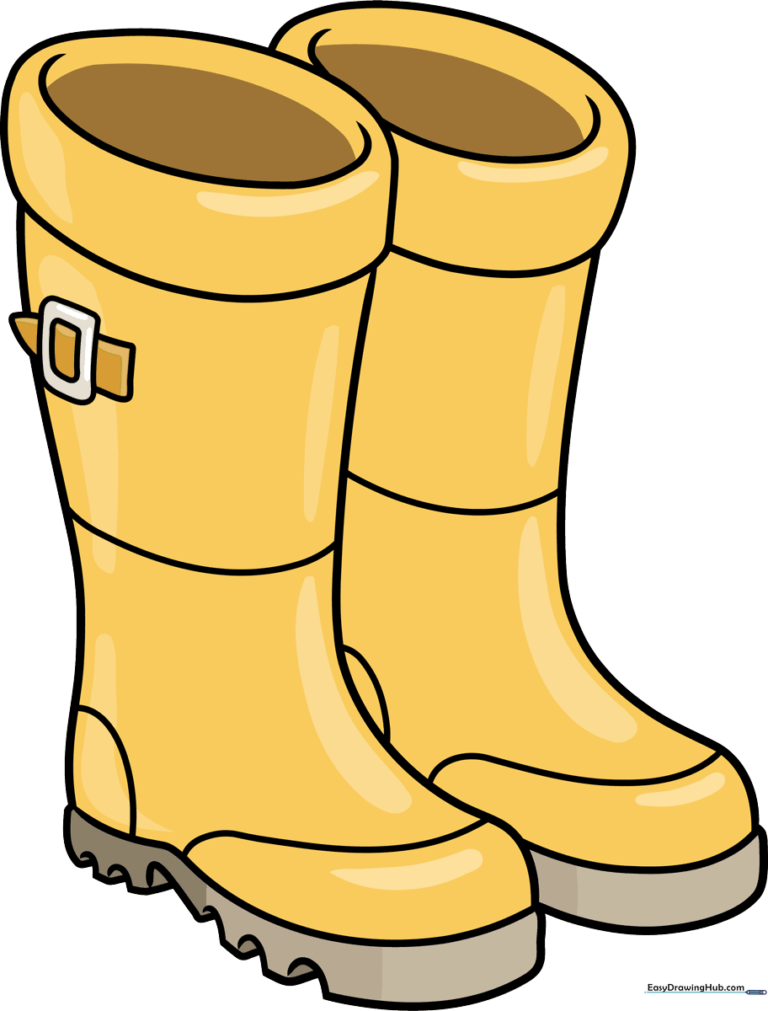
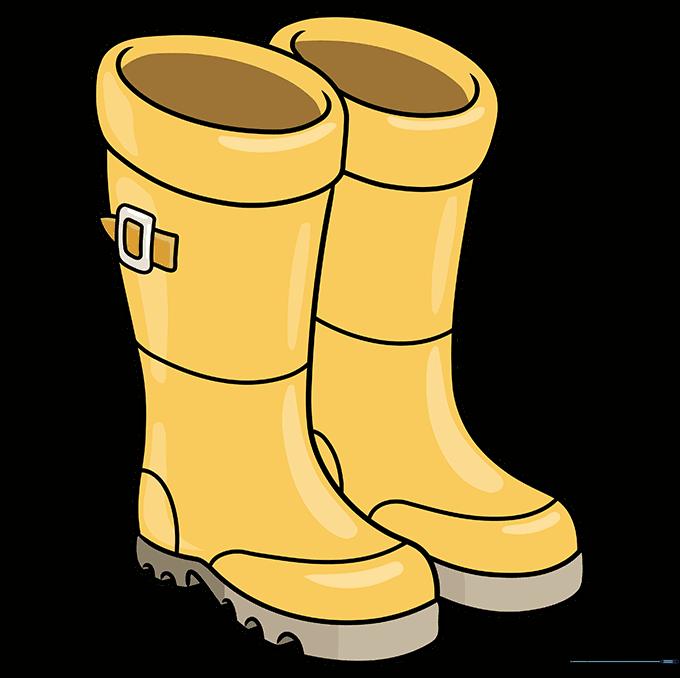
🎯 Final Result
Step-by-Step Instructions
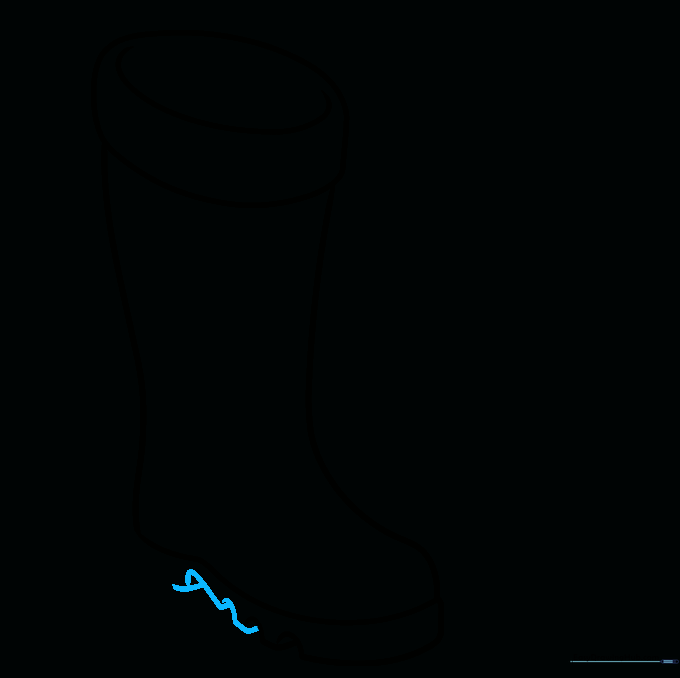
Step 1: Sketching the Boot Opening
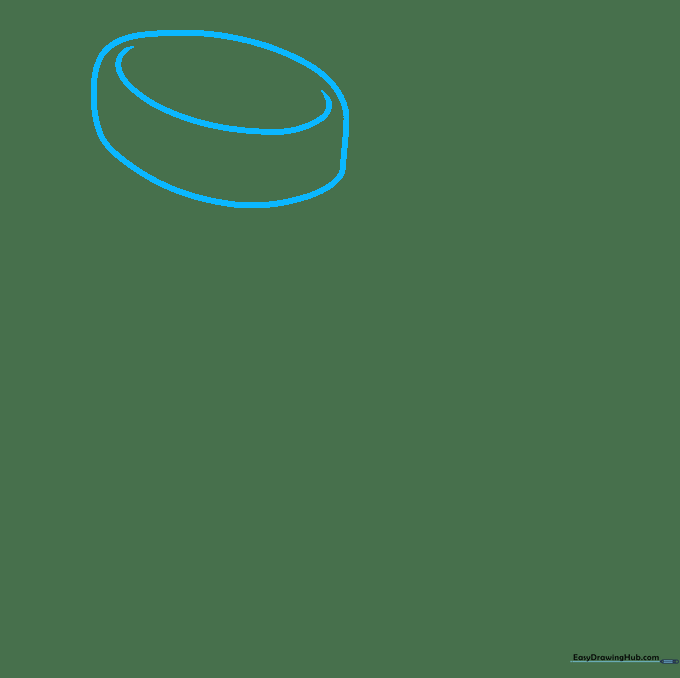
Start by drawing a small oval for the boot opening, then add a 'C' shape inside to create depth. Teacher's Tip: Keep this shape small—it sets the scale for the entire boot!
Step 2: Defining the Leg
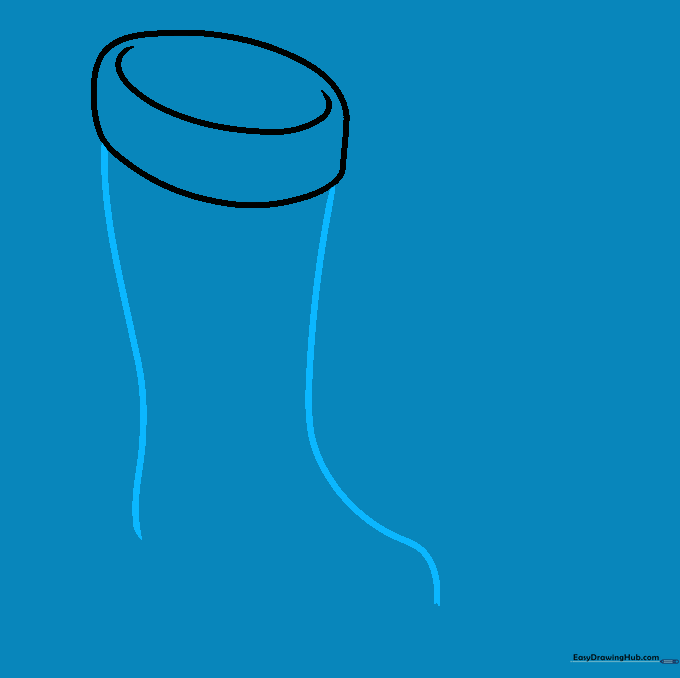
Extend two long, slightly curved lines downward from the oval. Tip: Make the front line curve outward slightly to form the toe area.
Step 3: Creating the Sole
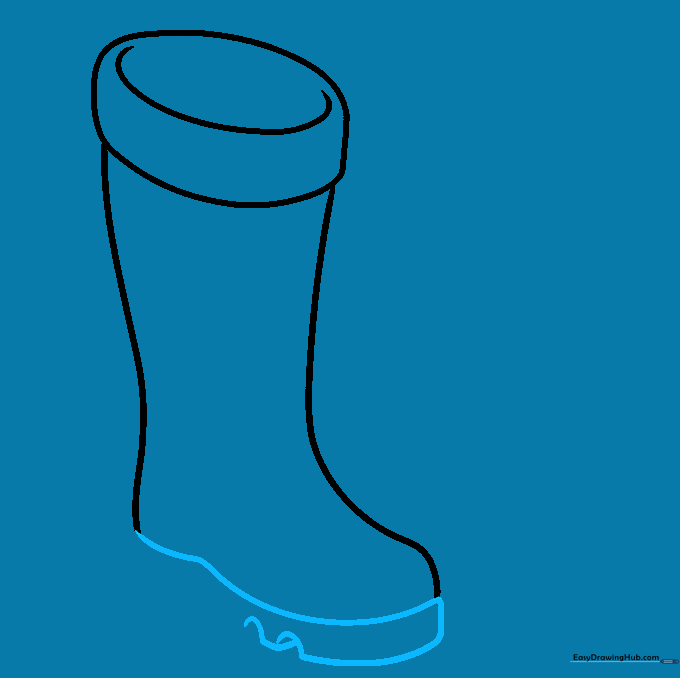
Close the bottom with a curved line, then double it back to create the thick sole. Add small, inverted 'U' shapes along the bottom for the tread. Tip: Press firmly for the tread to make it look sturdy.
Step 4: Adding Tread Texture
Continue adding overlapping curved lines along the sole to give it a realistic, grippy texture. Tip: Keep your spacing consistent for a professional look.
Step 5: Defining the Heel
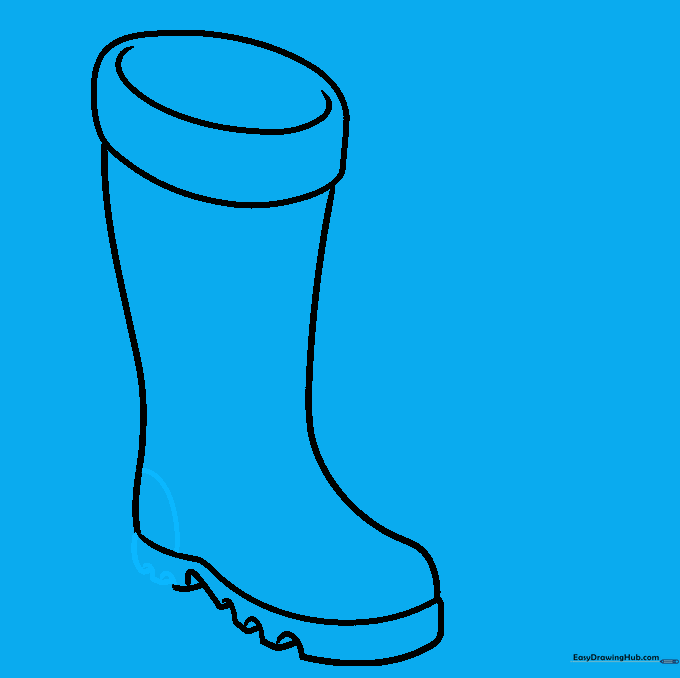
Add more 'U' shapes to the heel area and connect them to the back of the boot. Draw a curved line across the heel to separate it from the sole. Tip: This adds a 3D feel to your drawing.
Step 6: Drawing the Buckle

Draw a small rectangle with rounded corners on the side of the boot. Add a small square and triangle to represent the buckle mechanism. Tip: Use your eraser to clean up any overlapping lines inside the buckle.
Step 7: Adding Seams and Starting the Second Boot
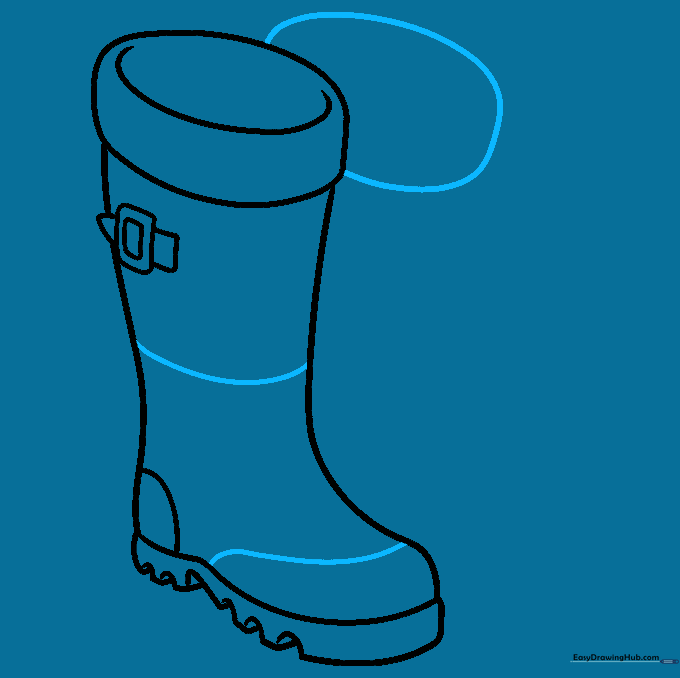
Draw horizontal curved lines across the toe and mid-leg to show the rubber seams. Then, start the second boot by drawing a partial oval for its cuff. Tip: The second boot should be slightly behind the first to show depth.
Step 8: Outlining the Second Boot
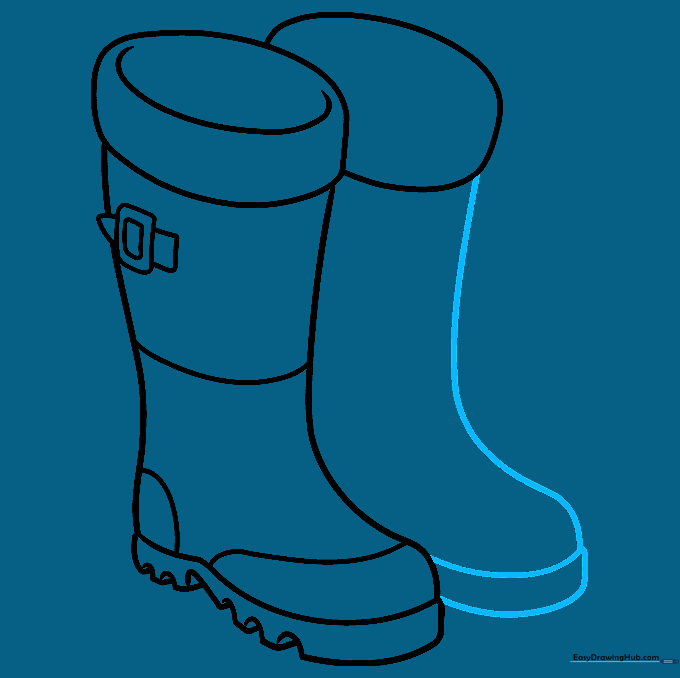
Use long, smooth curved lines to outline the body and sole of the second boot. Tip: Try to match the curve of the first boot to keep them looking like a pair.
Step 9: Finalizing Details

Add the same seam lines to the second boot—across the heel, toe, and cuff—to ensure they match the first one. Tip: Check your symmetry; does the second boot look like it belongs with the first?
Step 10: Adding Color
Time to color! Use bright yellow for a classic rainy-day look, or get creative with patterns like polka dots or stripes. Tip: Use a darker shade of your main color to add a little shadow on the side of the boots for a professional finish.
More Tutorials


