How to Draw Rippley from Fortnite: Easy 9-Step Guide
Bring the iconic blue Slurp monster to life with this beginner-friendly drawing tutorial. Designed for ages 7+, this guide uses basic geometric shapes to help you master Rippley’s unique, squishy proportions. Grab your pencil, eraser, and paper, and let’s start sketching!
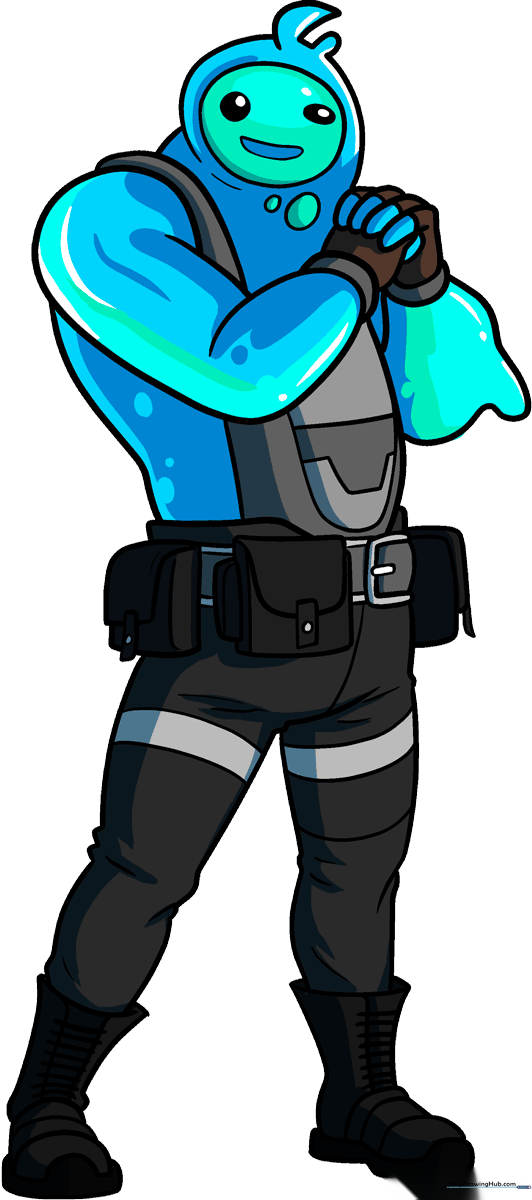
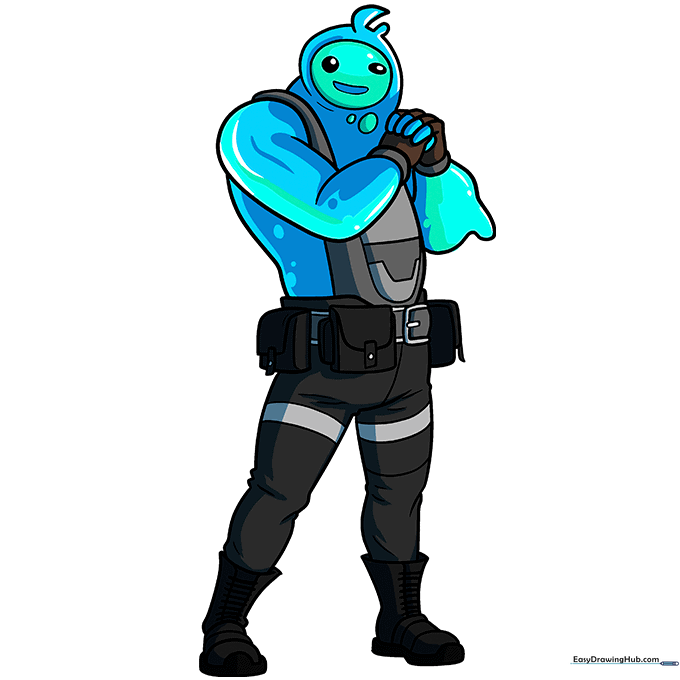
🎯 Final Result
Step-by-Step Instructions
Step 1: Sketching the Head Base

Draw a rounded oval for the head. Inside, sketch a smaller circle and oval to map out the eyes. Add a banana-shaped curve for the mouth. Teacher's Tip: Keep these lines faint; they are just your construction guides!
Step 2: Defining the Shoulders
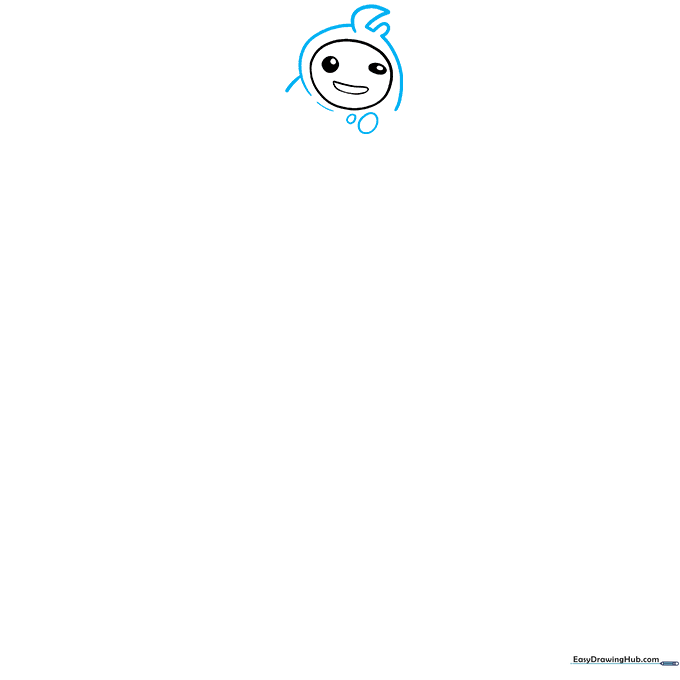
Surround the head with a wide semi-circle for the shoulders, adding a small triangle and oval on top for the head's detail. Add two ovals below the head to represent the chest area. Tip: Focus on smooth, rounded curves to give him that 'liquid' look.
Step 3: Constructing the Arms
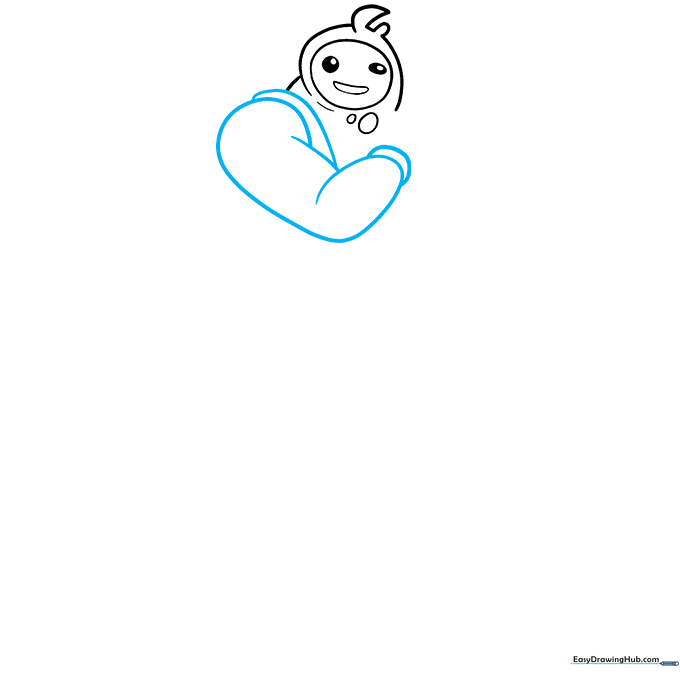
Outline the shoulder with a semi-circle and use two cylinders to form the arm. Sketch curves for the strap and cuff. Tip: Imagine the arm is made of soft tubes; don't make the joints too sharp.
Step 4: Drawing the Hands
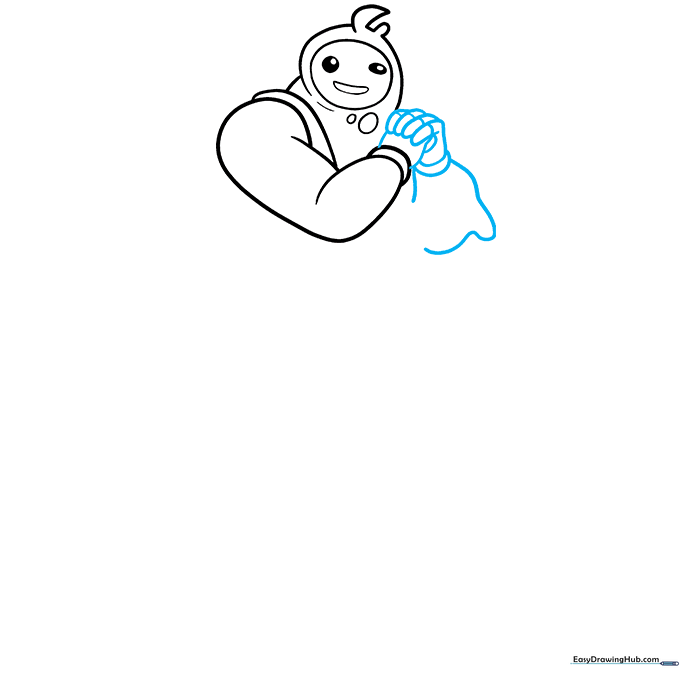
Draw four 'hot dog' shapes for the fingers. Outline the hands with soft curves and add the cuff details. Tip: Keep the fingers slightly rounded at the tips to match Rippley's cartoon style.
Step 5: Shaping the Torso
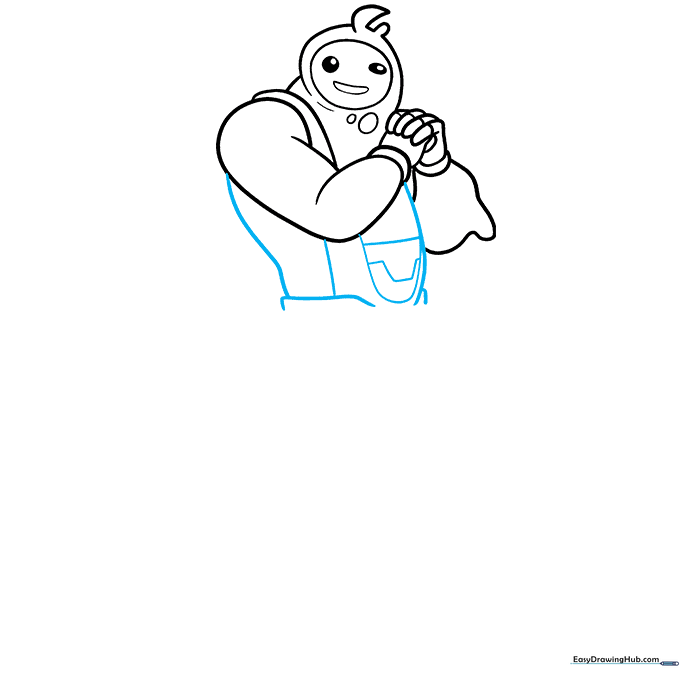
Sketch the left side of the body with a wavy diagonal line to suggest movement. Add a U-shape inside the body for the chest detail. Tip: Use a light touch to create the wavy line so it looks fluid rather than jagged.
Step 6: Adding Utility Pouches
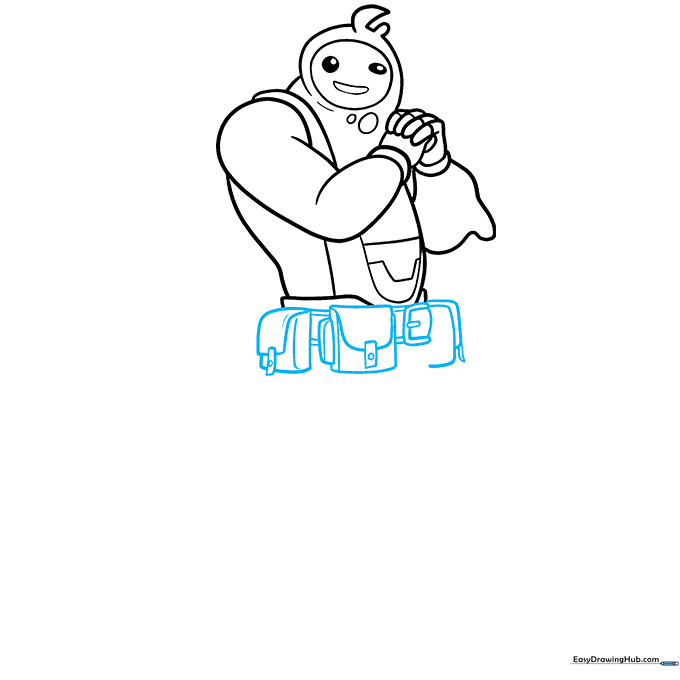
Draw rounded squares for the pouches on the belt, adding flaps with small U-shapes. Include the buckle detail. Tip: Use a ruler if you struggle with straight lines, but keep the corners rounded for a softer look.
Step 7: Sketching the Legs
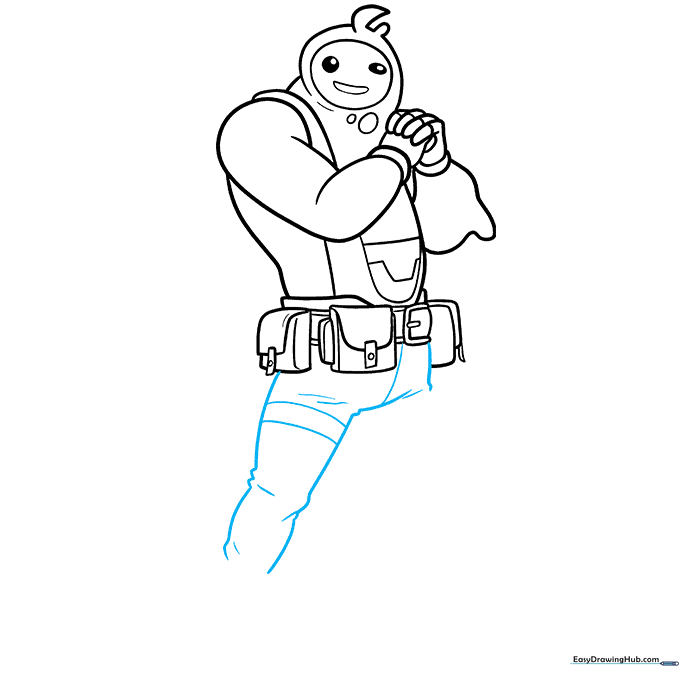
Outline the left leg using four uneven diagonal lines to create the pant shape. Add vertical lines for depth. Tip: Keep the legs slightly wider at the top than the bottom to match the character's stance.
Step 8: Completing the Legs

Repeat the process from the previous step for the right leg, ensuring they match in length and width. Tip: Check your symmetry by holding your drawing up to a mirror!
Step 9: Final Details and Outlining
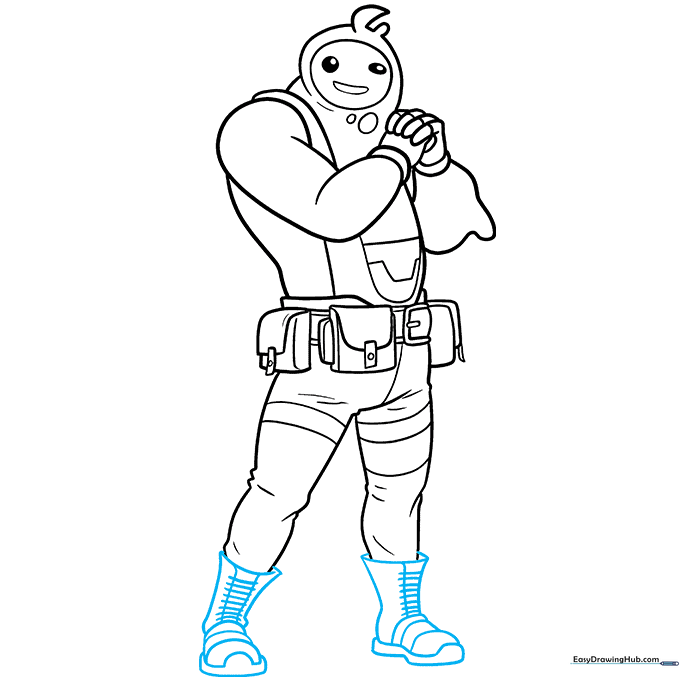
Draw the boots using curves and diagonal lines. Once you are happy with the sketch, go over your lines with a black marker and erase the pencil marks. Tip: Use a steady hand for the final outline to make your drawing look professional.
Coloring Your Rippley
Use shades of teal and blue for the body to create a 'Slurp' effect. Use gray for the outfit and black for the eyes with a white dot for the highlight. Tip: Layer your blues—light blue for the highlights and dark blue for the shadows.
More Tutorials


