How to Draw Rick Sanchez: Easy Step-by-Step Guide
Ready to bring the smartest man in the universe to your sketchbook? This tutorial is perfect for fans ages 8+ looking to master cartoon proportions. Grab a pencil, an eraser, and a piece of paper to follow along as we break down Rick’s iconic look into simple, manageable shapes.
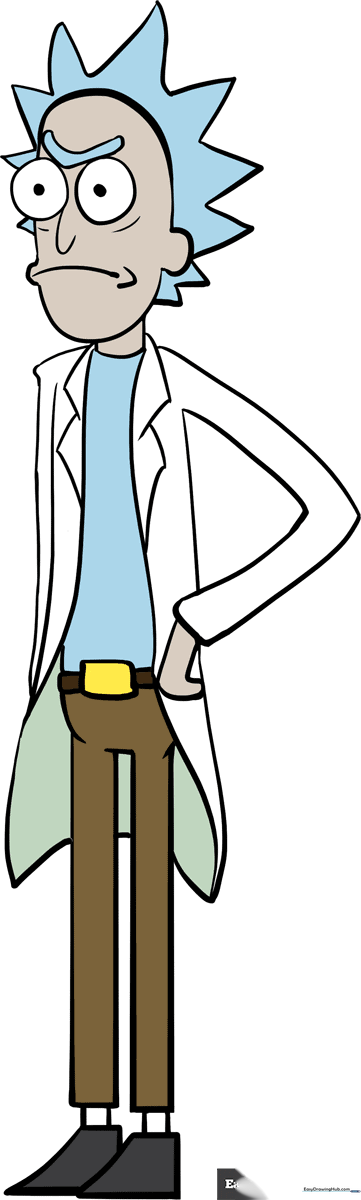
🎯 Final Result
Step-by-Step Instructions
Step 1: Sketching the Head Shape

Start by sketching Rick's head. Use long, light curved lines to form an elongated oval. Connect these with small 'C' shapes for his ear and the side of his frown. Teacher's Tip: Keep your pencil pressure light so you can easily adjust the shape if it looks a bit lopsided.
Step 2: Defining Facial Features

Draw two large circles for the eyes and add a dot in the center of each for pupils. Use a 'U' shape for the nose and a curved line for his signature frown. Teacher's Tip: Rick's eyes are quite large and expressive; don't worry if they aren't perfectly symmetrical—it adds to his character!
Step 3: Adding the Eyebrows
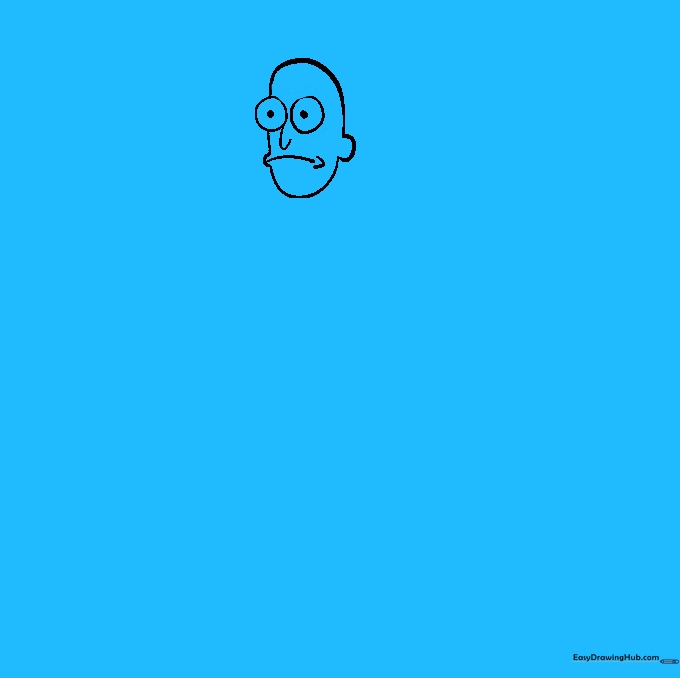
Draw Rick's iconic frowning eyebrows above the eyes using parallel 'U' shaped lines connected at the ends. Teacher's Tip: The angle of the eyebrows is what gives Rick his grumpy expression, so make sure they slant downward toward the nose.
Step 4: Sketching the Hair

Starting at the back of the head, use short, jagged lines to create his wild, spiky hair. Connect them at triangular points. Teacher's Tip: Rick’s hair is famously messy, so don't stress about making the spikes uniform—the more irregular, the better!
Step 5: Drawing the Lab Coat
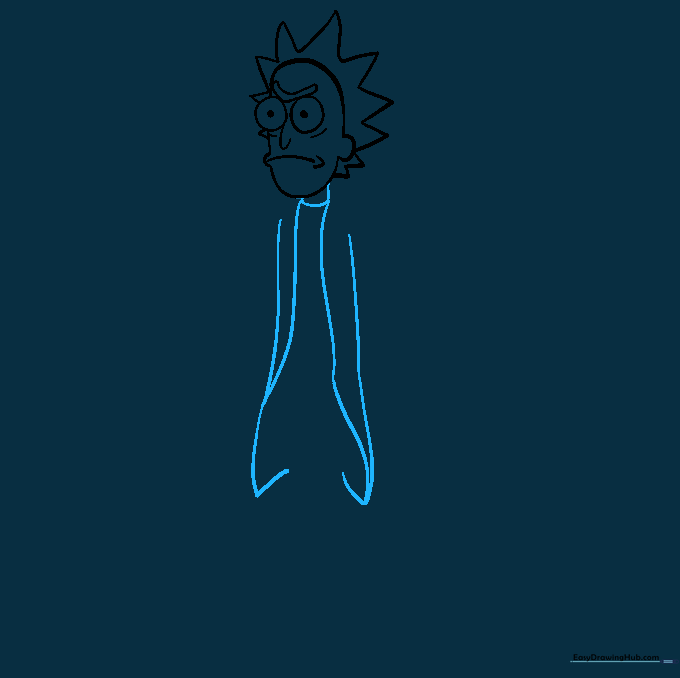
Enclose the neck with a curved line, then extend two long, curved lines downward to form the lab coat, curling them into a 'J' shape at the bottom. Teacher's Tip: Keep the coat lines loose and flowing to give it a natural, draped look.
Step 6: Adding the Collar
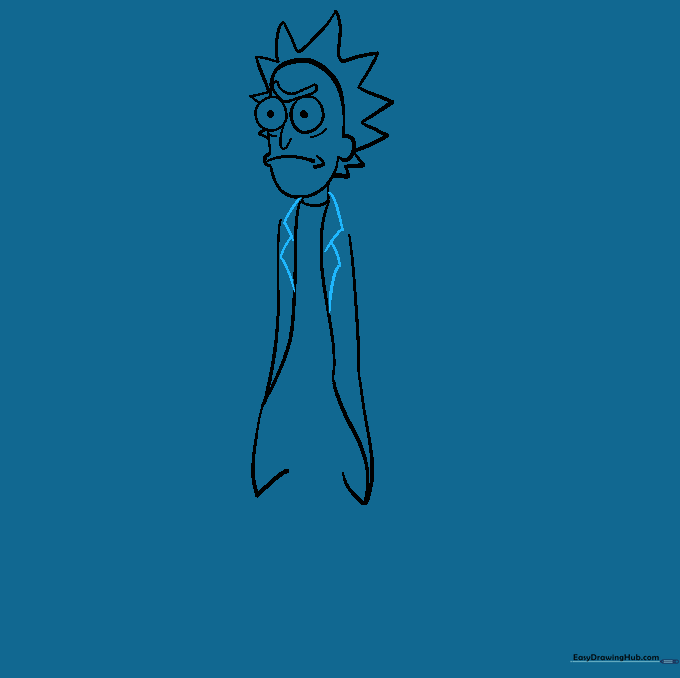
Use short lines to draw four small triangles just below the neck to form the collar. Teacher's Tip: This detail adds depth to the coat, making it look like a real garment rather than just a shape.
Step 7: Drawing the Arms and Hands
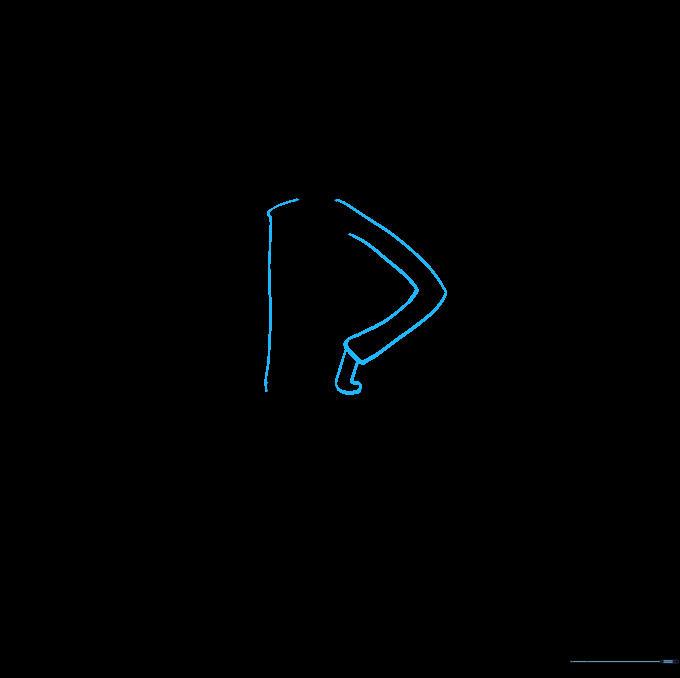
Use curved lines to form the shoulders and arms. On one side, draw a 'V' shape for the arm and enclose it with an irregular shape for the hand. Teacher's Tip: Hands can be tricky! Focus on the overall shape rather than individual fingers to keep it simple.
Step 8: Adding the Belt and Legs

Draw an incomplete half-circle for the lower body and add three rectangles of varying sizes for the belt. Extend two pairs of straight lines downward for the legs. Teacher's Tip: Use a ruler if you want the legs to look extra straight, or keep them freehand for a more cartoonish style.
Step 9: Finishing the Shoes
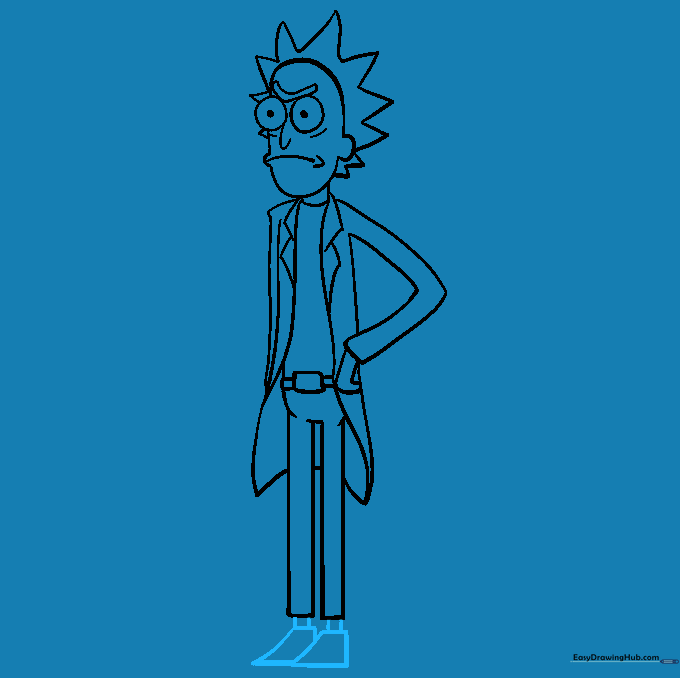
Extend parallel lines for the ankles and sketch an irregular trapezoid at the bottom of each leg for the shoes. Teacher's Tip: Make the shoes slightly wider than the ankles to give him a grounded, stable look.
Step 10: Bringing Rick to Life with Color

Time to color! Use white for the lab coat and a muted brown for his pants. Teacher's Tip: Use light blue for his hair to match his classic look, and don't forget to erase any remaining guide lines before you start coloring.
More Tutorials


