How to Draw Rainbow Friends Cyan: Easy 9-Step Guide
Bring the popular Rainbow Friends character, Cyan, to life with this simple, guided drawing tutorial. Designed for young artists and Roblox fans, this activity requires only a pencil, paper, and an eraser. Follow these steps to build confidence in your character-drawing skills while creating a fun, recognizable fan-art piece.
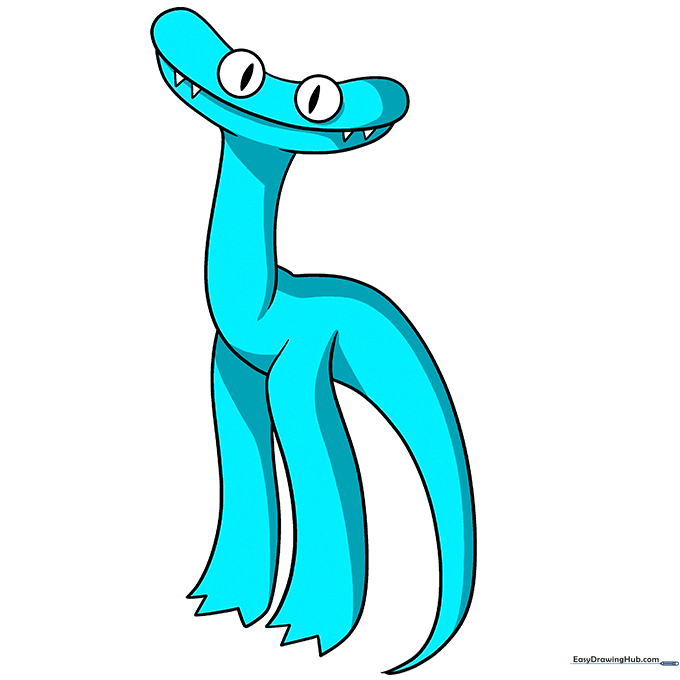
🎯 Final Result

Step-by-Step Instructions
Step 1: Sketching the Eyes
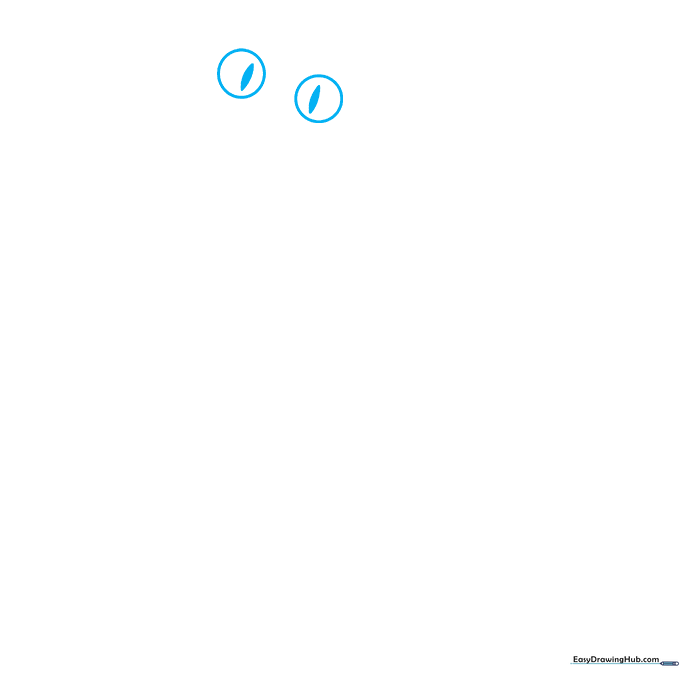
Start by drawing two circles for the eyes. Inside each, add a curved line to create a double-pointed shape for the pupils. Teacher's Tip: Keep these shapes symmetrical to give your character a focused, alert expression.
Step 2: Defining the Head
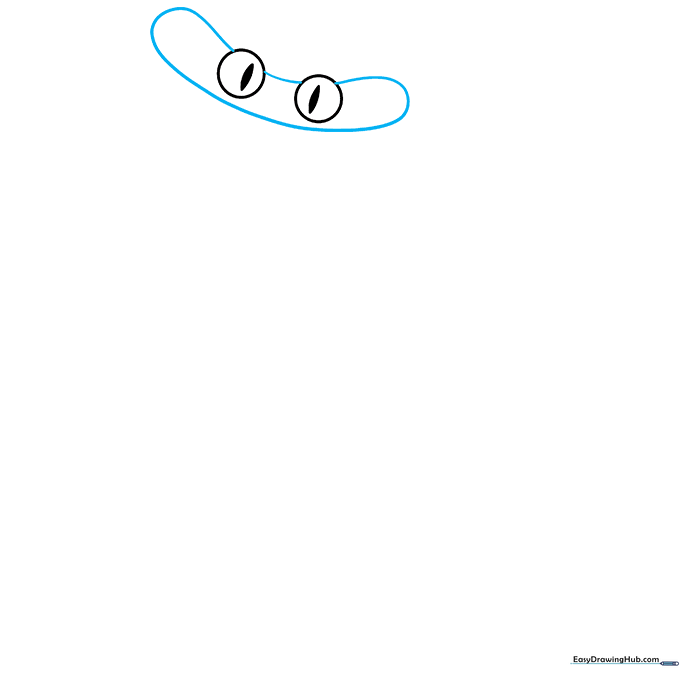
Use a long, smooth curved line to connect the eyes, forming a hotdog-like shape for the head. Teacher's Tip: Use a fluid motion with your wrist to get a nice, rounded curve.
Step 3: Creating the Mouth
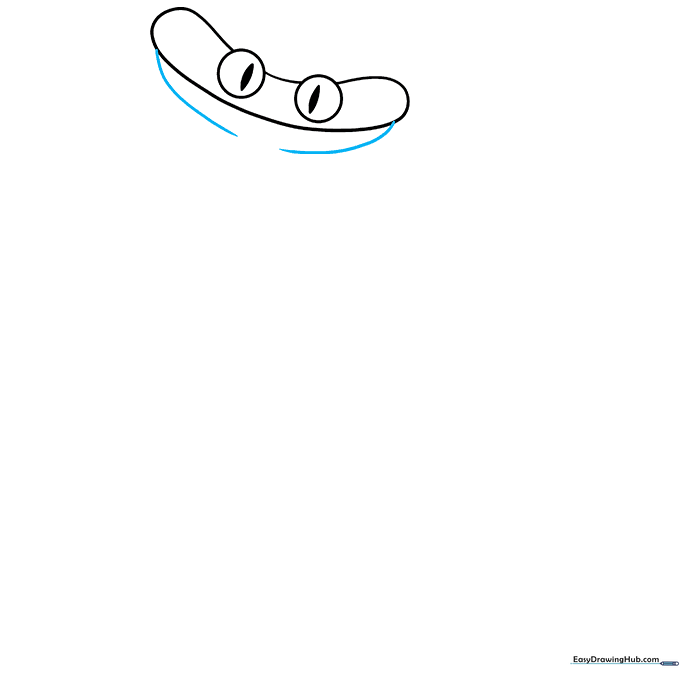
Extend a curved line from each end of the head to outline the jaw. Teacher's Tip: Imagine you are drawing a slight smile that stretches wide across the face.
Step 4: Adding Sharp Teeth
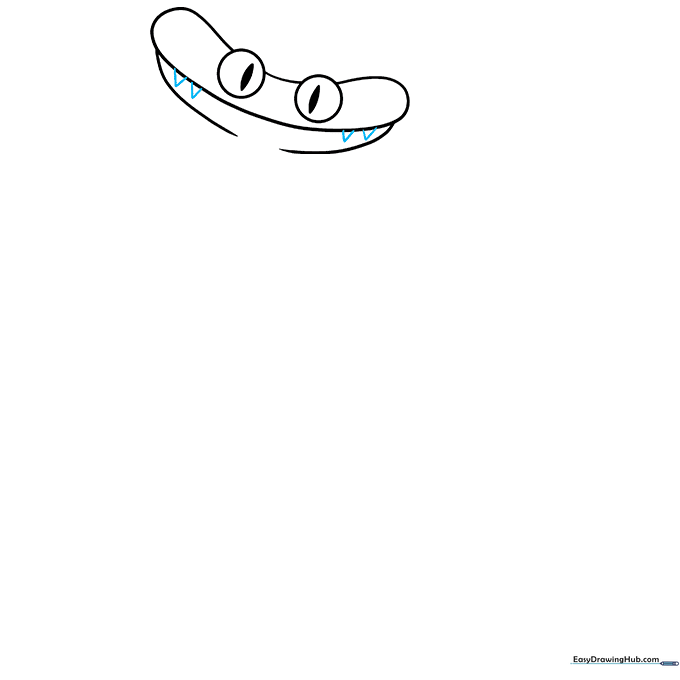
Draw four distinct triangular teeth extending from the mouth line. Teacher's Tip: Make the triangles slightly different sizes to give the character a more natural, playful look.
Step 5: Sketching the Neck

Extend two long, slightly curved lines downward from the base of the head. Teacher's Tip: Keep these lines parallel to create a sturdy, balanced neck.
Step 6: Drawing the First Leg
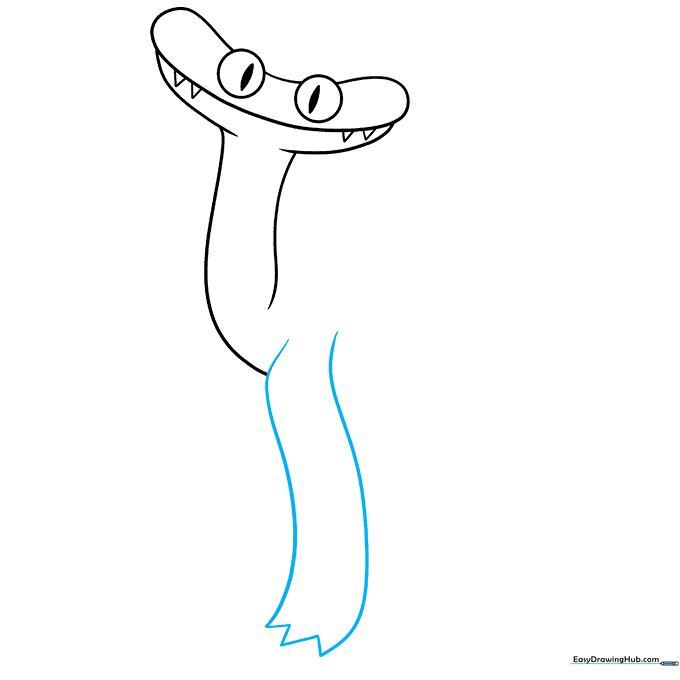
Draw two parallel curved lines forming a 'Y' shape from the neck, finishing with a zigzag line at the bottom for the foot. Teacher's Tip: The zigzag helps create the illusion of texture or claws.
Step 7: Adding the Second Leg
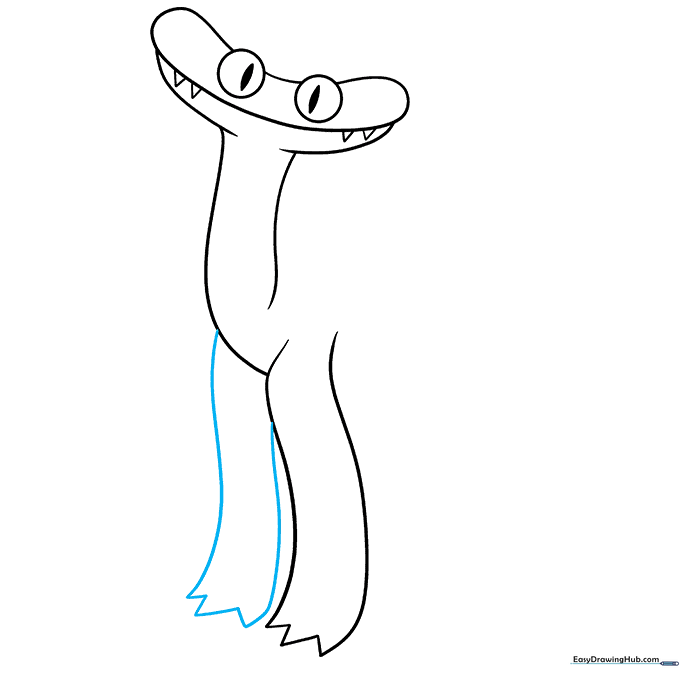
Repeat the process for the second leg using two long curved lines and a zigzag base. Teacher's Tip: Try to match the length of the first leg so your character looks stable.
Step 8: Shaping the Back and Tail
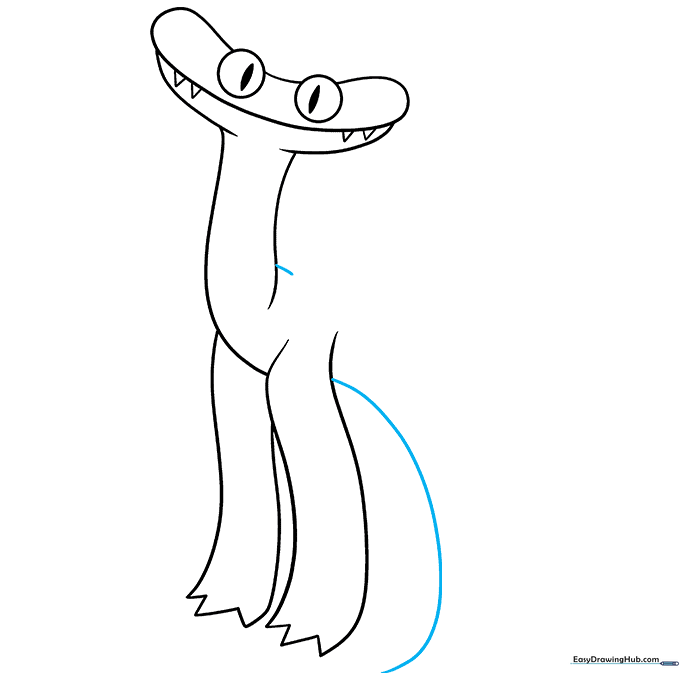
Draw a short curved line from the neck to start the back, then extend a long line from the leg to begin the tail. Teacher's Tip: A long, sweeping tail adds great movement to your drawing.
Step 9: Completing the Tail
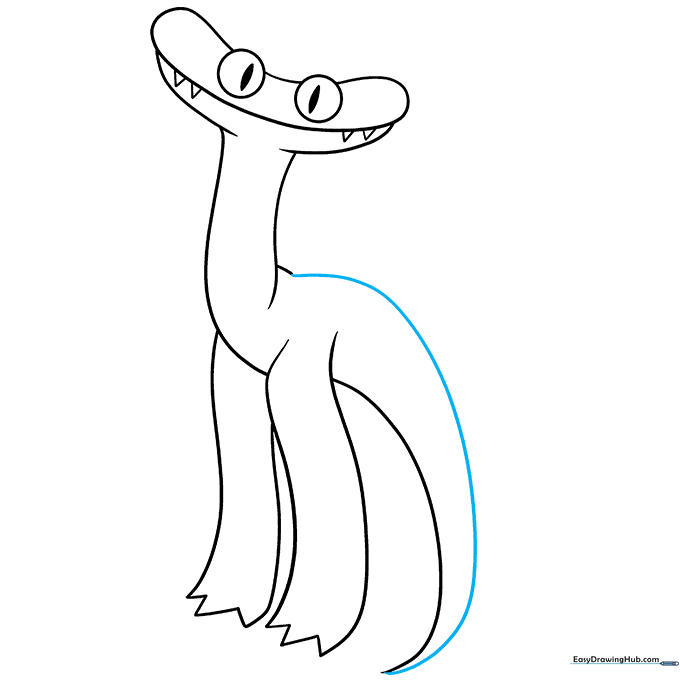
Connect the back line to the tip of the tail with a long, smooth curve. Teacher's Tip: Ensure the tail comes to a nice, sharp point to finish the silhouette.
Step 10: Adding Color
Fill in your character with a vibrant cyan or light blue. Teacher's Tip: Use light pressure with your colored pencil to create an even, smooth coat of color.
More Tutorials


