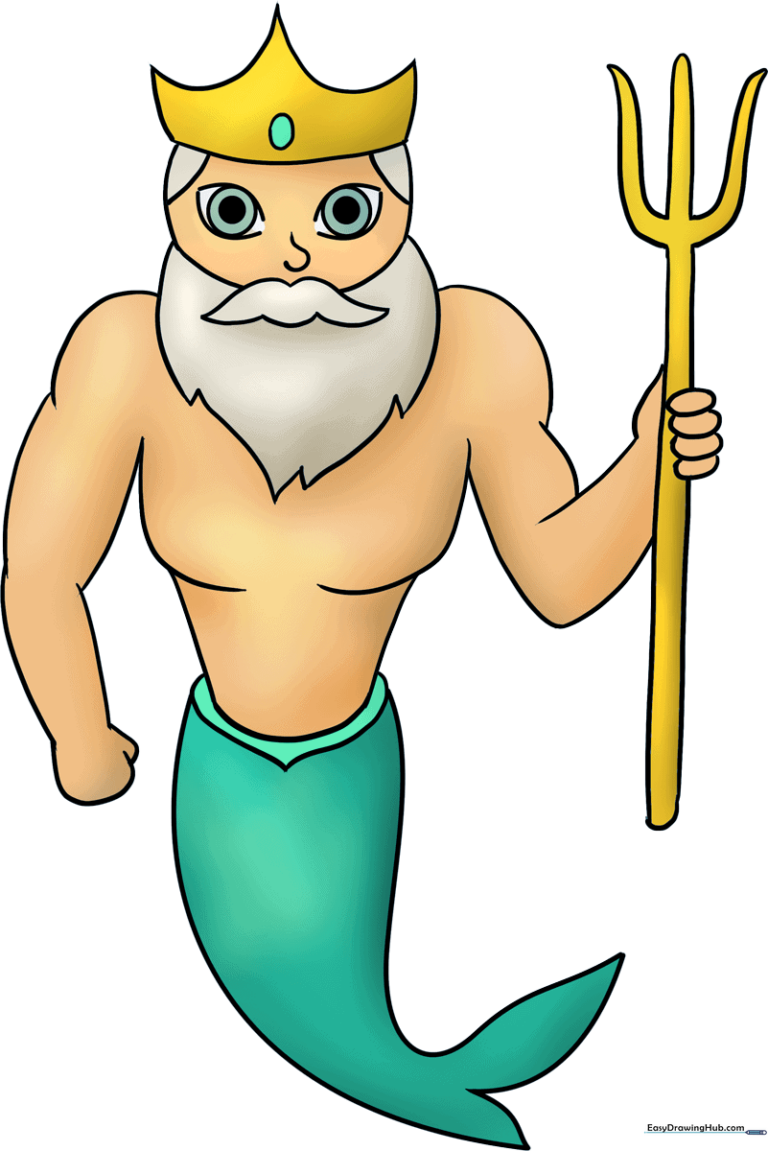
How to Draw Poseidon: Easy Step-by-Step Guide
Bring the King of the Sea to life with this fun, beginner-friendly drawing tutorial. Designed for ages 5 and up, this activity requires only a pencil, paper, and an eraser to master the basics of character design. Follow along to build confidence and develop your artistic skills through simple, geometric shapes.
🎯 Final Result
Step-by-Step Instructions
Step 1: Sketching the Foundation

Start by drawing a light circle for the head and an inverted triangle beneath it for the torso. Add a vertical center line to keep your character symmetrical. Teacher's Tip: Keep your pencil strokes very light at this stage so you can easily erase these guidelines later.
Step 2: Defining the Face

Add curved lines on the sides of the circle to shape the face. Draw two teardrop-shaped eyes, adding smaller circles inside for pupils. Use a small curved line for the nose. Teacher's Tip: Focus on making the eyes symmetrical to give your character a friendly, alert expression.
Step 3: Adding the Mustache and Beard
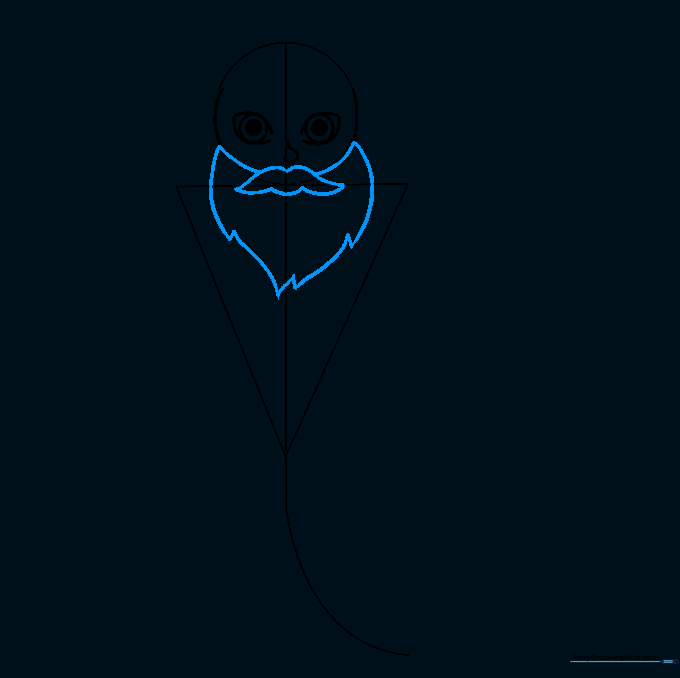
Draw an 'M' shape under the nose for the mustache, connecting it to the face. Add a long, flowing beard using jagged, curved lines. Teacher's Tip: Use quick, confident strokes for the beard to make it look wavy and natural.
Step 4: Drawing the Crown and Hair
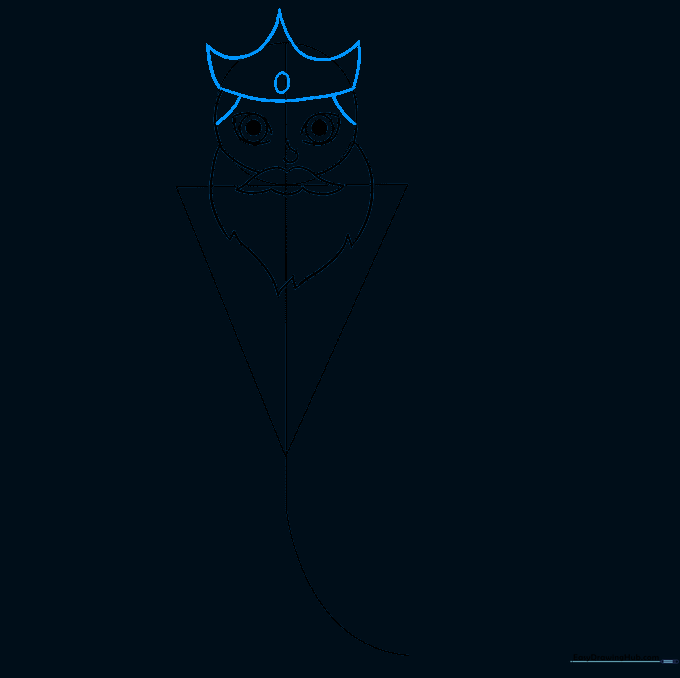
Sketch a crown across the top of the head with a central jewel. Add hair flowing from the crown down to the sides of the face. Teacher's Tip: Don't worry about perfect symmetry on the hair; waves look better when they are slightly irregular.
Step 5: Sketching the Torso

Use 'C' shaped lines to define the shoulders and pectoral muscles. Add curved lines below the chest to outline the abdomen. Teacher's Tip: Think of these as simple shapes—the chest is like a wide 'W' and the abs are just gentle curves.
Step 6: Drawing the First Arm
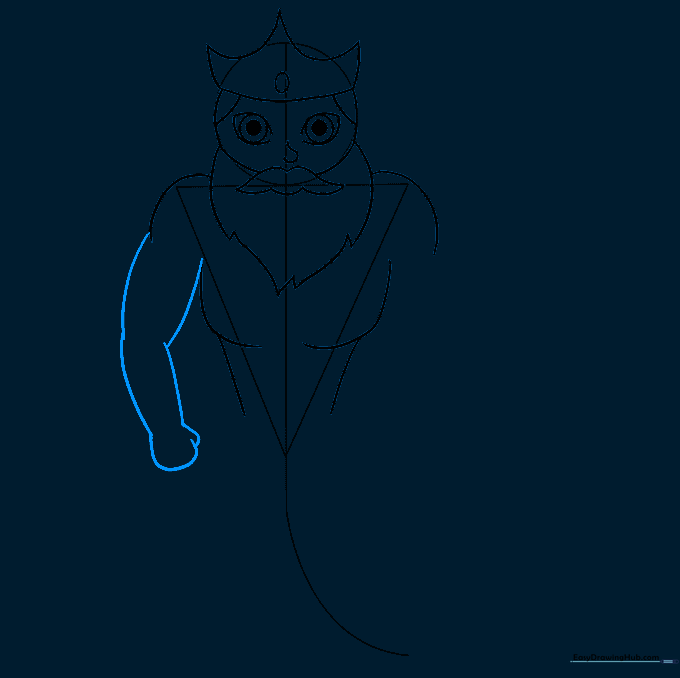
Outline the upper and lower arm using pairs of curved lines. Add a 'C' shape for the fist and a small curve for the thumb. Teacher's Tip: Keep the arm slightly bent to make the pose look more dynamic and active.
Step 7: Drawing the Second Arm
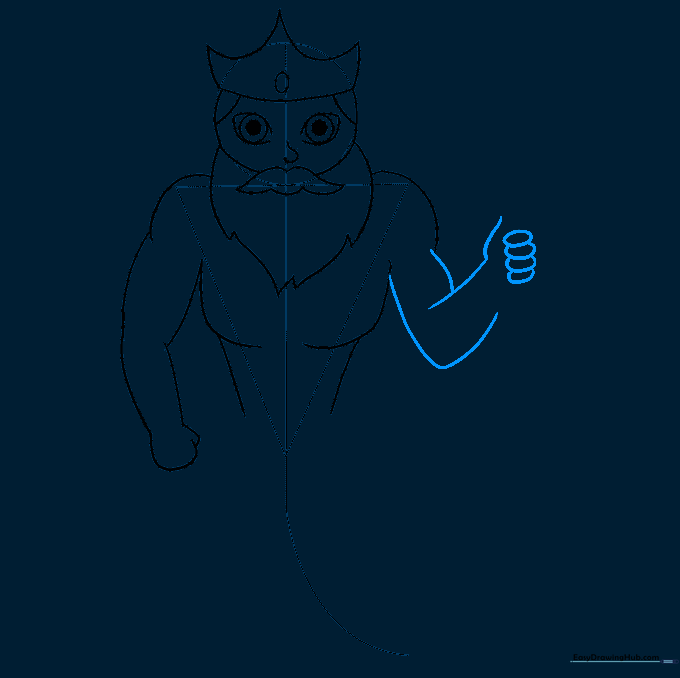
Sketch the second arm, positioning it as if it's holding a staff. Use overlapping curved lines for the fingers. Teacher's Tip: If the fingers look tricky, draw them as small, rounded ovals first, then refine the outlines.
Step 8: Adding the Trident
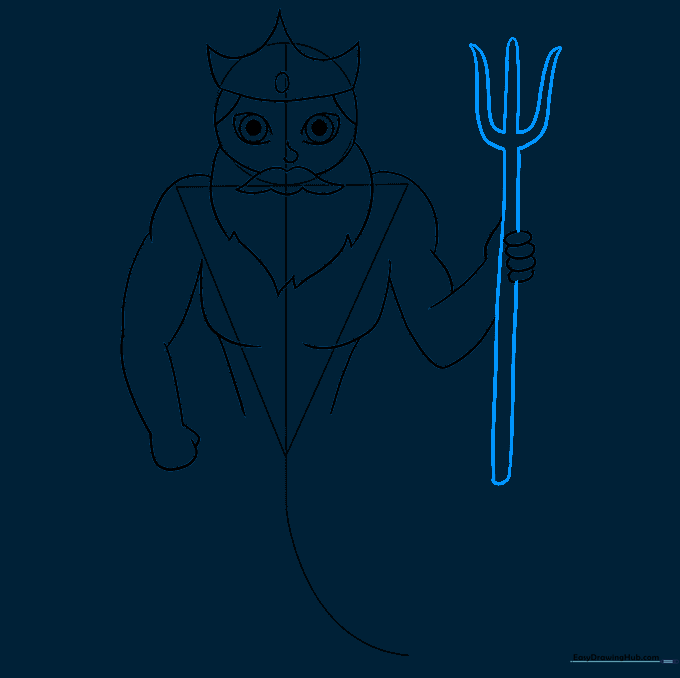
Draw the trident by extending parallel lines through the hand. Connect them with a pointed 'W' shape at the top. Teacher's Tip: Use a ruler if you want the staff to look perfectly straight, or draw freehand for a more organic look.
Step 9: Drawing the Tail

Enclose the torso and extend curved lines to form a fish-like tail. Add 'Y' shaped fins at the bottom. Teacher's Tip: Make the tail curve slightly to give your Poseidon a sense of movement as if he is swimming.
Step 10: Final Touches
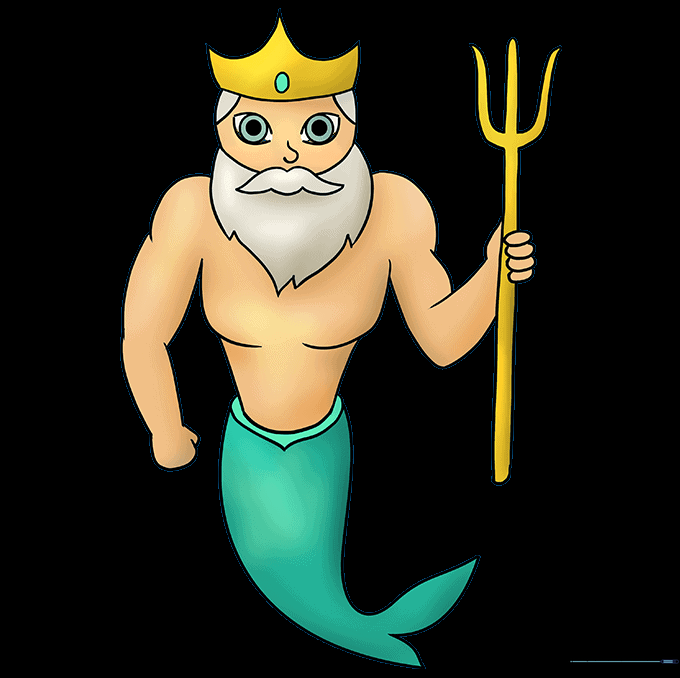
Gently erase your initial guidelines. Now, add color to your masterpiece! Teacher's Tip: Use blues and greens for the tail to capture the ocean theme, and gold for the crown and trident.
More Tutorials


