How to Draw Pluto: Easy 9-Step Disney Tutorial for Kids
Bring Mickey’s best friend to life with this beginner-friendly drawing guide. Designed for young artists ages 5 and up, this activity requires only a pencil, paper, and an eraser. Follow along to master Pluto's iconic floppy ears and playful expression while building your confidence in character sketching.
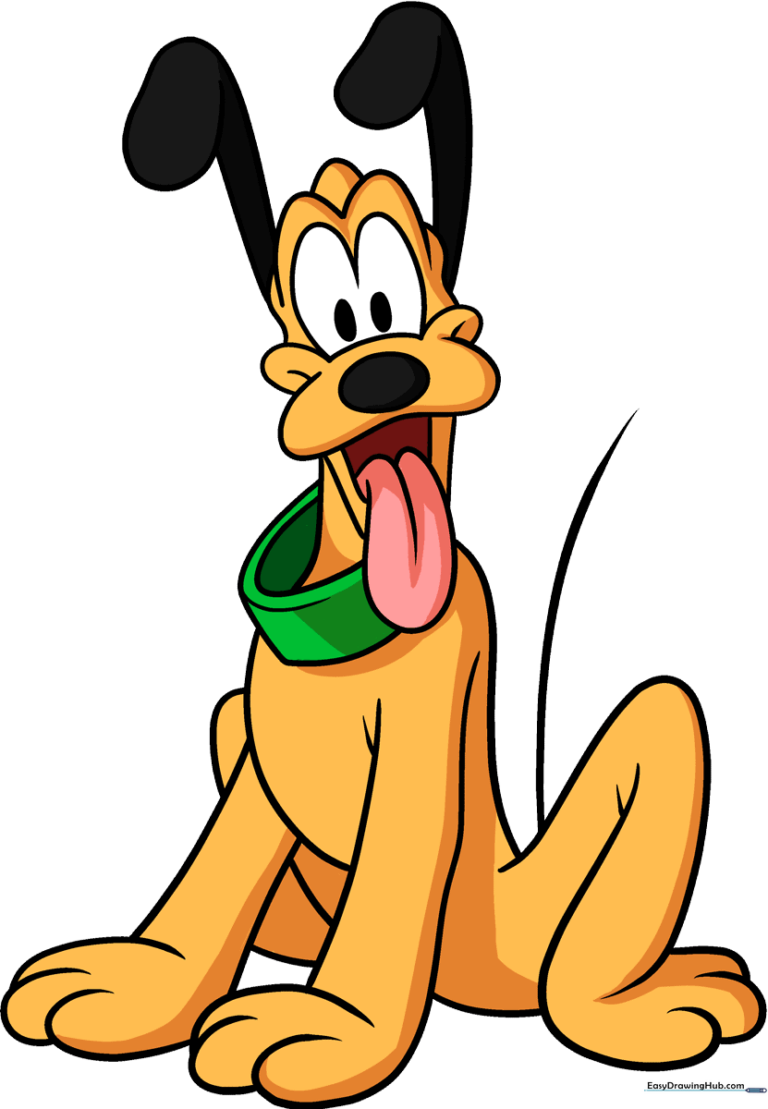
🎯 Final Result
Step-by-Step Instructions
Step 1: Sketching the Face and Eyes
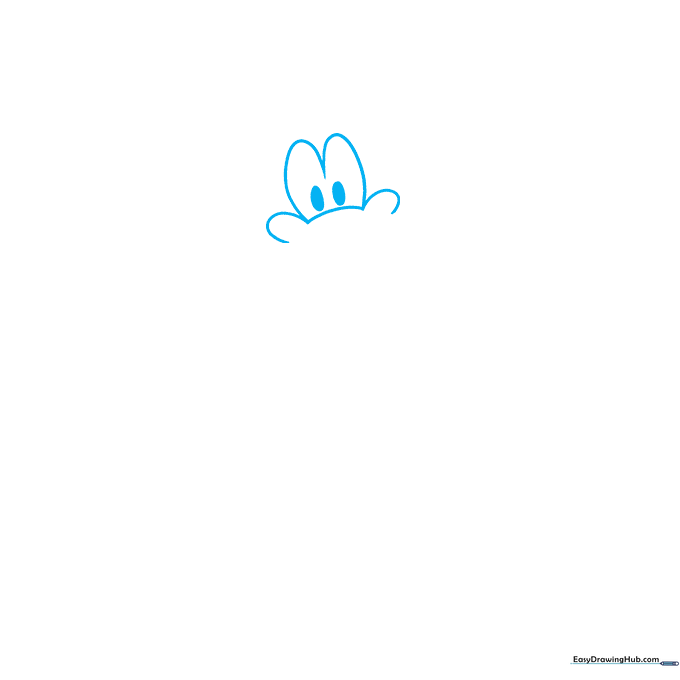
Start by drawing a soft curved line for the bridge of the nose, then add two 'M' shapes above it for his expressive eyes. Shade in two small ovals for pupils. Teacher's Tip: Keep your pencil lines light and feathery so you can easily adjust the shape of the eyes if needed.
Step 2: Defining the Snout
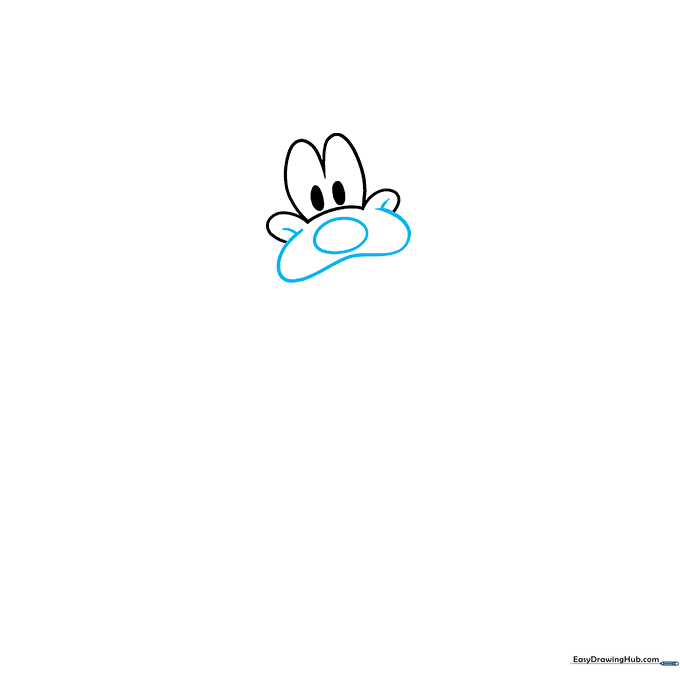
Draw a large, rounded oval for the nose pad. Enclose the snout around it with a smooth, curved line. Add small dashes at the corners of the mouth to give him that classic happy grin. Teacher's Tip: Pluto's nose is quite large, so don't be afraid to make it nice and bold!
Step 3: Adding the Tongue and Head Shape
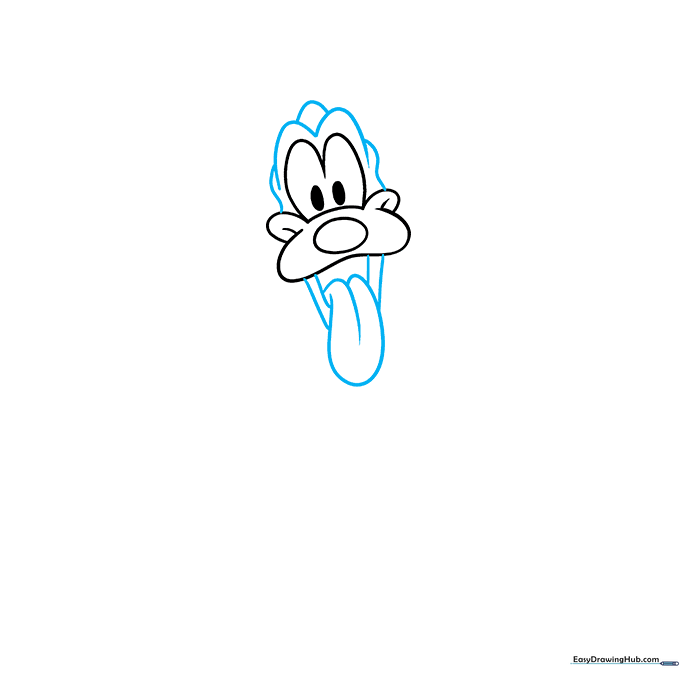
Draw an 'M' shape above the eyes to form his forehead, then use wavy lines to connect it to the mouth. Add a lolling tongue using overlapping curves. Teacher's Tip: Make the tongue look relaxed and floppy to capture Pluto's silly personality.
Step 4: Sketching the Iconic Ears
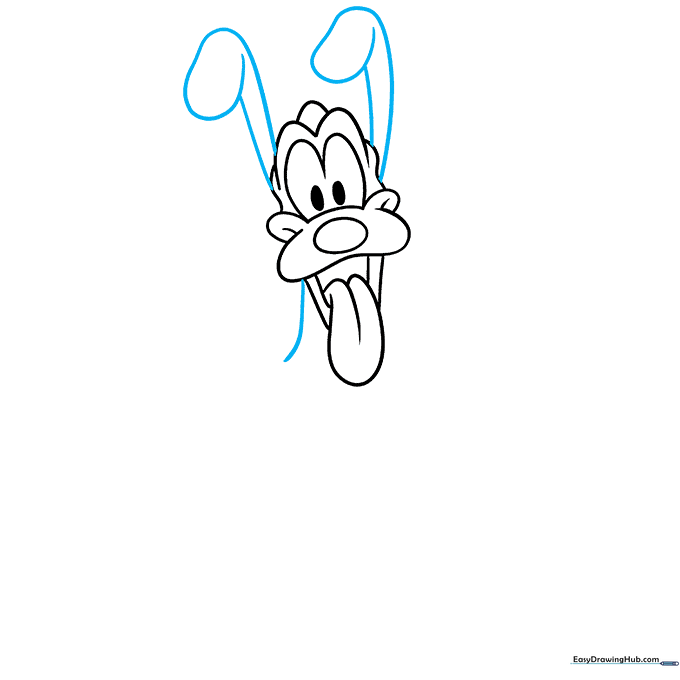
Extend two long, curved lines from the sides of the head, doubling them back to create those famous floppy ears. Start the neck line from the mouth area. Teacher's Tip: Don't worry if the ears aren't perfectly symmetrical; Pluto's ears are meant to look loose and wiggly!
Step 5: Drawing the Collar and Body
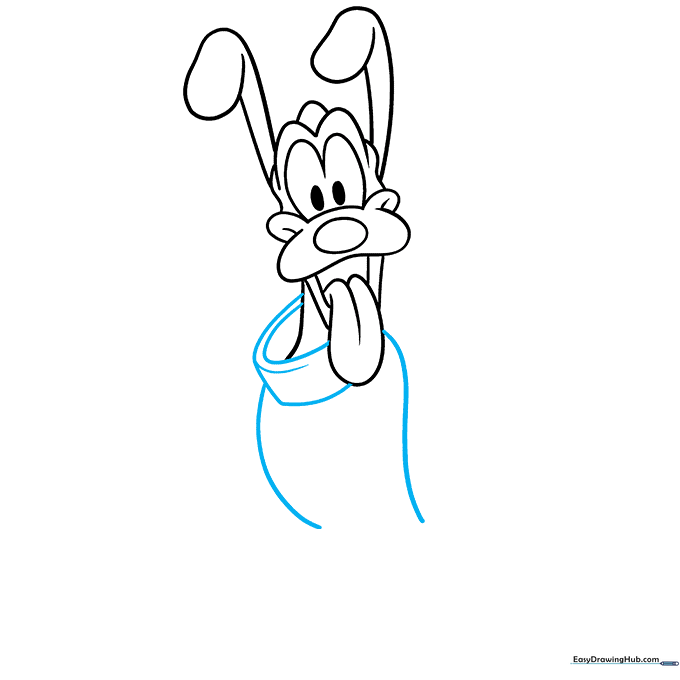
Use two 'C' shaped lines to sketch the collar, adding a small extra line for depth. Continue the body with two long, sweeping curves. Teacher's Tip: Imagine the collar is a thick band around his neck to help you place it correctly.
Step 6: The First Front Paw
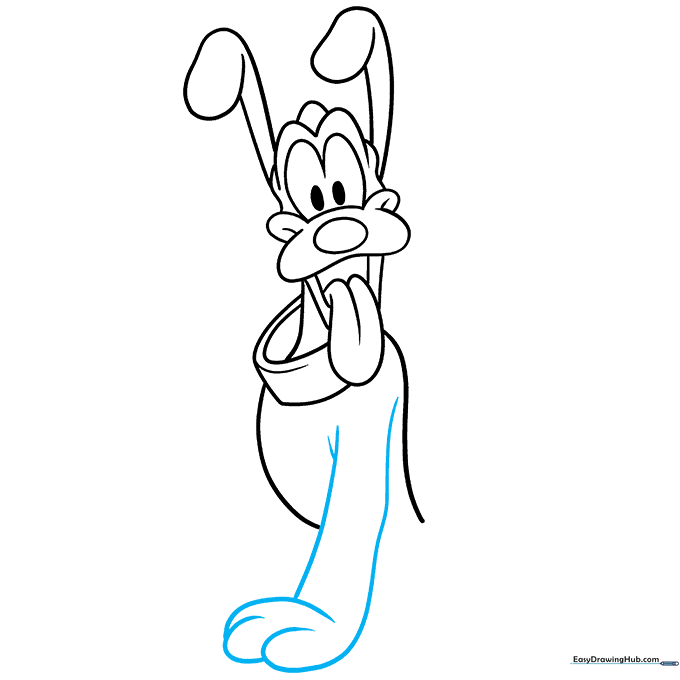
Use two long curved lines to form the leg, doubling one back to create the toe. Add two more small lines to finish the paw. Teacher's Tip: Keep the leg slightly curved to show that Pluto is standing in a relaxed pose.
Step 7: The Second Front Leg
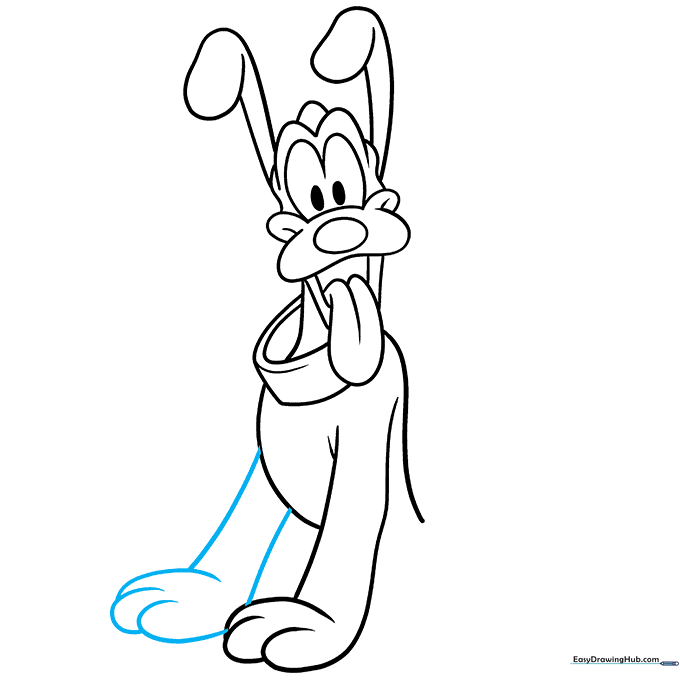
Draw the second foreleg using overlapping curved lines. Teacher's Tip: Since this leg is slightly behind the first, make it overlap just a little to create a sense of space and depth.
Step 8: Adding the Rear Leg
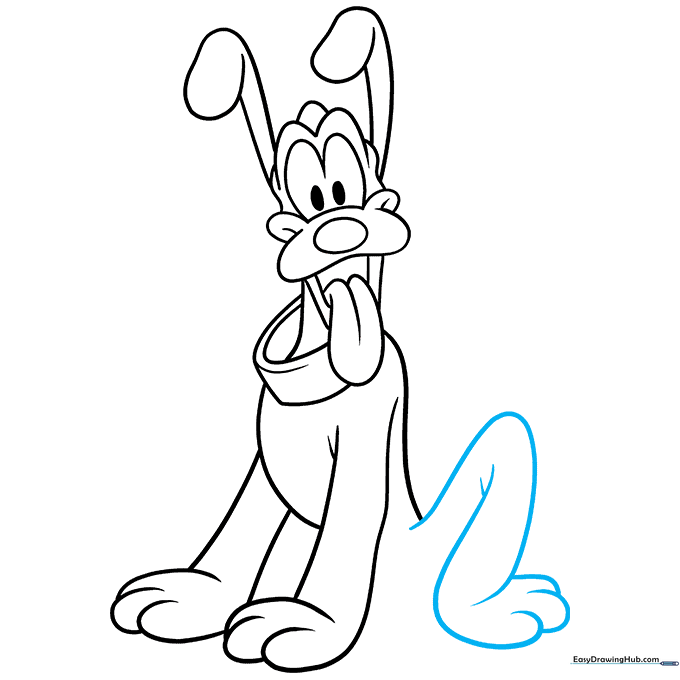
Sketch the rear leg bent at the knee using overlapping curves. Teacher's Tip: A bent leg adds movement to your drawing, making Pluto look like he's ready to run and play!
Step 9: Finalizing the Body and Tail
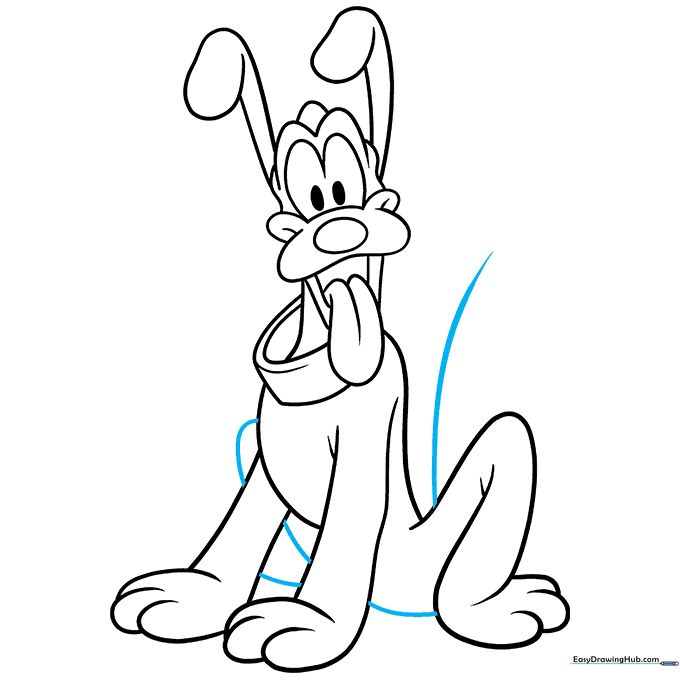
Complete the torso with short curves and add the final rear leg. Finish by drawing a thick, narrow tail. Teacher's Tip: Use a darker pencil stroke now to outline your final drawing and erase any stray guidelines.
Step 10: Bring Pluto to Life with Color

Time to color! Use a vibrant golden yellow for his fur, black for those floppy ears, and a soft pink for his tongue. A bright red or green collar really makes him pop. Teacher's Tip: Try using light, even strokes with your colored pencils to keep the fur looking smooth.
More Tutorials


